Web
本文旨在介绍如何设置 PS5 身份验证,让您的网页可以使用 Player Network 登录鉴权服务通过 PS5 渠道登录。
PS5 的开发一般不面向个人开发者,需要通过公司的商务联系 Sony 开通 PS5 开发权限。
前提条件
1. 在 PlayStation5 DevNet 设置游戏并申请 Client ID 和 Client Secret
成为开发者后,需要在 PlayStation5 DevNet 注册相应的游戏应用。
-
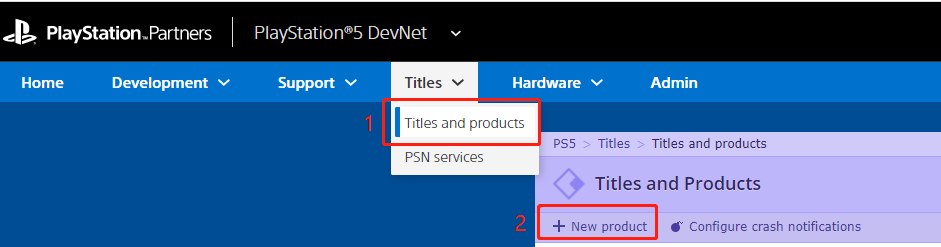
在 PlayStation5 DevNet,点击页面上方的 Titles > Titles and products 打开 Titles and Products 页面。
-
点击页面左上角的 New product。
-
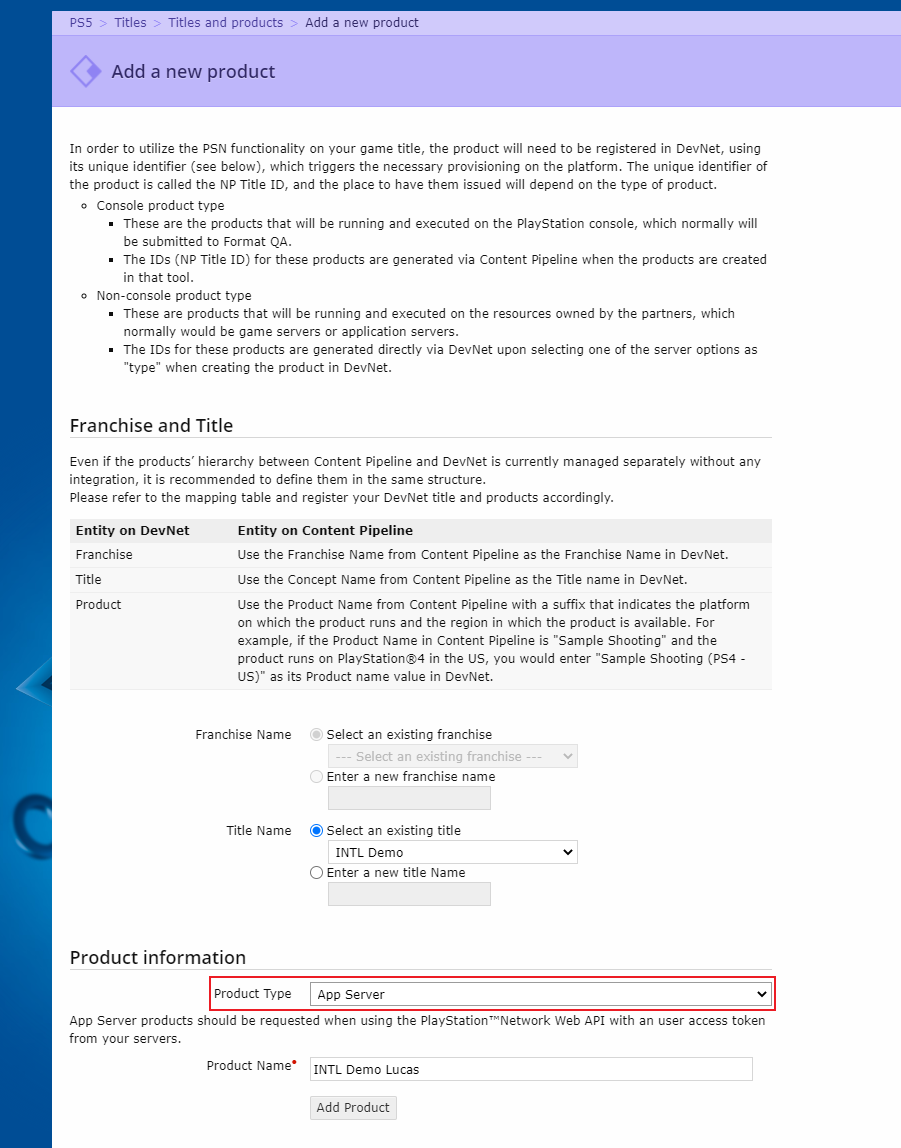
在 Add a new product 弹窗,输入基本产品信息。
info选择 App Server 为 Product 类型。
-
点击 Add Product 以添加一个新产品。
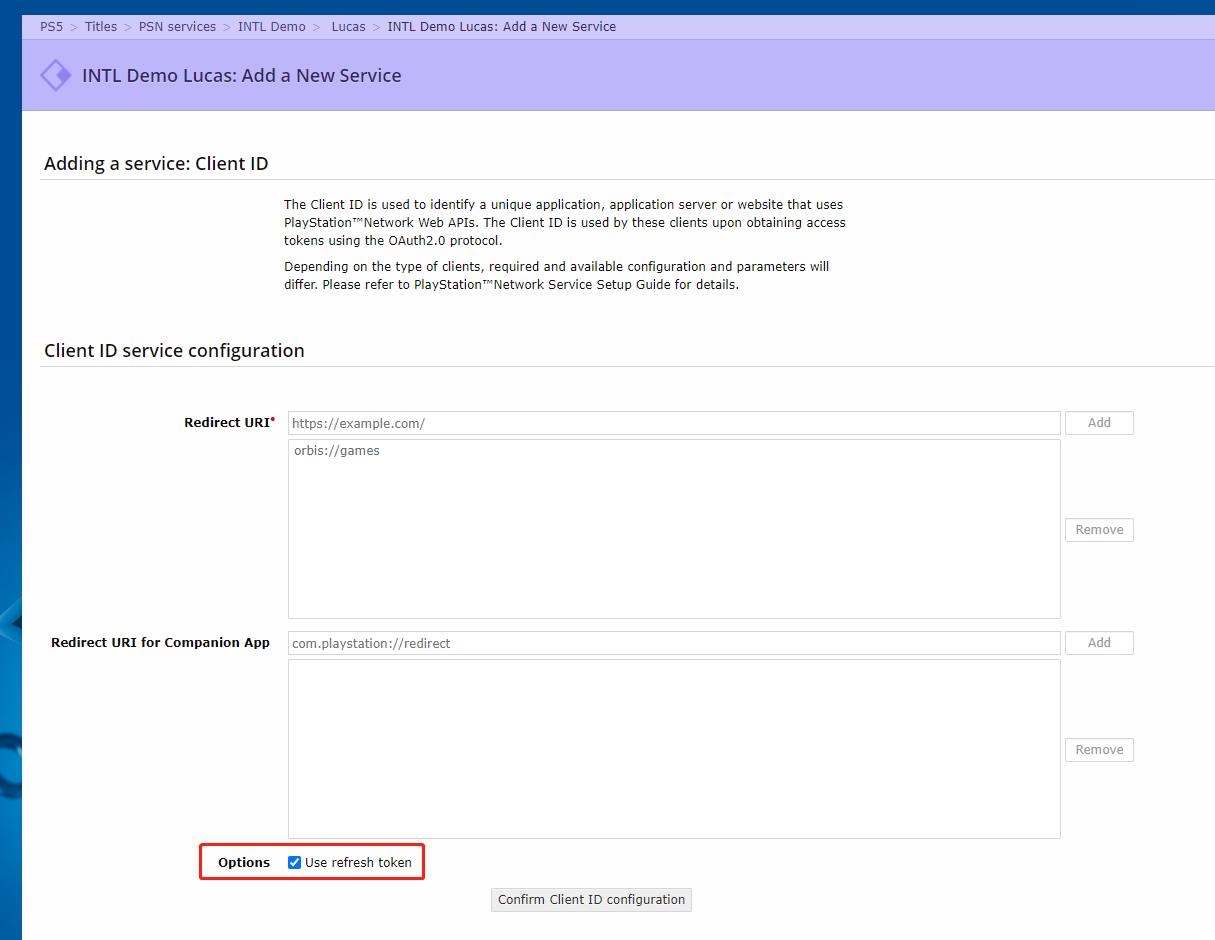
Add a New Service 页面将在产品添加成功后显示。 -
由于 Player Network SDK 使用 refresh token 进行 PS5 token 的刷新,在 Client ID 服务配置页面勾选 use refresh token 选项。
-
点击 Confirm Client ID configuration。
客户端 ID 服务配置页面被刷新以确认客户端 ID 信息。 -
点击 Request Client ID 完成新产品注册过程。
Sony 需要时间才能创建产品。在后端进程完成后,将显示注册产品的页面.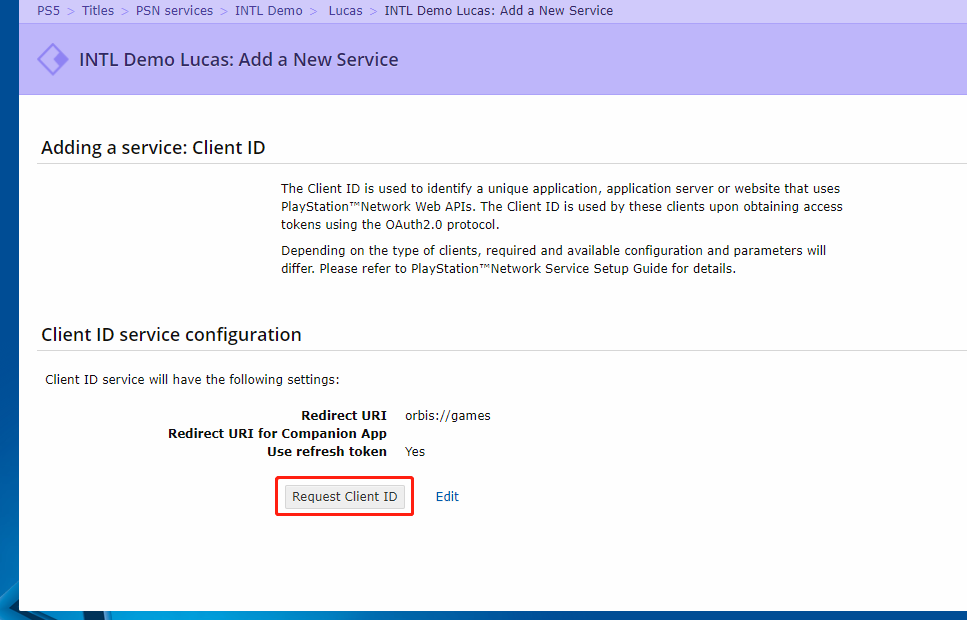
-
点击 Download Client Secret 下载产品的
Client Secret。将Client ID和Client Key发给 Player Network SDK 后台配置。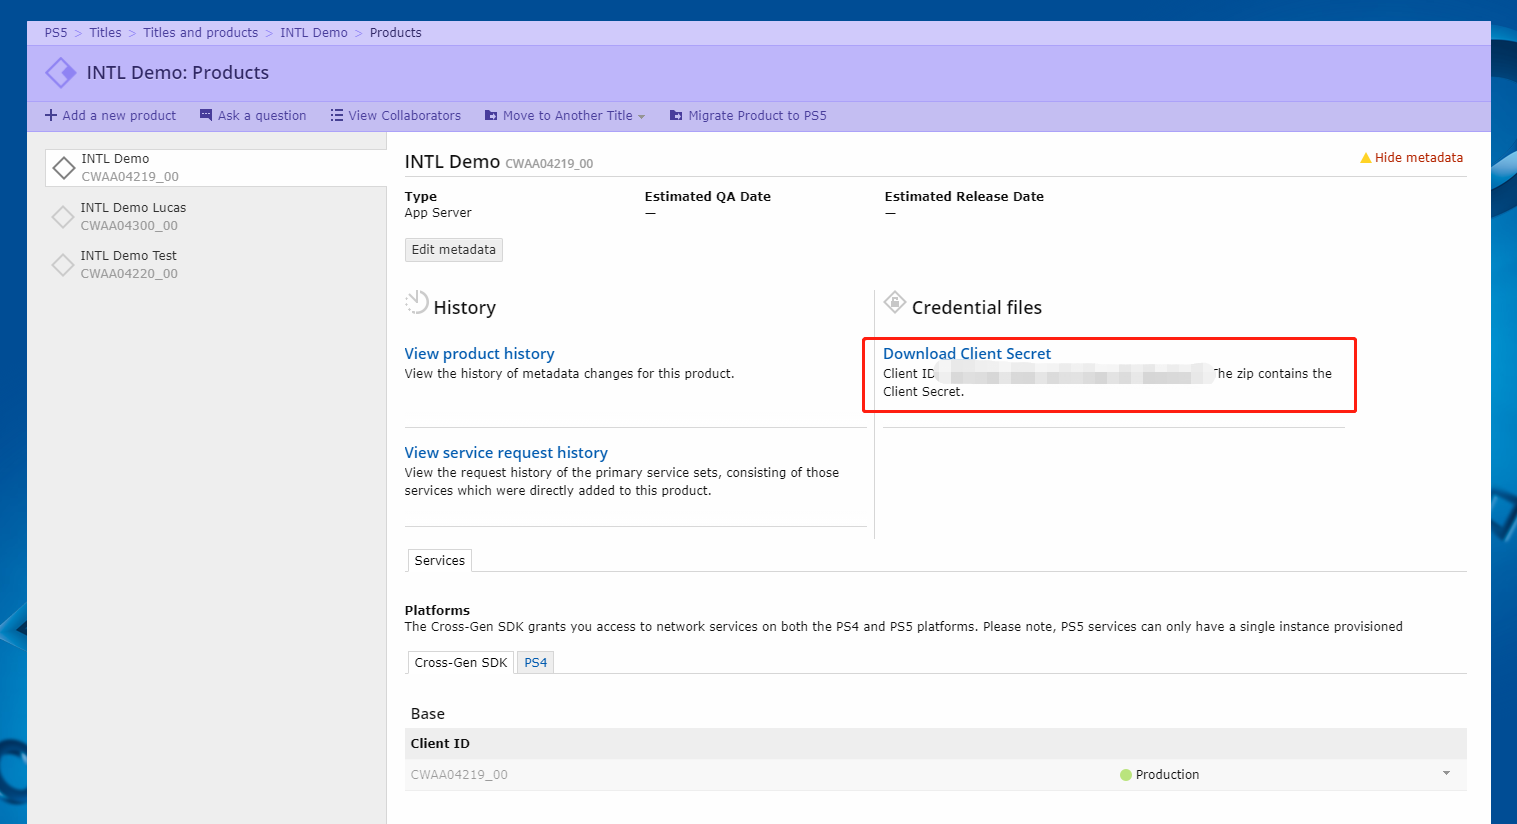
更多关于其他第三方渠道接入 SDK 的信息,请参见 JavaScript SDK。
步骤1:引⼊ JavaScript SDK
项目联调阶段可以引⼊ SDK 联调版本包,该包仅用于集成测试。项目上线须引⼊ SDK 正式版本包。
目前已支持 npm 包方式和 CDN 方式。
- npm
- CDN
$ npm install @intlsdk/account-api
// SDK 联调版本包
<script src="https://test-common-web.intlgame.com/sdk-cdn/account-api/latest/index.umd.js"></script>
// SDK 正式版本包
<script src="https://common-web.intlgame.com/sdk-cdn/account-api/latest/index.umd.js"></script>
步骤2:使用 SDK
在集成测试时,将 env 设置为测试环境;项目上线时,将 env 设置为相应的正式环境。
const accountApi = new IntlgameAccountApi({
  env: "test", // SDK environment
  gameID: 11,
});
| 参数 | 类型 | 描述 | 备注 |
|---|---|---|---|
| env | string | SDK 环境 更多信息,请参见 获取部署集群信息。 | 必填 |
| gameID | number | Player Network 游戏唯一标识 ID | 必填 |
步骤3:实现网页登录
实例化 accountApi 组件后,调用 thirdAuthorize 接口申请 PlayStation 渠道的登录授权令牌。
accountApi.thirdAuthorize({
    third_type: 'ps5',
}).then(
(res) => {
    console.log(res);
});
当 PlayStation 返回登录授权令牌后,调用 intlAuthorize 接口获取 Player Network SDK OpenID 和令牌登录网站。
accountApi.intlAuthorize({
    third_type: 'ps5',
    channel_info: {
        code: "EAAI2lTrXAZBwBAC",
        redirect_uri: "EAAI2lTrXAZBwBAC"
    }
}).then(
(res) => {
    console.log(res);
});
调用 intlLogout 接口登出网站。
accountApi.intlLogout({
    token: '4567xsdfsd',
    openid: 'xxxxxxxx',
    channel_id: 27,
}).then(
(res) => {
    console.log(res);
});
