Windows
The purpose of this article is to describe how to set up Epic authentication so that your game can be logged in through the Epic channel using the Player Network Login Authentication Service.
Prerequisites
- Configure the application on the Epic Developer Portal.
- Add developer members to the organization and give role permissions.
- Obtain a Player Network Console login account.
- Create a new project for your game or join an existing project.
- Download SDK.
- Integrate SDK.
- Add Epic as the login authentication method for the business in the Player Network Console.
Step 1:Configure SDK for Epic Login
-
Select your product at Epic Developer Portal.
-
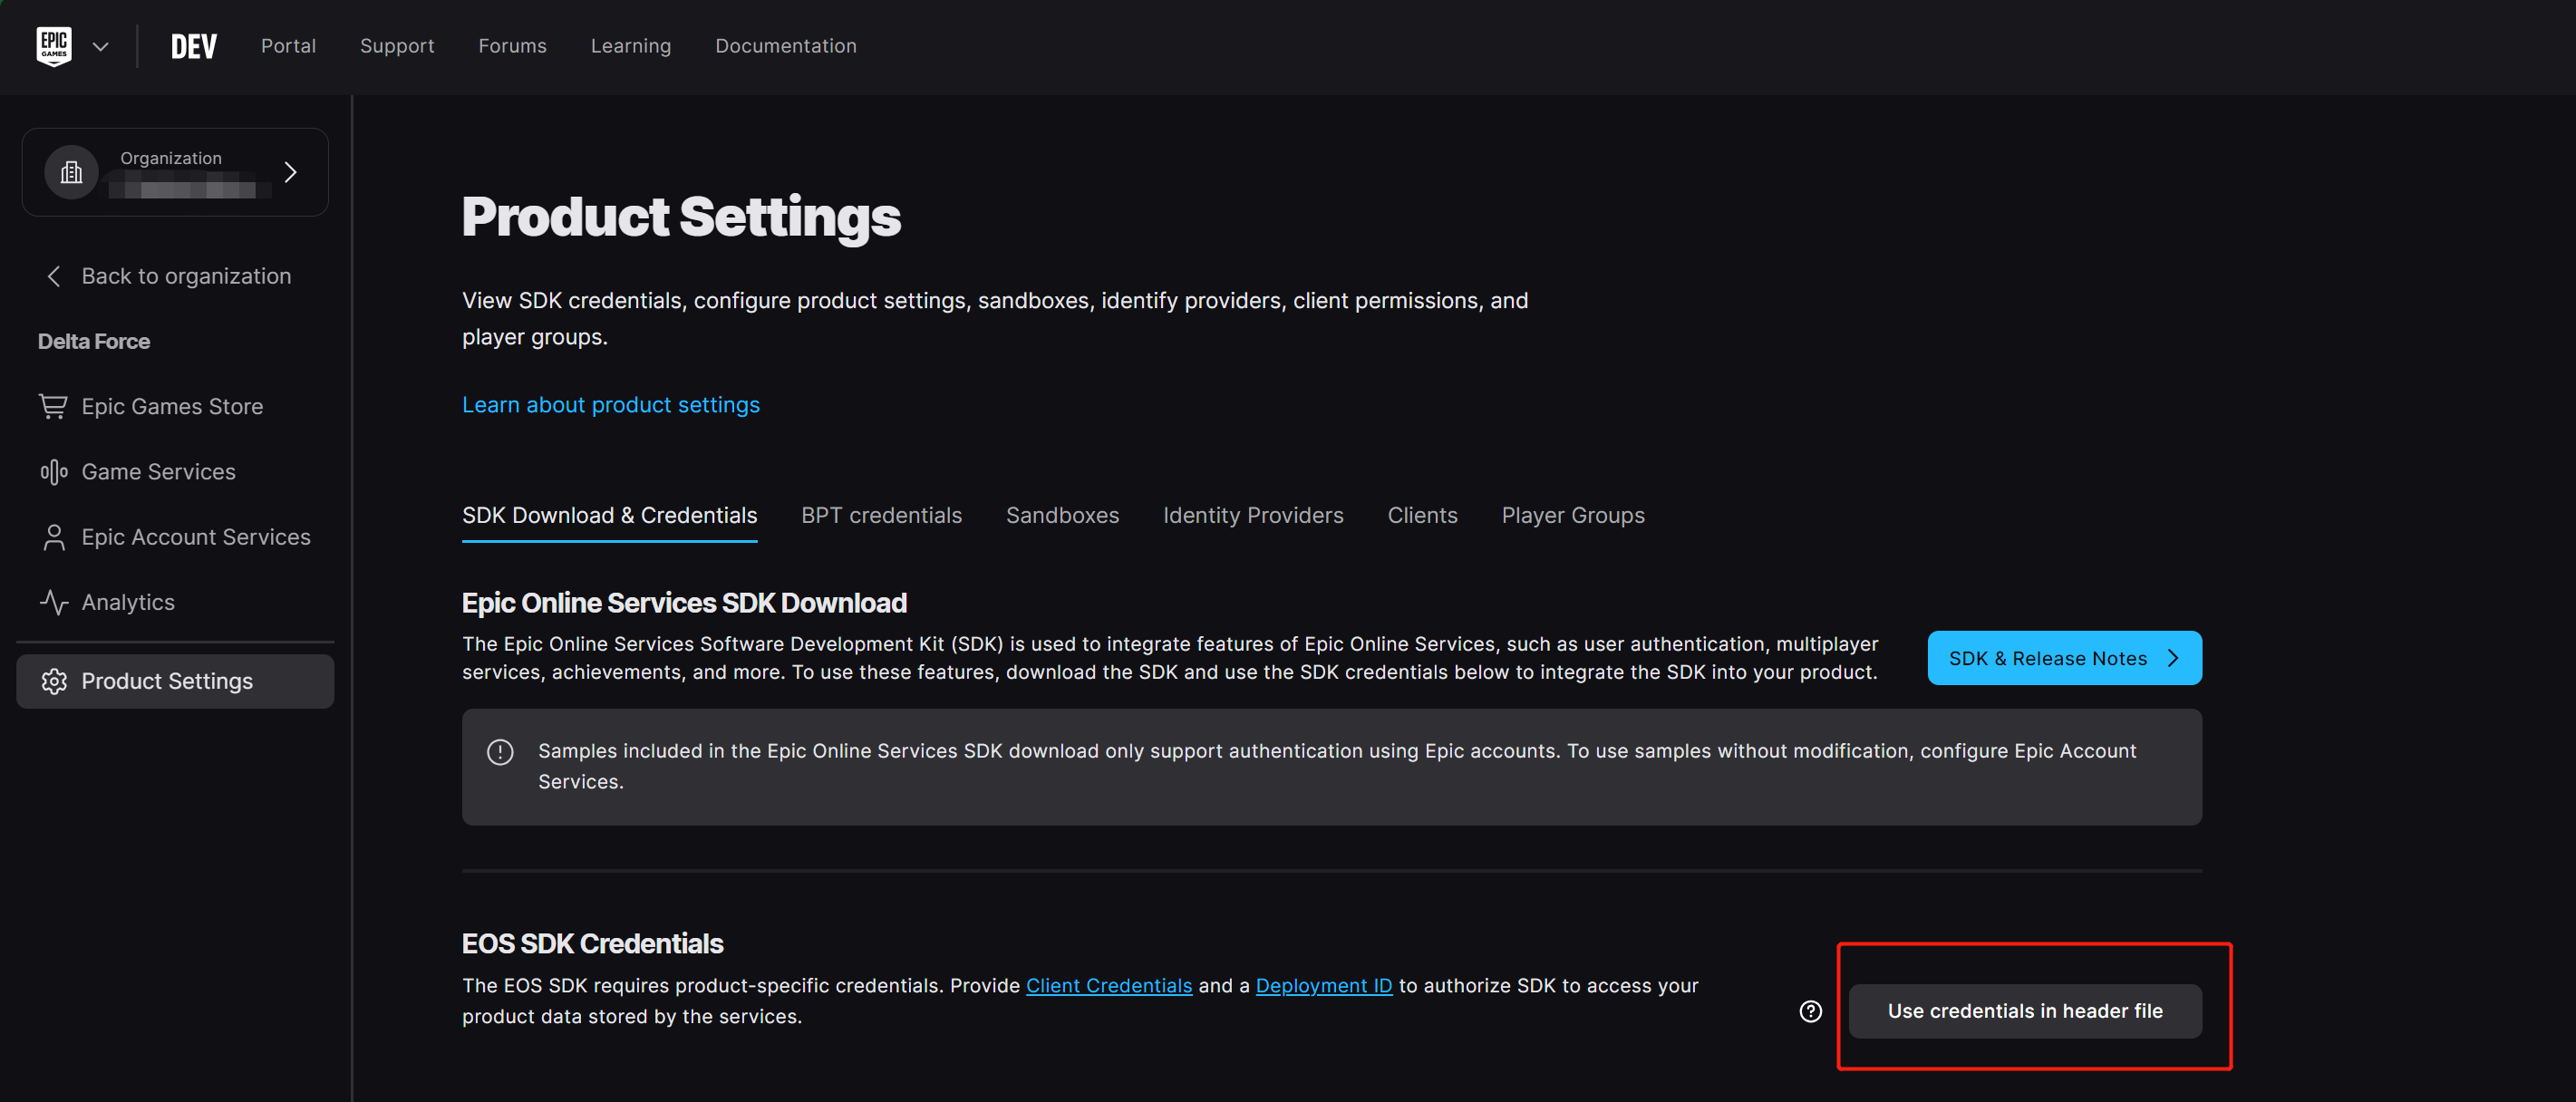
Click Product Settings and select SDK Download & Credentials.
-
Click Use credentials in header file under EOS SDK Credentials to use the generate header file function.
-
Complete the required information and click I understand after confirming the displayed instructions.The automatically generated information can be copied by clicking on the copy icon in the upper right corner.
- Deployment:Deployment environment, recommended Live, no need to reconfigure when product goes live
- Client:Client name
- Application:Product name

-
Configure the generated information into the INTLConfig.ini file.
[Epic]
EPIC_PRODUCT_NAME = {INTL_EPIC_PRODUCT_NAME}
EPIC_PRODUCT_VERSION = {INTL_EPIC_PRODUCT_VERSION}
EPIC_PRODUCT_ID = {INTL_EPIC_PRODUCT_ID}
EPIC_SANDBOX_ID = {INTL_EPIC_SANDBOX_ID}
EPIC_DEPLOYMENT_ID = {INTL_EPIC_DEPLOYMENT_ID}
EPIC_CLIENT_ID = {INTL_EPIC_CLIENT_ID}
EPIC_CLIENT_SECRET = {INTL_EPIC_CLIENT_SECRET}- Replace
{INTL_EPIC_PRODUCT_NAME}with the product name. - Replace
{INTL_EPIC_PRODUCT_VERSION}with a customized string indicating the product version number, such as "1.0". - Replace
{INTL_EPIC_PRODUCT_ID}with the value ofProductId[]. - Replace
{INTL_EPIC_SANDBOX_ID}with the value ofSandBoxId[]. - Replace
{INTL_EPIC_DEPLOYMENT_ID}with the value ofDeploymentId[]. - Replace
{INTL_EPIC_CLIENT_ID}with the value ofClientCredentialsId[]. - Replace
{INTL_EPIC_CLIENT_SECRET}with the value ofClientCredentialsSecret[].
- Replace
Step 2:Add Epic Login
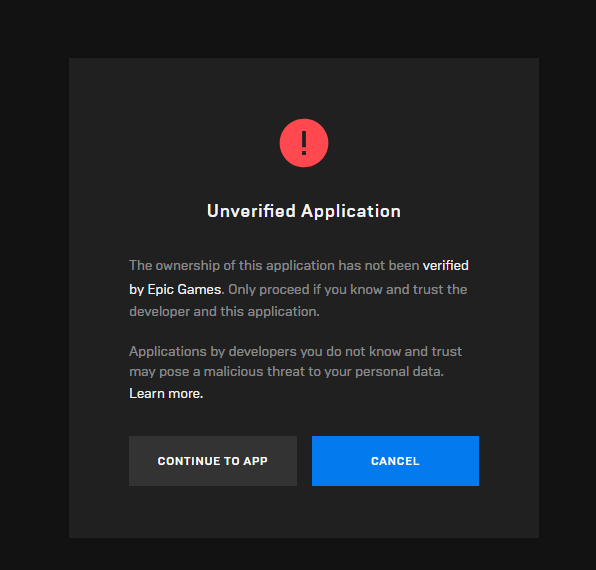
If the project has not been published on the Epic Games platform, a warning will be displayed when you log in.Only team members can log in properly.
-
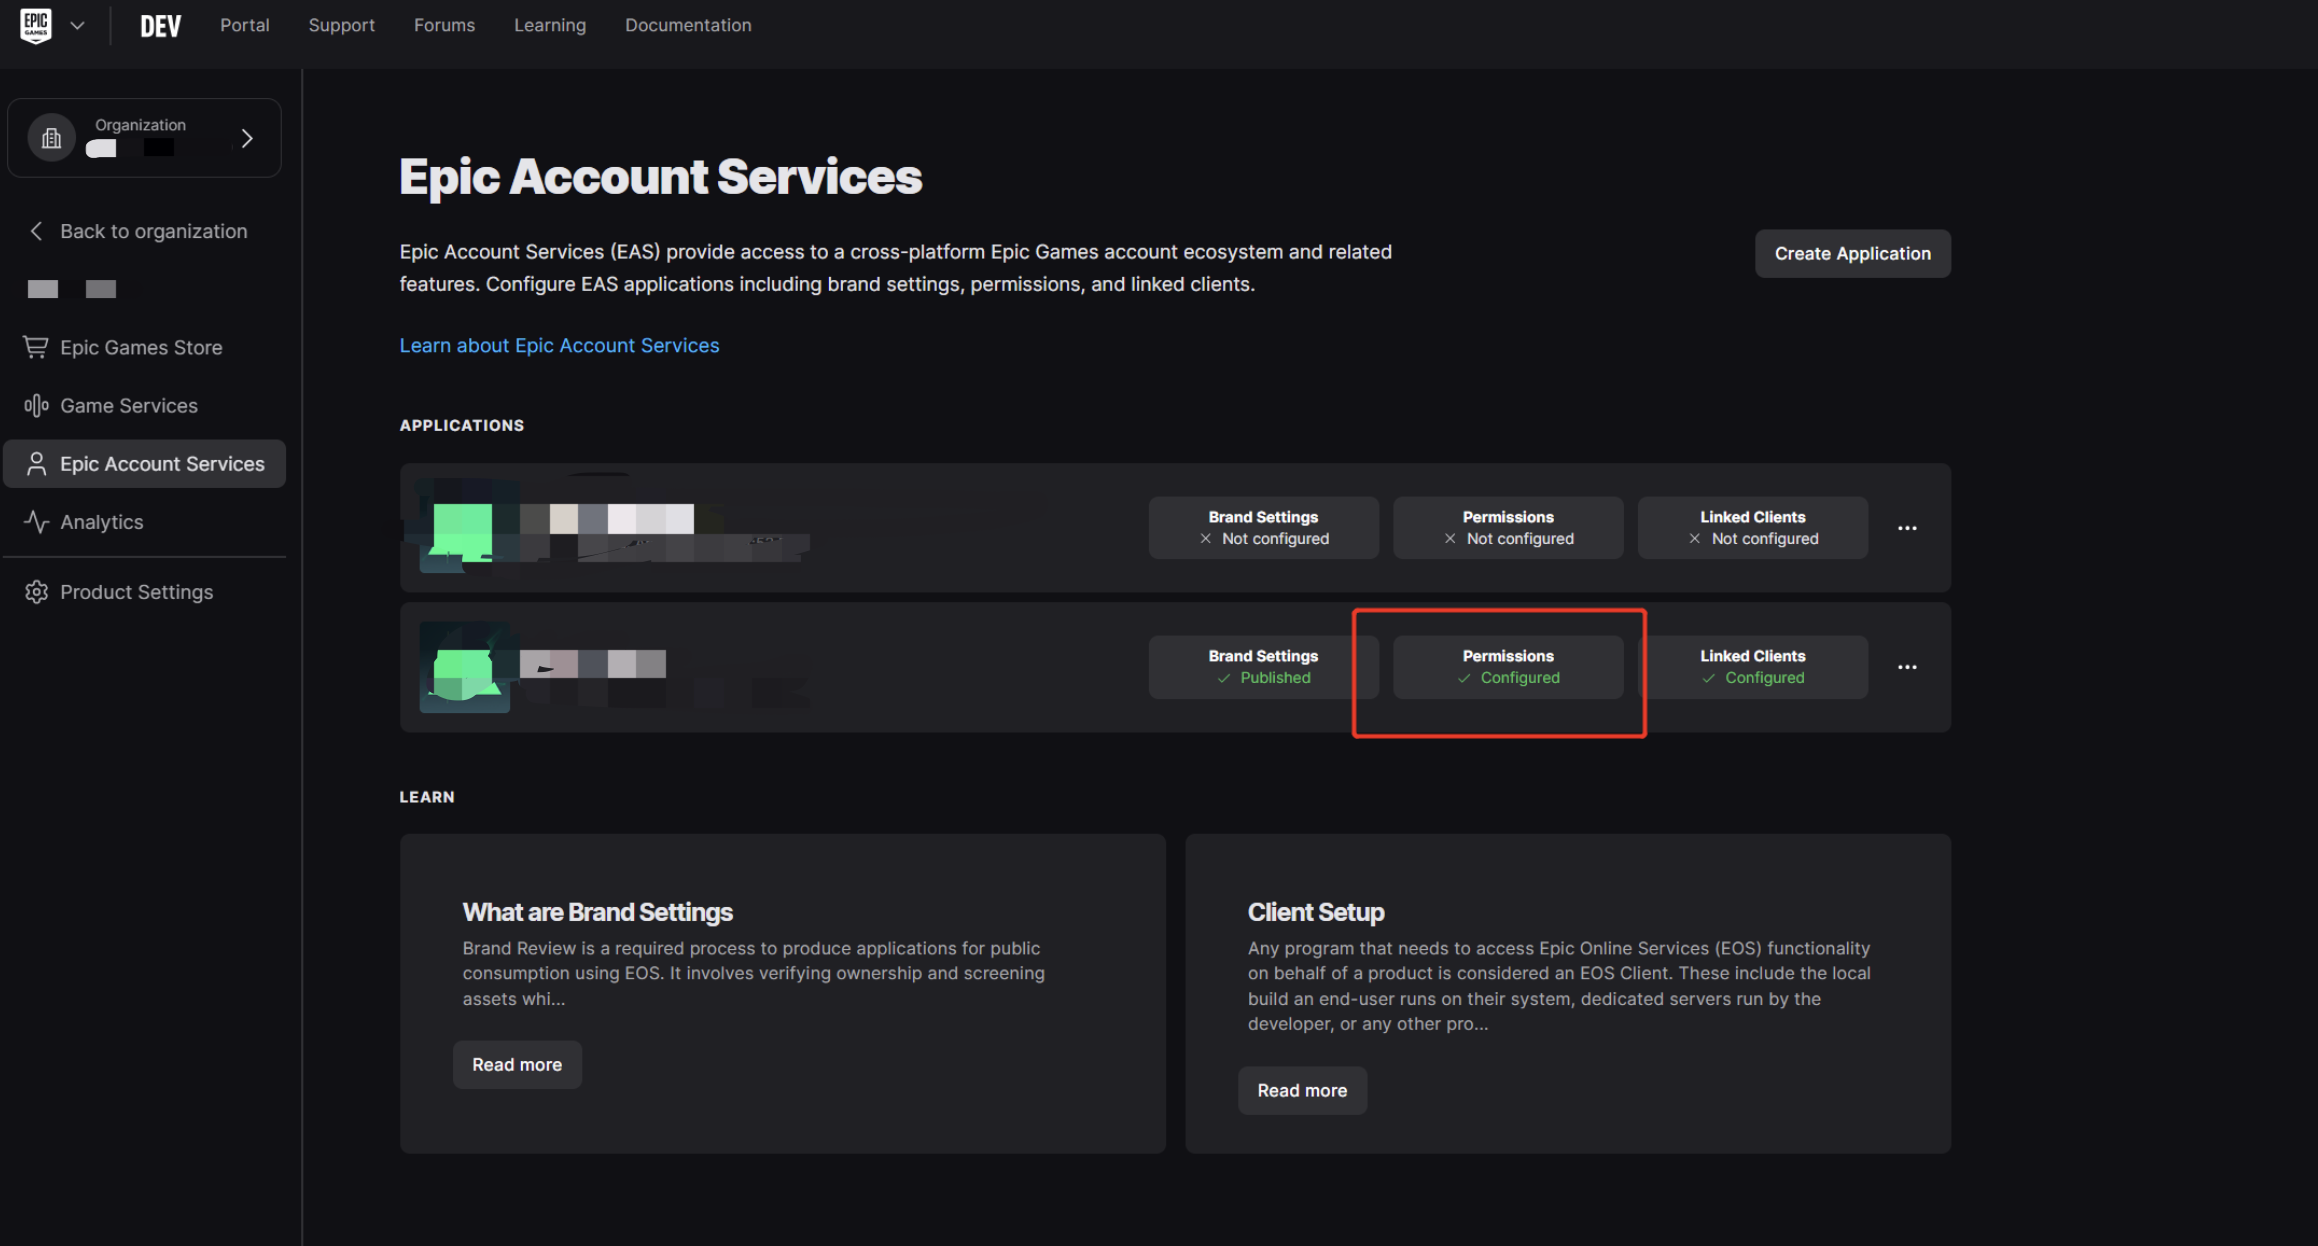
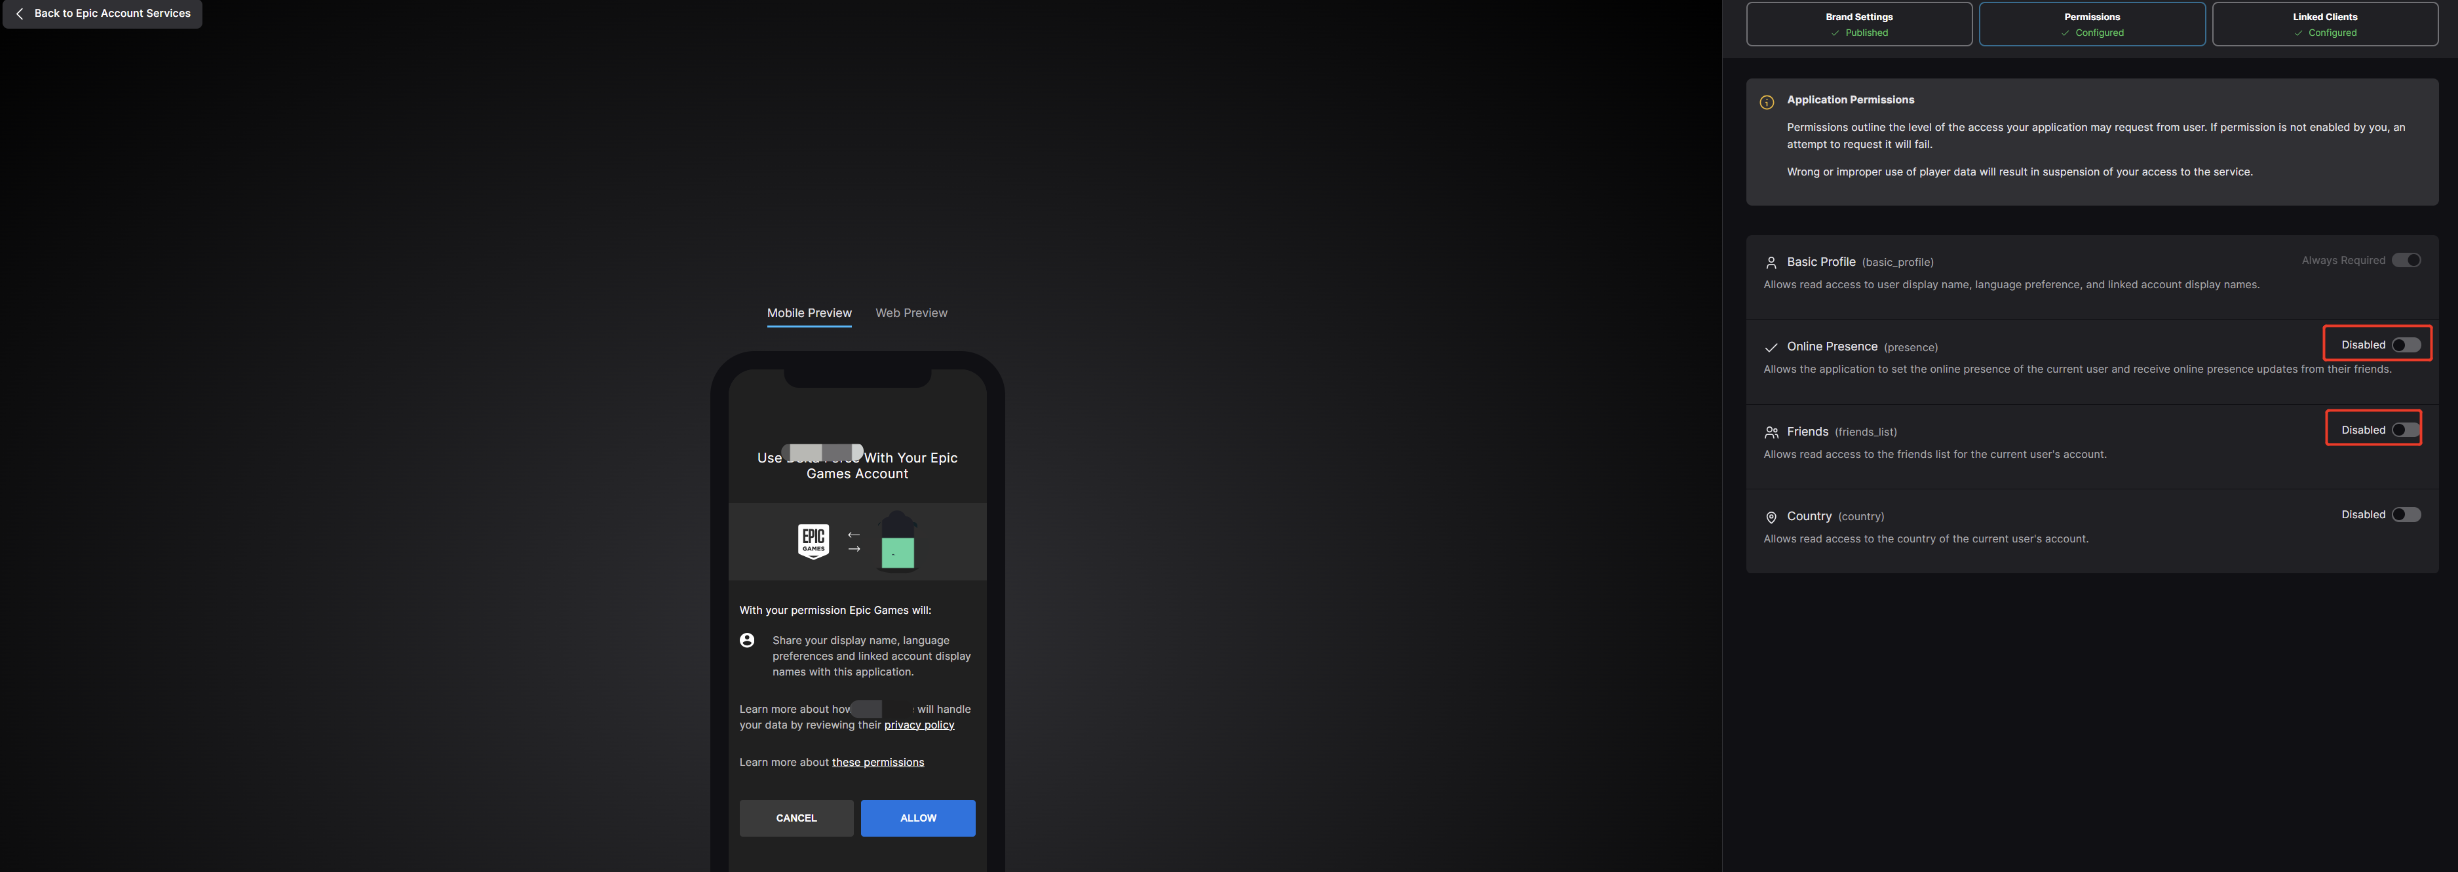
Configure the required login permissions on the Epic Account Services page.For more information, see Epic Account Services Data Privacy and Visibility.
- basic_profile:The basic profile is the minimum level of access required to retrieve any information about an Epic account.
- friends_list:Applications can access the friends list of an Epic account through the Friends List Access permission.
- presence:The presence access level allows applications to access the account's presence information.
-
Add
UpdateSDKcalls to ensure that Epic's asynchronous callback functionality works properly.
The Player Network SDK in PC applications only supports AccountPortal login mode.In this mode the Epic EOS SDK will open the login page in the system browser and use the locally stored Long Term Access Token to login to the network.For more information, see Persistent Login for Epic Account Users Outside of Epic Games Launcher.
Epic 支持将登录状态从一个进程传递给子进程,因此子进程无需额外的用户输入即可获取登录到父进程的 Epic 账号的登录状态信息。这一过程由刷新令牌完成,更多信息请参见 EOS API reference page for EOS_ELoginCredentialType。
Usage Scenarios:If the game needs to be launched via the launcher, the game will be opened after logging into Epic on the launcher.Since the launcher and the game are different processes, the game process cannot use the Epic login state from the launcher.If the game requires Epic login status (for example for payments), it can login to Epic by using a refresh token without any input from the player.
The Player Network SDK supports obtaining refresh tokens for Epic channels.After logging into the Epic using the Player Network SDK, the Player Network SDK returns the Epic's refresh token in the ChannelInfo field of the login result.Once the game process obtains a refresh token from the parent process, it can use the refresh token to log into the Epic.
- Register login-related callbacks.
- Unity
- Unreal Engine
// Add callbacks
public void AddAuthObserver()
{
    INTLAPI.AddAuthResultObserver(OnAuthResultEvent);
}

// Remove callbacks
public void RemoveAuthObserver()
{
    INTLAPI.RemoveAuthResultObserver(OnAuthResultEvent);
}

// Process the INTLAuthResult callback
public void OnAuthResultEvent(INTLAuthResult ret)
{
    Debug.Log($"MethodID: {ret.MethodId}");

    string methodTag = "";
    if (authRet.MethodId == (int)INTLMethodID.INTL_AUTH_LOGIN)
    {
        methodTag = "Login";
    }
    else if (authRet.MethodId == (int)INTLMethodID.INTL_AUTH_BIND)
    {
        methodTag = "Bind";
    }
    else if (authRet.MethodId == (int)INTLMethodID.INTL_AUTH_AUTOLOGIN)
    {
        methodTag = "AutoLogin";
    }
    else if (authRet.MethodId == (int)INTLMethodID.INTL_AUTH_QUERY_USER_INFO)
    {
        methodTag = "QueryUserInfo";
    }
    else if (authRet.MethodId == (int)INTLMethodID.INTL_AUTH_GET_AUTH_RESULT)
    {
        methodTag = "GetAuthResult";
    }
}
C++ Event Handling (above v1.15)
//configure callback
FINTLAuthEvent authEvent;
authEvent.AddUObject(this, &OnAuthResult_Implementation);
UINTLSDKAPI::SetAuthResultObserver(authEvent);
// Remove callbacks
UINTLSDKAPI::GetAuthResultObserver().Clear();
void OnAuthResult_Implementation(FINTLAuthResult ret)
{
    UE_LOG(LogTemp, Warning, TEXT("MethodID: %d"), ret.MethodId);
}
Unreal Event Handling
void OnAuthResult_Implementation(FINTLAuthResult ret)
{
    UE_LOG(LogTemp, Warning, TEXT("MethodID: %d"), ret.MethodId);
}
- Call the
AutoLogininterface to log in automatically.
- Unity
- Unreal Engine
INTLAPI.AutoLogin();
UINTLSDKAPI::AutoLogin();
- If automatic login fails, call the
Logininterface to let the player log in manually.
- Unity
- Unreal Engine
string refreshToken; //refresh token from another proccess
StringBuilder Extra_Json = new StringBuilder();
Extra_Json.Append("{");
Extra_Json.Append("\"")
    .Append("LoginMode")
    .Append("\"")
    .Append(":")
    .Append("\"")
    .Append("RefreshToken")
    .Append("\",");
Extra_Json.Append("\"")
    .Append("Token")
    .Append("\"")
    .Append(":")
    .Append("\"")
    .Append(refreshTokentoken)
    .Append("\"");
Extra_Json.Append("}");
string channel = "Epic";
string permissions = "basic_profile,friends_list,presence"; //permissions for epic
string extraJson = Extra_Json.ToString();

INTLAPI.Login(channel, permissions, extraJson);
FString RefreshToken;// refresh token from another proccess
const auto Permissions = TEXT("basic_profile,friends_list,presence"); //permissions for epic
FString Extra_JSON = TEXT("");
const TSharedRef<TJsonWriter<>> JsonWriter = TJsonWriterFactory<>::Create(&Extra_JSON);
JsonWriter->WriteObjectStart();
JsonWriter->WriteValue(TEXT("LoginMode"), TEXT("RefreshToken"));
JsonWriter->WriteValue(TEXT("Token"), RefreshToken);
JsonWriter->WriteObjectEnd();
JsonWriter->Close();

UINTLSDKAPI::Login(EINTLLoginChannel::kChannelEpic, Permissions, Extra_JSON);
- Synchronize client authentication status with the game backend and wait for the final verification result.
Step 3: Acceptance testing for login functionality
Search for the keyword "AuthResult" in the Player Network SDK logs to confirm whether the channel name and OpenID are returned correctly.If correct, it means the integration configuration is successful, and login functionality has been successfully added.
If you encounter problems during the integration process, please refer to Frequently Asked Questions.
