Web
The purpose of this article is to describe how to set up Facebook authentication so that your page can log in through the Facebook channel using the Player Network login authentication service.
Prerequisites
1. Set up the Facebook app in Meta for Developers
1. Register an Account
Before configuring the platform for your app, sign up for a Facebook developer account and create an app in the Facebook App Dashboard.
-
Register for an account at Facebook and follow the prompts to complete account verification (Email or cell phone verification).
-
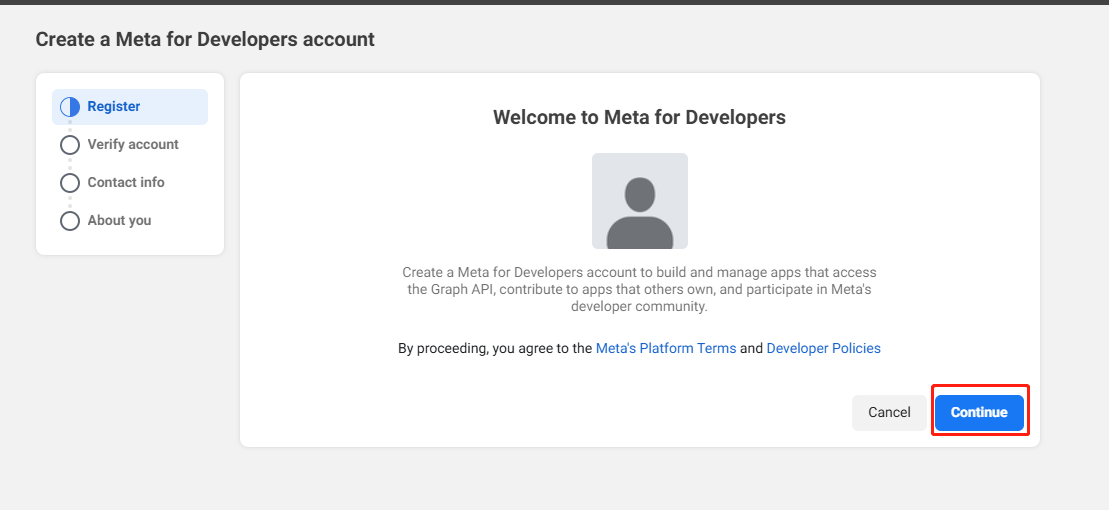
Activate a developer account at Meta for Developers.

-
Agree to the agreement and continue.
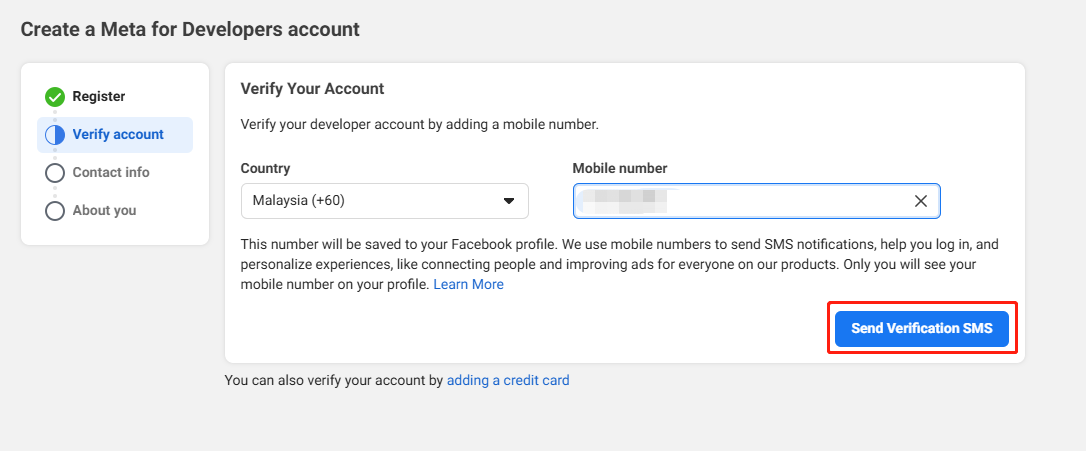
-
Complete the cell phone verification.
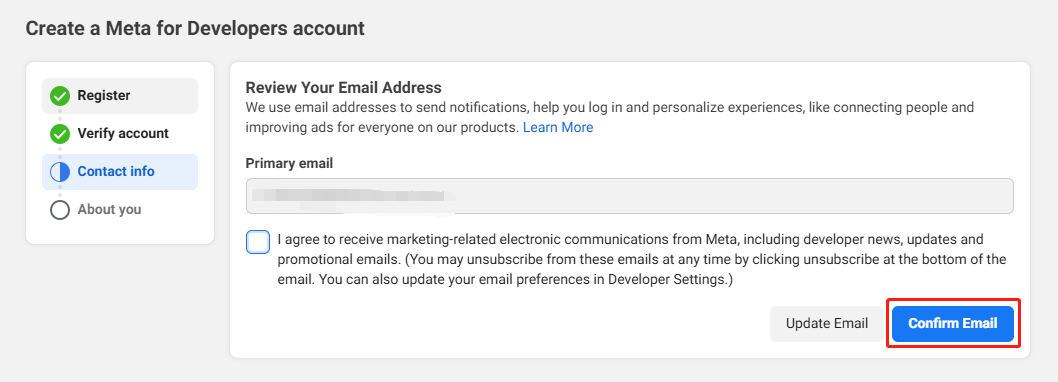
-
Confirm Email.
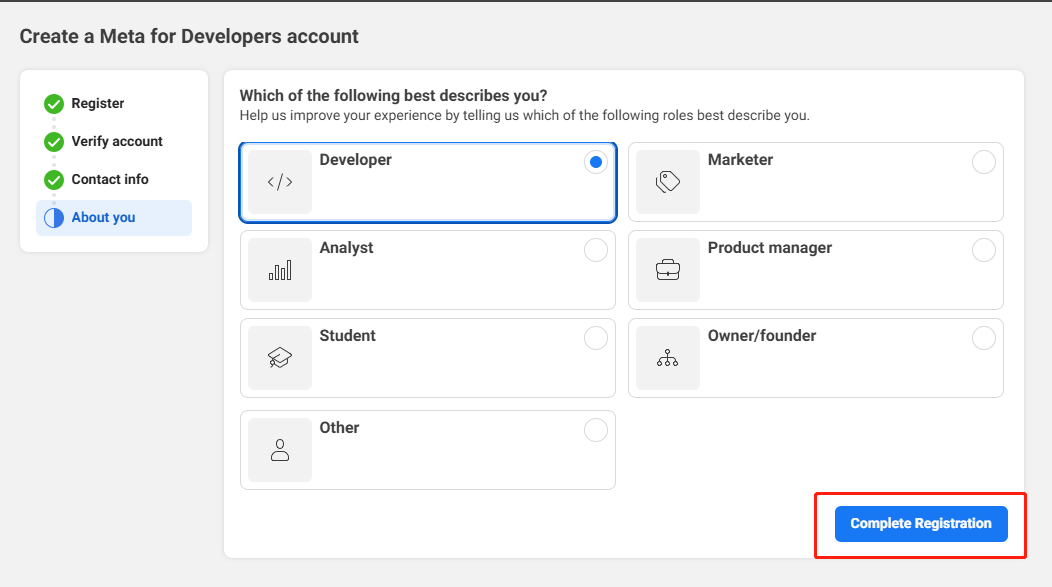
-
Complete the registration.
-
Add the Facebook SDK to your project at Meta for Developers.
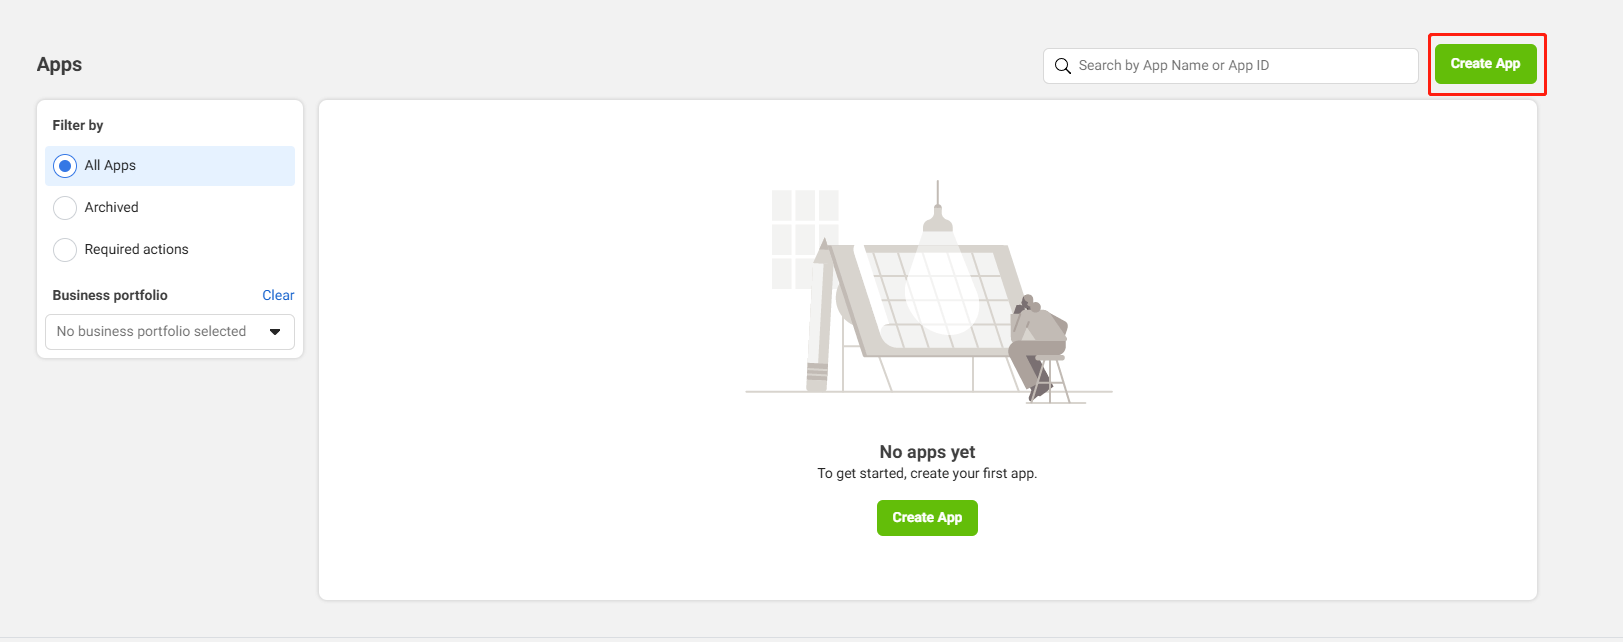
2. Create an Application
-
Click Create App in the upper right corner.
-
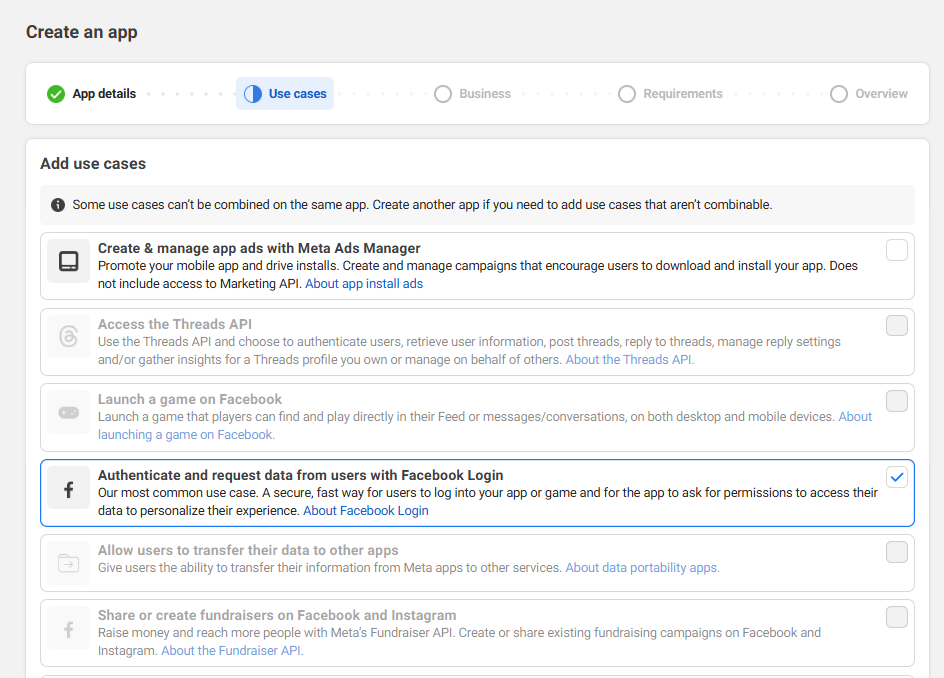
Fill out basic information:
- App name -
FACEBOOK_DISPLAYNAMEin the INTLConfig.ini configuration file. - App contact email - The primary contact email for receiving notifications from Facebook about the app.

- App name -
-
The application type is selected as Authenticate and request data from users with Facebook Login.
-
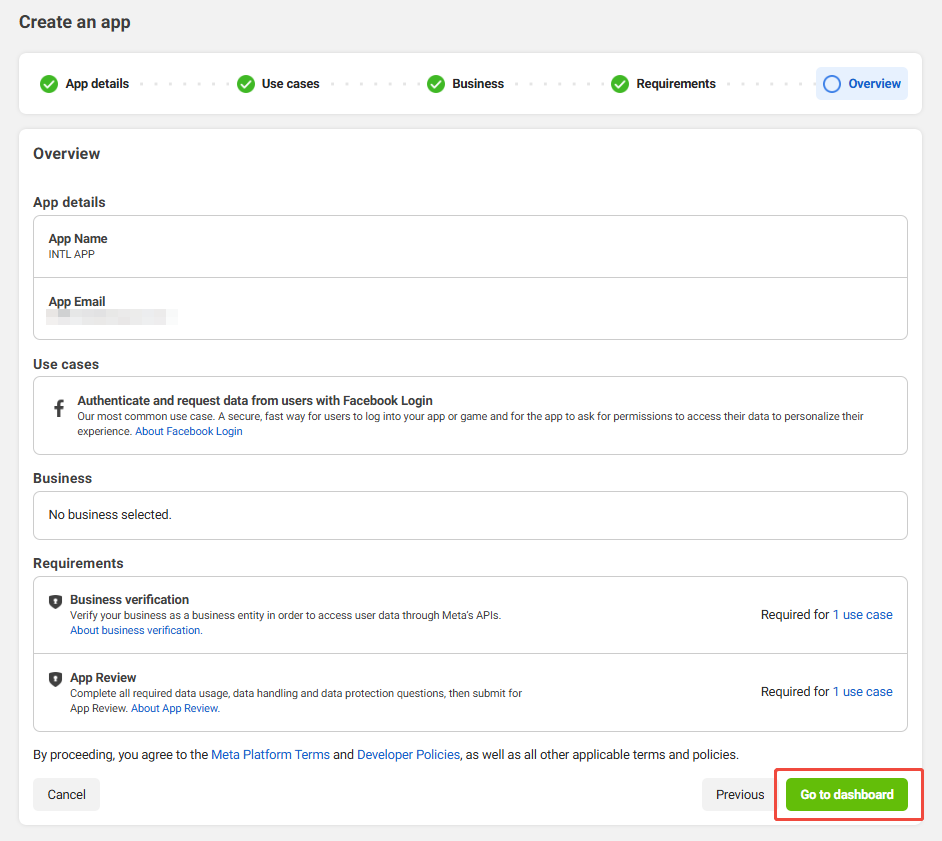
Select Business and continue to the next step if not shown.

-
Agreed and continued.

-
Check the overview, and click Go to Dashboard to complete app creation.
3. Configure Application
Enter the Privacy Agreement URL, User Data Deletion, and Terms of Service URLs according to Facebook specifications.If you do not comply with the Facebook Code, Facebook may disable your app after it is published.
Apps that have been submitted to Facebook can continue to use Facebook Login For Gaming, new apps that have not been submitted can only use Facebook Login.For more information, see Facebook Login For Gaming.
-
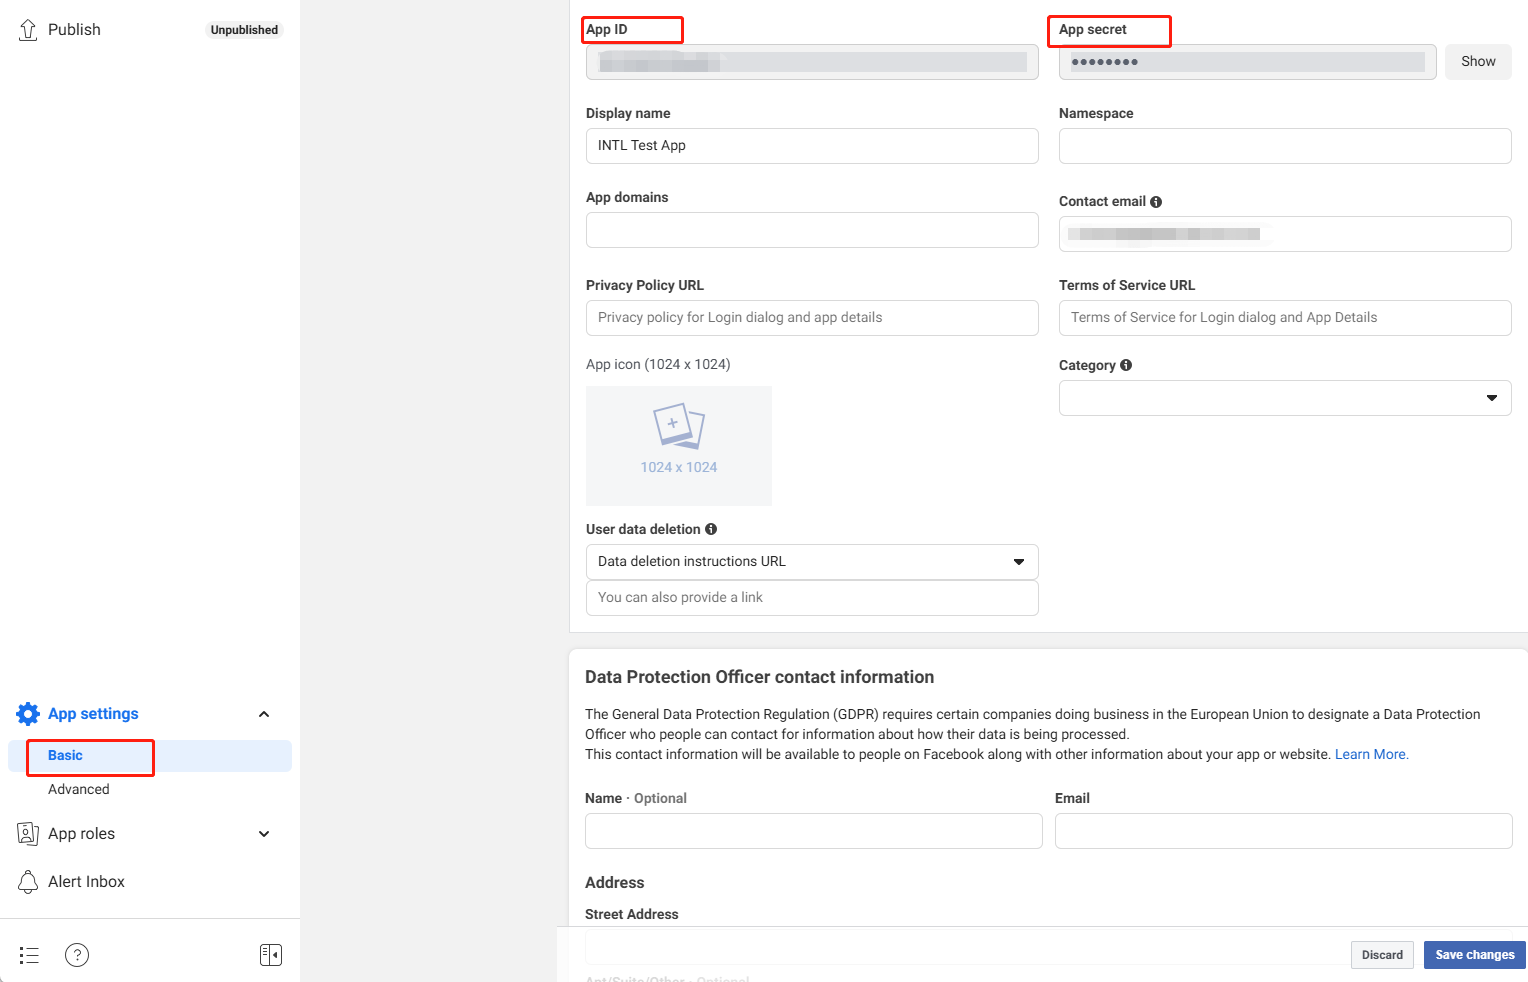
In the left navigation bar, click App Settings > Basic to view basic information about the application, such as App ID and App secret.
-
In the Privacy Policy URL field, enter the URL of the privacy agreement.
-
In the User Data Deletion field, select the Data Deletion Description URL and enter the URL based on the user's data deletion description.
-
In the Terms of Service field, enter the URL of the Terms of Service page.
-
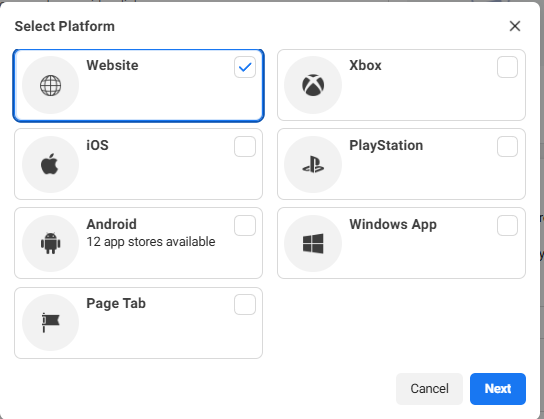
Click Add Platform and select Add Web.
-
Enter the configuration directly, or click Quick Start in the upper right corner of the platform configuration screen to set up the configuration according to the guide.
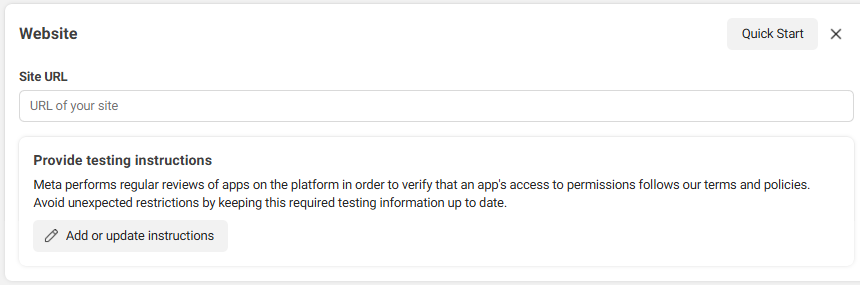
-
Click Save Changes to save the configuration.
Configuring Facebook Login
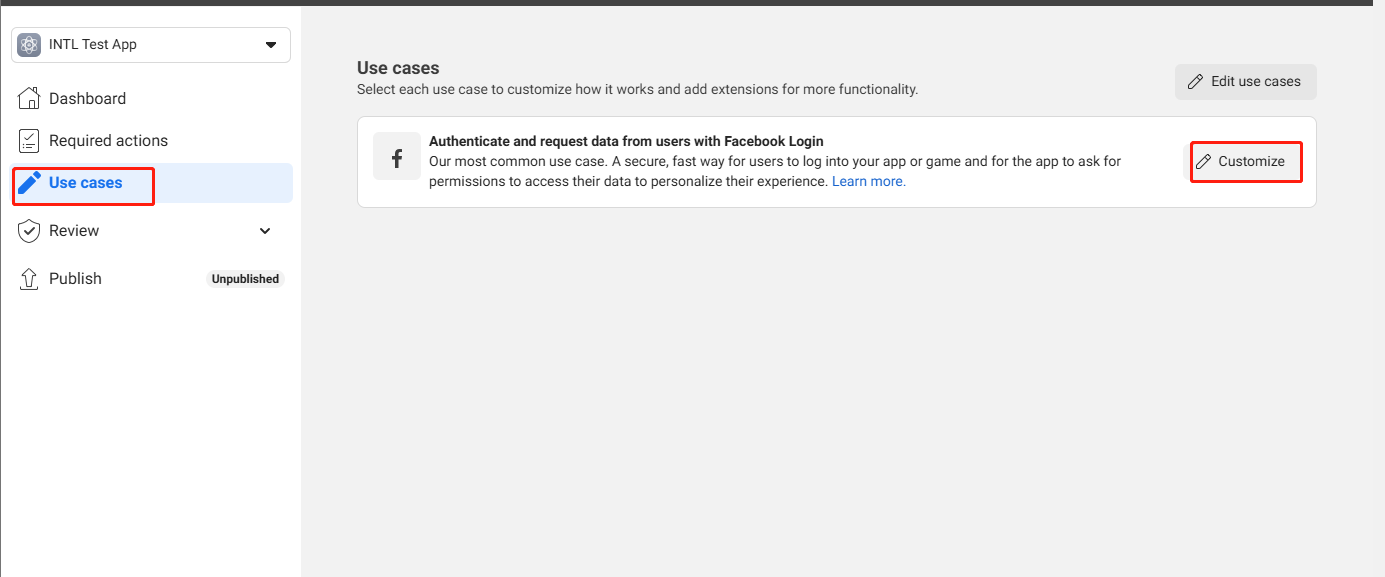
- In the Facebook App Dashboard, click Use cases > Customize.
- Under Facebook Login select Settings.
- At Valid OAuth Redirect URIs, fill in
https://common-web.intlgame.com/jssdk/facebooklogincallback.htmlandhttps://test-common-web.intlgame .com/jssdk/facebooklogincallback.html. - In Allowed Domains for the JavaScript SDK, fill in
https://common-web.intlgame.com/andhttps://test-common-web.intlgame.com/. - Open Embedded Browser OAuth Login.
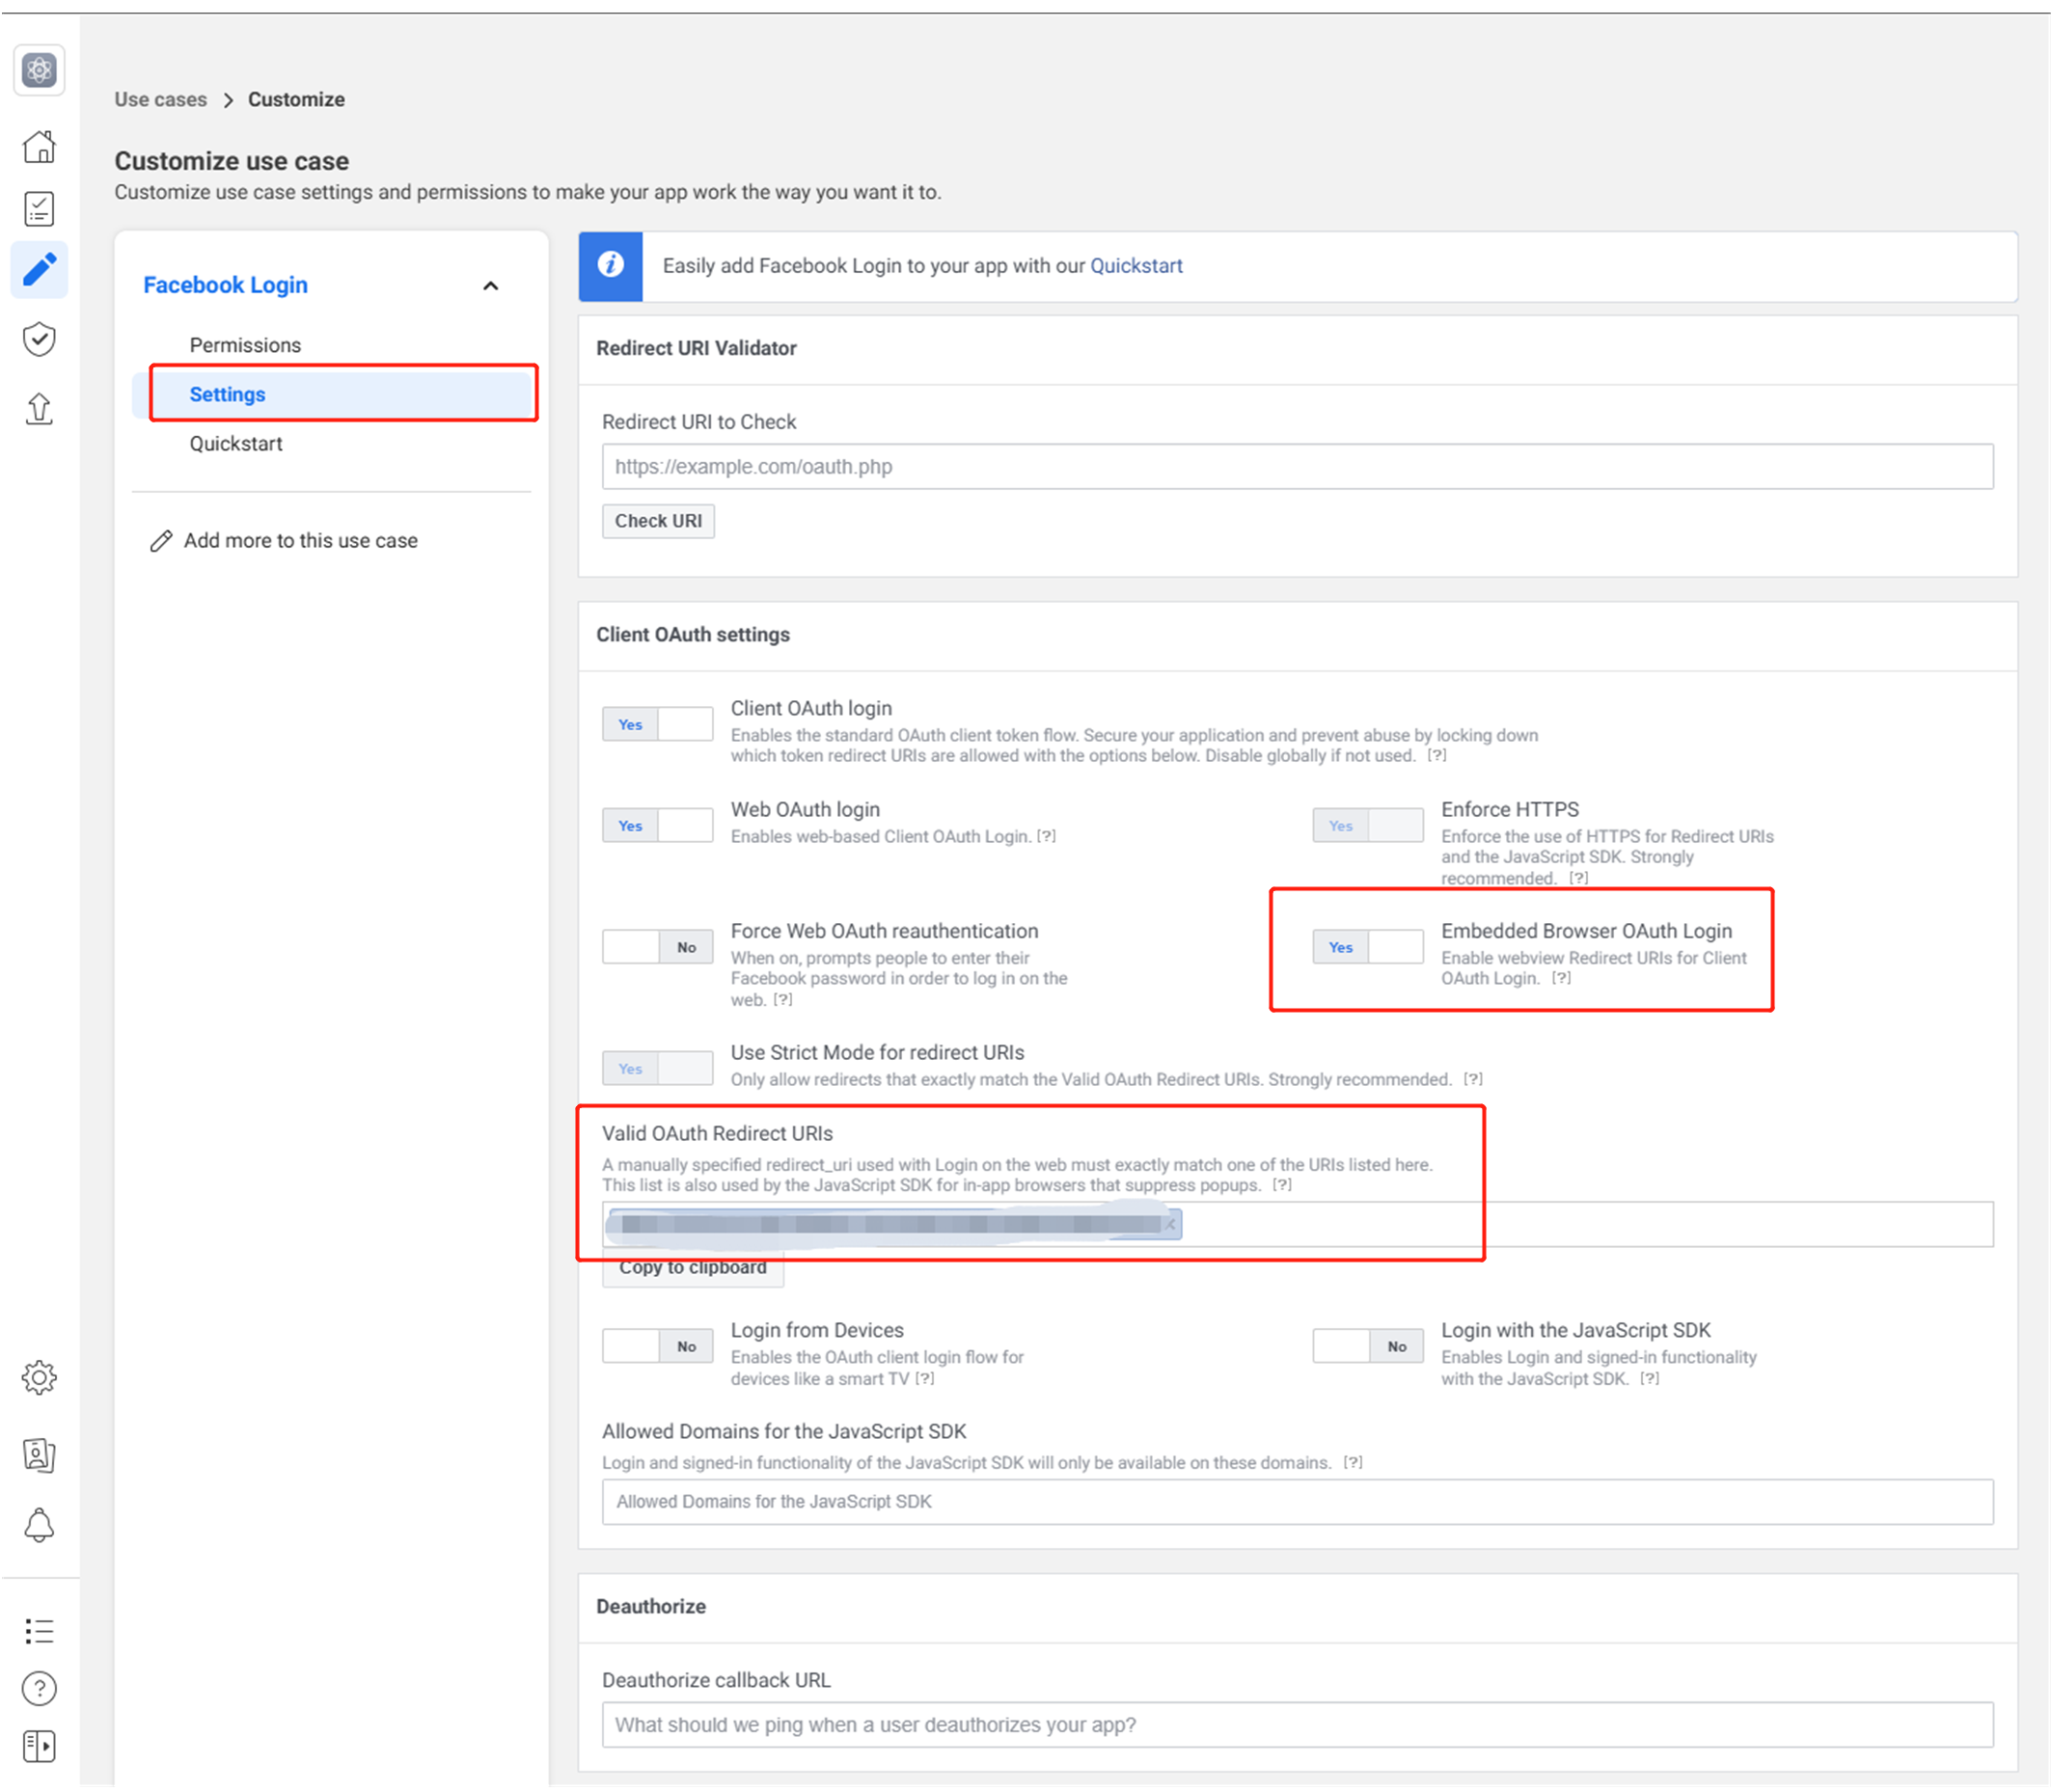
- Click Save changes at the bottom of the page to save the configuration.
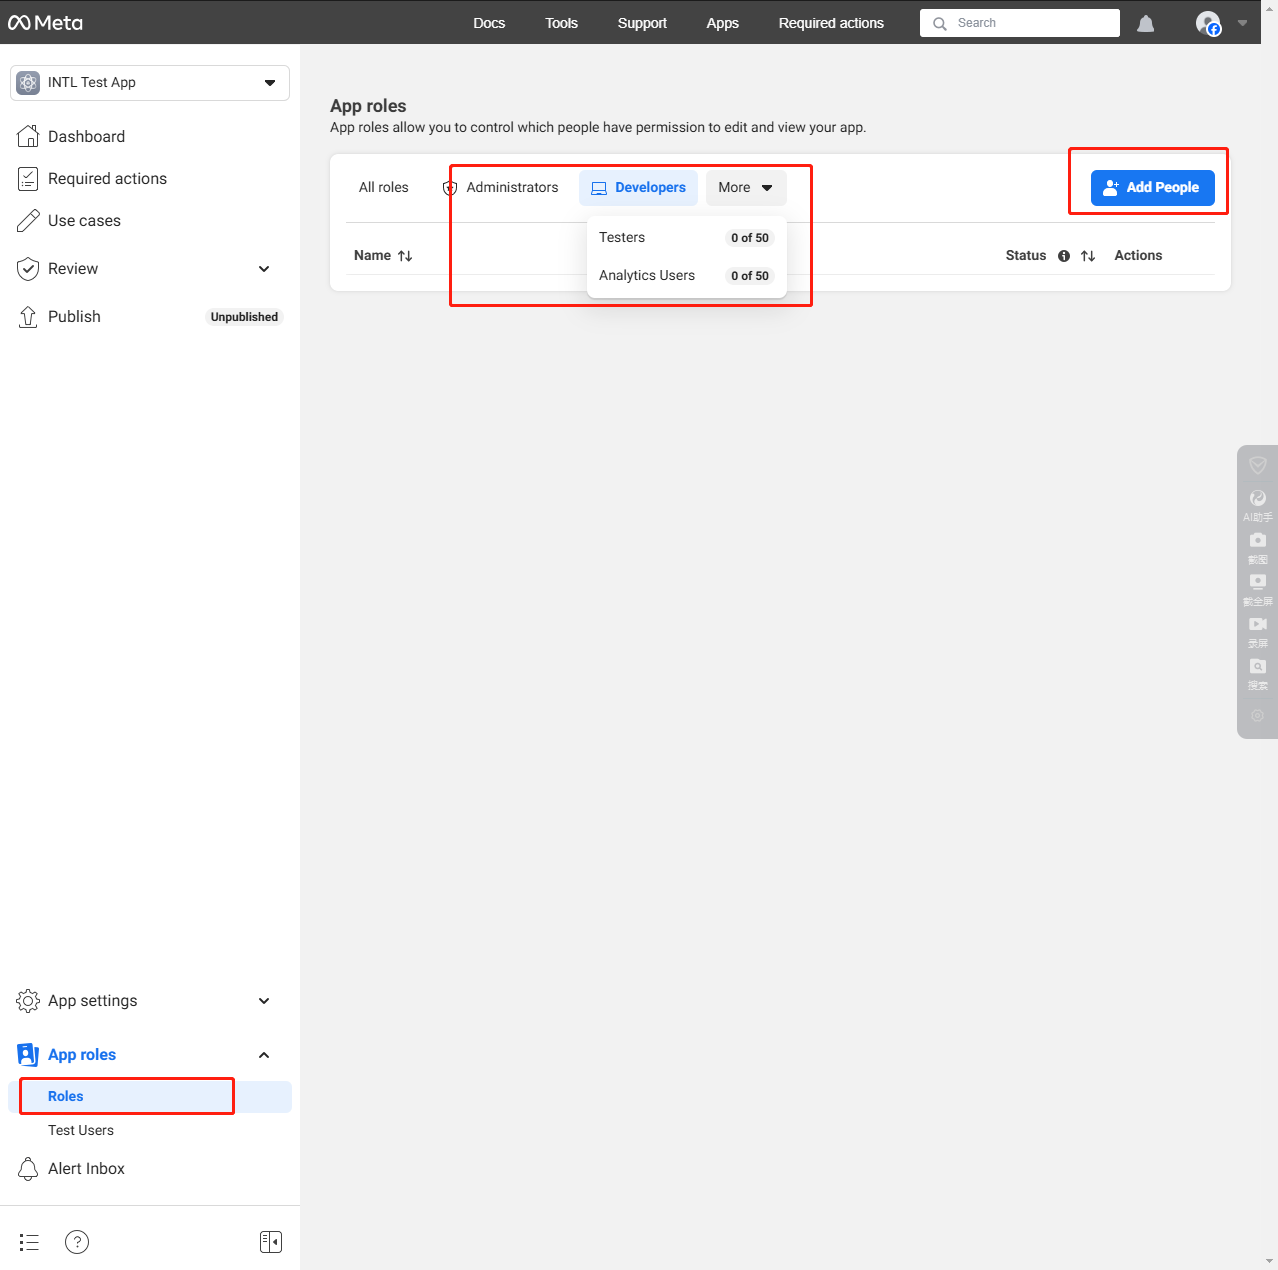
4. Adding tester privileges
Until the app is released, only test users or users who have been added to a permission list can access Facebook features.
- In the Facebook App Dashboard, click Roles.
- Click Add Administrators/Add Developers/Add Testers to add each role.
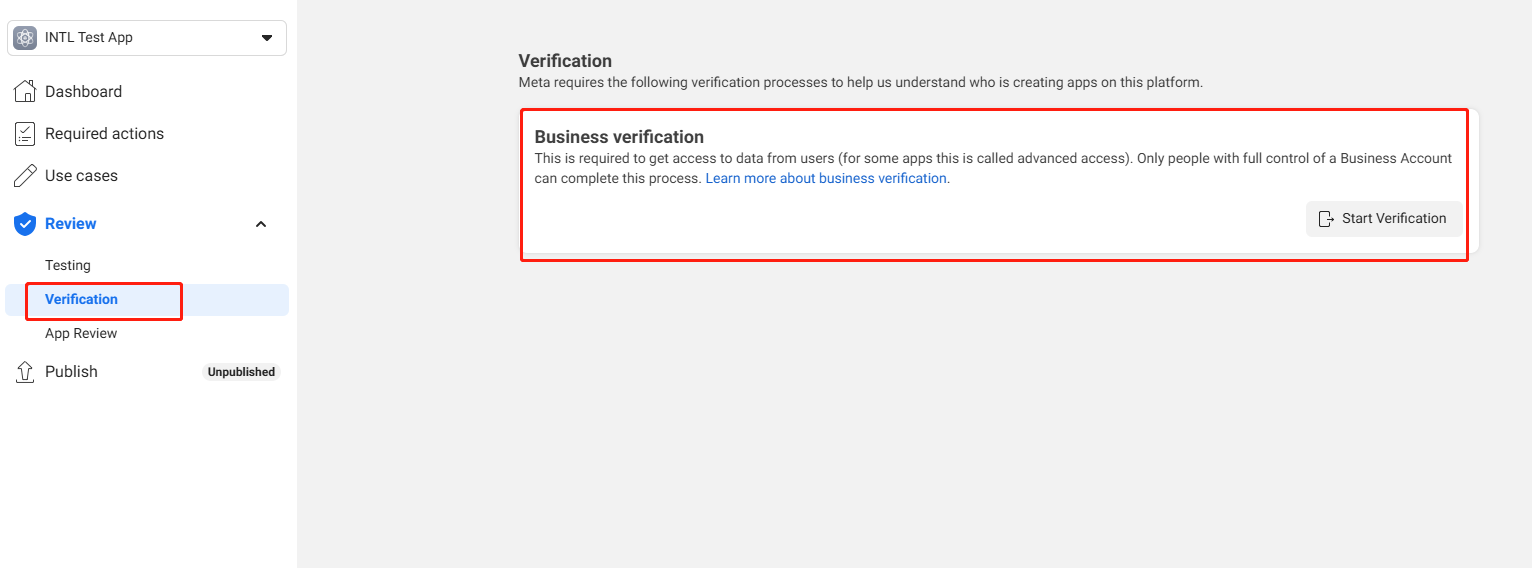
5. Completion of Facebook Business Certification
Certain Meta technologies or features require Meta Commerce certification before they can be used.For business accreditation, please contact the Player Network assistant.
- Obtain Player Network Console login account.
- Create a new project for your game, or join an existing one.
- Add Facebook as a login authentication method for business in the Player Network console.
For more information about integrating other third-party channels into the SDK, see JavaScript SDK.
Step 1: Introduce JavaScript SDK
During project integration testing, import the debugging SDK package, which is intended only for integration testing.For project launch, the official SDK package must be imported.
Currently, both npm package method and CDN method are supported.
- npm
- CDN
$ npm install @intlsdk/account-api
// SDK debug version package
<script src="https://test-common-web.intlgame.com/sdk-cdn/account-api/latest/index.umd.js"></script>
// SDK official version package
<script src="https://common-web.intlgame.com/sdk-cdn/account-api/latest/index.umd.js"></script>
Step 2: Use SDK
During integration testing, set env to test environment; when the project goes live, set env to the corresponding official environment.
const accountApi = new IntlgameAccountApi({
  env: "test", // SDK environment
  gameID: 11,
});
| Parameters | Type | Description | Remarks |
|---|---|---|---|
| env | string | SDK environment For more information, see Obtain deployment cluster information. | Required |
| gameID | number | Player Network unique game ID | Required |
Step 3: Implement Web Login
After instantiating the accountApi component, call the thirdAuthorize interface to request an access token for the Facebook channel.
accountApi.thirdAuthorize({
    third_type: 'facebook',
}).then(
(res) => {
    console.log(res);
});
After Facebook returns the access token, call the intlAuthorize API to obtain the Player Network SDK OpenID and token to log in to the website.
accountApi.intlAuthorize({
    third_type: 'facebook',
    channel_info: {
        access_token: "EAAI2lTrXAZBwBAC"
    }
}).then(
(res) => {
    console.log(res);
});
Call the intlLogout API to log out from the website.
accountApi.intlLogout({
    token: '4567xsdfsd',
    openid: 'xxxxxxxx',
    channel_id: 4,
}).then(
(res) => {
    console.log(res);
});
