Web
The purpose of this article is to explain how to set up LINE authentication so that your web page can log in through the LINE channel using the Player Network login authentication service.
Prerequisites
1. Setting up the LINE application on the LINE Developers Console
1. Create LINE application and configure channels
Before configuring the application for the desired platform, log in to the LINE Developers Console and create a developer account.With your developer account, use the LINE Developers Console and create a channel (a communication channel between LINE features and your application).
Create a channel
-
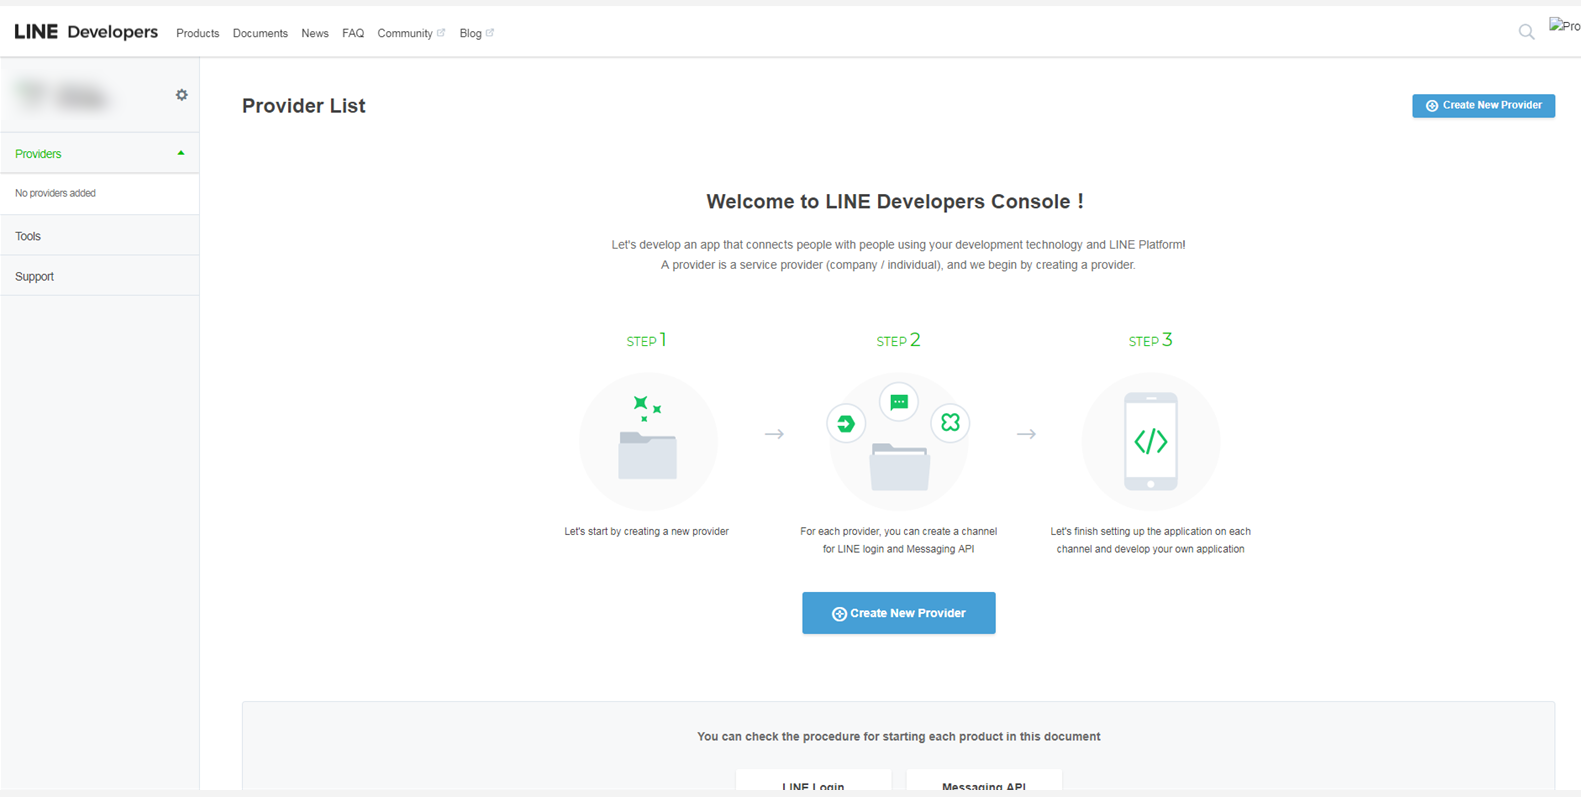
On the Console home page, click Create New Provider and follow the on-screen instructions to create the provider.
-
On the Channels tab of the Providers page, click Create a LINE Login channel.
-
On the New Channel Creation page, enter the required information and click Create.
-
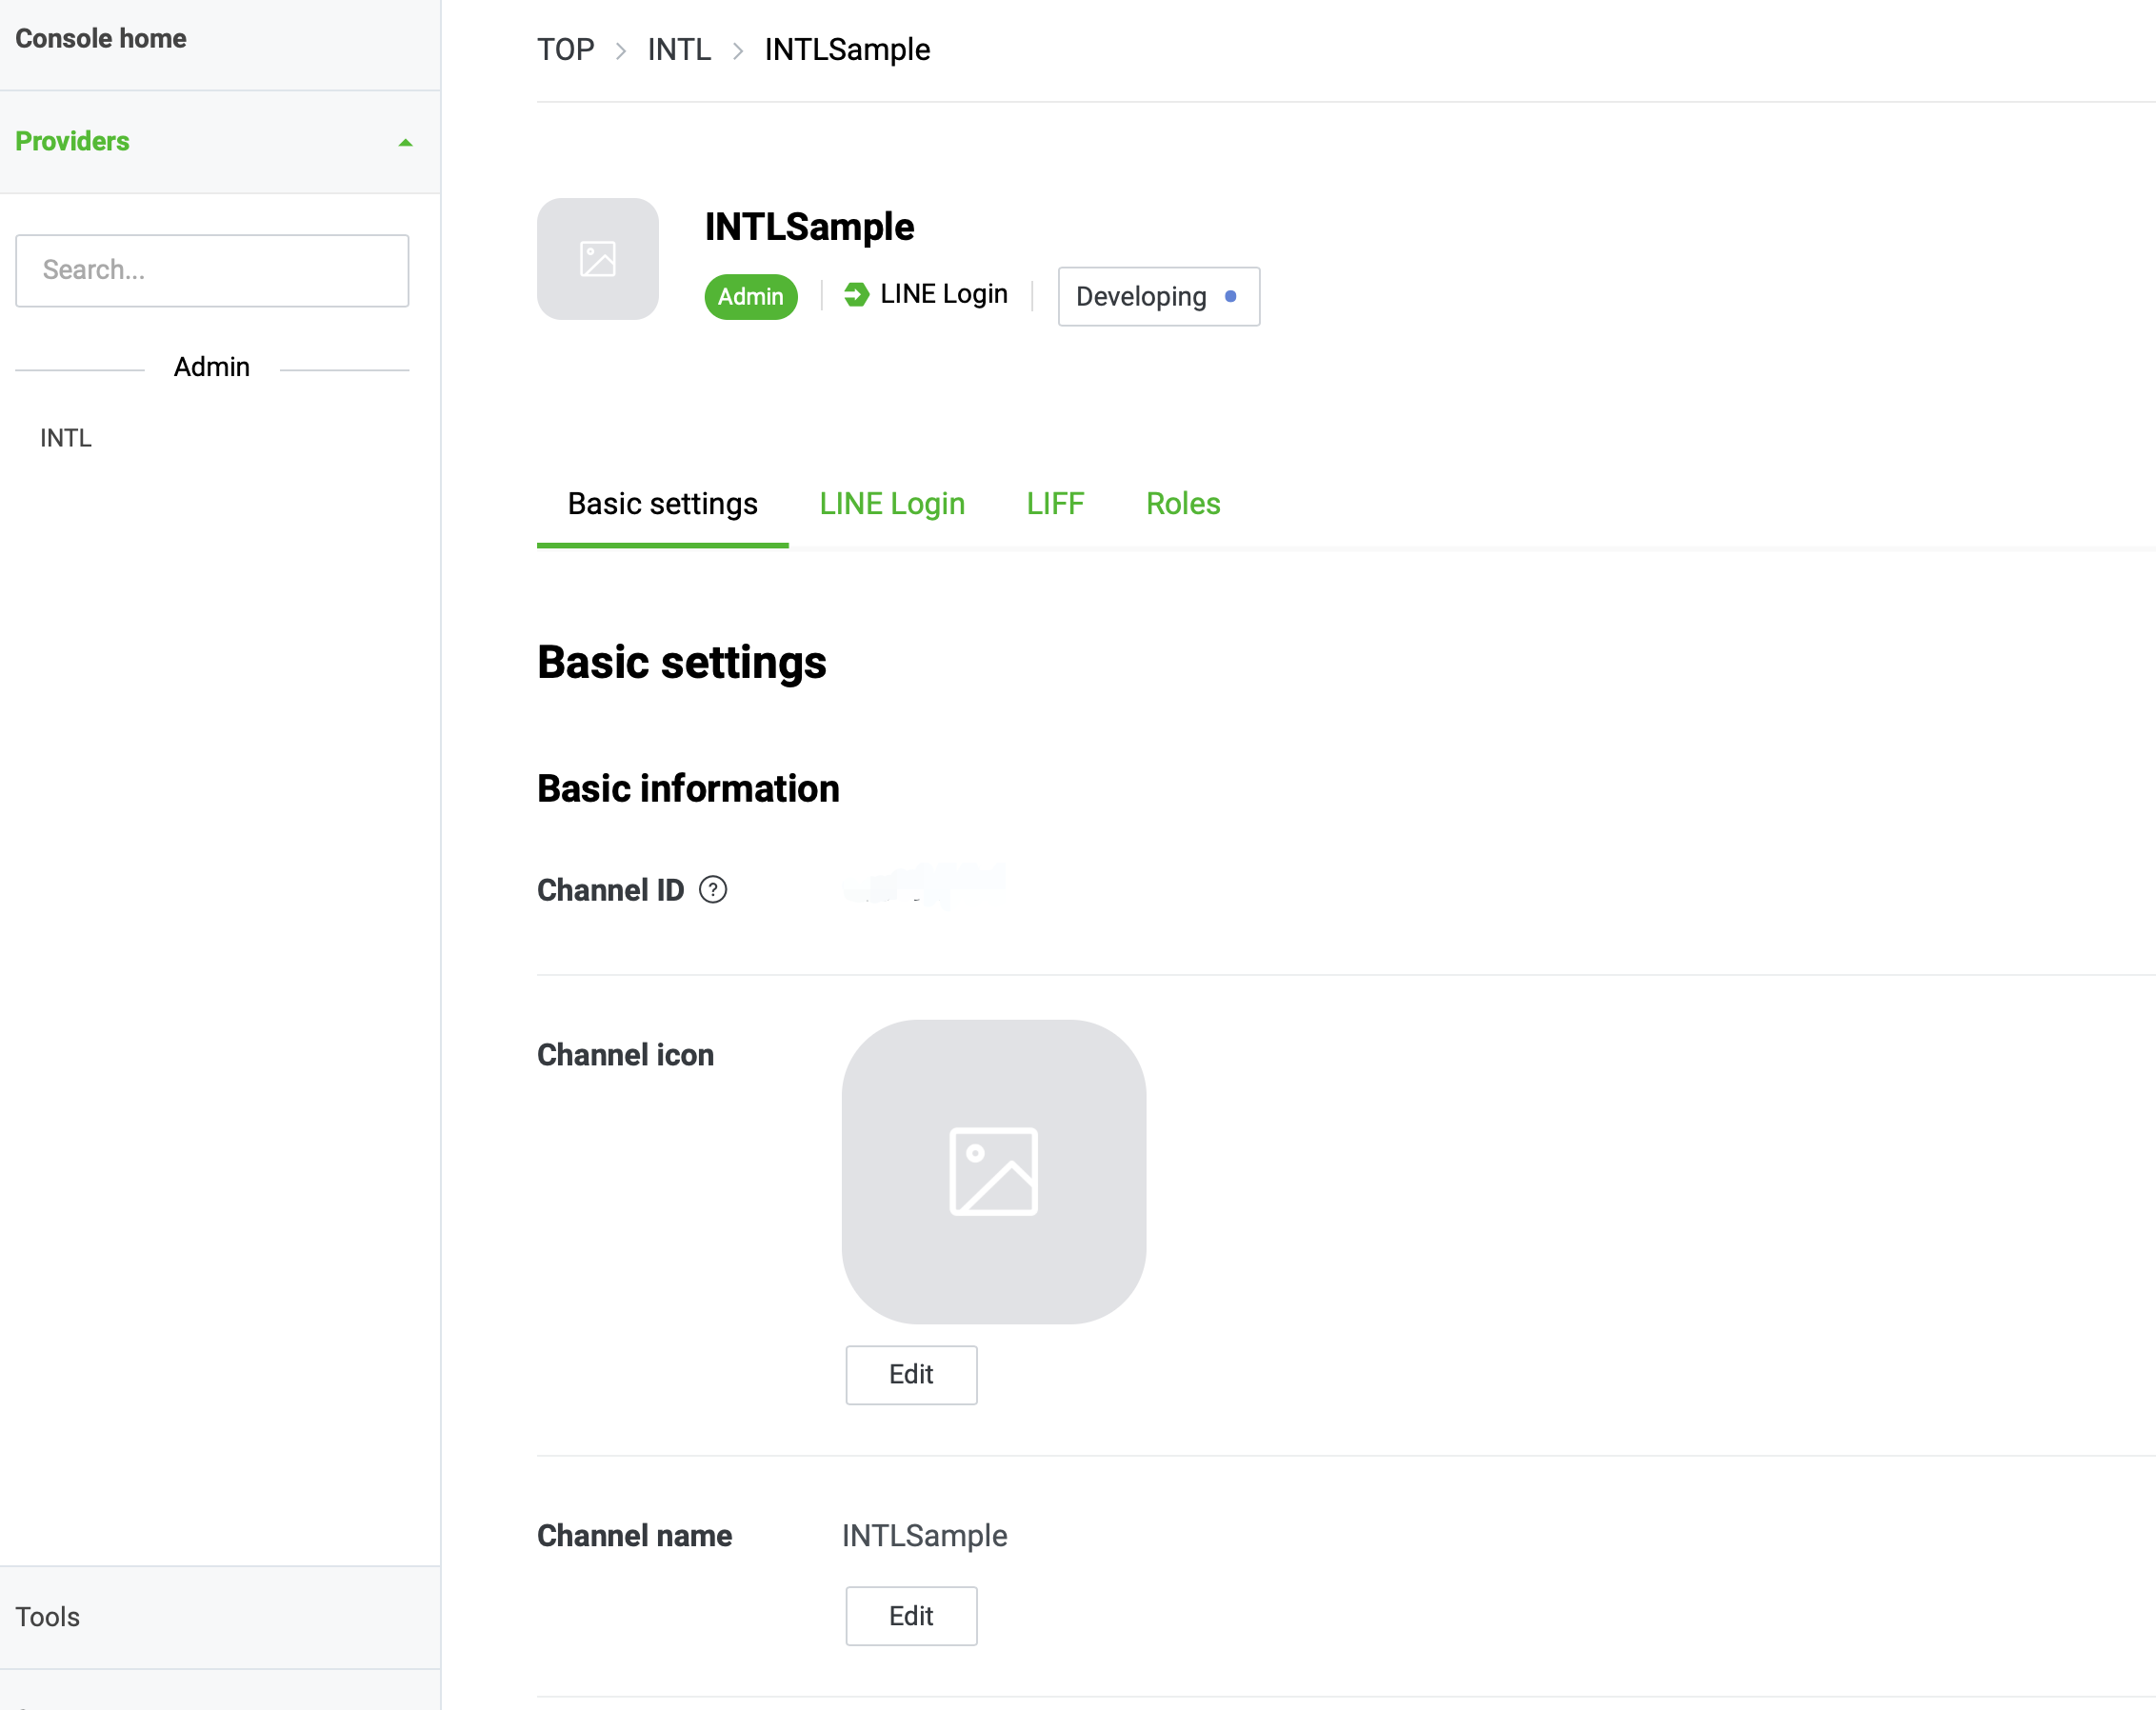
In the Basic settings tab of the Channel page, check Channel ID and other information required for Player Network SDK configuration.
-
Configure channels for web applications.
In the LINE Login tab on the Channel page, enable Web app and enter the required information.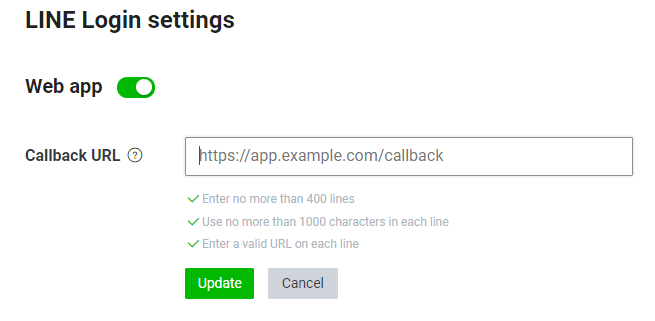
- Test environment:https://test-common-web.intlgame.com/jssdk/linelogincallback.html
- Production environment:https://common-web.intlgame.com/jssdk/linelogincallback.html
-
Click Update to save the configuration.
2. Adding user rights
Immediately after creating a channel, the channel is set to Developing mode.Only channel administrators and testers can use the LINE login feature.
Adding Testers
-
Log in to the LINE Developers Console.
-
Select the appropriate channel from the recently visited channels on the home page.

-
On the Channels page, click Roles.
-
In the Roles tab, click Invite by email.

-
Add testers in the Invite new members section.
Email:Tester's LINE account
Role: Tester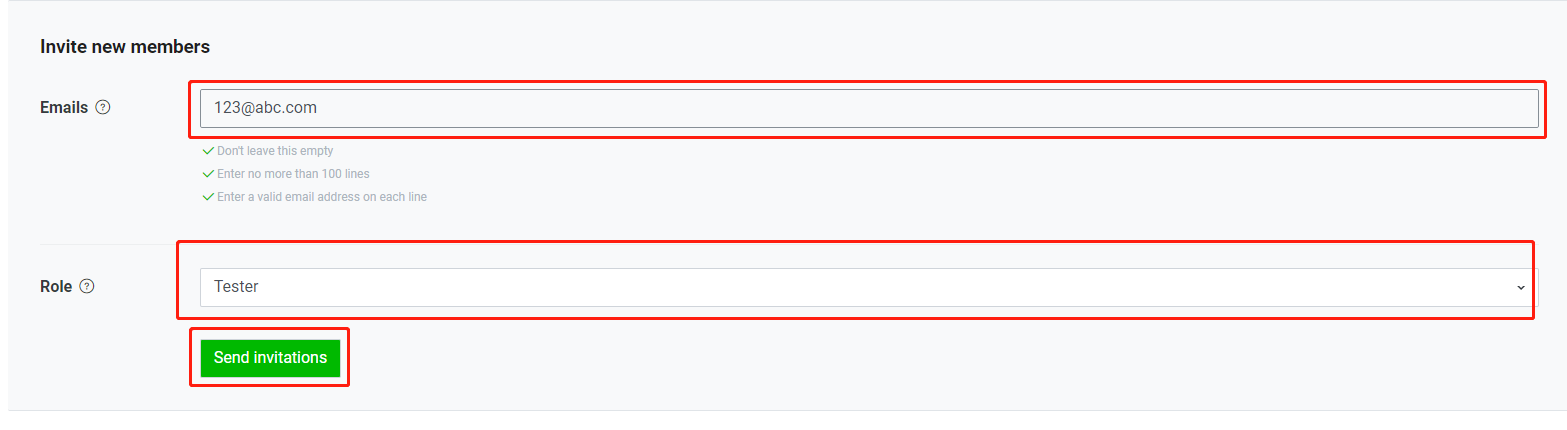
-
Click Send Invitations to send tester invitations.
-
Waiting for testers to accept email invitations.
- Obtain Player Network Console login account.
- Create a new project for your game, or join an existing one.
- Add LINE as the login authentication method for the service in the Player Network console.
For more information about integrating other third-party channels into the SDK, see JavaScript SDK.
Step 1: Introduce JavaScript SDK
Currently, both npm package method and CDN method are supported.
- npm
- CDN
$ npm install @intlsdk/account-api
// SDK debug version package
<script src="https://test-common-web.intlgame.com/sdk-cdn/account-api/latest/index.umd.js"></script>
// SDK official version package
<script src="https://common-web.intlgame.com/sdk-cdn/account-api/latest/index.umd.js"></script>
Step 2: Use SDK
During integration testing, set env to test environment; when the project goes live, set env to the corresponding official environment.
const accountApi = new IntlgameAccountApi({
  env: "test", // SDK environment
  gameID: 11,
});
| Parameters | Type | Description | Remark |
|---|---|---|---|
| env | string | SDK environment For more information, see Obtain deployment cluster information. | Requir ed |
| gameID | number | Player Network unique game ID | Requir ed |
Step 3: Implement Web Login
After instantiating the accountApi component, call the thirdAuthorize interface to request a login authorization token for the LINE channel.
accountApi.thirdAuthorize({
    third_type: 'line',
}).then(
(res) => {
    console.log(res);
});
When the LINE returns the login authorization token, call the intlAuthorize interface to get the Player Network SDK OpenID and token to log into the site.
accountApi.intlAuthorize({
    third_type: 'line',
    channel_info: {
        access_token: "EAAI2lTrXAZBwBAC",
        expires_in: "xxxx",
    }
}).then(
(res) => {
    console.log(res);
});
Call the intlLogout API to log out of the website.
accountApi.intlLogout({
    token: '4567xsdfsd',
    openid: 'xxxxxxxx',
    channel_id: 14,
}).then(
(res) => {
    console.log(res);
});
