Nintendo
The purpose of this article is to describe how to set up Nintendo Switch authentication so that your games can be logged in through the Nintendo Switch channel using the Player Network login authentication service
The Nintendo Switch channel login currently only supports Unreal Engine, with Unity in the works.
Prerequisites
1. Creating a product on the Nintendo Developer Portal
Businesses should apply for a Nintendo developer account on their own and create a game product before configuring the Player Network.
Required Fields:
| field | Type | Description |
|---|---|---|
| application_id | String | Application ID provided by Nintendo |
| redirect_uri | String | Redirect URI |
| client_id | String | Client ID provided by Nintendo |
| client_secret | String | Client Secret provided by Nintendo |
1. Creating a Nintendo Product
-
Log in to Nintendo Developer Portal and select MY PRODUCTS.
-
Under Products, click Create Product.
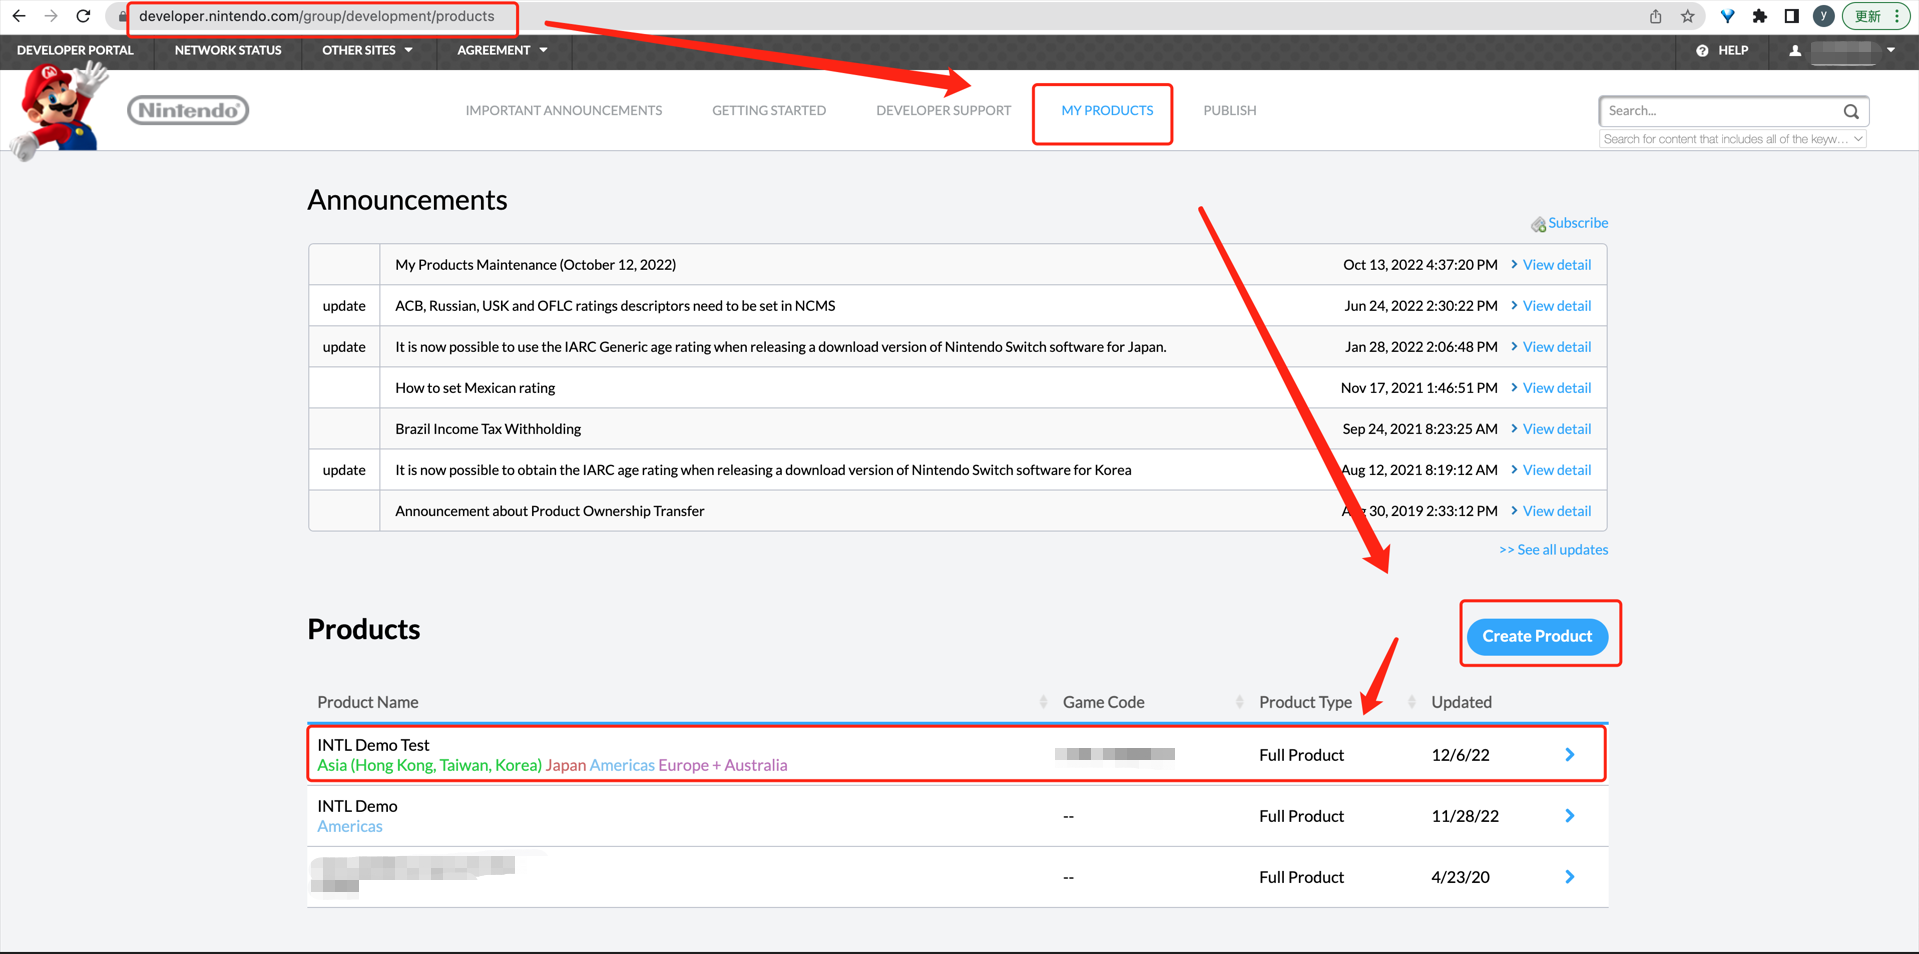
-
Enter the application details.After selecting Target Delivery Format, options related to Target Sales Regions will appear.
Target Sales Regions Need to select regions other than China.
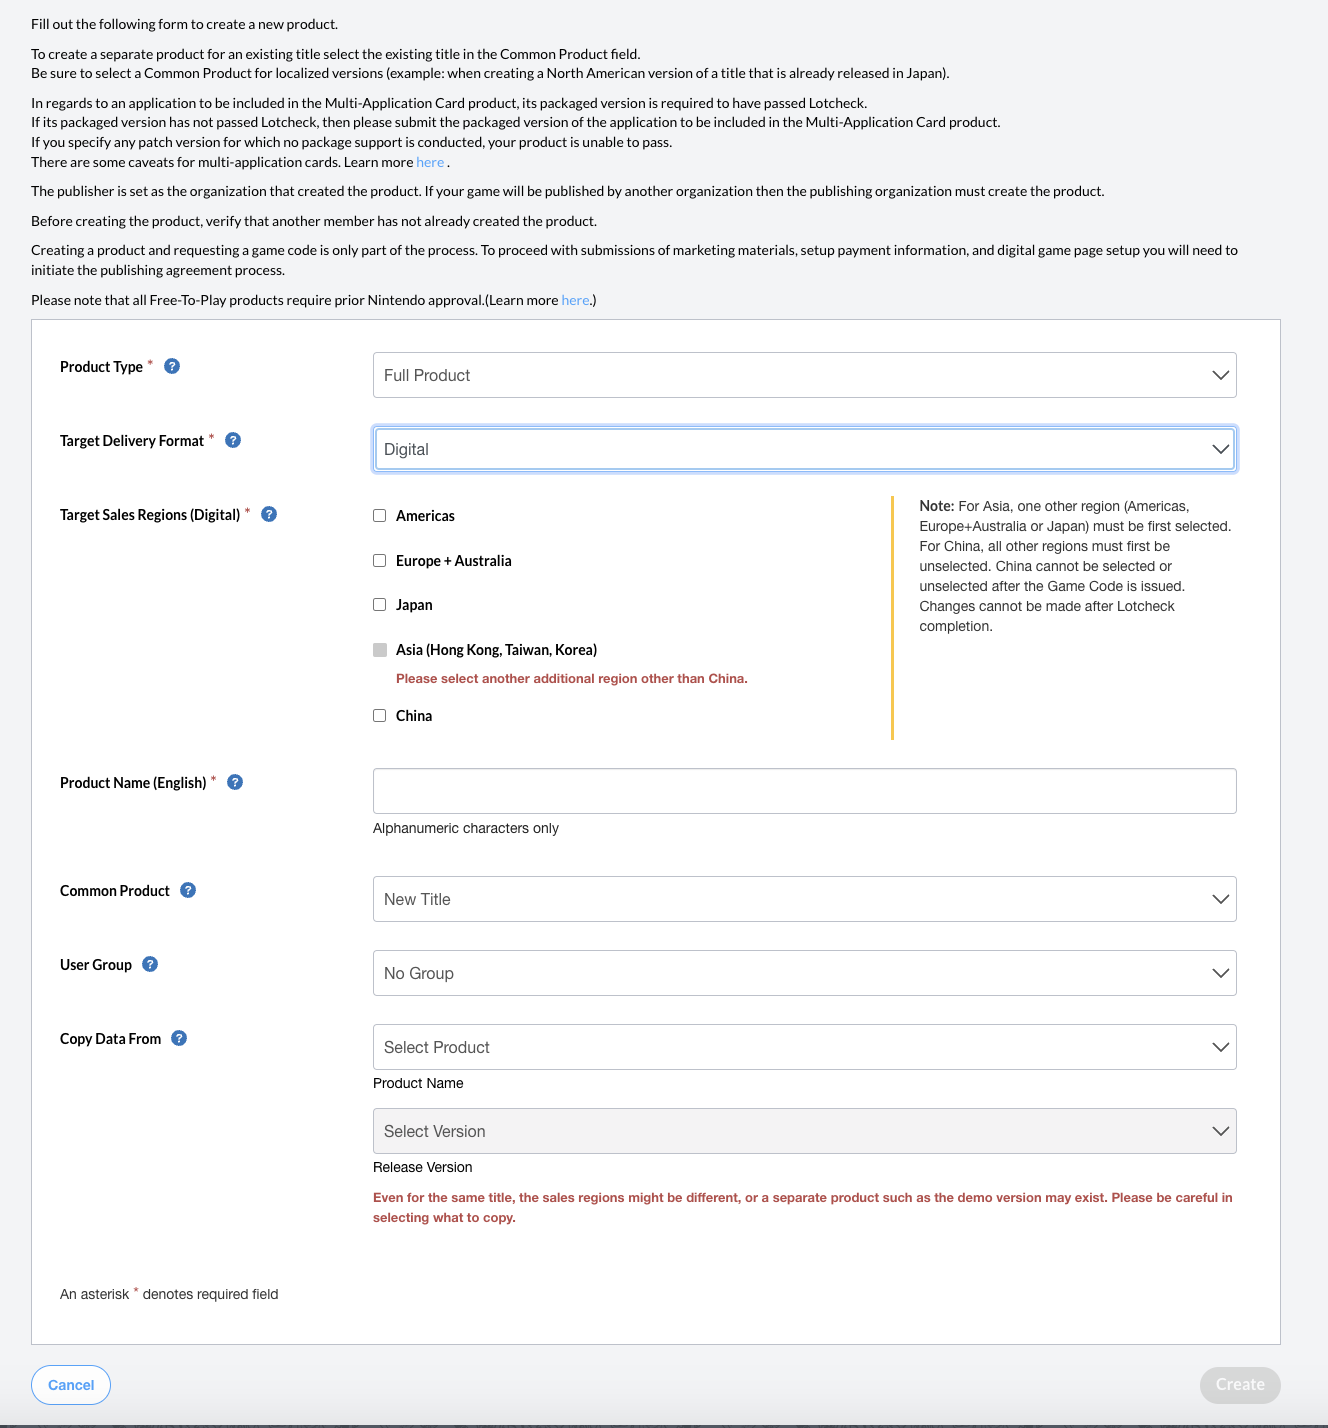
- Click Create to create your product.
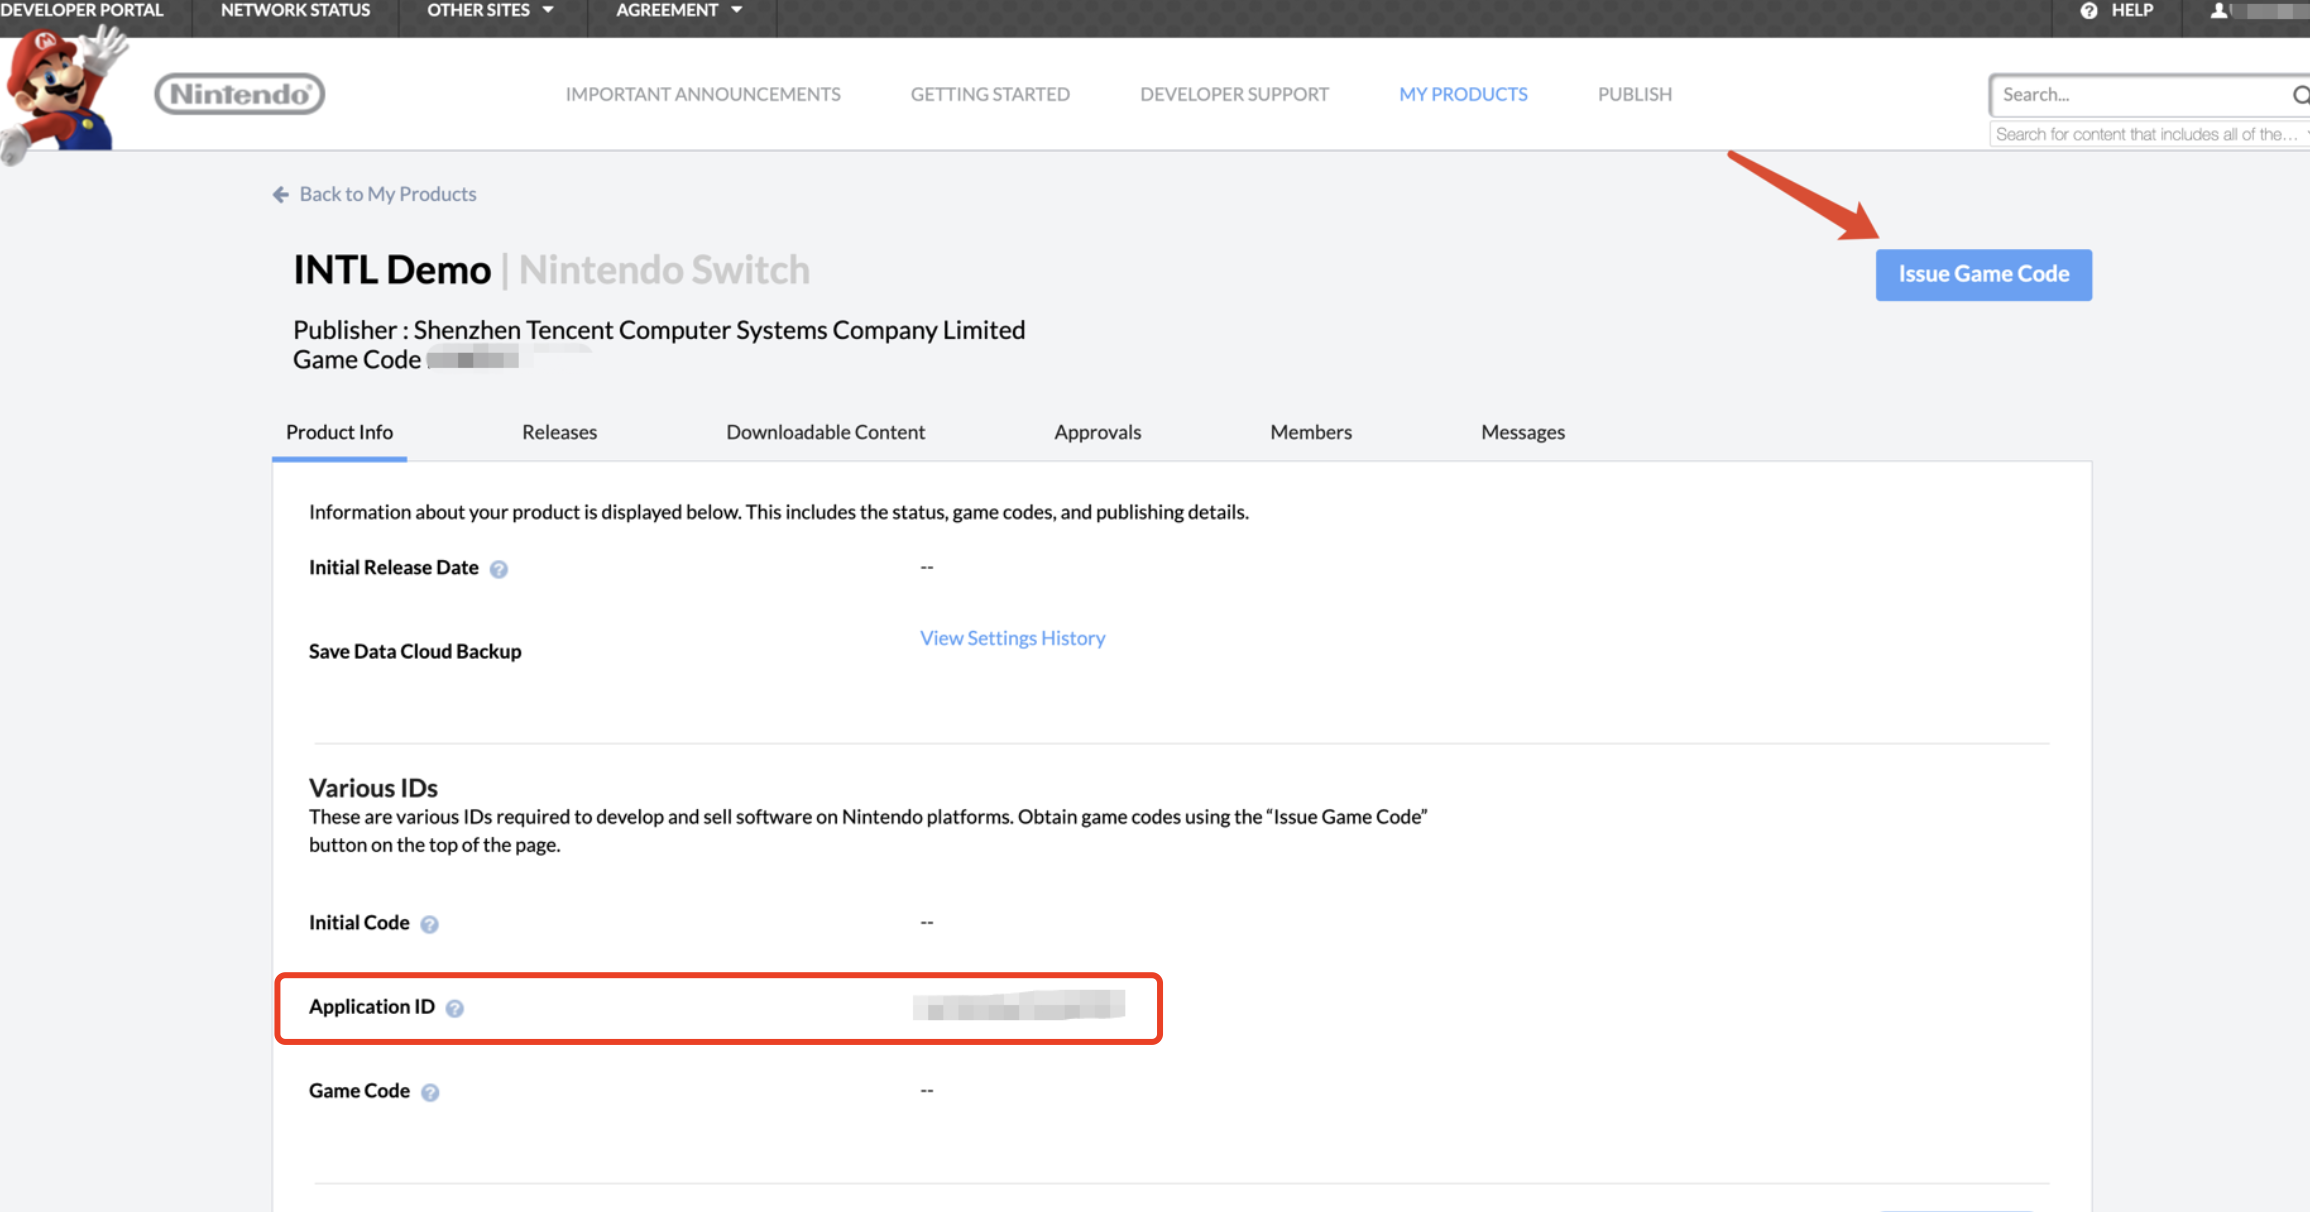
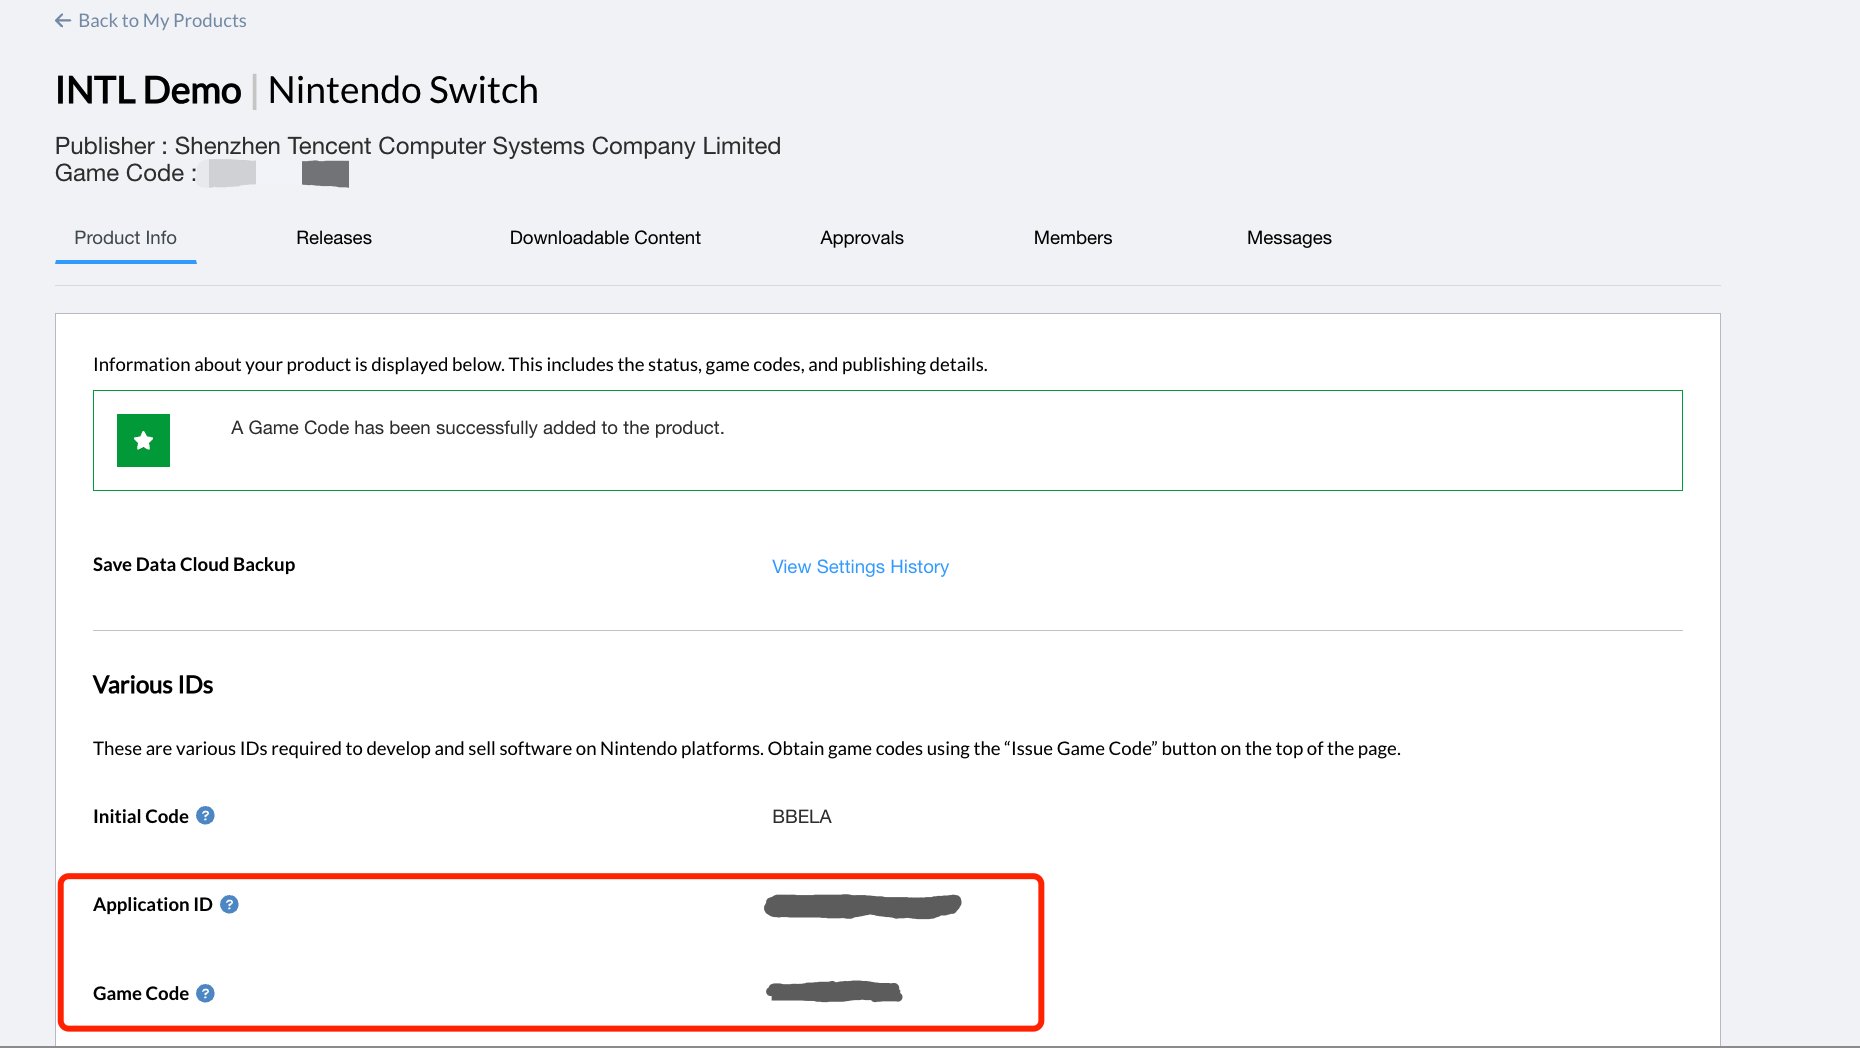
2. Publish the game code, get the Application ID
-
On the MY PRODUCTS page, under Products select your product.
-
In the upper right corner of the page, click Issue Game Code.
-
Enter details under Publishing Information.
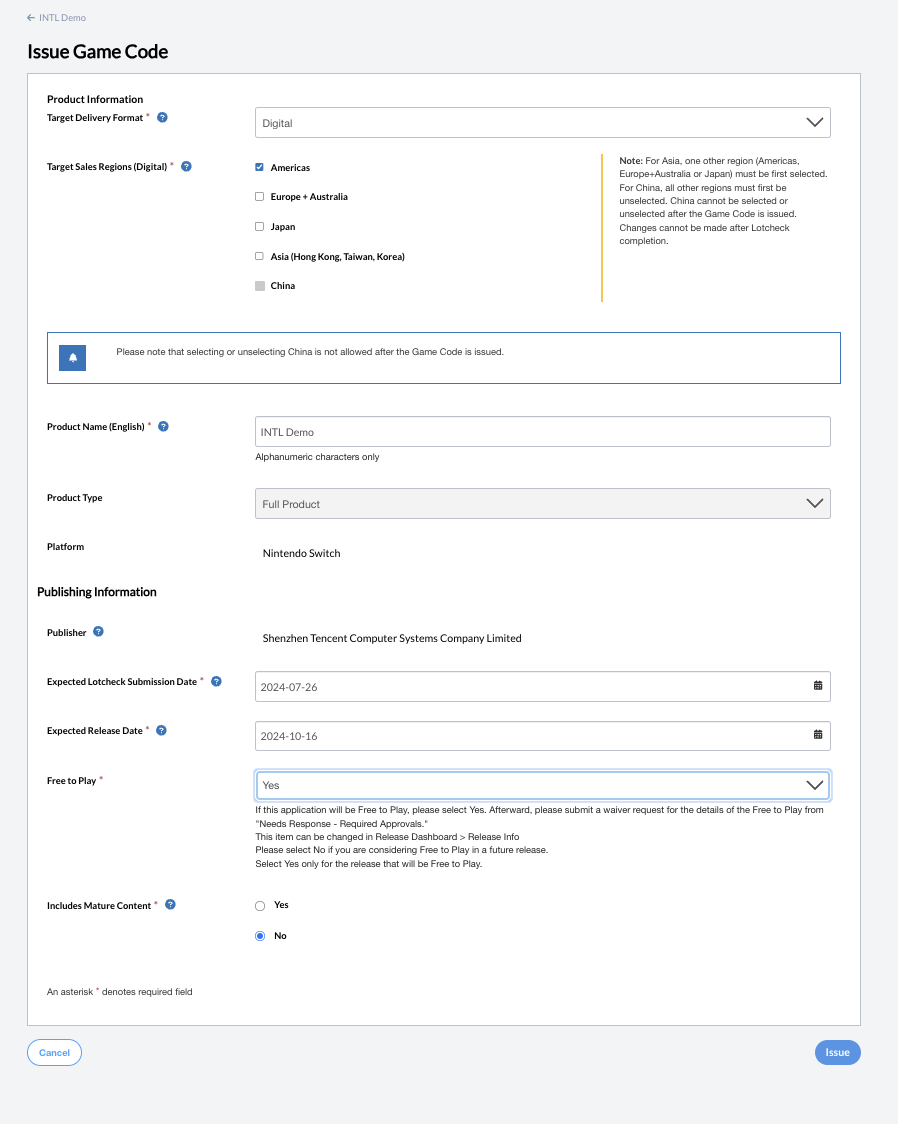
-
Click Issue and the created Application ID and Game Code will be displayed on the product page.
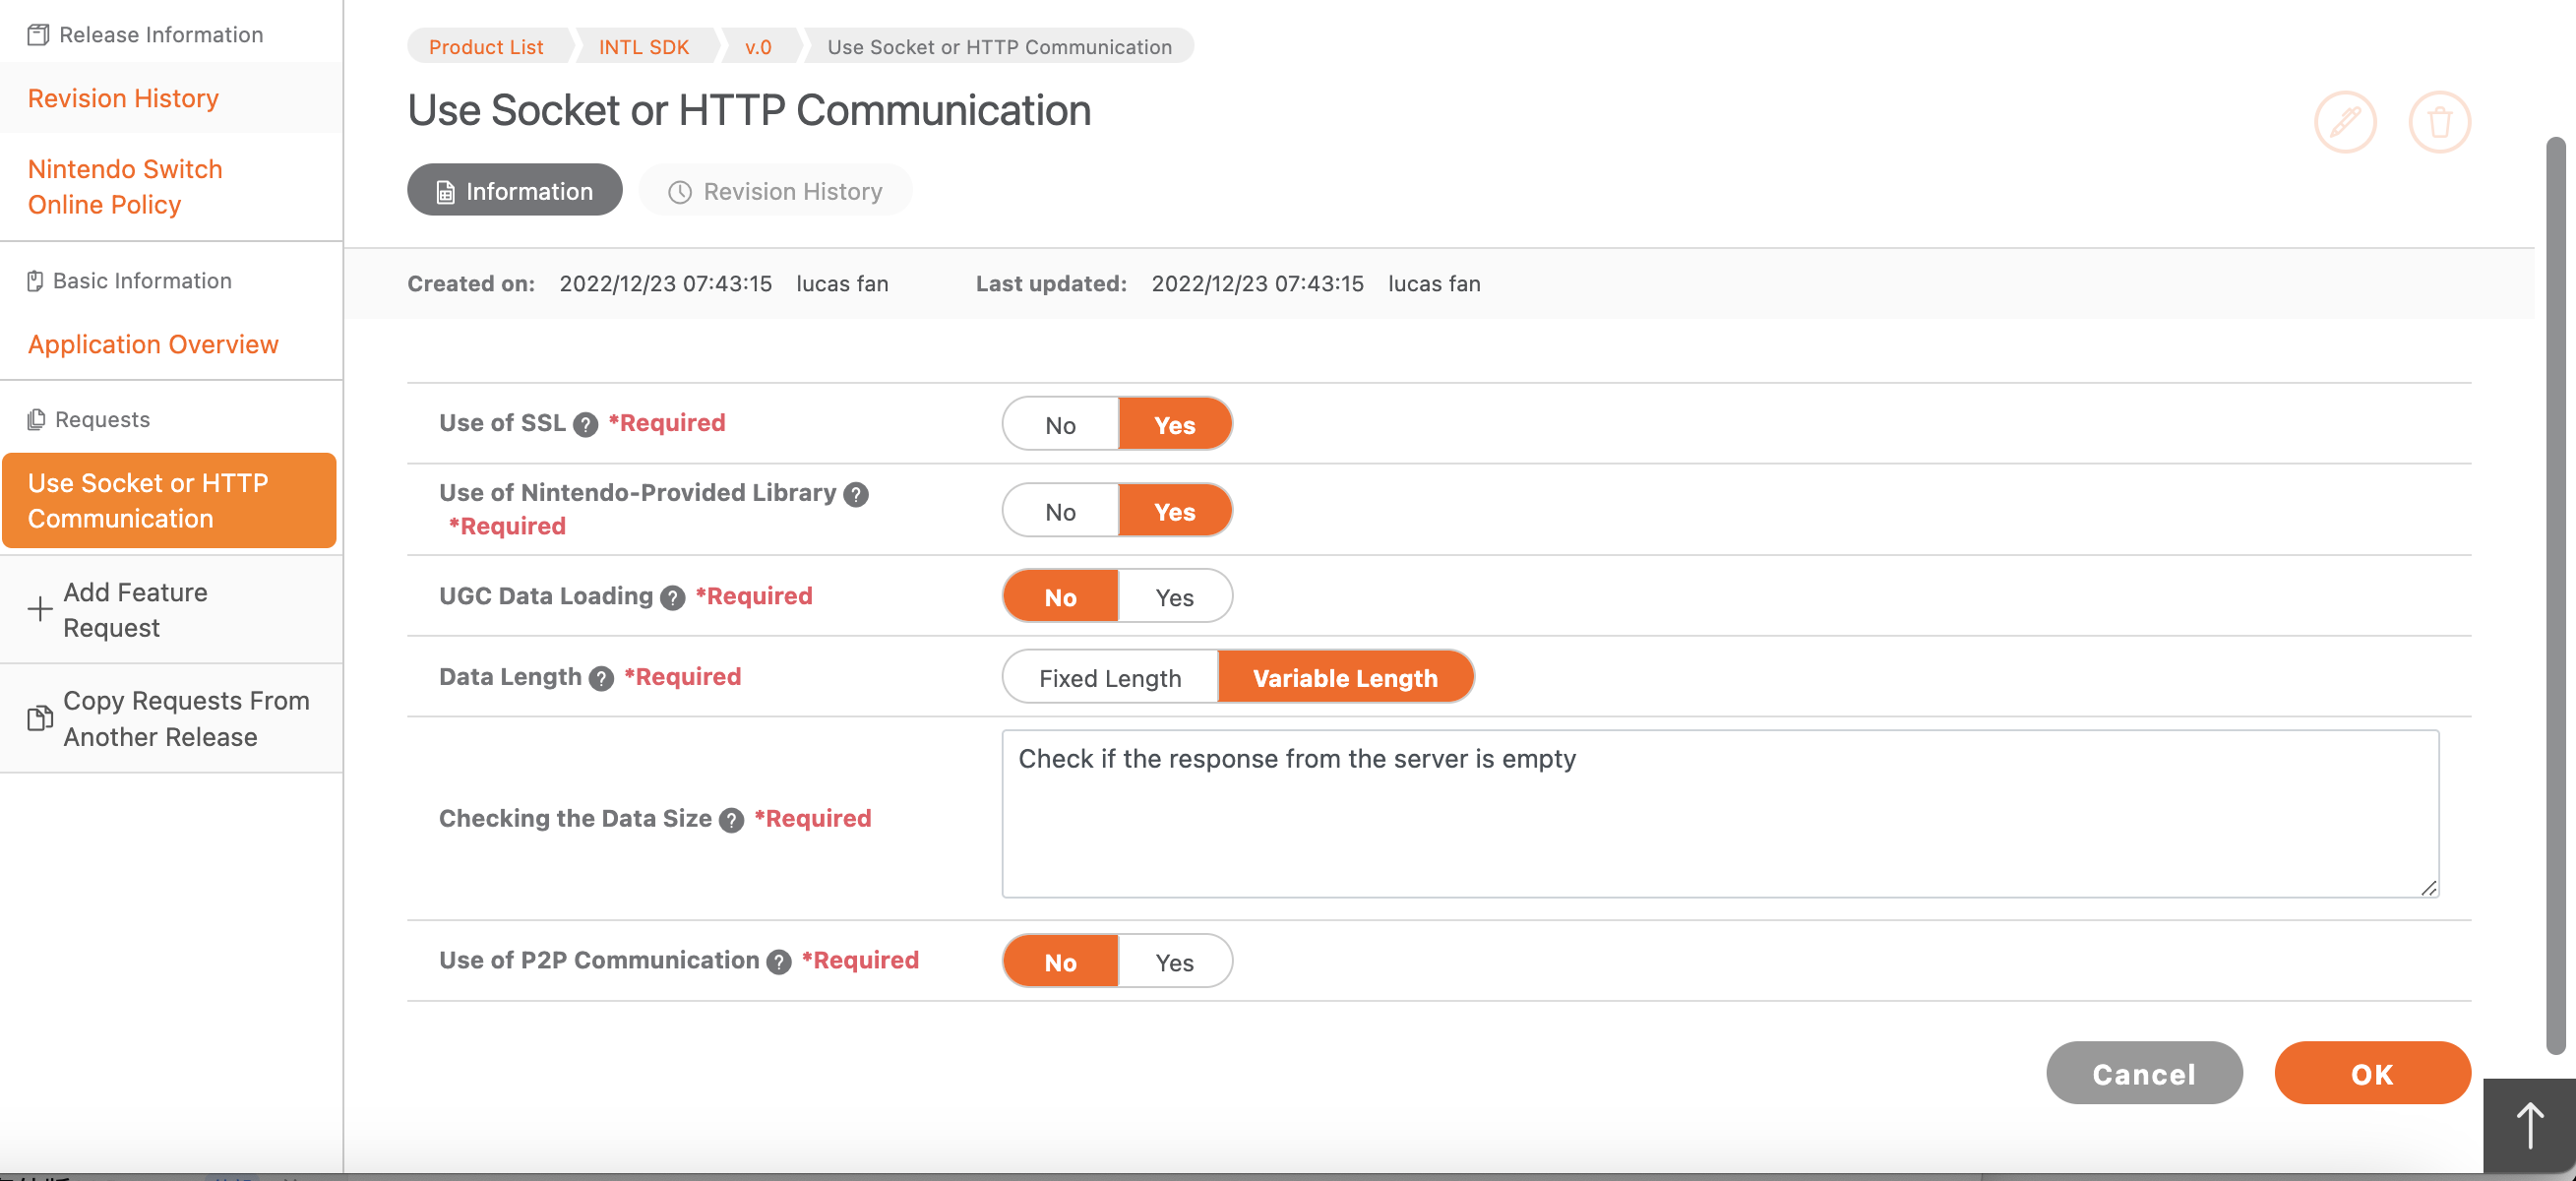
3. Configuring sockets and HTTP communication
When creating an online game, you need to add the following information to ensure that the game can connect to the network without any problems.
-
Log into OMAS2 with your Nintendo Developer account and select Products and Releases in the sidebar.
-
Select your product on the Product List page.
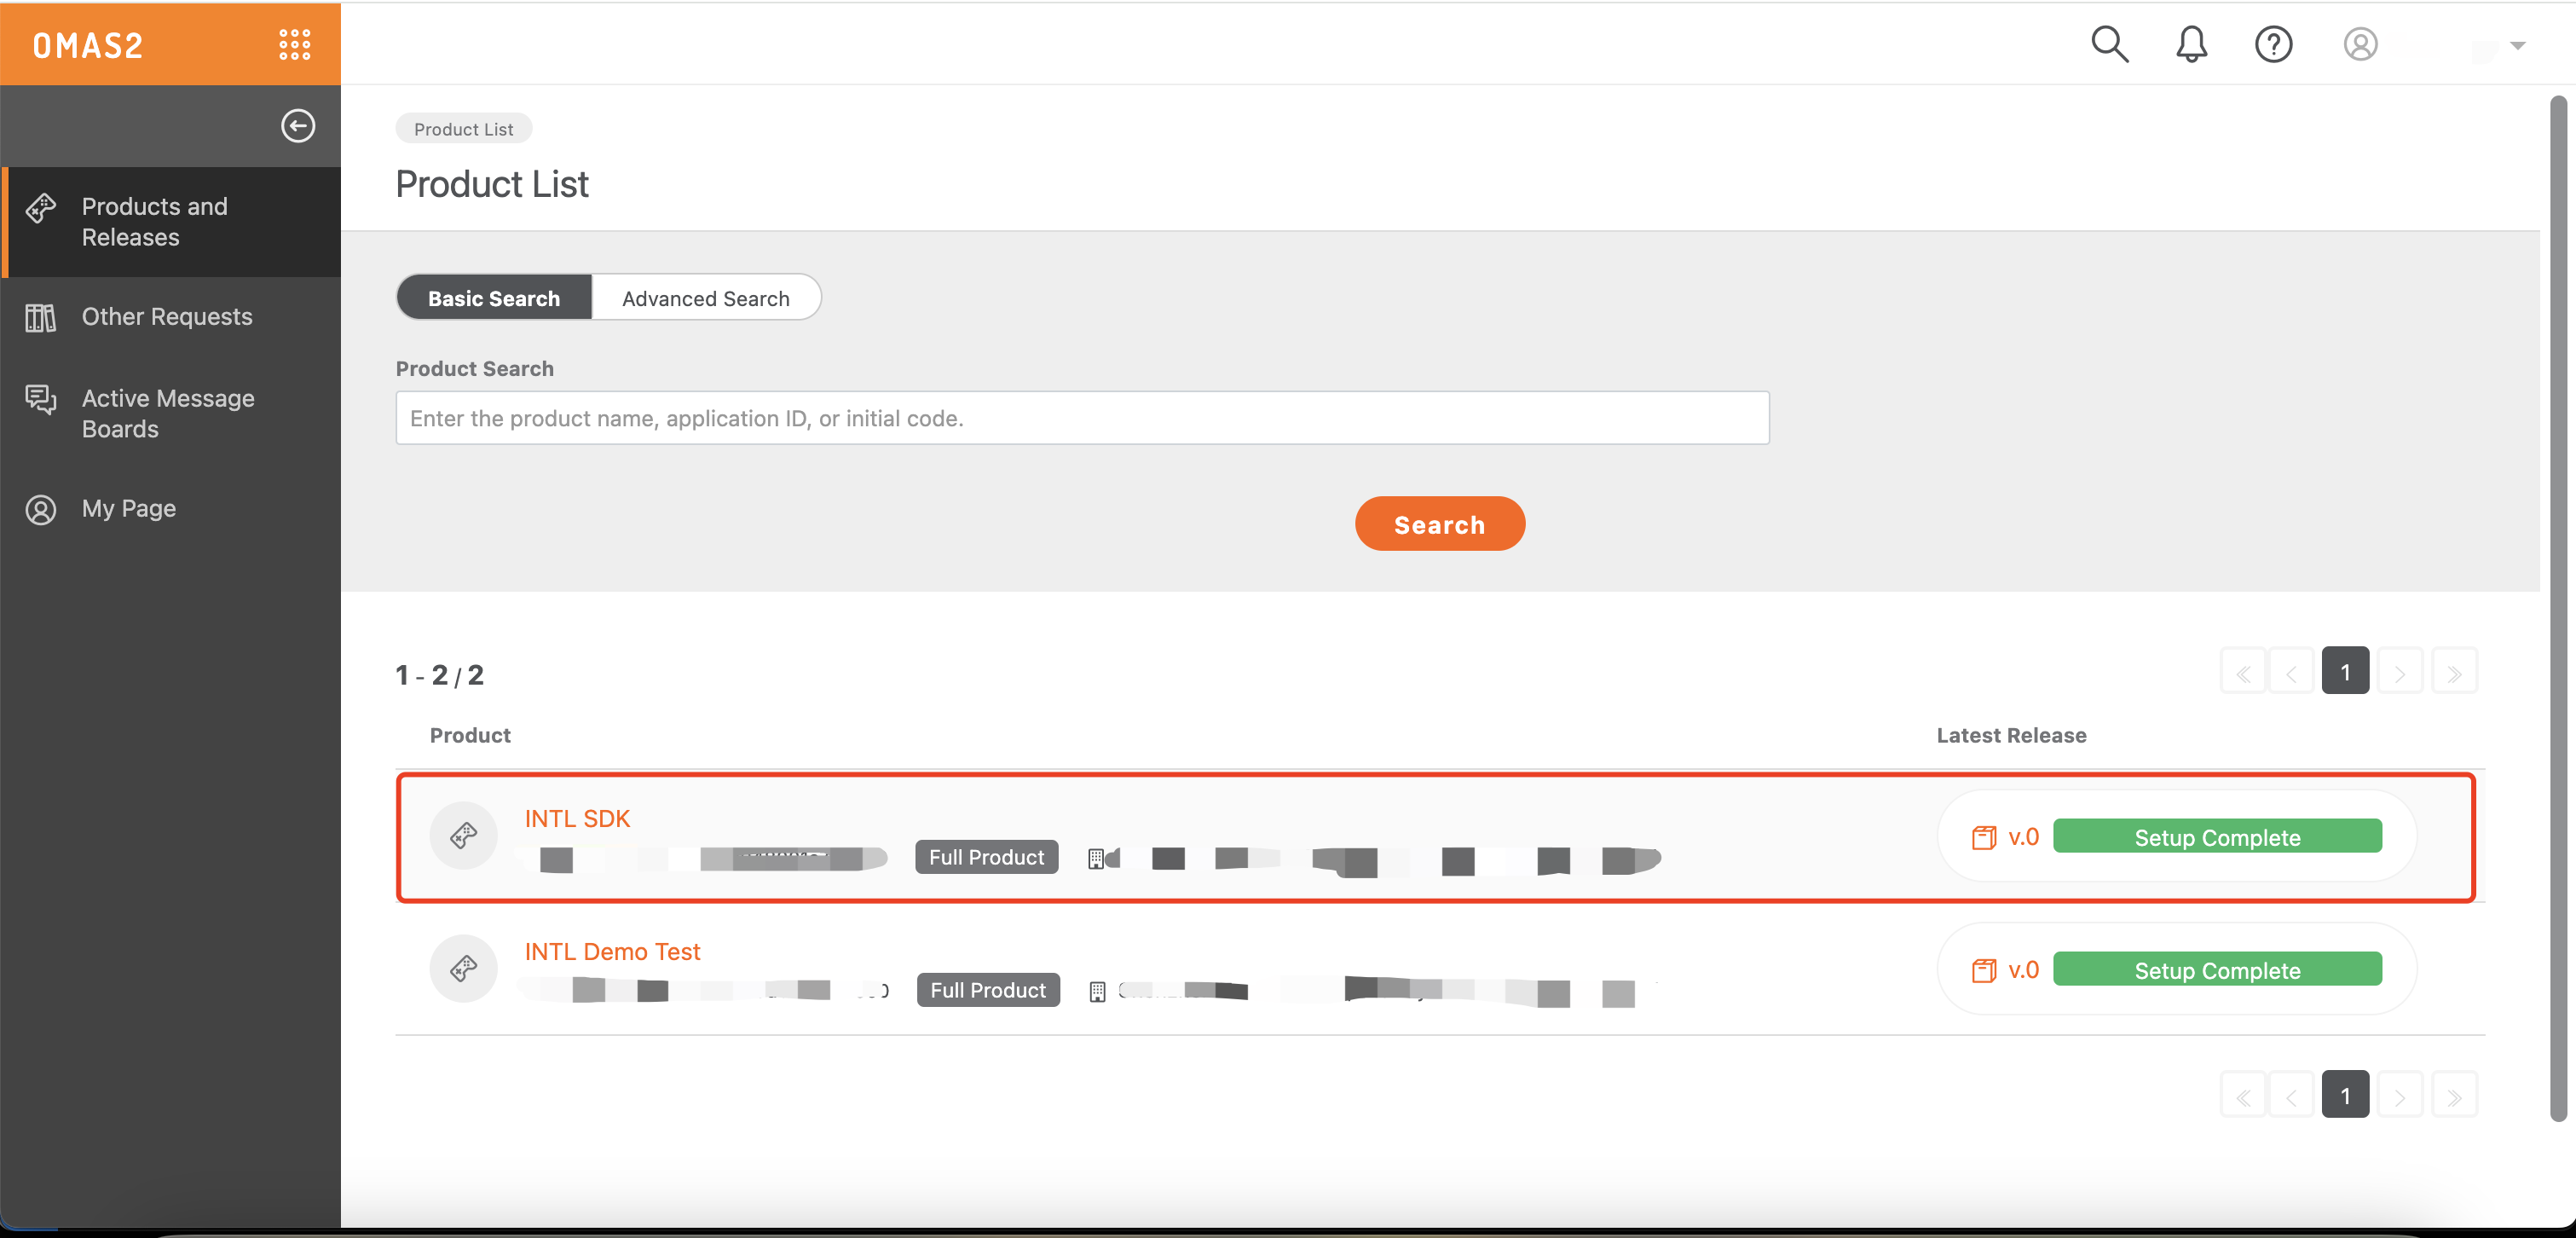
- Click Latest Release.
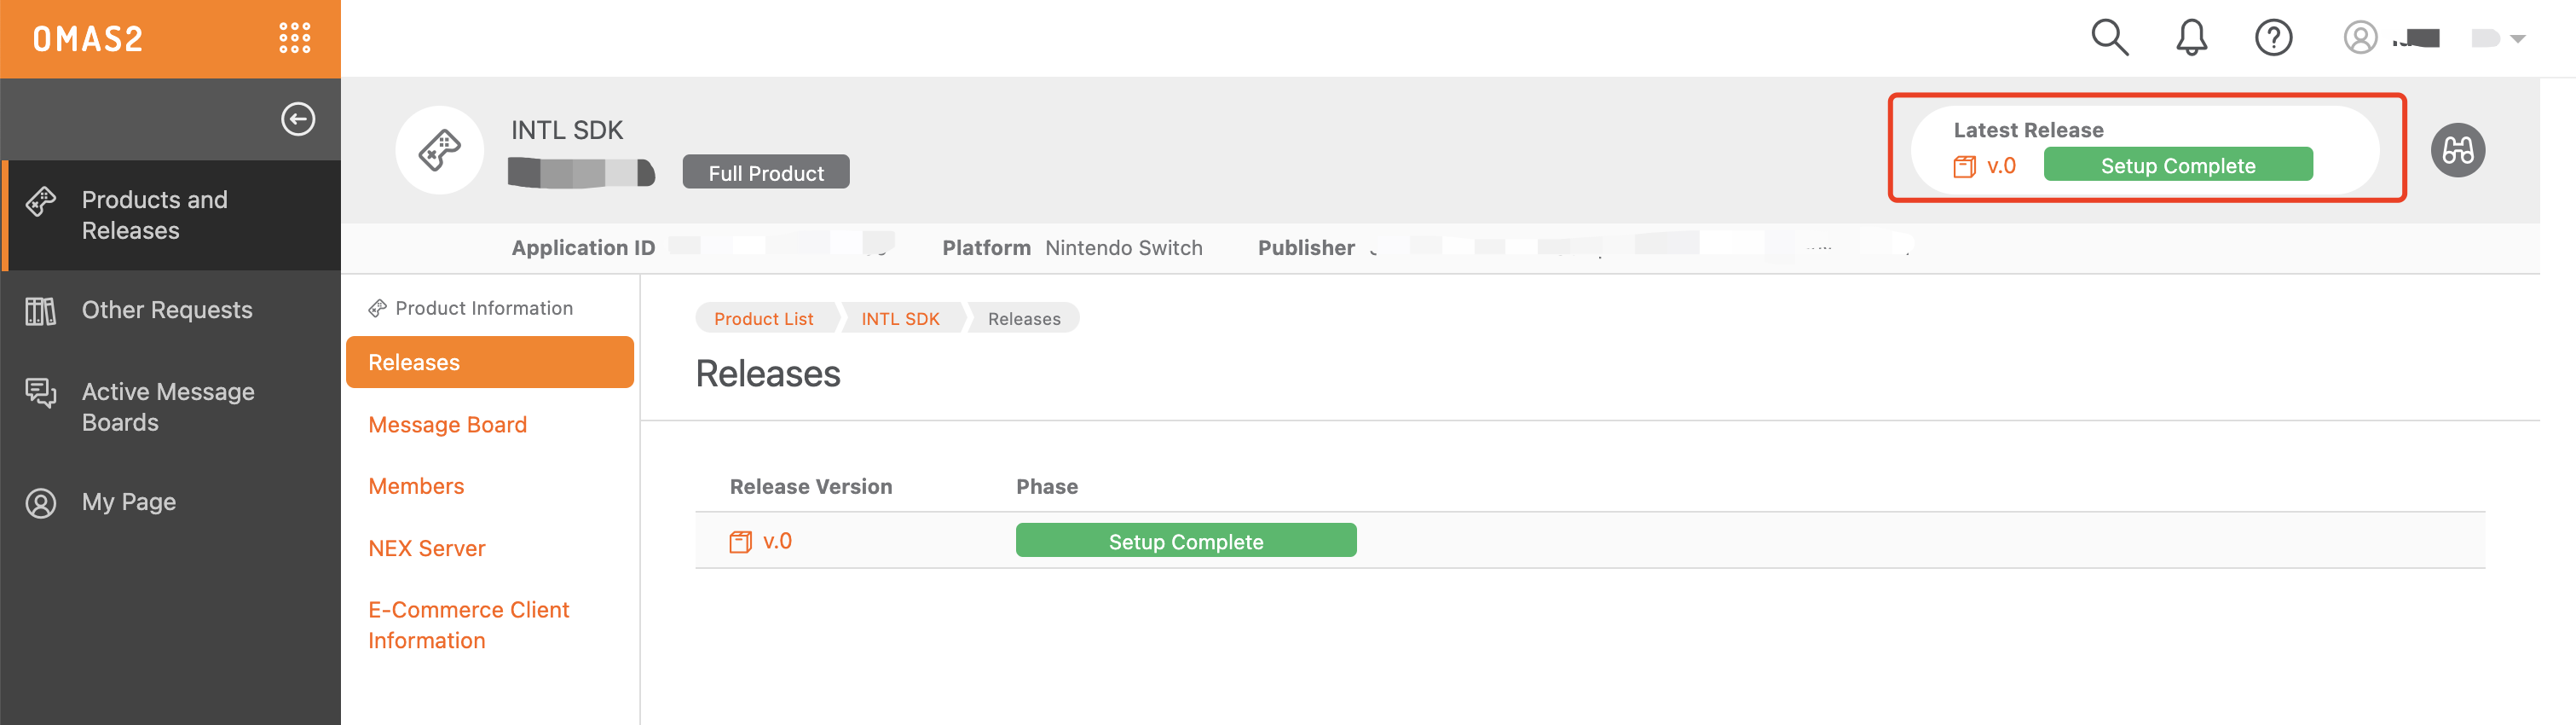
- Under Add Feature Request, click Use Socket or HTTP Communication.
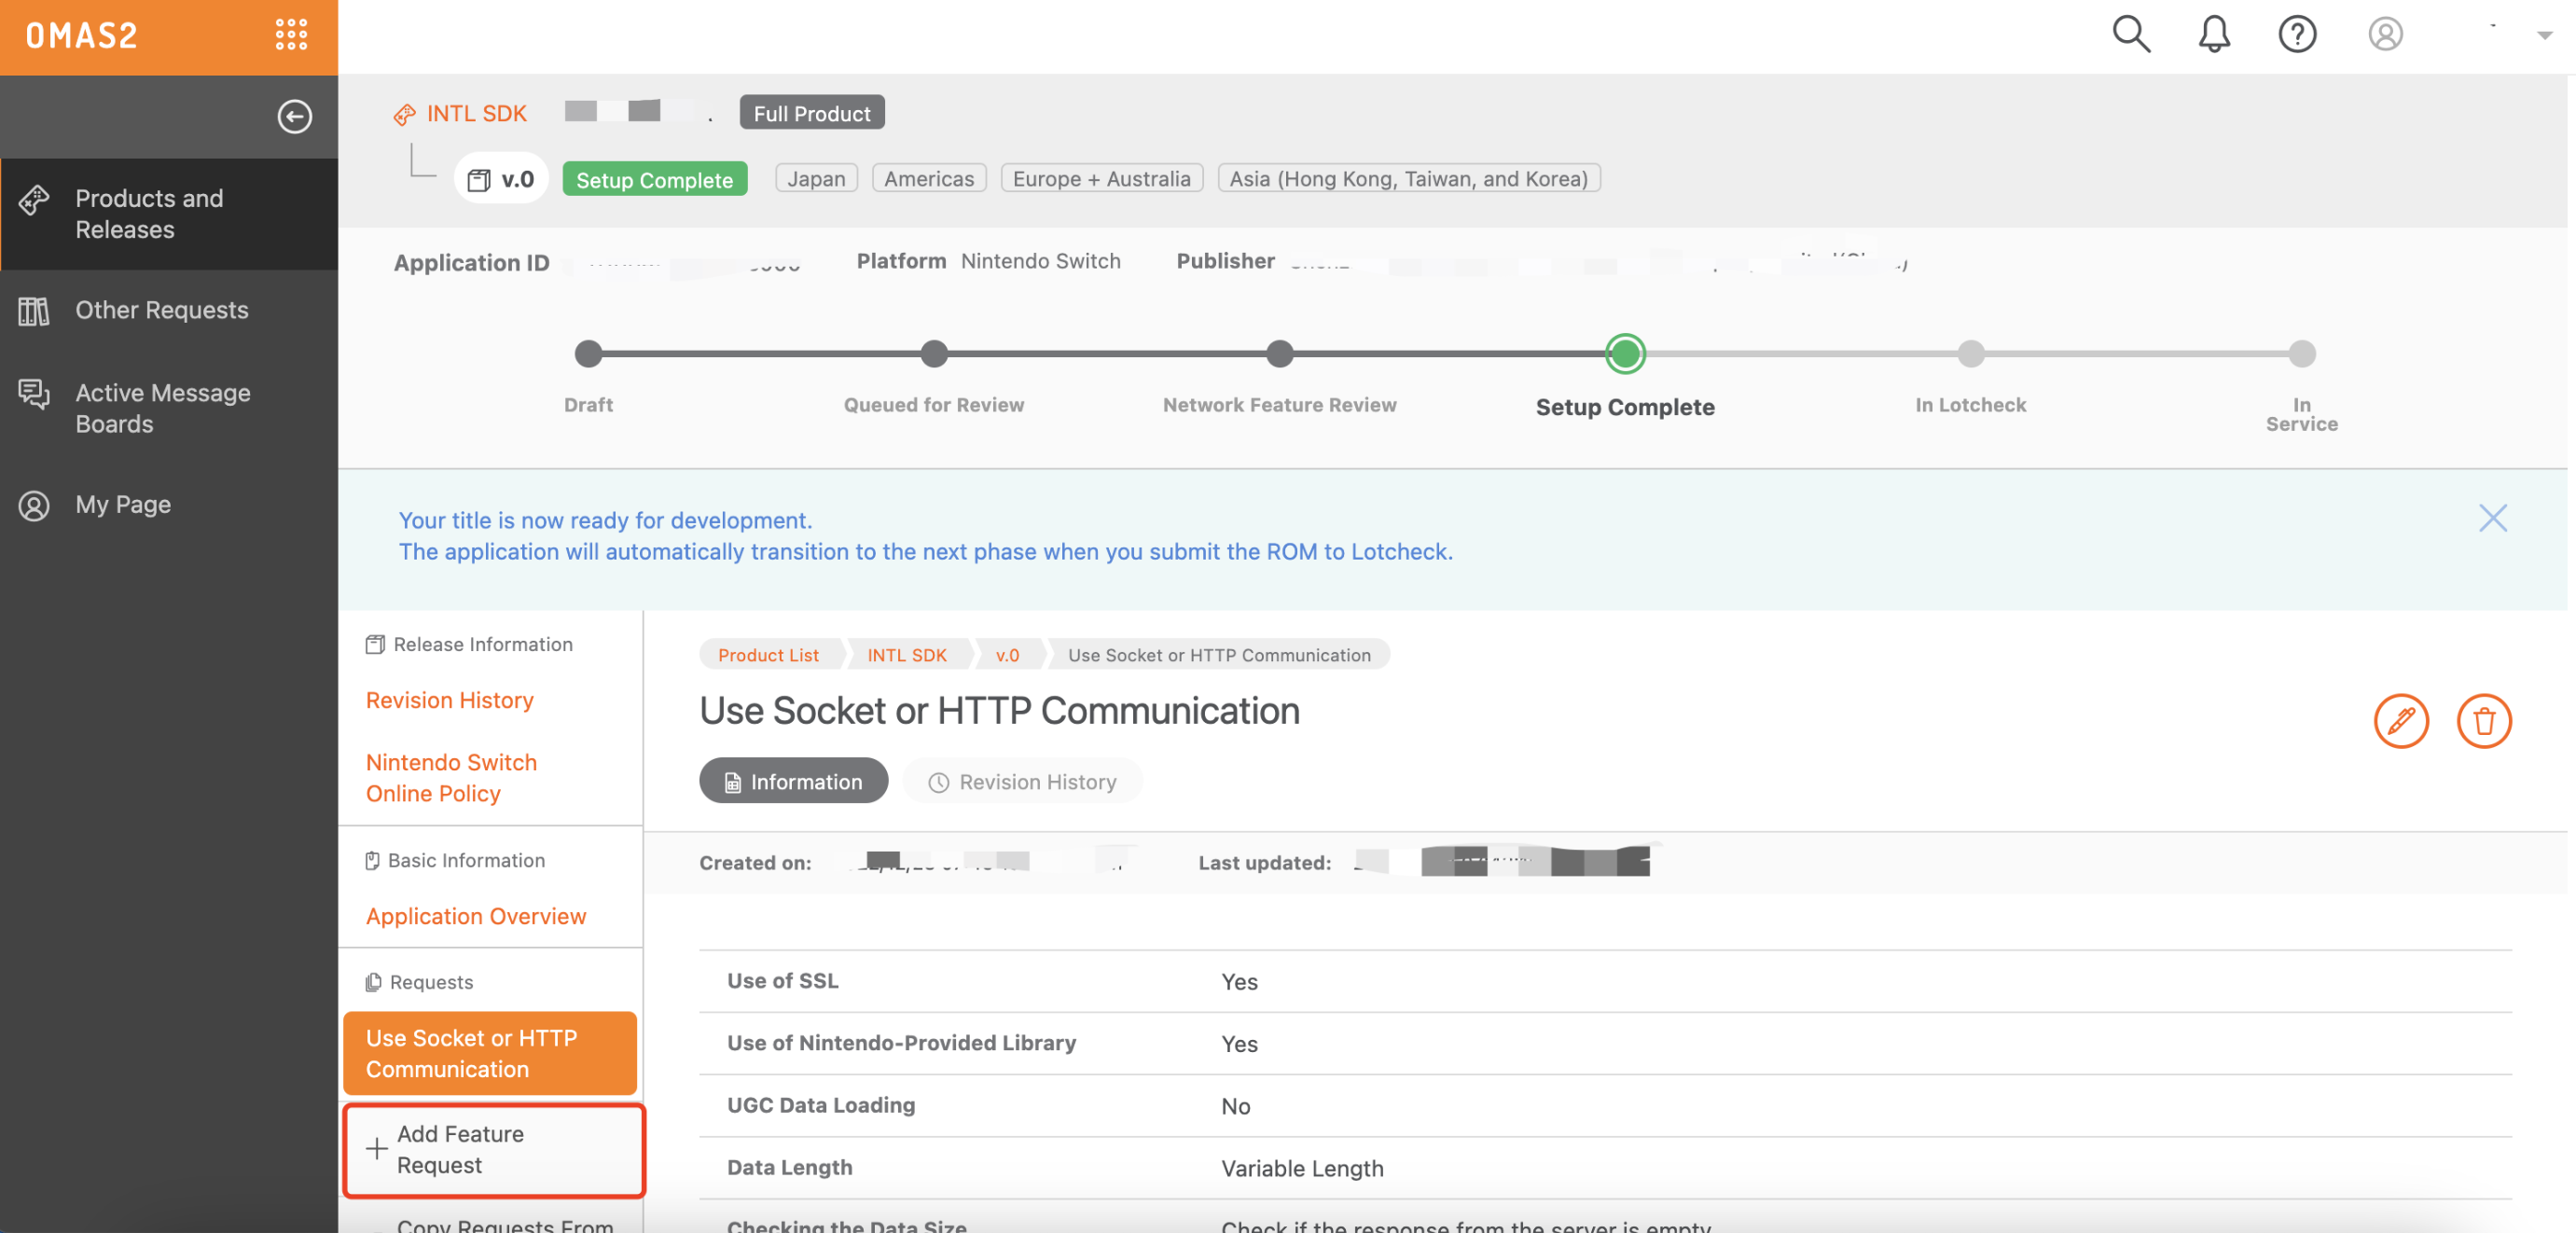
- After entering the product's network details, click OK.
4. Request Client ID and Client Secret
In order to deploy to different server environments, a set of client_id and client_secret must be requested for the development version and one for the release version.
-
Log in to OMAS2 Application Page with your Nintendo Developer account.
-
Enter the required information.
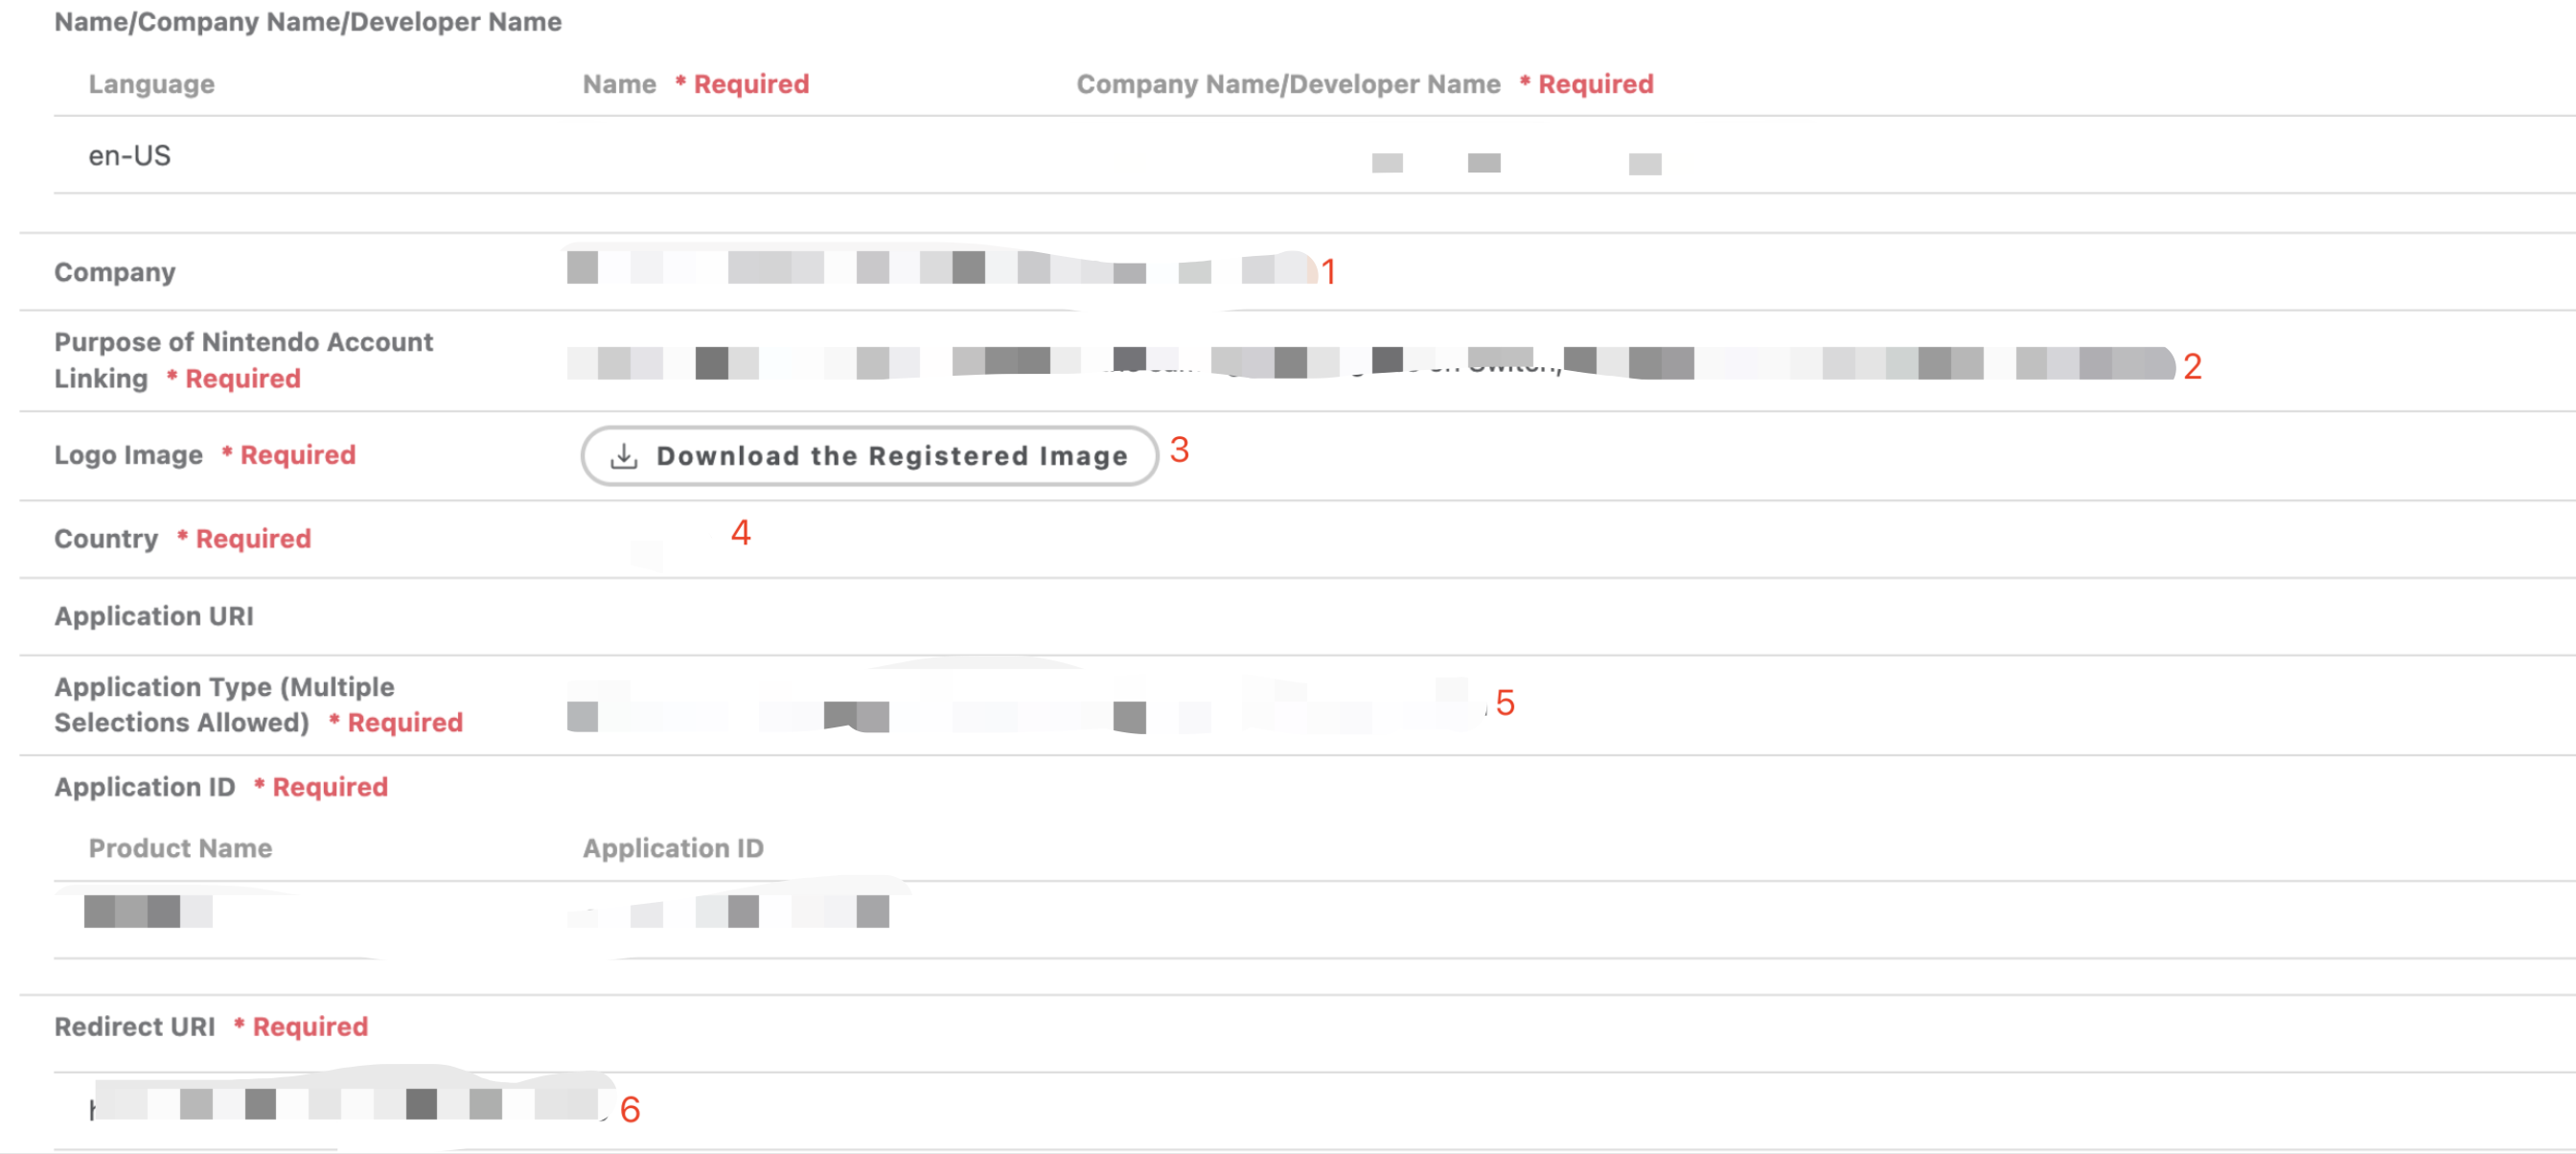
Do not enter China in the Country field.
During the testing phase, you can enter any redirect URI in the Redirect URI field.However, the game should update this field to the actual redirect URI before publishing the game.This field can be modified after the application is completed.
- The request will be approved with the
client_idandclient_secretfor that product version.
- Obtain Player Network Console login account.
- Create a new project for your game, or join an existing one.
- Download SDK.
- Integrate SDK.
- Add Nintendo as the login authentication method for the business in the Player Network Console.
Step 1:Add Nintendo Login
There is no need to configure Nintendo account information in INTLConfig.ini.
- Register login related callbacks.
//configure callback
FINTLAuthEvent authEvent;
authEvent.AddUObject(this, &OnAuthResult_Implementation);
UINTLSDKAPI::SetAuthResultObserver(authEvent);
// Remove callbacks
UINTLSDKAPI::GetAuthResultObserver().Clear();

void OnAuthResult_Implementation(FINTLAuthResult ret)
{
    UE_LOG(LogTemp, Warning, TEXT("MethodID: %d"), ret.MethodId);
}

void OnAuthResult_Implementation(FINTLAuthResult ret)
{
    UE_LOG(LogTemp, Warning, TEXT("MethodID: %d"), ret.MethodId);
} - Call the
AutoLoginmethod for automatic login.UINTLSDKAPI::AutoLogin(); - If automatic login fails, call the
Loginmethod to let players log in manually.UINTLSDKAPI::Login(EINTLLoginChannel::kChannelNintendo); - Synchronize client authentication status with the game backend, waiting for final validation results.
Step 2:Packaging Configuration URL Whitelisting
In Nintendo, the system browser needs to be configured with a corresponding whitelist to load URLs.The Player Network SDK provides the URL whitelist content that is required for the LI PASS compliance process, and the business simply adds the content to the URL whitelist in the game project.
The corresponding AccessibleUrls.txt file can be found in the Switch directory under the INTLCore plugin:
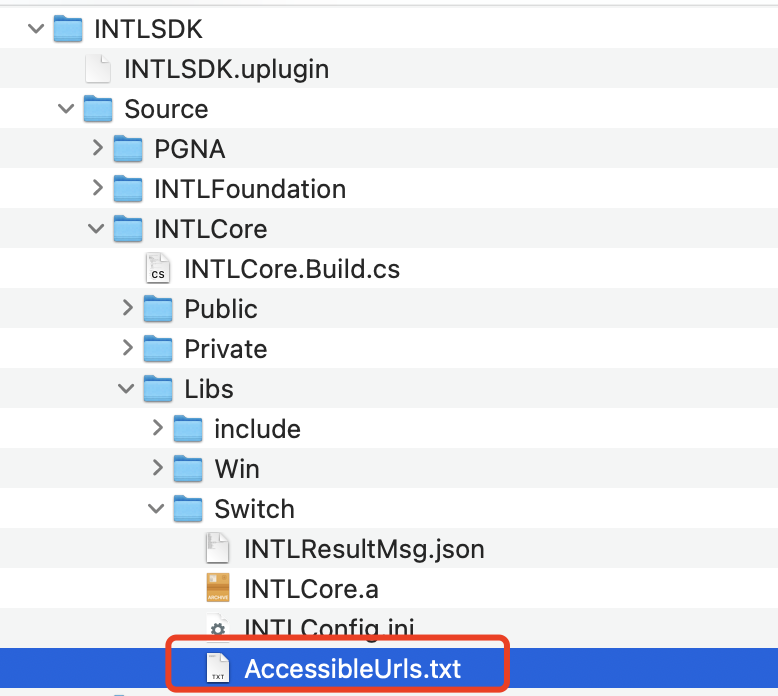
The corresponding URL whitelist in AccessibleUrls.txt is:
^https://test\.account\.levelinfinite\.com/(.*)
^https://account\.levelinfinite\.com/(.*)
^https://www\.levelinfinite\.com/(.*)
^https://test\.account\.levelinfinite\.com/(.*)
^https://test-common-web\.intlgame\.com/(.*)
^https://common-web\.intlgame\.com/(.*)
^https://test\.intlgame\.com/(.*)
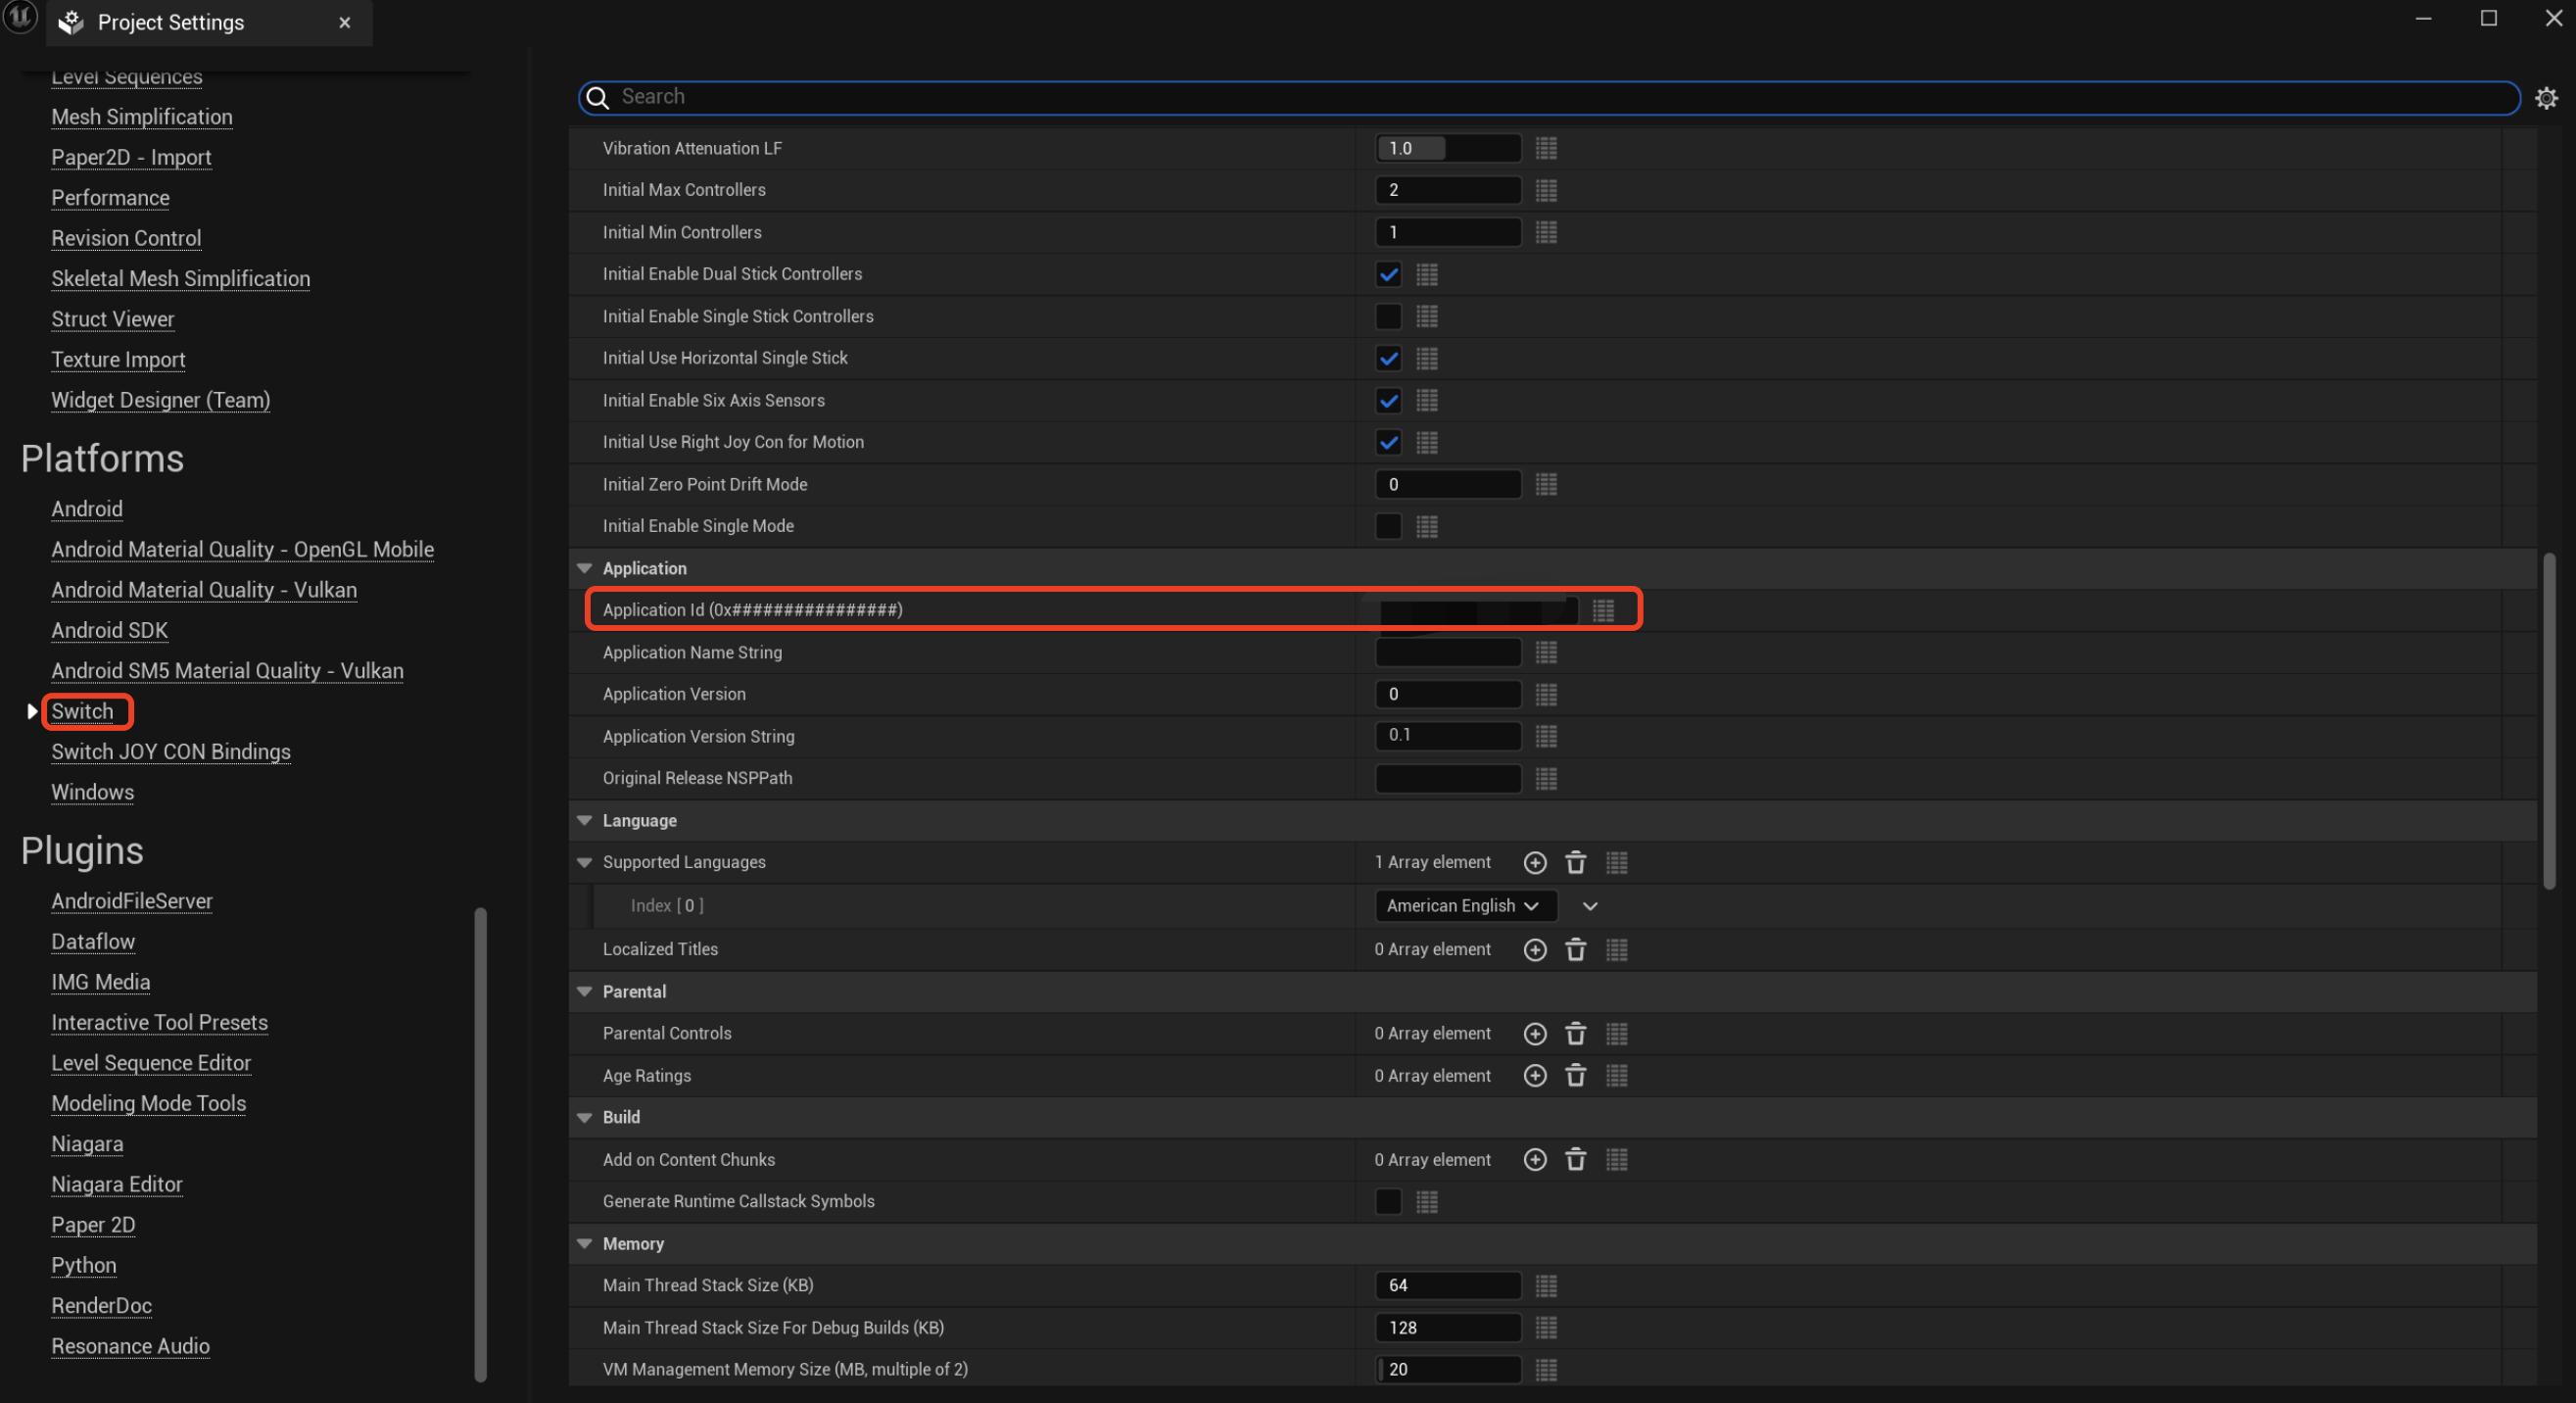
业务在打包 Nintendo 版本的时候,需要将 Nintendo 提供的 Application ID 值配置到项目设置内的 Application Id
Step 3: Acceptance testing for login functionality
Search for the keyword "AuthResult" in the Player Network SDK logs to confirm whether the channel name and OpenID are returned correctly.If correct, it means the integration configuration is successful, and login functionality has been successfully added.
