Web
This article aims to introduce how to set up PS5 authentication, so that your web page can use Player Network login authentication service to log in through the PS5 channel.
PS5 development is generally not open to individual developers; it requires your company business contact Sony to obtain PS5 development permissions.
Prerequisites
1. Set up your game and apply for Client ID and Client Secret in PlayStation5 DevNet
After becoming a developer, you need to register the corresponding game application in PlayStation5 DevNet.
-
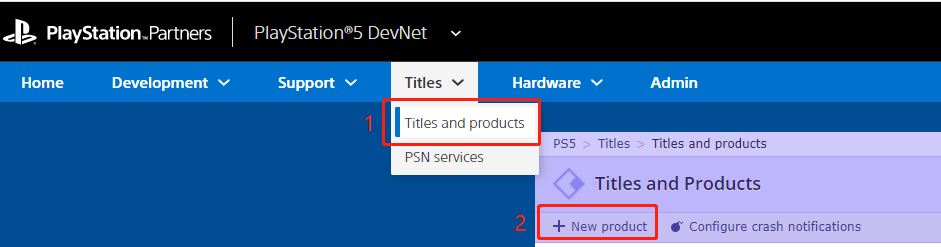
In the top navigation bar of PlayStation5 DevNet, click Titles > Titles and products to open the Titles and Products page.
-
Click New product at the top left corner of the page.
-
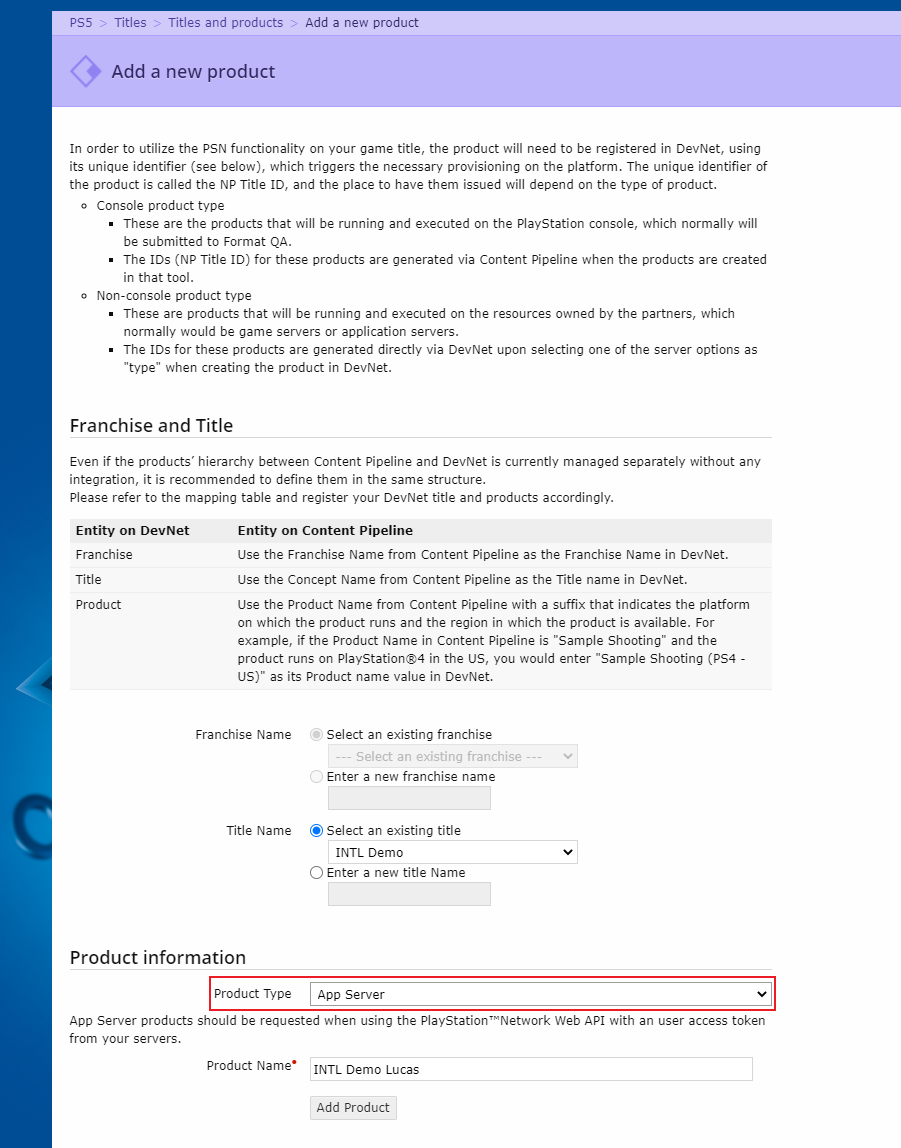
In the Add a new product popup, enter the basic product information.
Choose App Server for **Product Type。
-
Click Add Product to add a new product.
The Add a New Service page will appear after the product has been added successfully. -
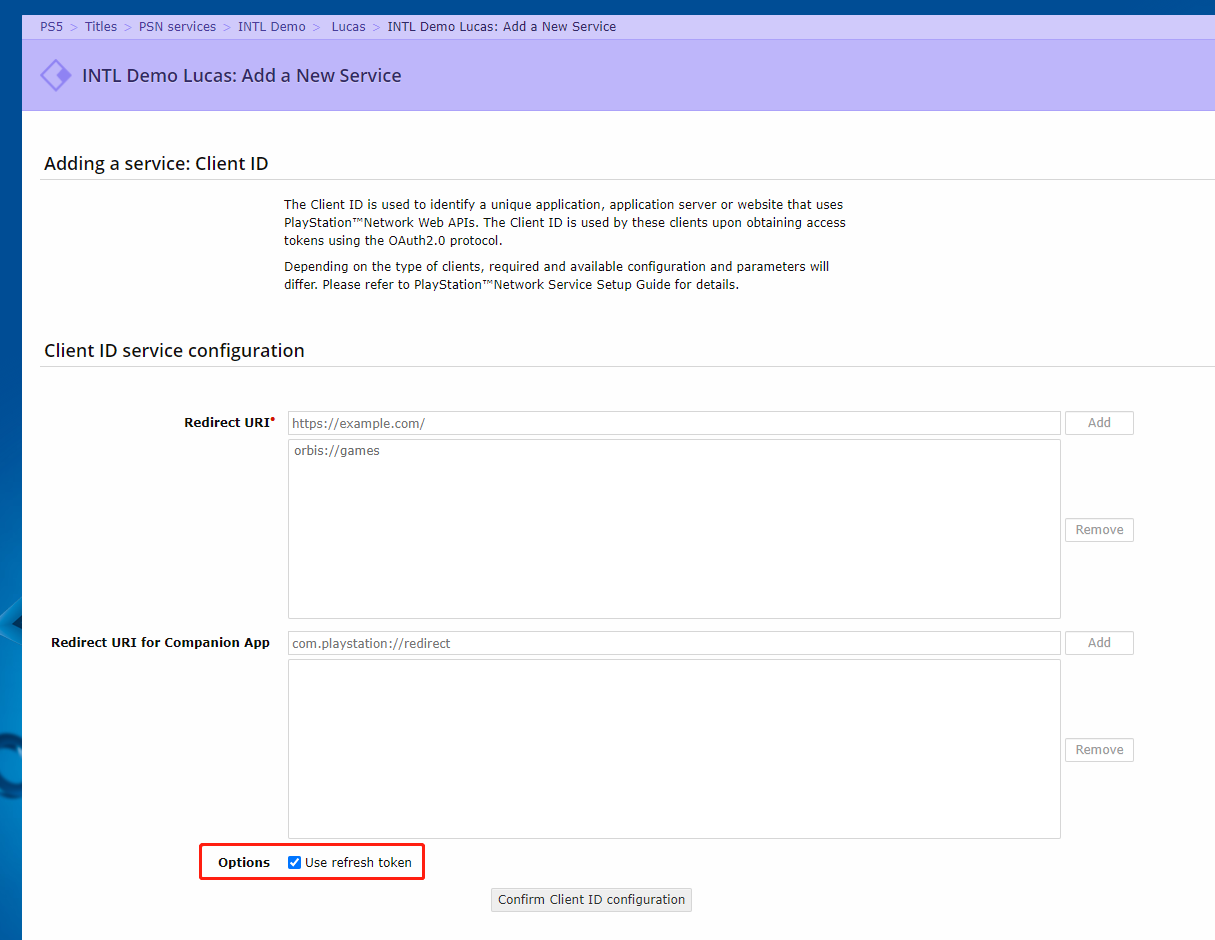
Since the Player Network SDK uses a refresh token to update the PS5 token, check the use refresh token option on the Client ID service configuration page.
-
Click Confirm Client ID configuration.
The Client ID service configuration page will be refreshed to confirm the Client ID information. -
Click Request Client ID to complete the new product registration process.
Sony needs some time to create the product.After the backend process is complete, the product registration page will be displayed.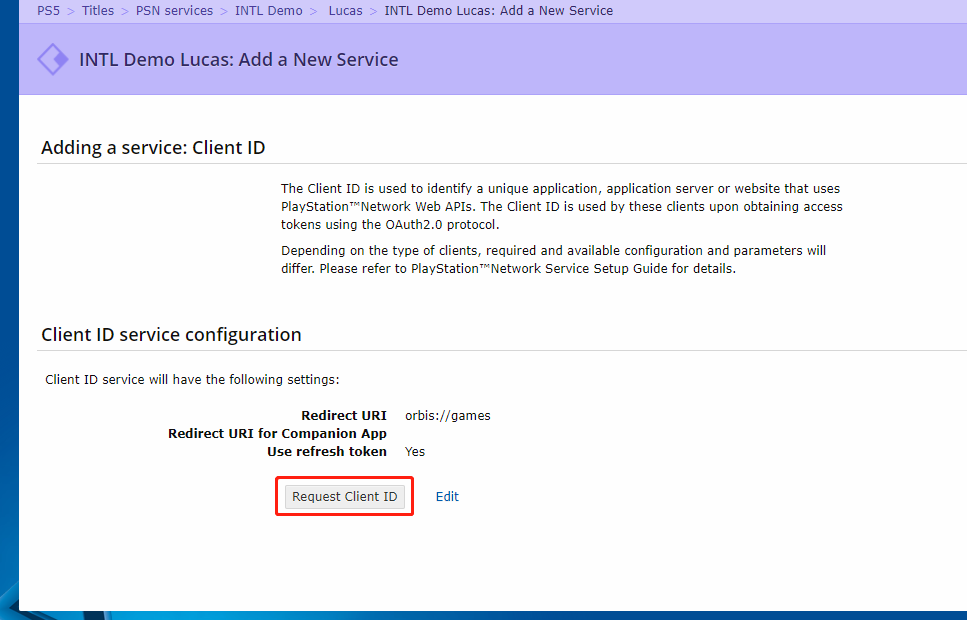
-
Click Download Client Secret to download the product's
Client Secret.Send theClient IDandClient Keyto the Player Network SDK backend for configuration.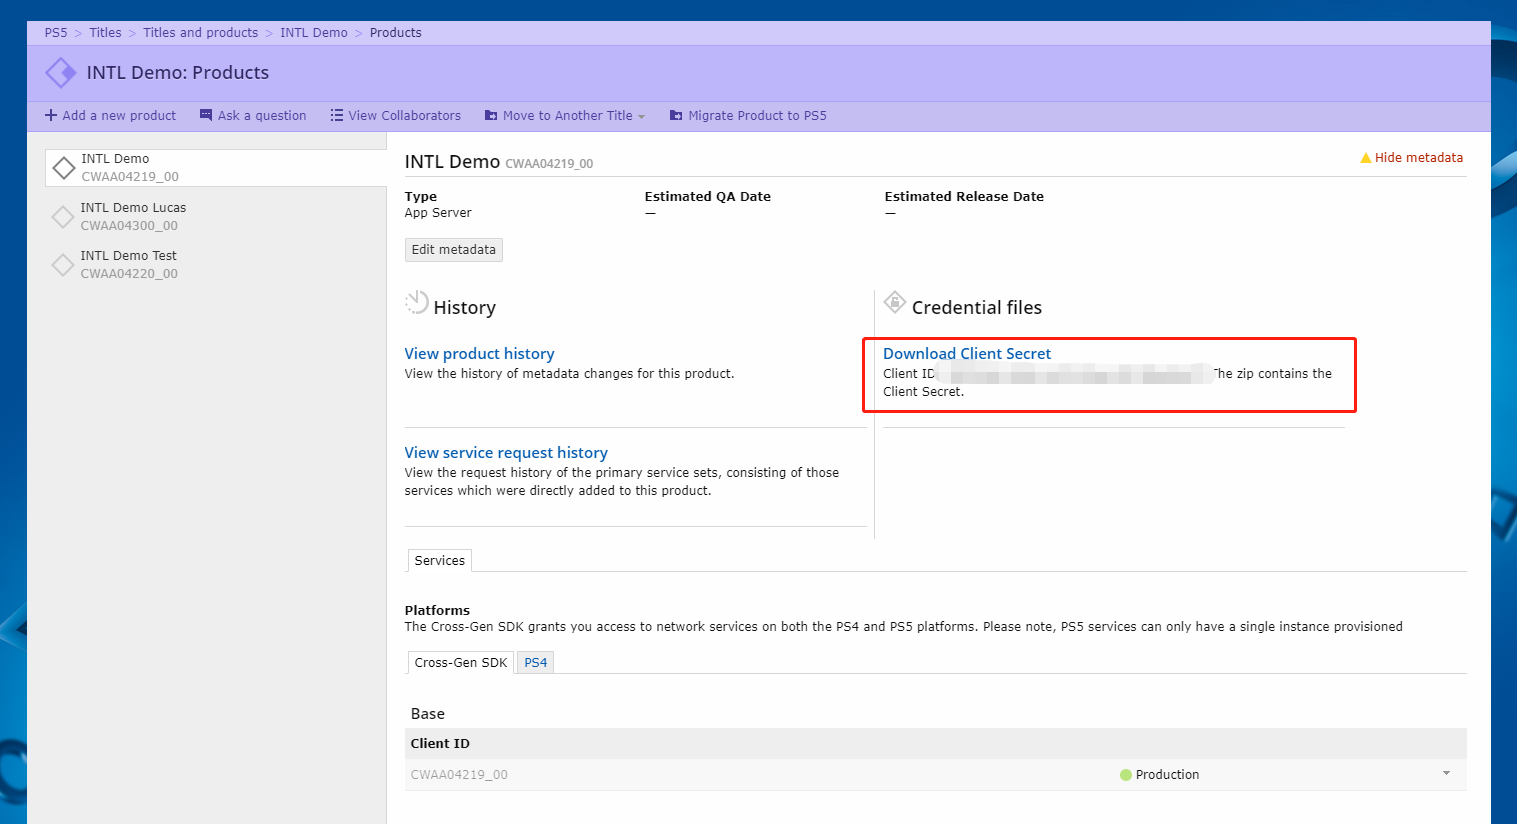
- Obtain Player Network Console login account.
- Create a new project for your game, or join an existing one.
- Add PS5 as a login authentication method in Player Network Console.
For more information about integrating other third-party channels into the SDK, see JavaScript SDK.
Step 1: Introduce JavaScript SDK
During project integration testing, import the debugging SDK package, which is intended only for integration testing.For project launch, the official SDK package must be imported.
Currently, both npm package method and CDN method are supported.
- npm
- CDN
$ npm install @intlsdk/account-api
// SDK debug version package
<script src="https://test-common-web.intlgame.com/sdk-cdn/account-api/latest/index.umd.js"></script>
// SDK official version package
<script src="https://common-web.intlgame.com/sdk-cdn/account-api/latest/index.umd.js"></script>
Step 2: Use SDK
During integration testing, set env to test environment; when the project goes live, set env to the corresponding official environment.
const accountApi = new IntlgameAccountApi({
  env: "test", // SDK environment
  gameID: 11,
});
| Parameters | Type | Description | Remark |
|---|---|---|---|
| env | string | SDK environment For more information, see Obtain Deployment Cluster Information. | Required |
| gameID | number | Unique Player Network Game ID | Required |
Step 3: Implement Web Login
After instantiating the accountApi component, call the thirdAuthorize interface to request a login authorization token for the PlayStation channel.
accountApi.thirdAuthorize({
    third_type: 'ps5',
}).then(
(res) => {
    console.log(res);
});
After PlayStation returns the login authorization token, call the intlAuthorize API to obtain the Player Network SDK OpenID and token to log in to the website.
accountApi.intlAuthorize({
    third_type: 'ps5',
    channel_info: {
        code: "EAAI2lTrXAZBwBAC",
        redirect_uri: "EAAI2lTrXAZBwBAC"
    }
}).then(
(res) => {
    console.log(res);
});
Call the intlLogout API to log out from the website.
accountApi.intlLogout({
    token: '4567xsdfsd',
    openid: 'xxxxxxxx',
    channel_id: 27,
}).then(
(res) => {
    console.log(res);
});
