iOS
This document introduces how to set up VK authentication, allowing your game to use Player Network's login authentication service to sign in via the VK channel.
Prerequisites
1. Set up your game on the VK developer website
1. Create a VK app
The following information was last updated on January 14, 2025. Please refer to the latest details on the VK developer website.
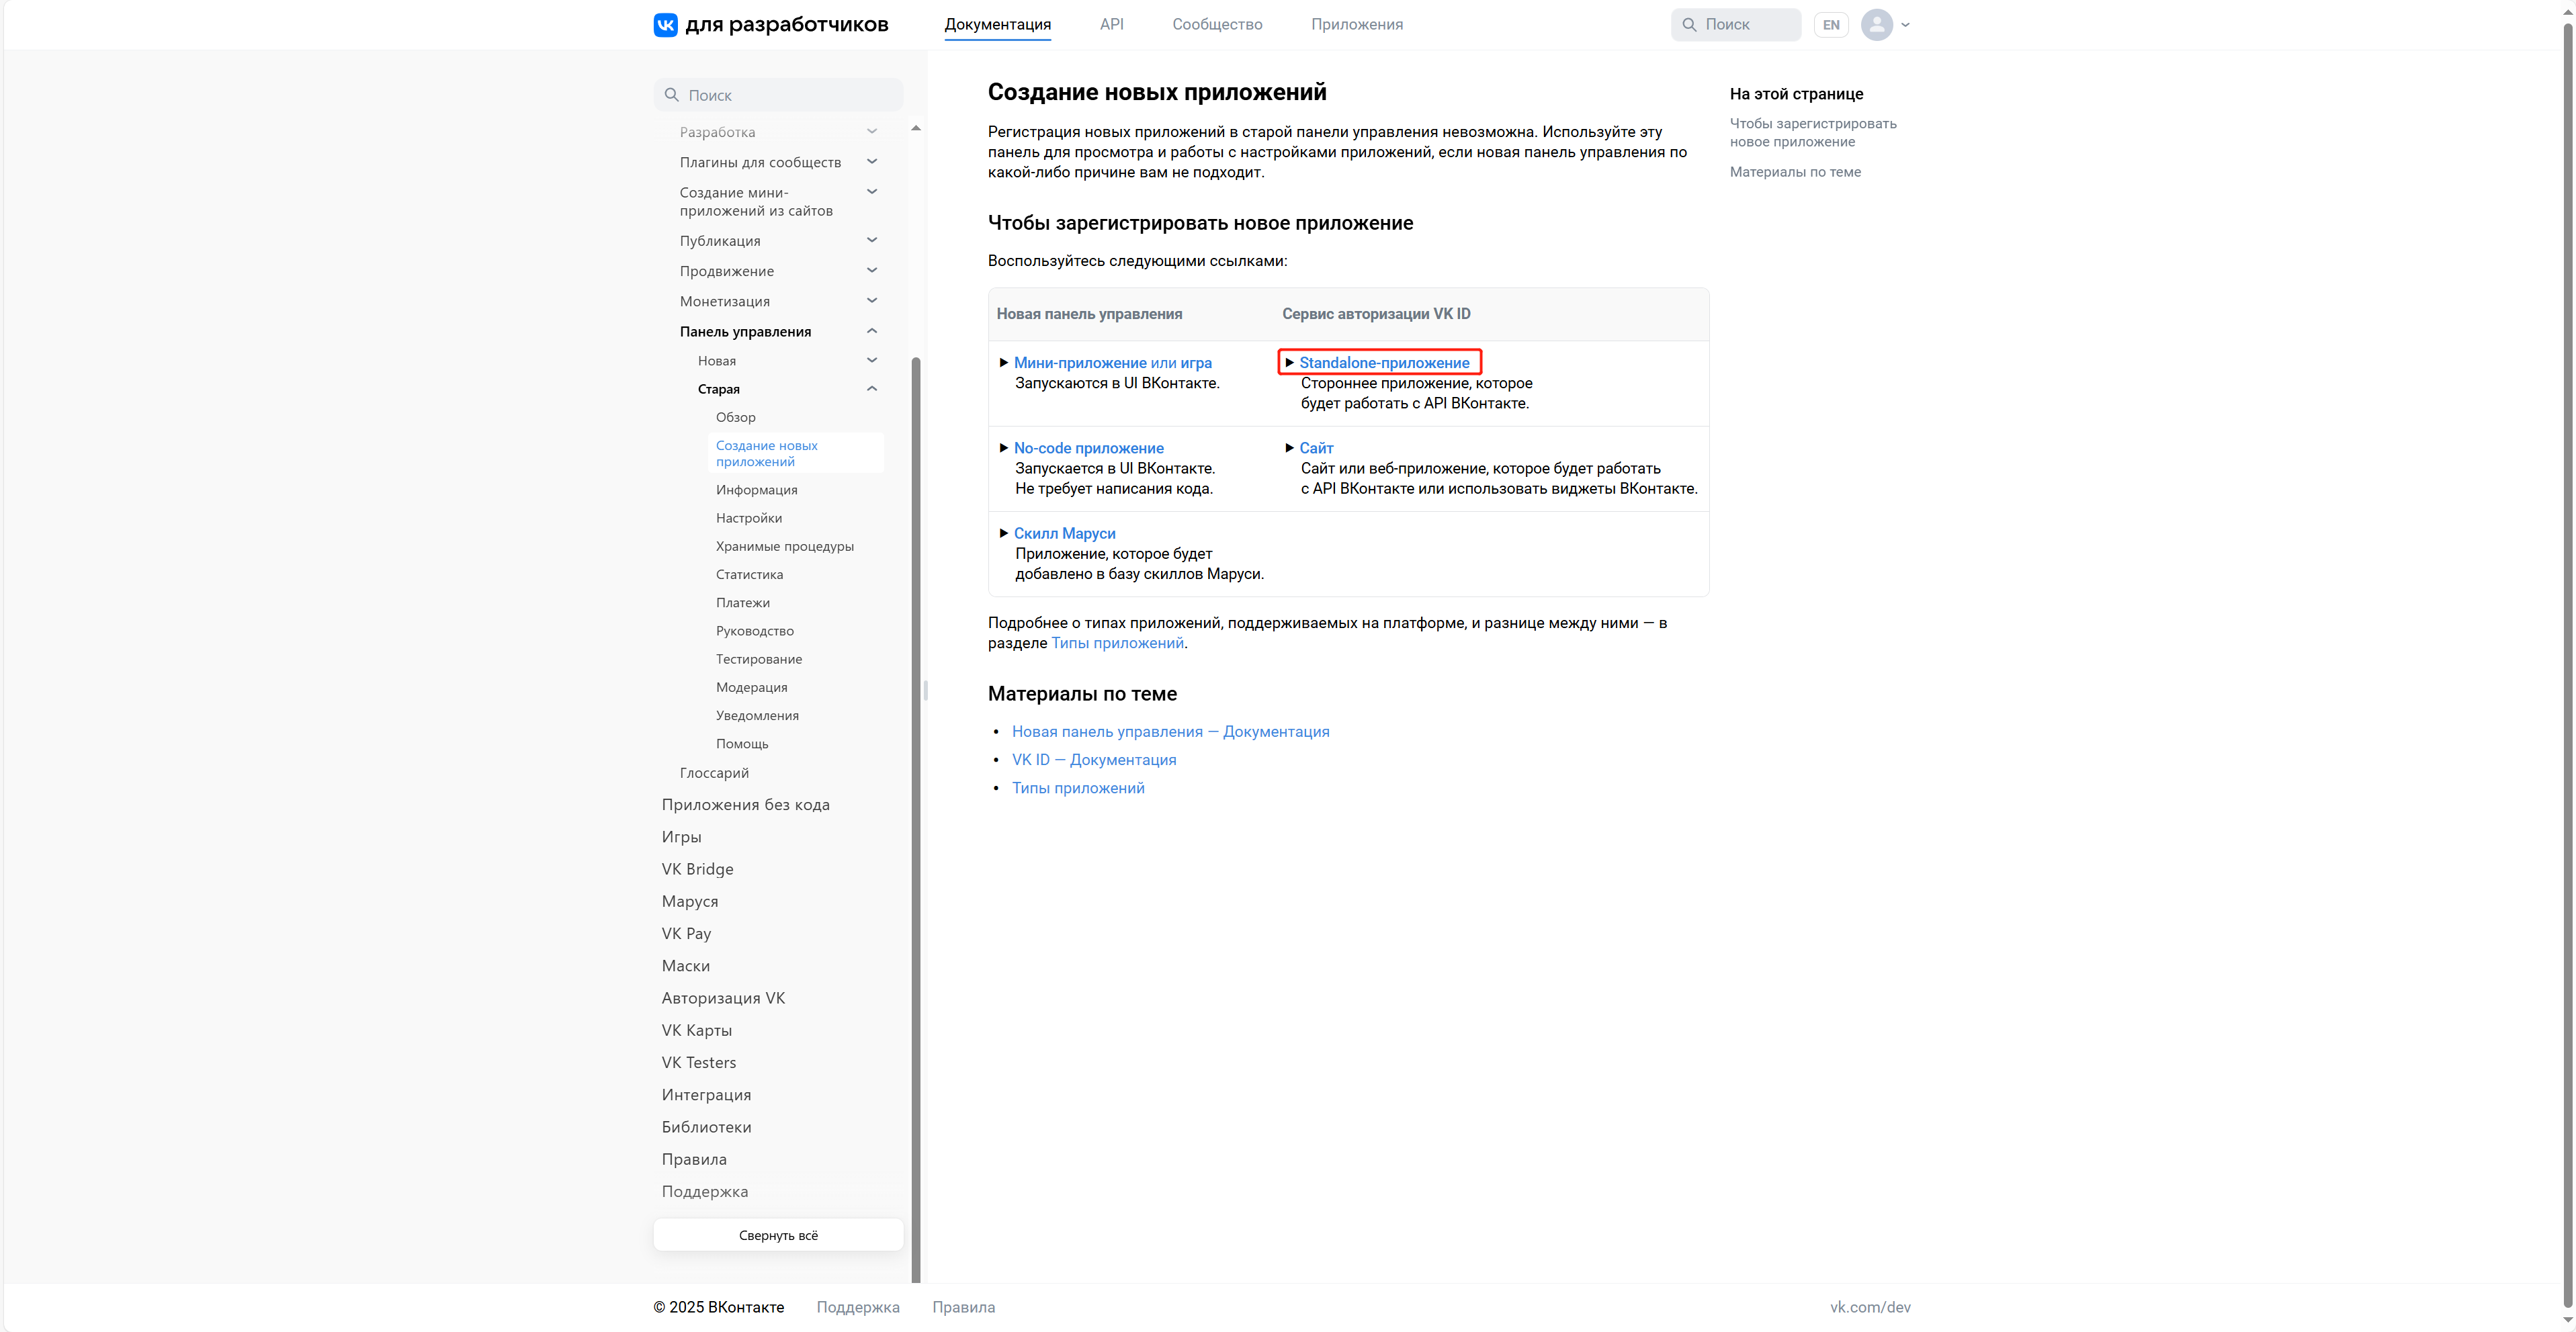
Currently, the VK developer website no longer allows creation of VK apps. Follow the steps below to go to the VK ID developer website.
Player Network SDK does not currently support VK ID. For detailed information and version support plans, please contact Player Network Assistant.
-
Log in to or register an account on the VK developer website.
-
Click Standalone application。
-
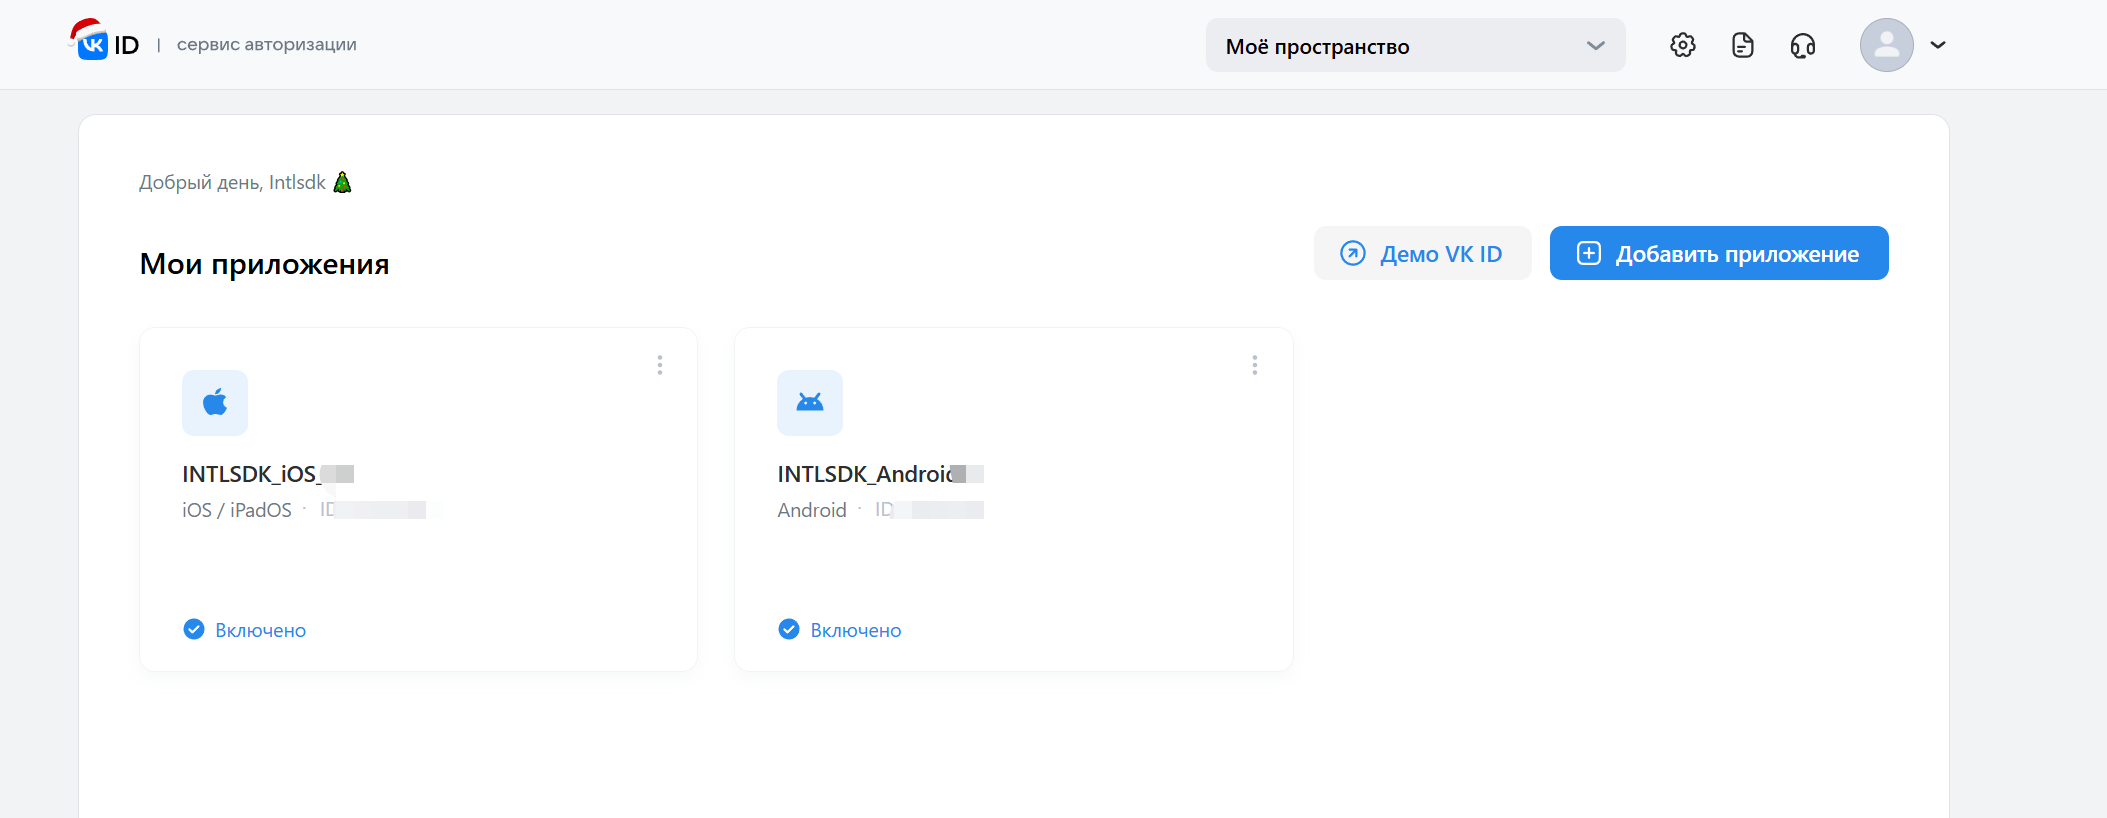
Go to the VK ID developer website to create an app.
2) Configure the app
Enter application information
-
Go to the VK developer website。
-
On the Information page of the corresponding app, enter your application details.

-
Click Save to save the entered information.
Enable OpenAPI
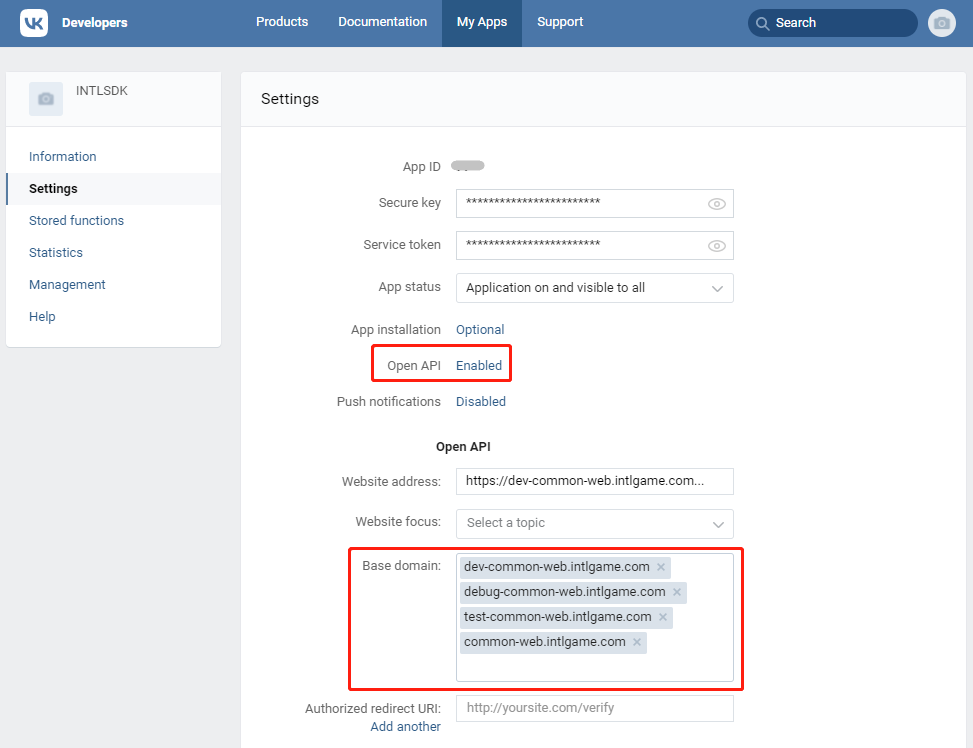
- Enable OpenAPI.
- Add the following base domains:
- dev-common-web.intlgame.com
- debug-common-web.intlgame.com
- test-common-web.intlgame.com
- common-web.intlgame.com
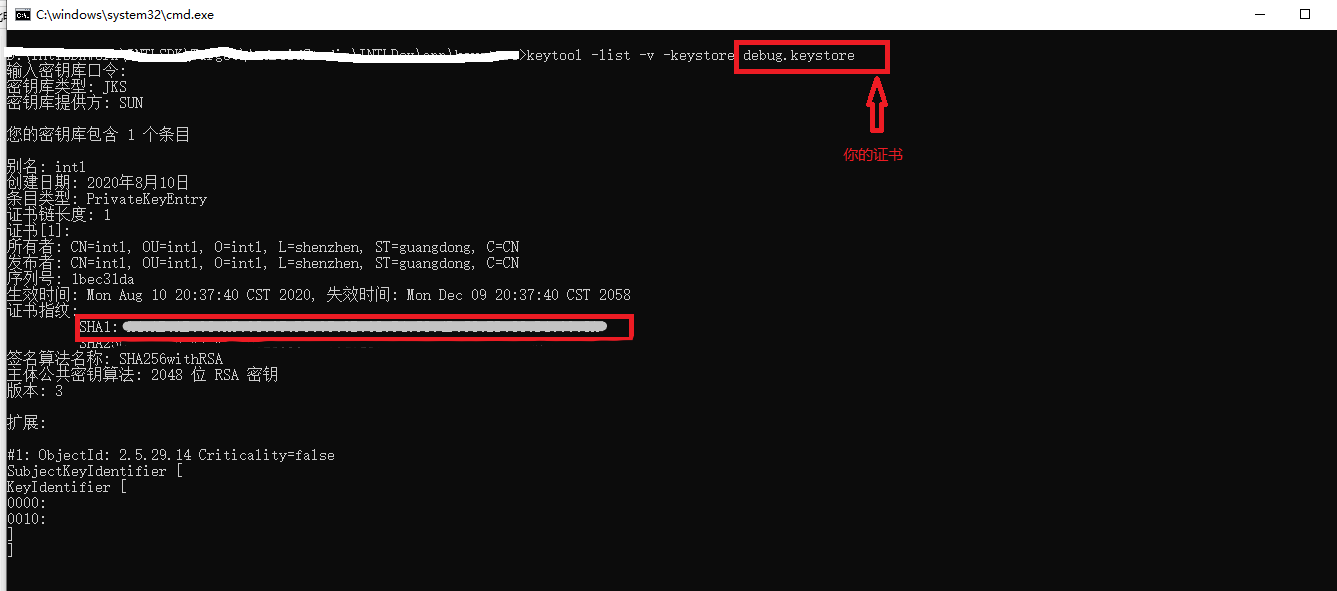
Get Android fingerprint
To obtain the Android fingerprint, follow the instructions in Get the SHA1 Value for Android.
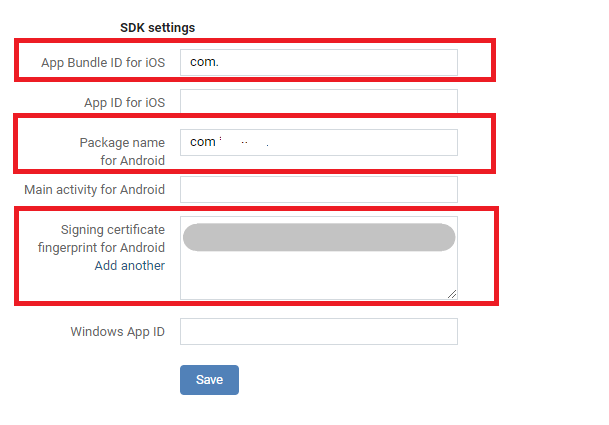
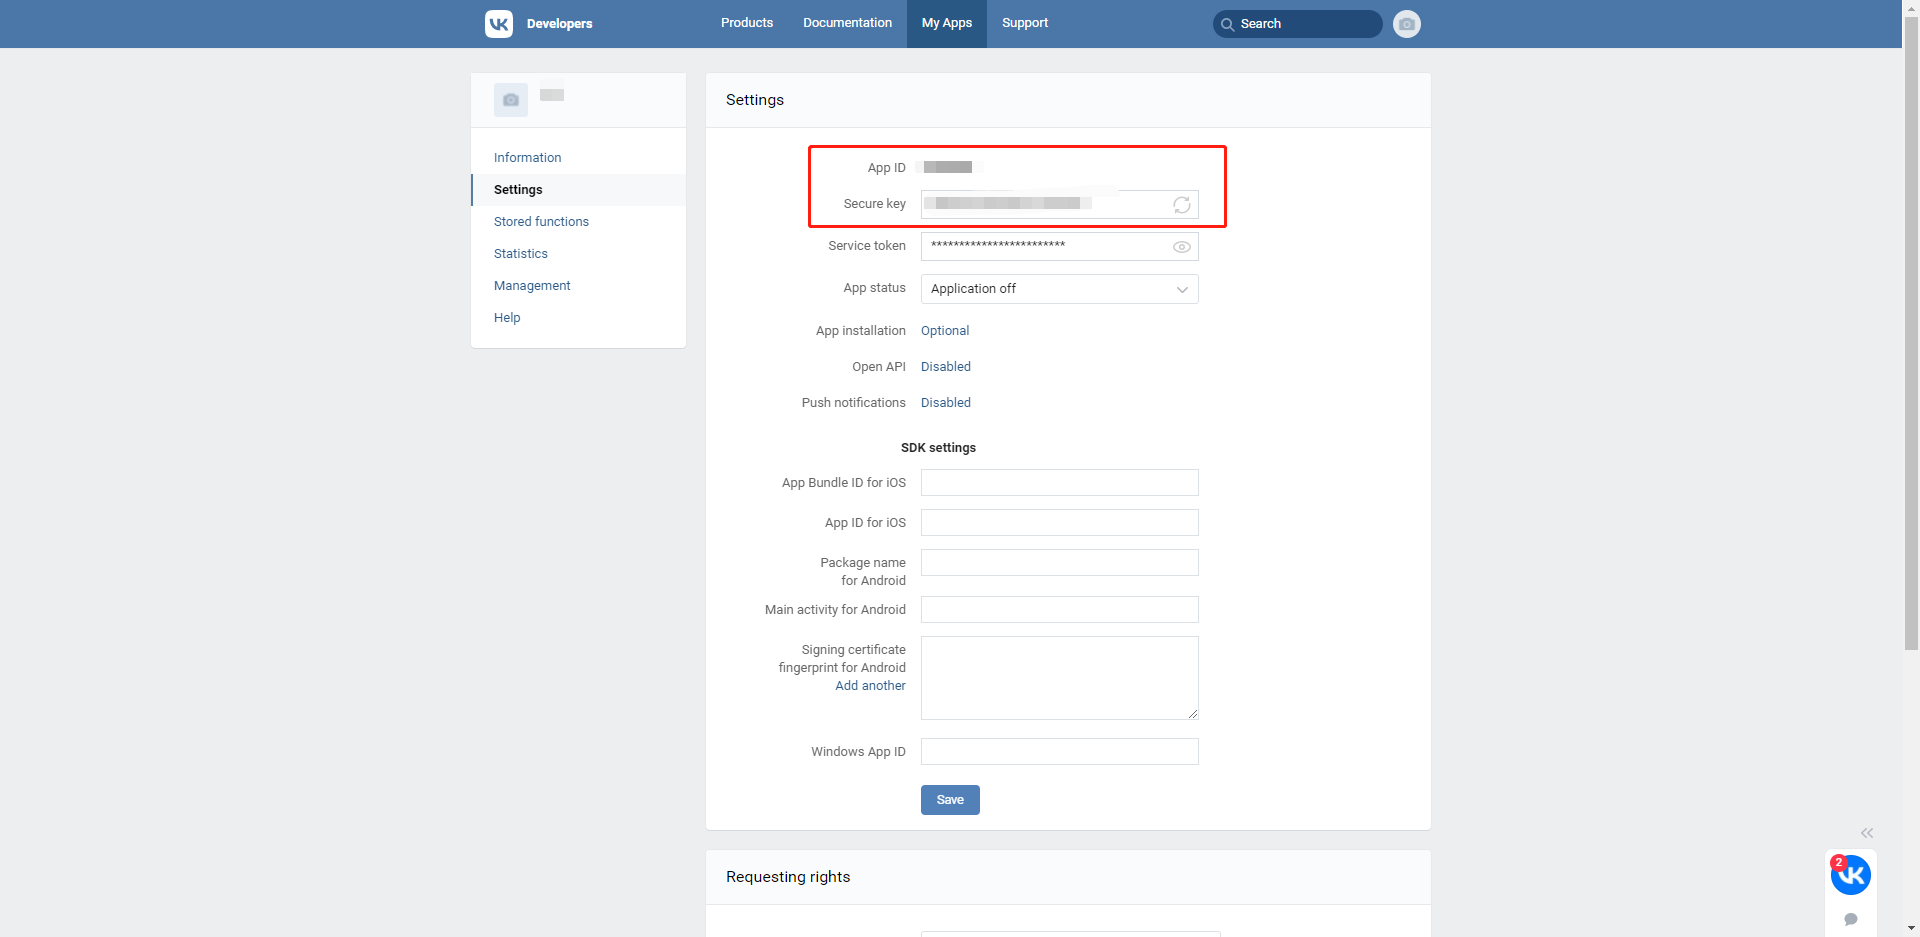
SDK Settings
- Go to the Settings page of your app.
- In the SDK settings section, enter App Bundle ID for iOS, Package name for Android, and Signing certificate fingerprint for Android。
Get App ID, Secure key, and other information
Go to the App's Settings page to obtain the App ID and other information.
- Obtain Player Network Console login account.
- Create a new project for your game, or join an existing one.
- Download SDK.
- Integrate the SDK.
- Add VK as a login authentication method for business in the Player Network Console.
Step 1: Configure SDK for VK Login
If VK authorization is obtained, add a URL scheme to the application.
Xcode 5:
- Open application settings.
- Select info/URLType。
- Set Identifier and URL Schemes to
vk+APP_ID.
Xcode 4:
- Open
info.plist. - Add a row for URL Types.
- Set URL identifier to
vk+APP_ID.
Open your project's INTLConfig.ini file:
[VK Channel Configuration] VK_APP_ID = {INTL_VK_APP_ID}
Replace {INTL_VK_APP_ID} with the registered VK App ID.
Step 2: Add VK Login
- Register login-related callbacks.
- Unity
- Unreal Engine
// Add callbacks
public void AddAuthObserver()
{
 INTLAPI.AddAuthResultObserver(OnAuthResultEvent);
}

// Remove callbacks
public void RemoveAuthObserver()
{
 INTLAPI.RemoveAuthResultObserver(OnAuthResultEvent);
}

// Process the INTLAuthResult callback
public void OnAuthResultEvent(INTLAuthResult ret)
{
 Debug.Log($"MethodID: {ret.MethodId}");

 string methodTag = "";
 if (authRet.MethodId == (int)INTLMethodID.INTL_AUTH_LOGIN)
 {
 methodTag = "Login";
 }
 else if (authRet.MethodId == (int)INTLMethodID.INTL_AUTH_BIND)
 {
 methodTag = "Bind";
 }
 else if (authRet.MethodId == (int)INTLMethodID.INTL_AUTH_AUTOLOGIN)
 {
 methodTag = "AutoLogin";
 }
 else if (authRet.MethodId == (int)INTLMethodID.INTL_AUTH_QUERY_USER_INFO)
 {
 methodTag = "QueryUserInfo";
 }
 else if (authRet.MethodId == (int)INTLMethodID.INTL_AUTH_GET_AUTH_RESULT)
 {
 methodTag = "GetAuthResult";
 }
}
C++ Event Handling (above v1.15)
//configure callback
FINTLAuthEvent authEvent;
authEvent.AddUObject(this, &OnAuthResult_Implementation);
UINTLSDKAPI::SetAuthResultObserver(authEvent);
// Remove callbacks
UINTLSDKAPI::GetAuthResultObserver().Clear();
void OnAuthResult_Implementation(FINTLAuthResult ret)
{
 UE_LOG(LogTemp, Warning, TEXT("MethodID: %d"), ret.MethodId);
}
Unreal Event Handling
void OnAuthResult_Implementation(FINTLAuthResult ret)
{
 UE_LOG(LogTemp, Warning, TEXT("MethodID: %d"), ret.MethodId);
}
- Call the
AutoLogininterface to log in automatically.
- Unity
- Unreal Engine
INTLAPI.AutoLogin();
UINTLSDKAPI::AutoLogin();
- If automatic login fails, call the
Logininterface to let the player log in manually.
- Unity
- Unreal Engine
INTLAPI.Login(INTLChannel.VK);
UINTLSDKAPI::Login(EINTLLoginChannel::kChannelVK);
- Synchronize client authentication status with the game backend and wait for the final verification result.
Step 3: Acceptance testing for login functionality
Search for the keyword "AuthResult" in the Player Network SDK logs to confirm whether the channel name and OpenID are returned correctly.If correct, it means the integration configuration is successful, and login functionality has been successfully added.
If you encounter problems during the integration process, please refer to Frequently Asked Questions.
