Push Notification
In Android 12 and above systems, due to the tightening of SCHEDULE_EXACT_ALARM permission requests by the Android API, the Player Network SDK uses internal delay triggers to implement push.Therefore, after the app is closed, delayed code cannot be triggered, and the trigger time may deviate due to the system sleep strategy.
Prerequisites
To start using local notifications, simply integrate the Player Network SDK.
Remote push notifications utilize Firebase's push functionality. To use remote push, please complete the following steps:
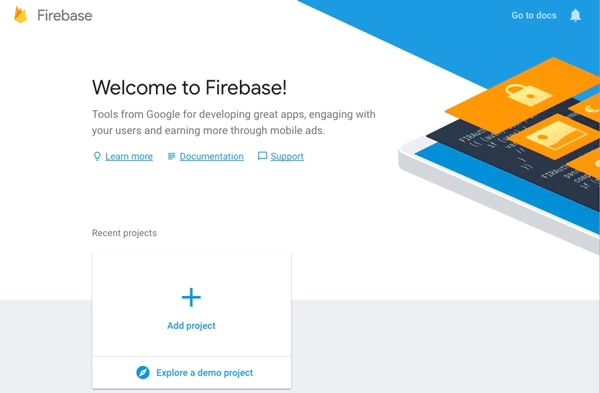
1. Register the Firebase project
In the Firebase Console page, follow the prompts to register a Firebase project.
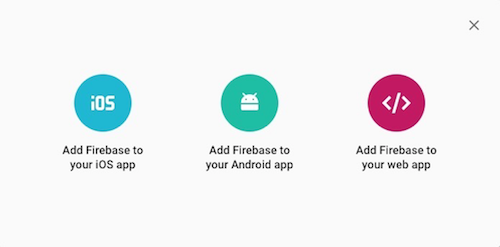
2. Add an application
Firebase supports Multi-store channel package, allowing multiple apps to be created under the same developer account.Simply fill in the new channel package name and corresponding signature configuration under the same Firebase project, and complete additional game application configuration by repeating the following steps.
-
In the Project Overview page of the Firebase Console, add the Firebase application for the corresponding platform.
-
Add the relevant information according to prompts.
-
Add Android application.
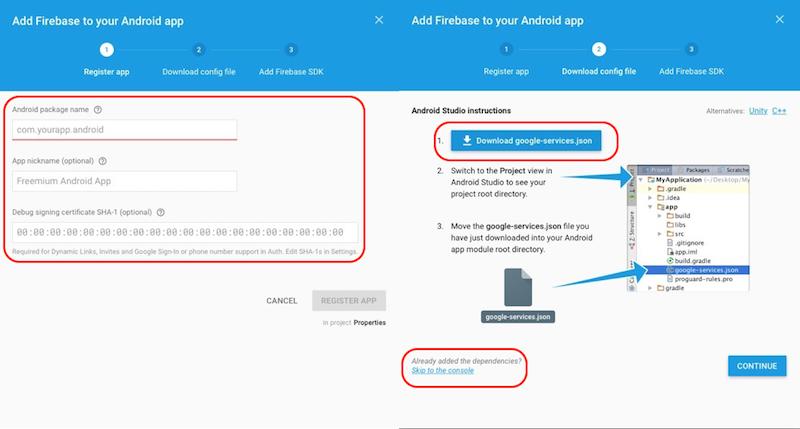
- After filling in the information, click REGISTER APP.
If some fields are uncertain, they can be supplemented later in settings. - Download the
google-services.jsonfile for backup, and it can be re-downloaded from the Firebase Console later. - Skip other steps.
- After filling in the information, click REGISTER APP.
-
Add iOS application.
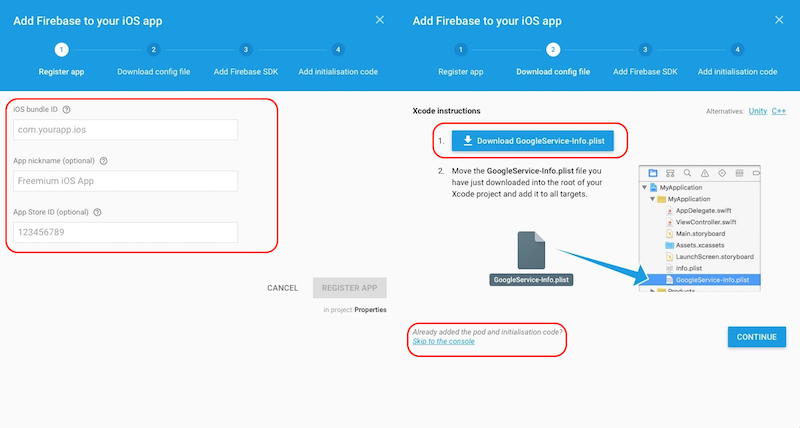
- After filling in the information, click REGISTER APP.
If some fields are uncertain, they can be supplemented later in settings. - Download the
google-services.jsonfile for backup, and it can be re-downloaded from the Firebase Console later. - Configure APN certificates for push functionality.
- After filling in the information, click REGISTER APP.
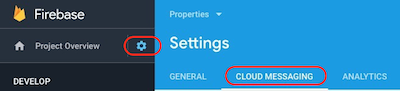
3. Upload iOS APNs Certificate
-
On the Settings page, click CLOUD MESSAGING and find the iOS project.
-
Add Development Certificate and Production Certificate separately.
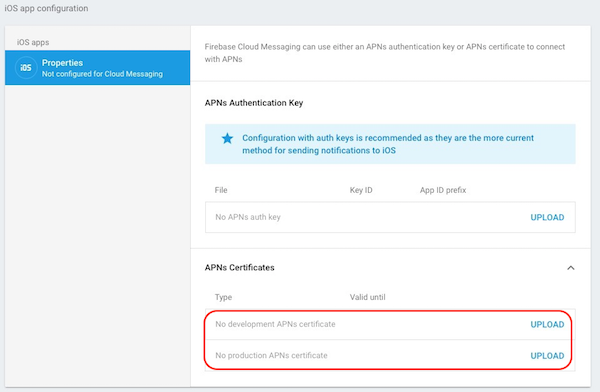
For more details, see Set up Apple platform client.
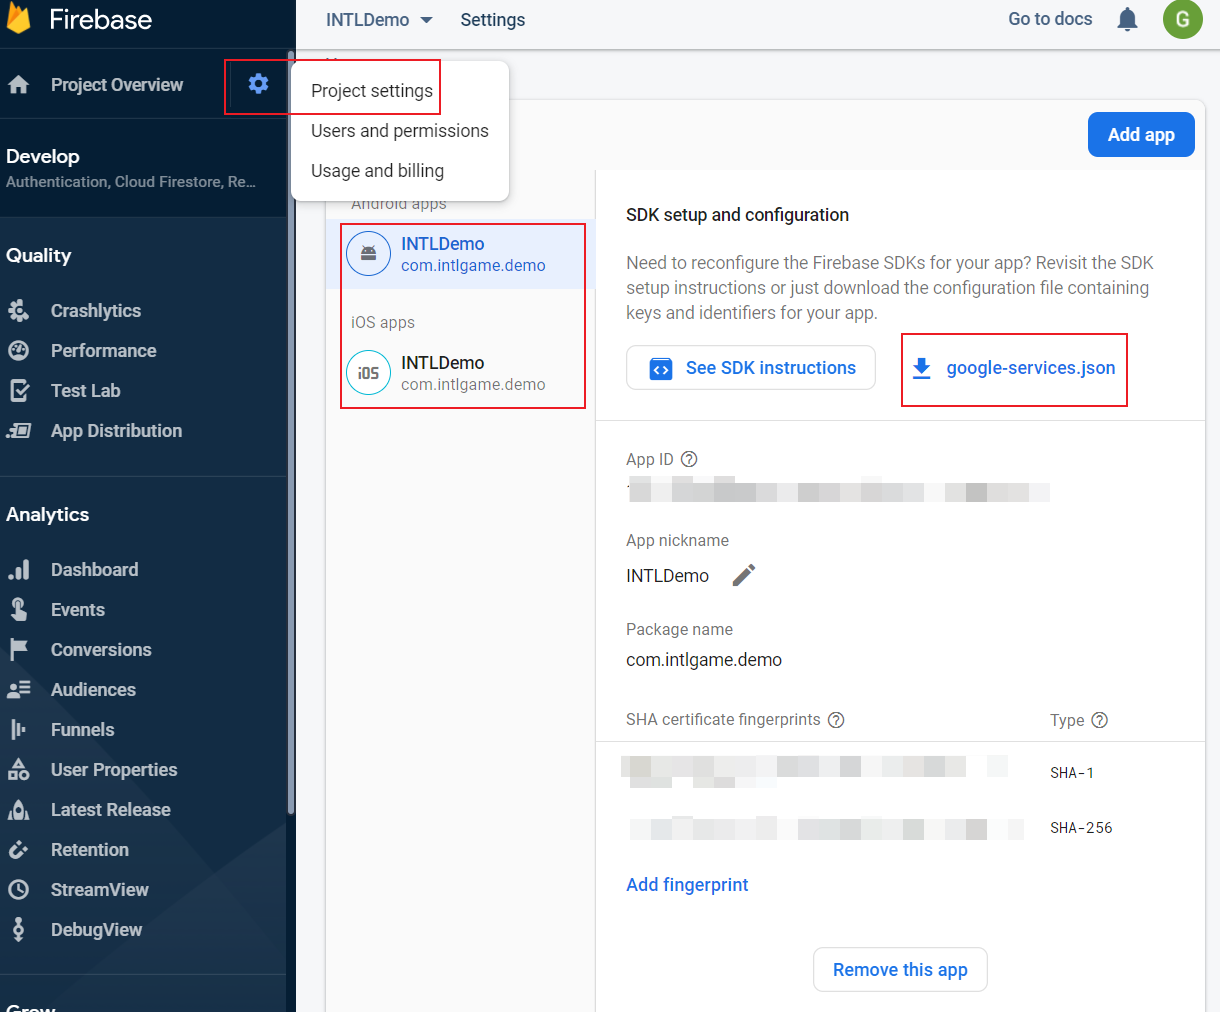
4. Project Configuration
In Project settings, you can continue to edit project information, download google-services.json and GoogleService-Info.plist, or configure the Android certificate fingerprint.
Step 1: Permissions and project configuration
Local Notification
Add the following configuration in Android's INTLConfig.ini.
[Android Local Notification]
ANDROID_LOCAL_NOTIFICATION_ENABLE = 1
Remote Push
Firebase remote push configuration for the push module.
Android
User Permissions
Since Firebase SDK only supports minSdkVersion >= 19, running on systems below Android 4.2 may have issues. Set minSdkVersion >= 19 for your game.
Firebase requires access to network permissions.
<uses-permission android:name="android.permission.WAKE_LOCK" />
<uses-permission android:name="android.permission.INTERNET"/>
<uses-permission android:name="android.permission.ACCESS_NETWORK_STATE"/>
Project Configuration
Configure the Android client key in the INTLConfig.ini file.
[Google]
GOOGLE_CLIENT_KEY_ANDROID = {YOUR_CLIENT_KEY_ANDROID}
- Replace
{YOUR_CLIENT_KEY_ANDROID}with the Web client key required by Player Network SDK, the client ID corresponding to webpage client when configuring API OAuth in the Credentials page.This is the Server Client ID established in the OAuth operations configured at the backend of OAuth 2.5.
google-services.json
Missing google-services.json file will cause packaging failure.
- Unity
- Unreal Engine
Gradle packaging supports reading contents directly from the google-services.json file, which are converted into the corresponding app/build/generated/res/google-services/{build_type}/values/values.xml configuration file.
For more details on adding the google-services.json file under the project's Assets/Plugins/Android/ directory, see The Google Services Gradle Plugin.
Gradle packaging supports reading contents directly from the google-services.json file, which are converted into the corresponding app/build/generated/res/google-services/{build_type}/values/values.xml configuration file.
For more details on adding the google-services.json file under the project's Plugins/INTLSDK/Source/INTLFirebase/Libs/Android directory, see The Google Services Gradle Plugin.
[Optional] Configure Default Background Color
- Unity
- Unreal Engine
Specify the color when configuring notifications to use it as the default notification banner background color.
You can define color in the resource files under the Android project directory at Unity's Assets/Plugins/Android/.
For example: xxx/res/values/colors.xml.
{/* Set the color for push notifications to be used when the notification itself has not set a color. For more information, see README(https://goo.gl/6BKBk7). */}
  <meta-data
    android:name="com.google.firebase.messaging.default_notification_color"
    android:resource="@color/colorAccent" />
Specify the color when configuring notifications to use it as the default notification banner background color.
You can place the color definition file under the INTLFirebase/Libs/Android/res/ directory and then add the following code in INTLFirebase_APL.xml.The color definition file will be copied to the Android resource directory and used to set the push background color.
<resourceCopies>
  <copyFile src="$S(PluginDir)/lib/Android/res/values.xml" dst="$S(BuildDir)/res/values/values.xml"/>
</resourceCopies>

<addElements tag="application">
    <meta-data android:name="com.google.firebase.messaging.default_notification_color" android:resource="@color/colorAccent" />
</addElements>
[Optional] Configure Default Icon
- Unity
- Unreal Engine
Specify the icon when configuring notifications to use it as the default notification icon.
You can place drawable files in the Android project directory under Unity's Assets/Plugins/Android/.
For example: xxx/res/drawable.
{/*Set a custom default icon, used when the notification itself does not have an icon set.
    See README(https://goo.gl/l4GJaQ) for more information.*/ }
<meta-data
    android:name="com.google.firebase.messaging.default_notification_icon"
    android:resource="@drawable/ic_stat_ic_notification" />
Specify the icon when configuring notifications to use it as the default notification icon.
You can place icon files under the INTLFirebase/Libs/Android/drawable directory and then add the following code in INTLFirebase_APL.xml.The icon will be copied to the Android resource directory and set as the push icon.
<resourceCopies>
  <copyDir src="$S(PluginDir)/drawable/" dst="$S(BuildDir)/res/drawable" />
</resourceCopies>

<addElements tag="application">
    <meta-data android:name="com.google.firebase.messaging.default_notification_icon" android:resource="@drawable/ic_stat_ic_notification" />
</addElements>
Android supports small and large push icons.
- The small icon is displayed in the top status bar and notification banner.
For Android 5.0+ (API level 21+), the icon background must be white and transparent.The shadow of the notification banner can be colored with an accent color, but the icon's color is not affected by the accent color.
- The recommended size for the large icon is 256x256 pixels; if not set, the small icon will be used.The display position of the large icon depends on the Android version of the device:
- On Android 4.0.3 — 6.0 (API levels 15 – 23) devices, it displays on the left side of the notification text.
- On Android 7.0+ (API level 24+) devices, it displays on the right side of the notification text.
It is recommended to use the Notification icon generator tool to create push icons with appropriate resolutions.
| Pixel Density | Resolution | File Path |
|---|---|---|
| MDPI | 24 x 24 (drawable-mdpi) | Assets/Plugins/Android/res/drawable-mdpi/ |
| HDPI | 36 x 36 (drawable-hdpi) | Assets/Plugins/Android/res/drawable-hdpi/ |
| XHDPI | 48 x 48 (drawable-xhdpi) | Assets/Plugins/Android/res/drawable-xhdpi/ |
| XXHDPI | 72 x 72 (drawable-xxhdpi) | Assets/Plugins/Android/res/drawable-xxhdpi/ |
| XXXHDPI | 96 x 96 (drawable-xxxhdpi) | Assets/Plugins/Android/res/drawable-xxxhdpi/ |
| XXXHDPI (large) | 256 x 256 (drawable-xxxhdpi) (large) | Assets/Plugins/Android/res/drawable-xxxhdpi/ |
iOS
Project Configuration
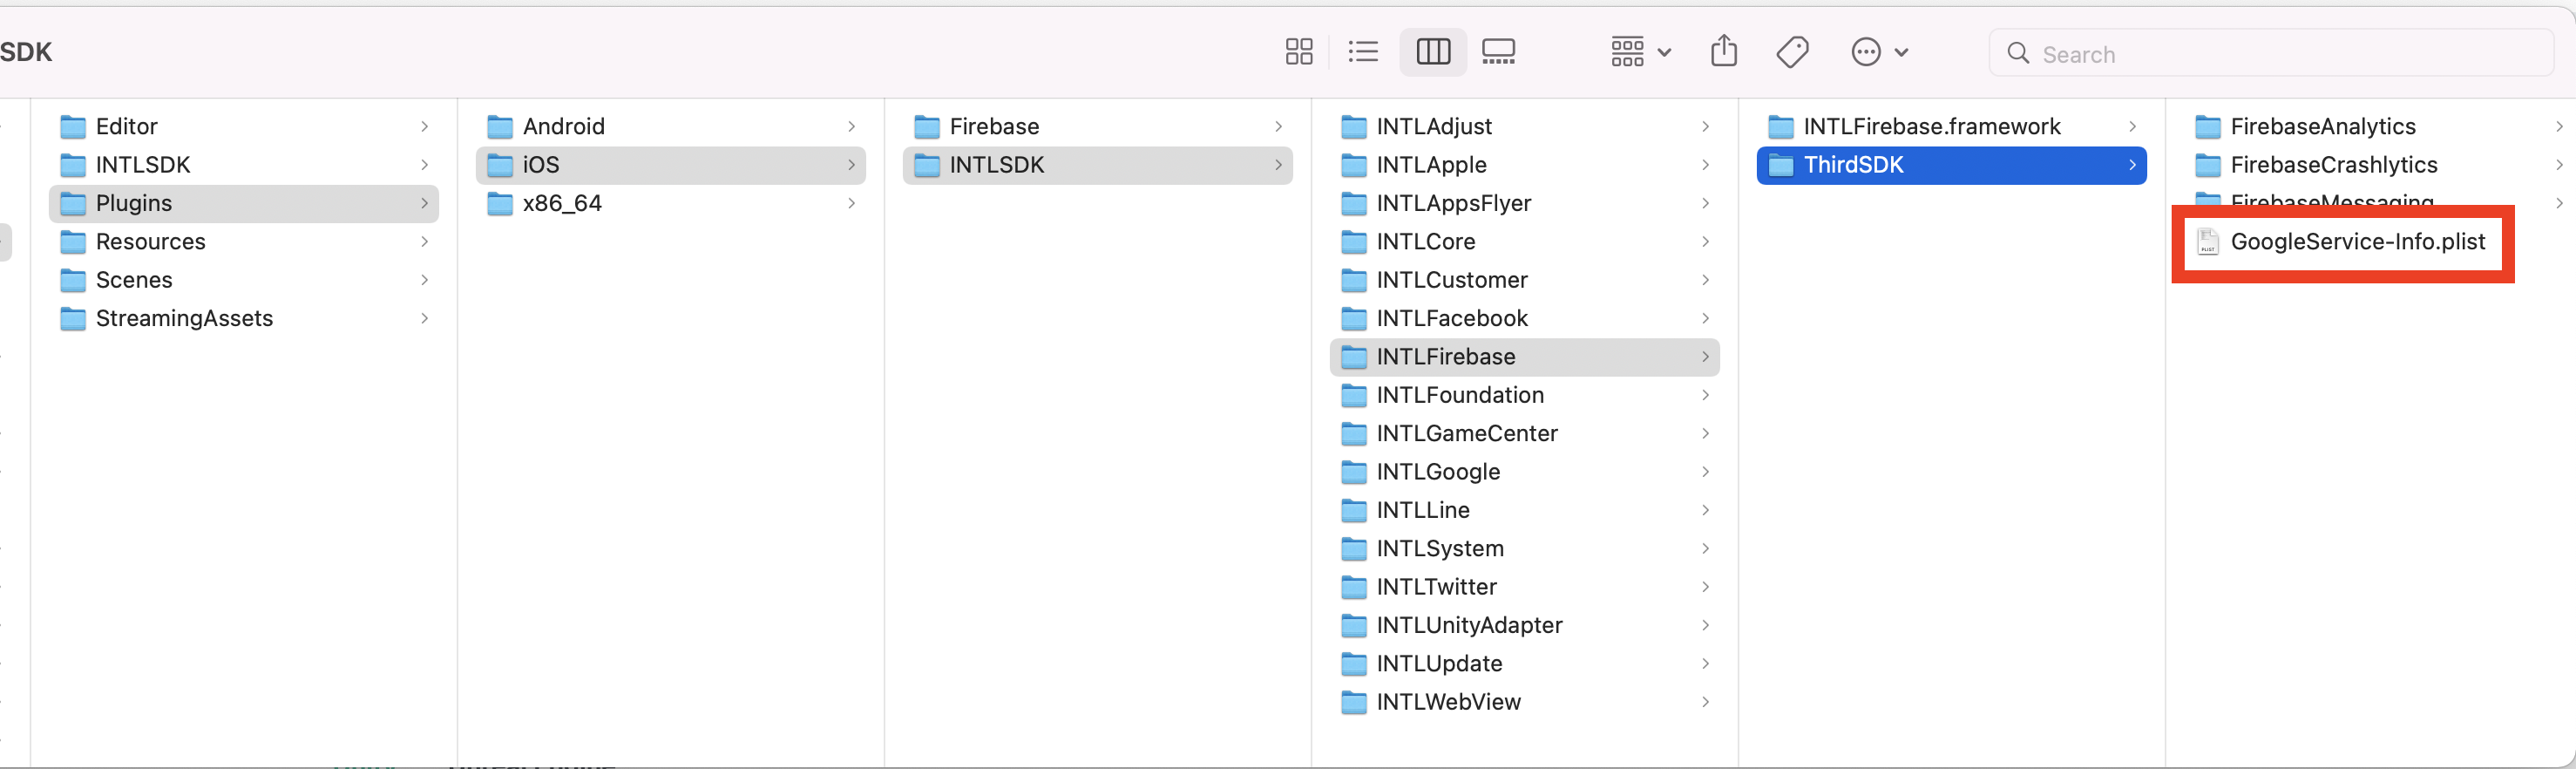
Firebase Plist
Missing GoogleService-info.plist file will cause app startup crash.
Replace the configuration file GoogleService-info.plist into the Assets/Plugins/iOS/INTLSDK/INTLFirebase/ThirdSDK/ directory.
- Unity
- Unreal Engine
Enable push for Xcode project
Unity needs to enable the Firebase push feature in the Xcode project.Before exporting the Xcode project, you need to complete the .projmods file configuration.
Player Network SDK has already written the following configuration into the INTLFirebaseKit.projmods file; you only need to ensure the information is correct.
{
    "group": "INTL",
    "libs": [],
    "frameworks": [],
    "files": [
        "Plugins/iOS/INTLSDK/INTLFirebase/GoogleService-Info.plist"
    ],
    "folders": [],
    "excludes": [],
    "headerpaths":[],
    "build_settings": {},
    "system_capabilities": {"com.apple.Push":"TRUE"},
    "Info.plist":{},
}
For more information on Xcode project export, see Player Network SDK XUPorter Solution.
After export is complete, enable Remote notifications under Capability > Background Modes > Push Notifications in the project.
iOS Push Adaptation
For Unreal Engine 4.21 and above, modify the following engine source code:
-
IOSAppDelegate.h
class APPLICATIONCORE_API FIOSCoreDelegates
{
public:
// Broadcast when this application is opened from an external source
DECLARE_MULTICAST_DELEGATE_FourParams(FOnOpenURL, UIApplication*, NSURL*, NSString*, id);
DECLARE_MULTICAST_DELEGATE_TwoParams(FApplicationHandleEventsForBackgroundURLSessionDelegate, NSString*, NSDictionary*); // Added code
static FOnOpenURL OnOpenURL;
static FApplicationHandleEventsForBackgroundURLSessionDelegate OnApplicationHandleEventsForBackgroundURLSessionDelegate; // Added code
}; -
IOSAppDelegate.cpp
extern bool GShowSplashScreen;

FIOSCoreDelegates::FOnOpenURL FIOSCoreDelegates::OnOpenURL;
TArray<FIOSCoreDelegates::FFilterDelegateAndHandle> FIOSCoreDelegates::PushNotificationFilters;
FIOSCoreDelegates::FApplicationHandleEventsForBackgroundURLSessionDelegate FIOSCoreDelegates::OnApplicationHandleEventsForBackgroundURLSessionDelegate; // Added code
- (void)application:(UIApplication *)application handleEventsForBackgroundURLSession:(NSString *)identifier completionHandler:(void (^)(void))completionHandler
{
FString Id(identifier);
FCoreDelegates::ApplicationBackgroundSessionEventDelegate.Broadcast(Id);
completionHandler();
NSDictionary* dict = [NSDictionary dictionaryWithObjectsAndKeys:completionHandler, @"handler", nil]; // Added code
FIOSCoreDelegates::OnApplicationHandleEventsForBackgroundURLSessionDelegate.Broadcast(identifier, dict); // Added code
}
Step 2: Register callback
Add the following callback for the push module.
- Unity
- Unreal Engine
| API | Function |
|---|---|
| AddPushBaseResultObserver | Add the BaseResult callback for the Player Network SDK push module. Used for handling interface callbacks for RegisterPush. |
| RemovePushBaseResultObserver | Remove the callback listener for BaseResult. |
| AddPushResultObserver | Add the PushResult callback for the Player Network SDK push module. Used for handling interface callbacks for AddLocalNotification. |
| RemovePushResultObserver | Remove the callback for PushResult. |
| API | Function |
|---|---|
| SetPushBaseResultObserver | Set the BaseResult callback for the Player Network SDK push module. |
| GetPushBaseResultObserver | Get callback for BaseResult. |
| OnPushBase_Implementation | Implement the BaseResult callback for the RegisterPush interface. |
| SetPushResultObserver | Set the PushResult callback for the Player Network SDK push module. |
| GetPushResultObserver | Get callback for PushResult. |
| OnPushResult_Implementation | Implement the PushResult callback for the AddLocalNotification interface. |
Step 3: Configure Notifications
Local Notification
Call the AddLocalNotification interface.
Remote Push
Send push notifications to all devices:
- Call the
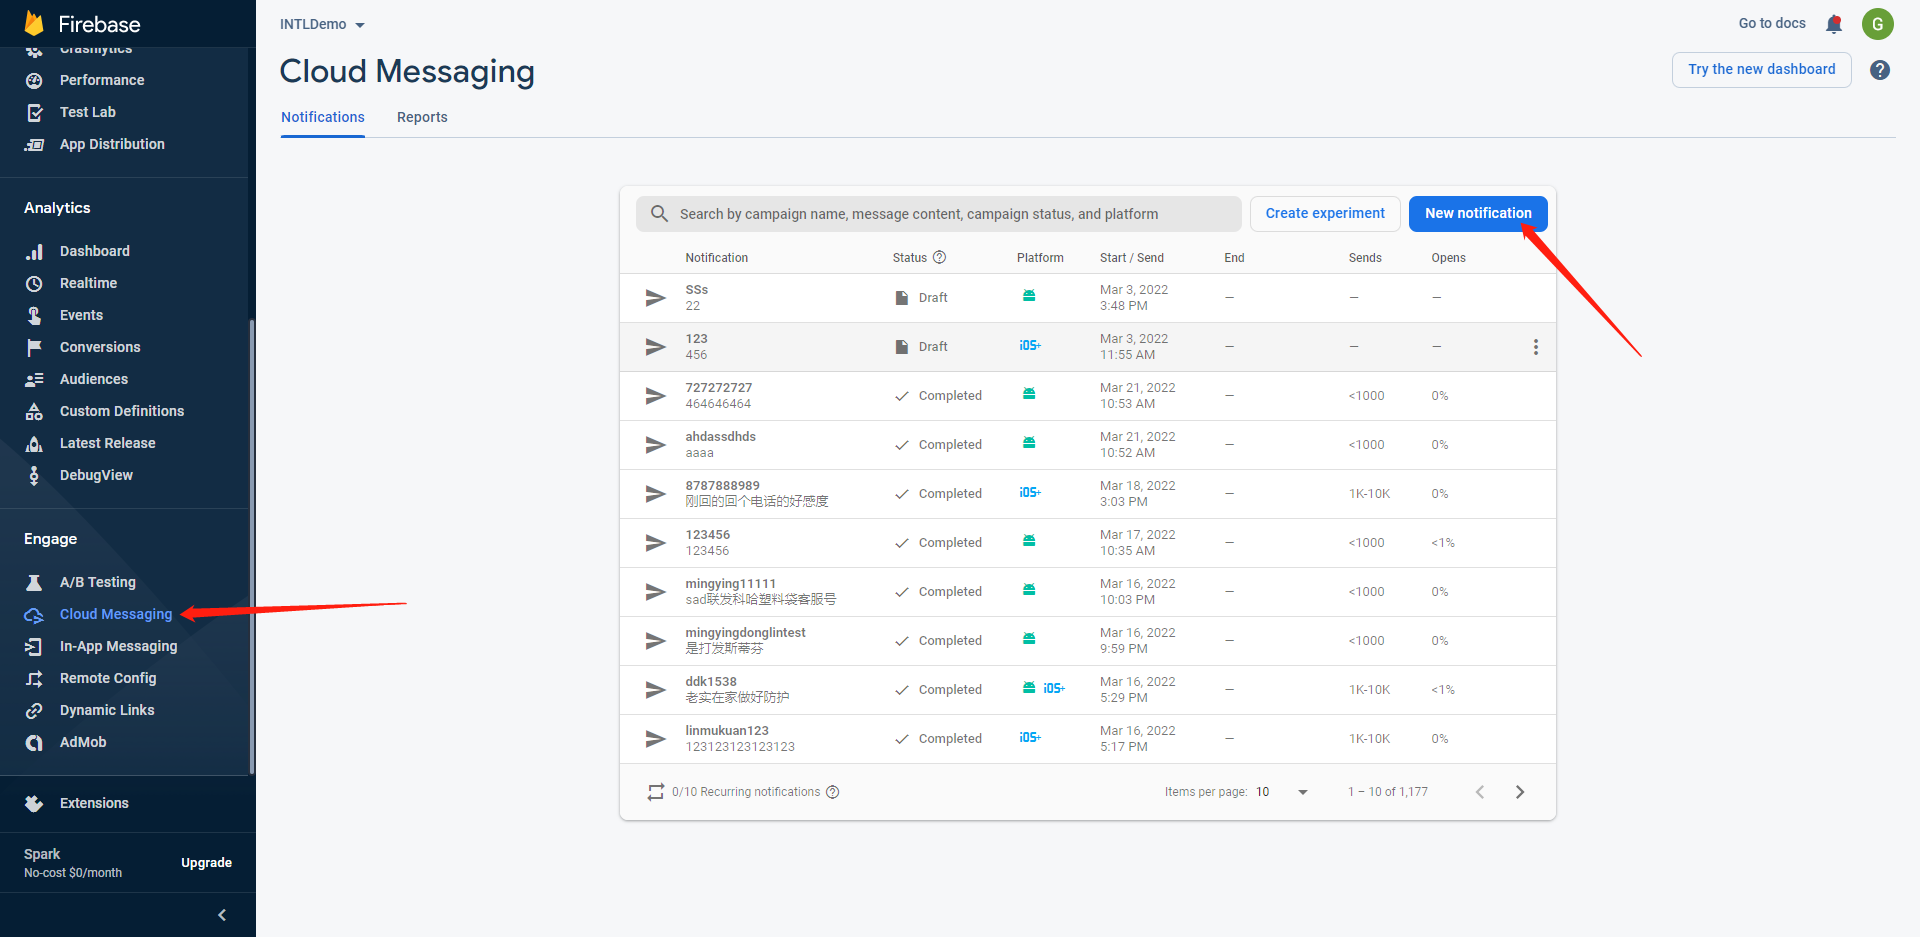
RegisterPushinterface in the game, then terminate the game. - In Firebase's backend, select Cloud Messaging, then click Create Notification.
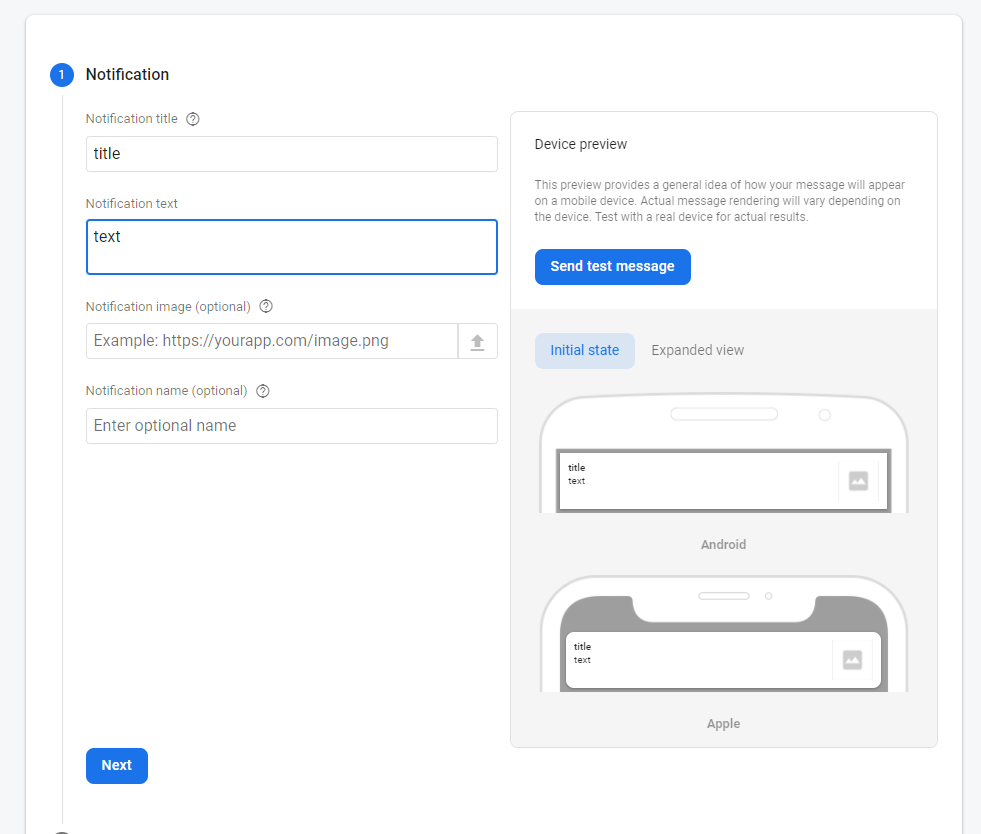
- Fill in the notification title and text, then click Next.
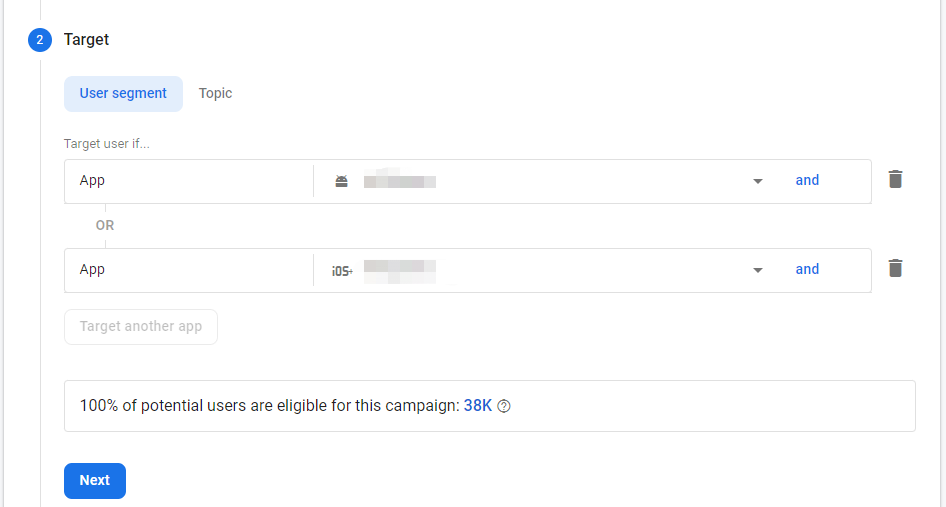
- Select the bundle to send to the application, then click Next.
- Select the time, then click Review.
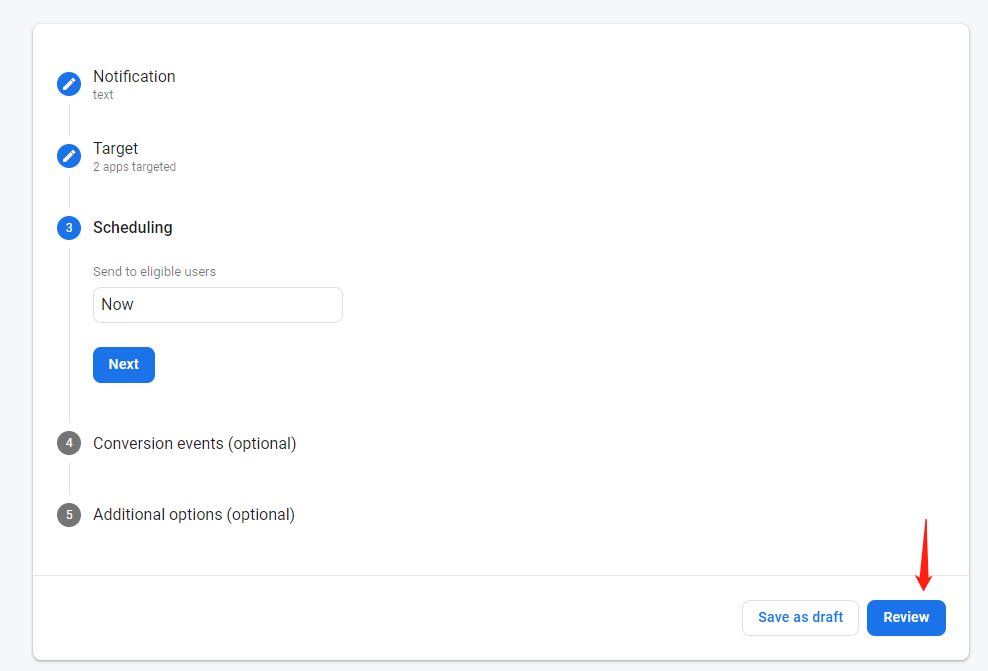
- Once reviewed, you can send the push notification.
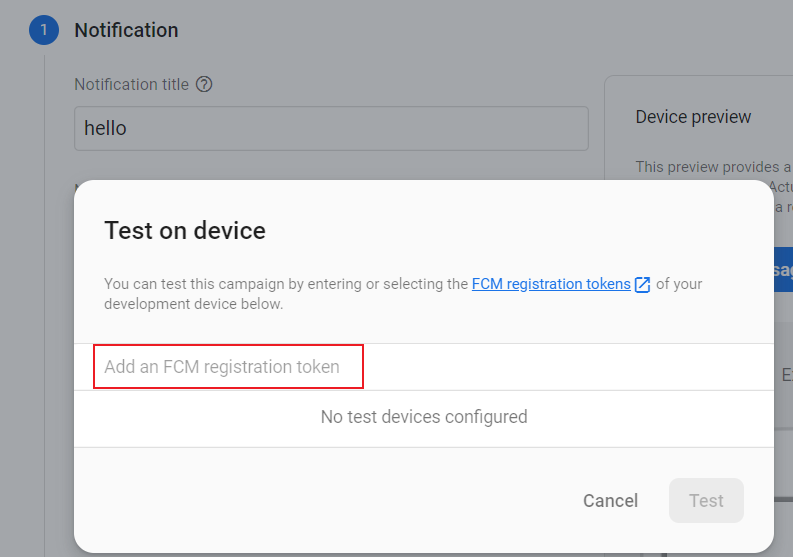
Send push notifications to pushToken registered devices:
- Call the
RegisterPushinterface in the game, then copy the FCM token from the logs and terminate the game.
- In Firebase's backend, select Cloud Messaging, then click Create Notification.
- Fill in the notification title and text, then click Send Test Message.
- Fill in the FCM token from the logs, then click Test to conduct the push test.
Push Interface
Clear iOS App Badge
- Unity
- Unreal Engine
The following badge clearing code needs to be added to the applicationDidBecomeActive method in the Classes/UnityAppController.mm file in the Xcode project directory.
[UIApplication sharedApplication].applicationIconBadgeNumber=0;
Example code:
- (void)applicationDidBecomeActive:(UIApplication*)application
{
    ::printf("-> applicationDidBecomeActive()\n");

    [self removeSnapshotView]; // Code may vary between Unity versions
    [UIApplication sharedApplication].applicationIconBadgeNumber=0; // Added code


    if (_unityAppReady)
    {
        if (UnityIsPaused() && _wasPausedExternal == false)
        {
            UnityWillResume();
            UnityPause(0);
        }
        if (_wasPausedExternal)
        {
            if (UnityIsFullScreenPlaying())
                TryResumeFullScreenVideo();
        }
        UnitySetPlayerFocus(1);
    }
    else if (!_startUnityScheduled)
    {
        _startUnityScheduled = true;
        [self performSelector: @selector(startUnity:) withObject: application afterDelay: 0];
    }

    _didResignActive = false;
}
Automatically add code by creating a XCodePostProcess.cs script.
- Assign the variable
codeto the badge clearing code in theEditorCodemethod. - Add the method through anchor code.Due to different Unity versions, please confirm whether
[self removeSnapshotViewController];or[self removeSnapshotView];is called in theapplicationDidBecomeActivemethod, and then use the corresponding result in Step 3. - Configure
unityAppController.WriteBelowaccording to the result of Step 2. - Call
EditorCodein theOnPostProcessBuildmethod. - Check if the built
UnityAppController.mmhas successfully added the badge clearing code.
private static void EditorCode(string filePath)
{
    // load UnityAppController.mm
    UnityEngine.Debug.Log("EditorCode: " + filePath);
    XClass unityAppController = new XClass(filePath + "/Classes/UnityAppController.mm");

    //add codes
    string codes = "[UIApplication sharedApplication].applicationIconBadgeNumber=0;"; // Added code
    unityAppController.WriteBelow("[self removeSnapshotViewController];", codes); // Added code
}
Register the callback function in the Initialize function of the INTLAppDelegate.mm file.
FCoreDelegates::ApplicationHasReactivatedDelegate.AddStatic(&ApplicationHasReactivatedDelegate_Handler);
New function added in INTLAppDelegate.mm file.
static void ApplicationHasReactivatedDelegate_Handler()
{
   [UIApplication sharedApplication].applicationIconBadgeNumber =0;
}
Push Status
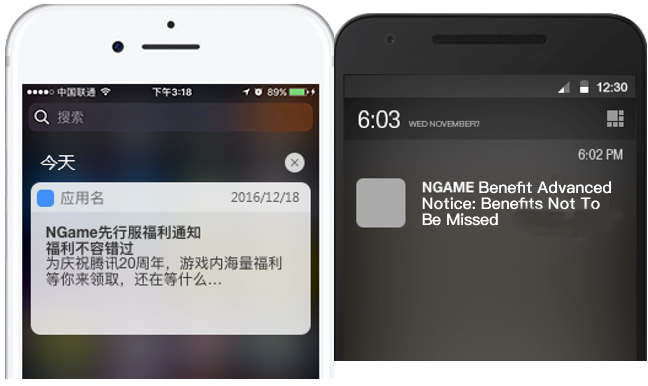
Notification display behavior in different scenarios:
| Status | iOS | Android |
|---|---|---|
| Foreground app | Not display | Not display |
| Background app | Display | Display |
| Exit app | Display | Display |
On iOS 10 and later, you can make notifications appear on the banner by modifying userNotificationCenter:, willPresentNotification:, and withCompletionHandler:. For details, see Apple Developer Documentation.
On Samsung devices, users need to go to Settings > Notifications > Sleeping apps and add your app to the exception (allow auto-start) list in order to receive push notifications when the app is closed.
For Xiaomi devices, background permissions in the battery settings should not be restricted to receive push notifications when the app is exited.When the app's memory is cleared, displayed notifications will also disappear.
Whether callbacks occur in different scenarios:
| Status | iOS | Android |
|---|---|---|
| Foreground app | Yes | Yes |
| Background app | No | No |
| Click Notification | Yes | No |
Push Notification API
- Unity
- Unreal Engine
| API | Function |
|---|---|
| RegisterPush | Register Push |
| UnregisterPush | Account Cancellation |
| AddLocalNotification | Add Local Notification |
| ClearLocalNotifications | Clear Local Notification |
| DeleteLocalNotifications | Delete Local Notification |
| API | Function |
|---|---|
| RegisterPush | Register Push |
| UnregisterPush | Account Cancellation |
| AddLocalNotification | Add Android Local Notification |
| AddLocalNotificationIOS | Add iOS Local Notification |
| ClearLocalNotifications | Clear Local Notification |
| DeleteLocalNotifications | Delete Local Notification |
If you encounter issues during integration, please refer to the FAQs.
