Account Center
Users can manage their projects in the Account Center:
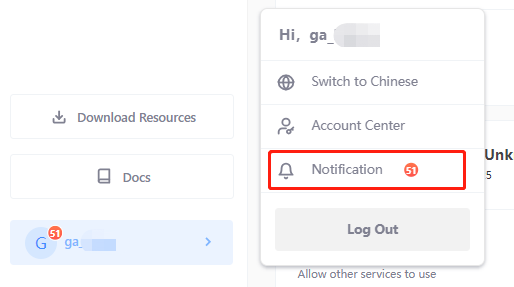
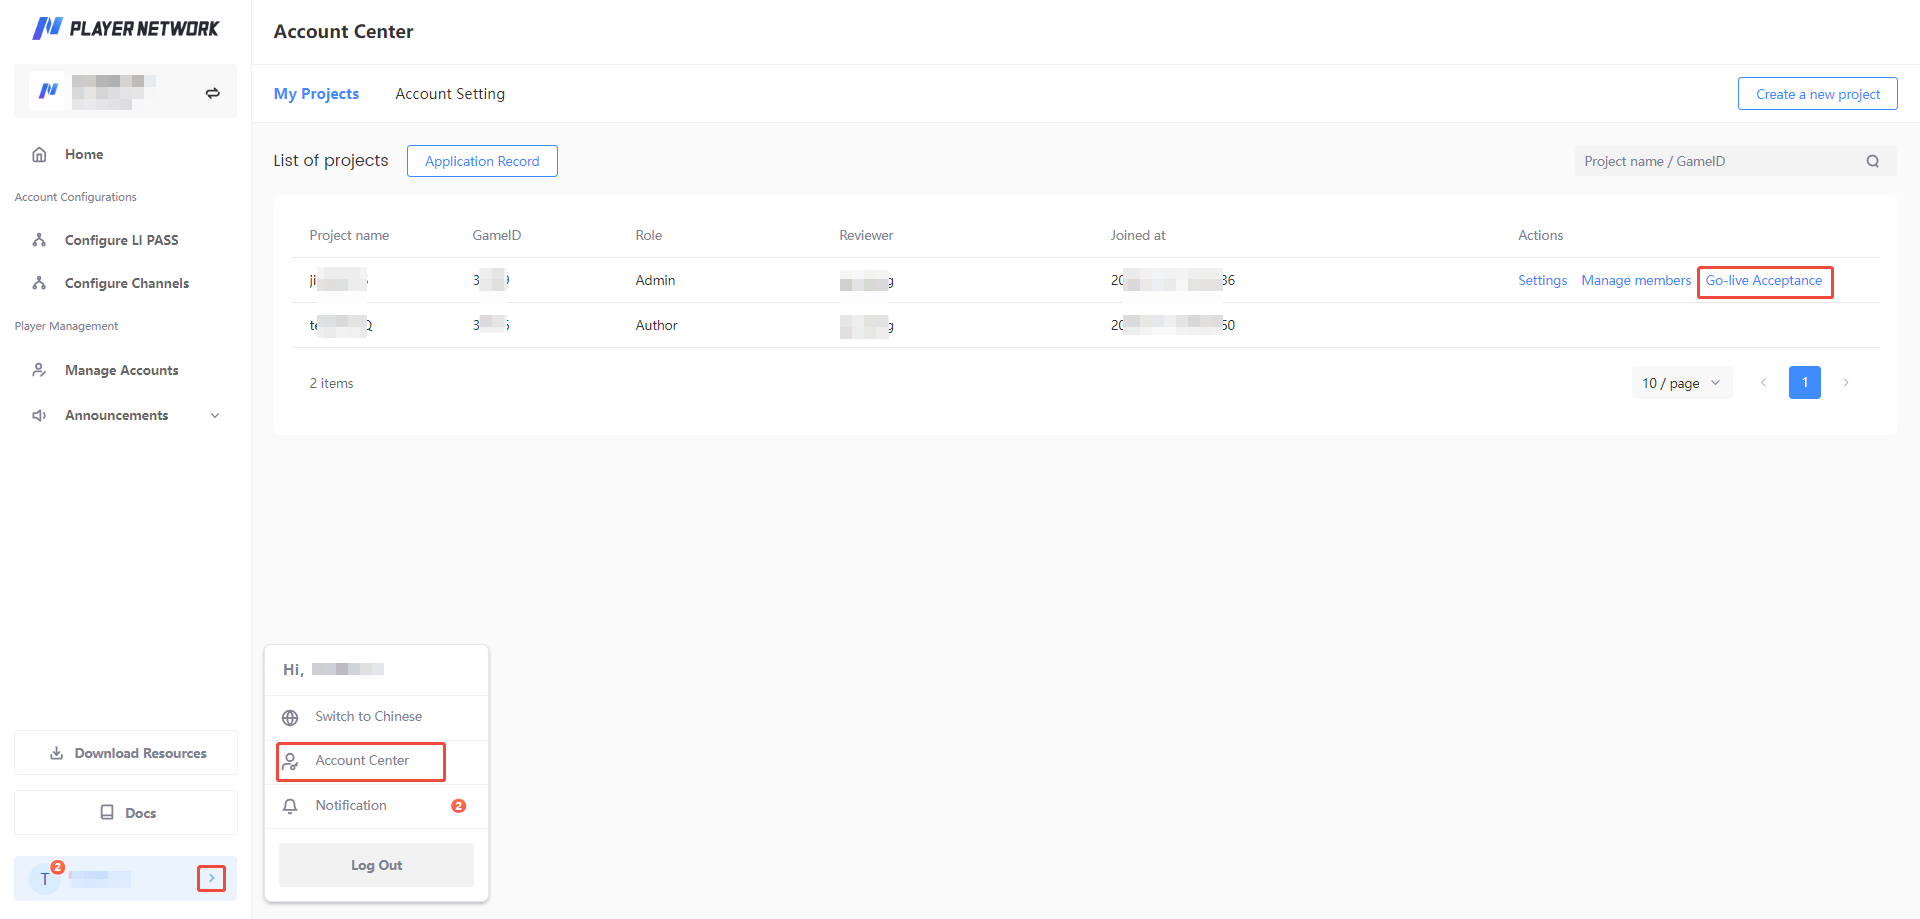
- Click the account username at the bottom of the left sidebar.
- [Optional] Click Switch to English to change the displayed language of the page, and click Message Notifications to view received message notifications.
For more information, see Message Notifications. - Click Account Center.
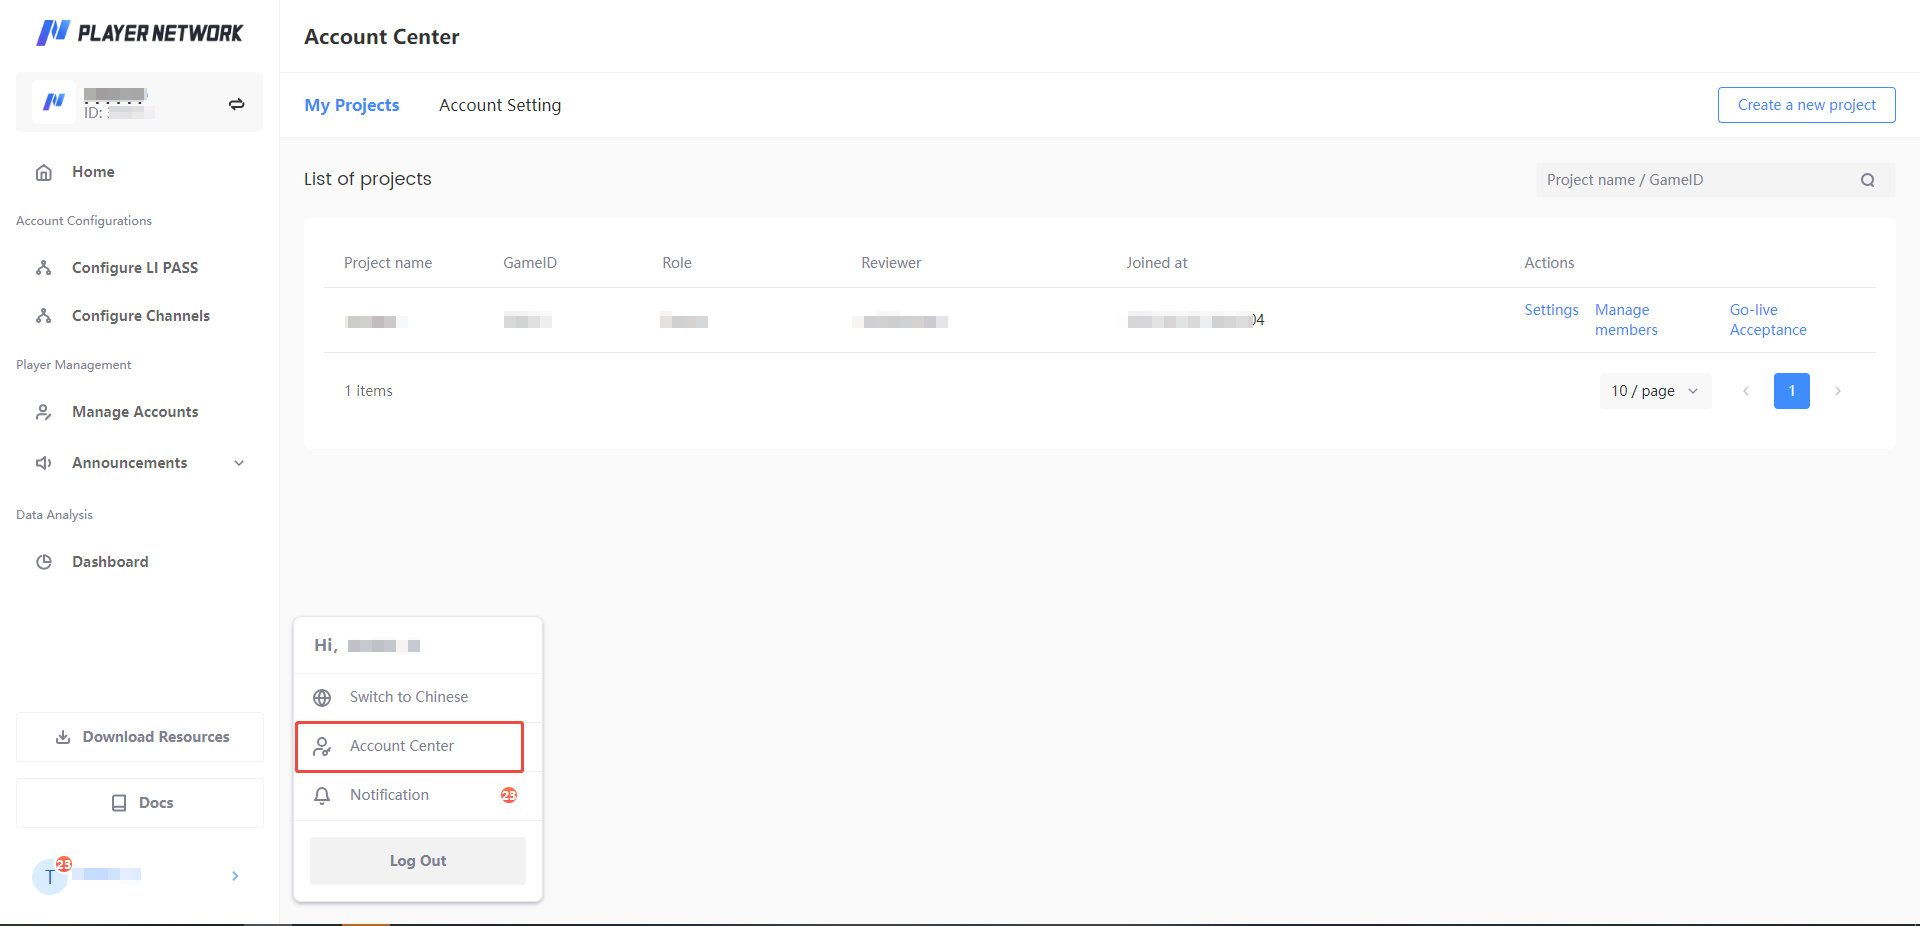
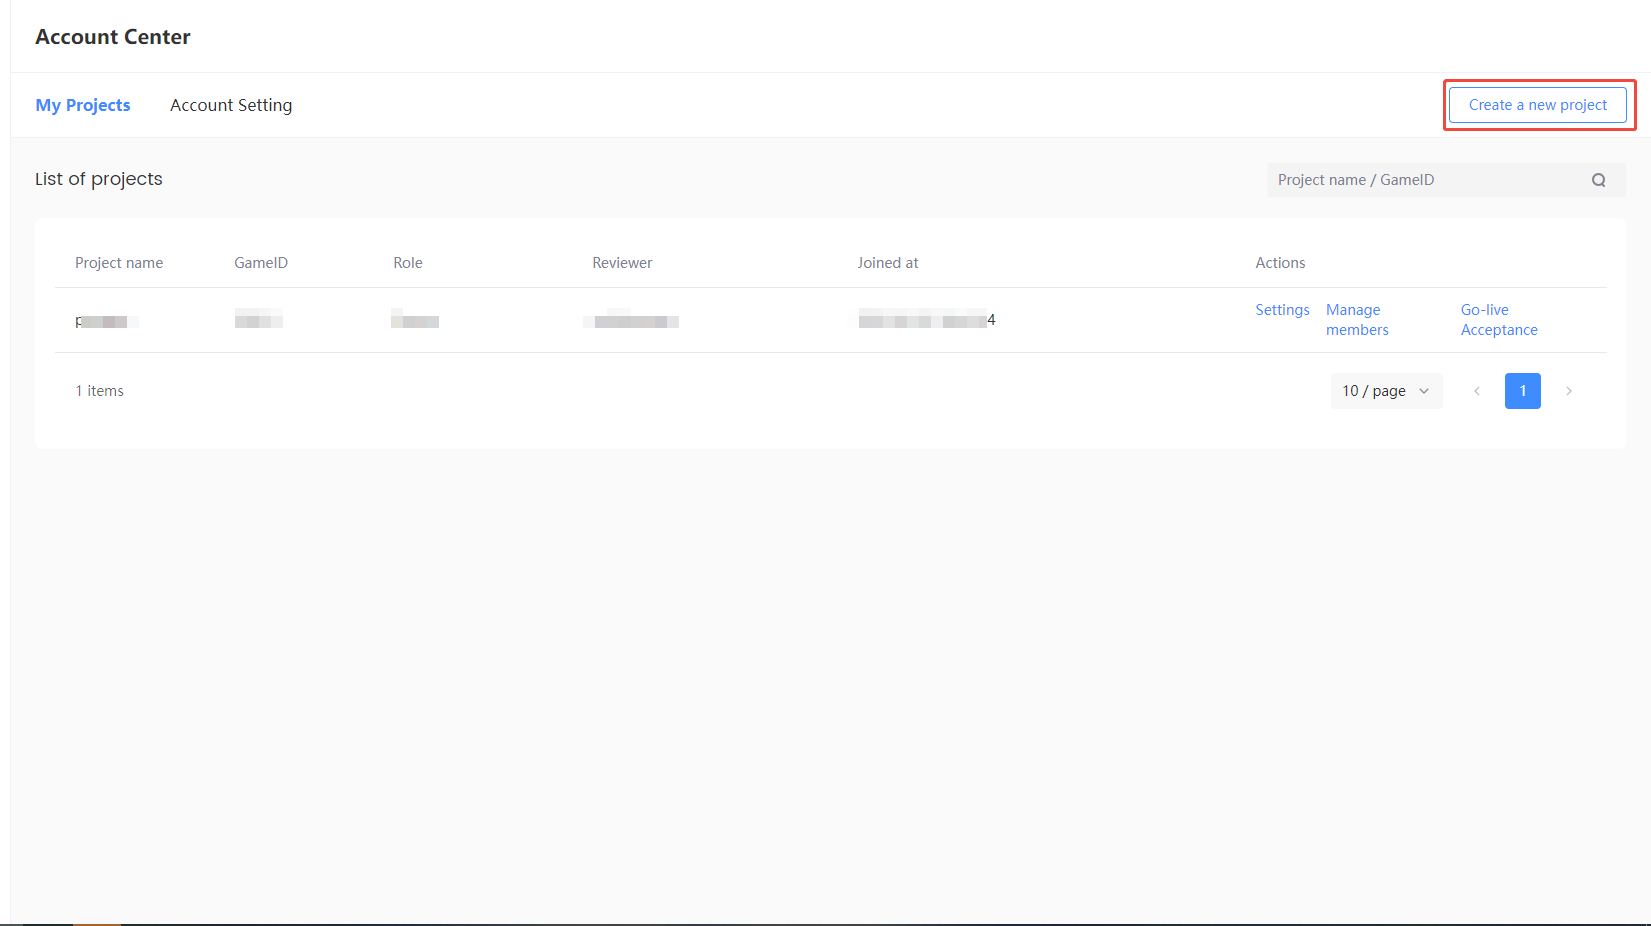
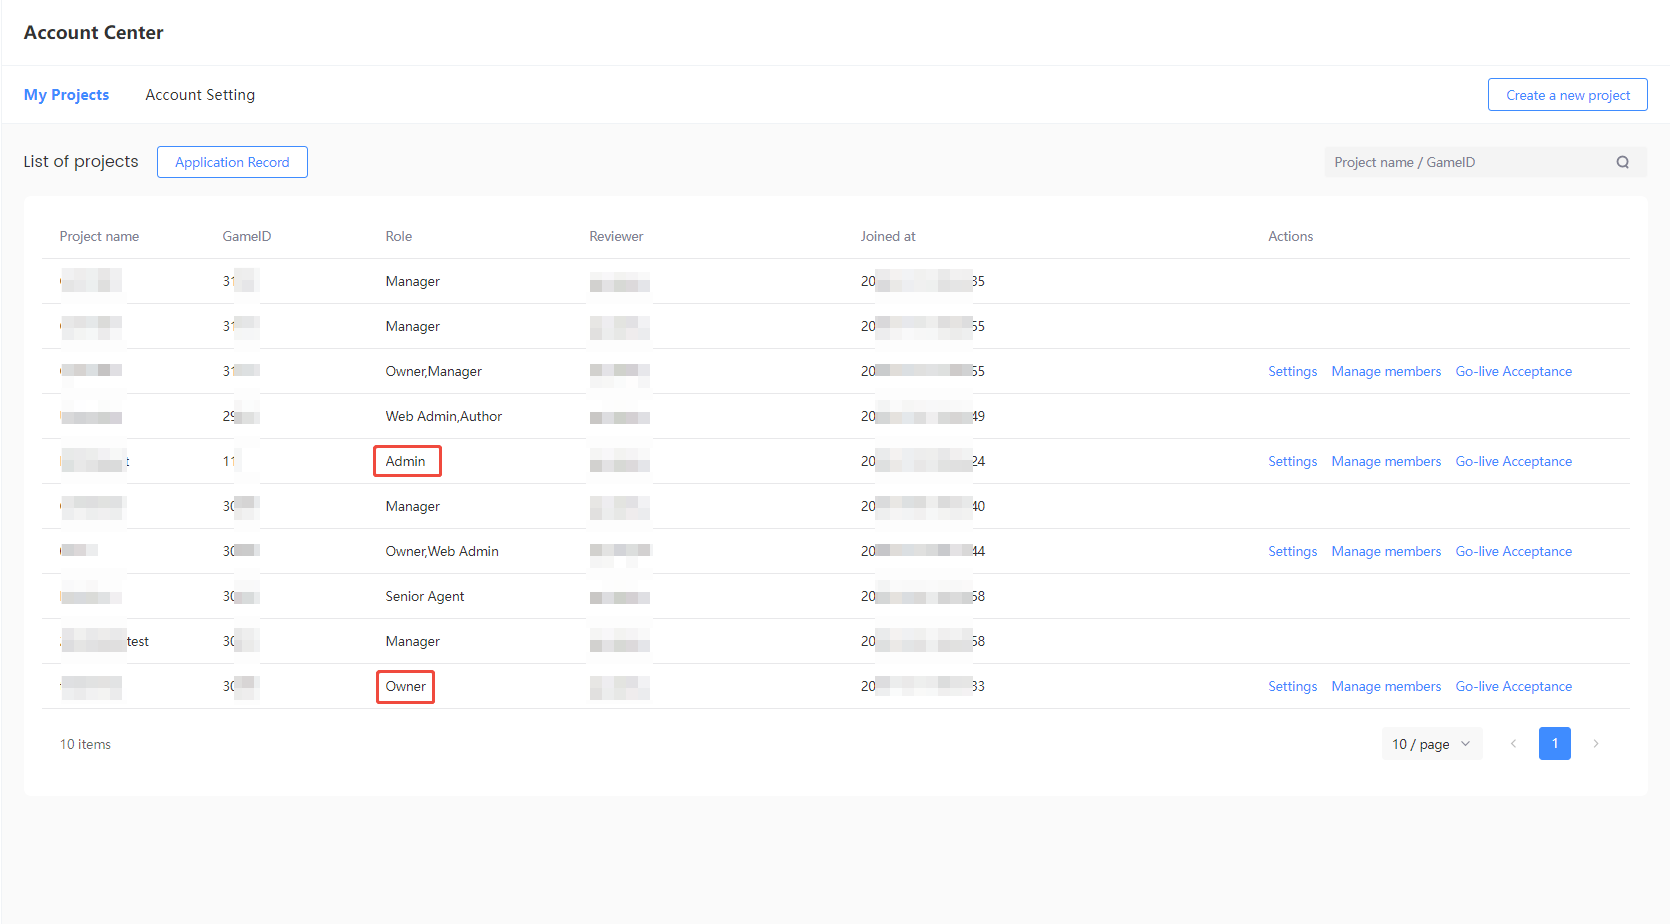
My Projects
Create a New Project
-
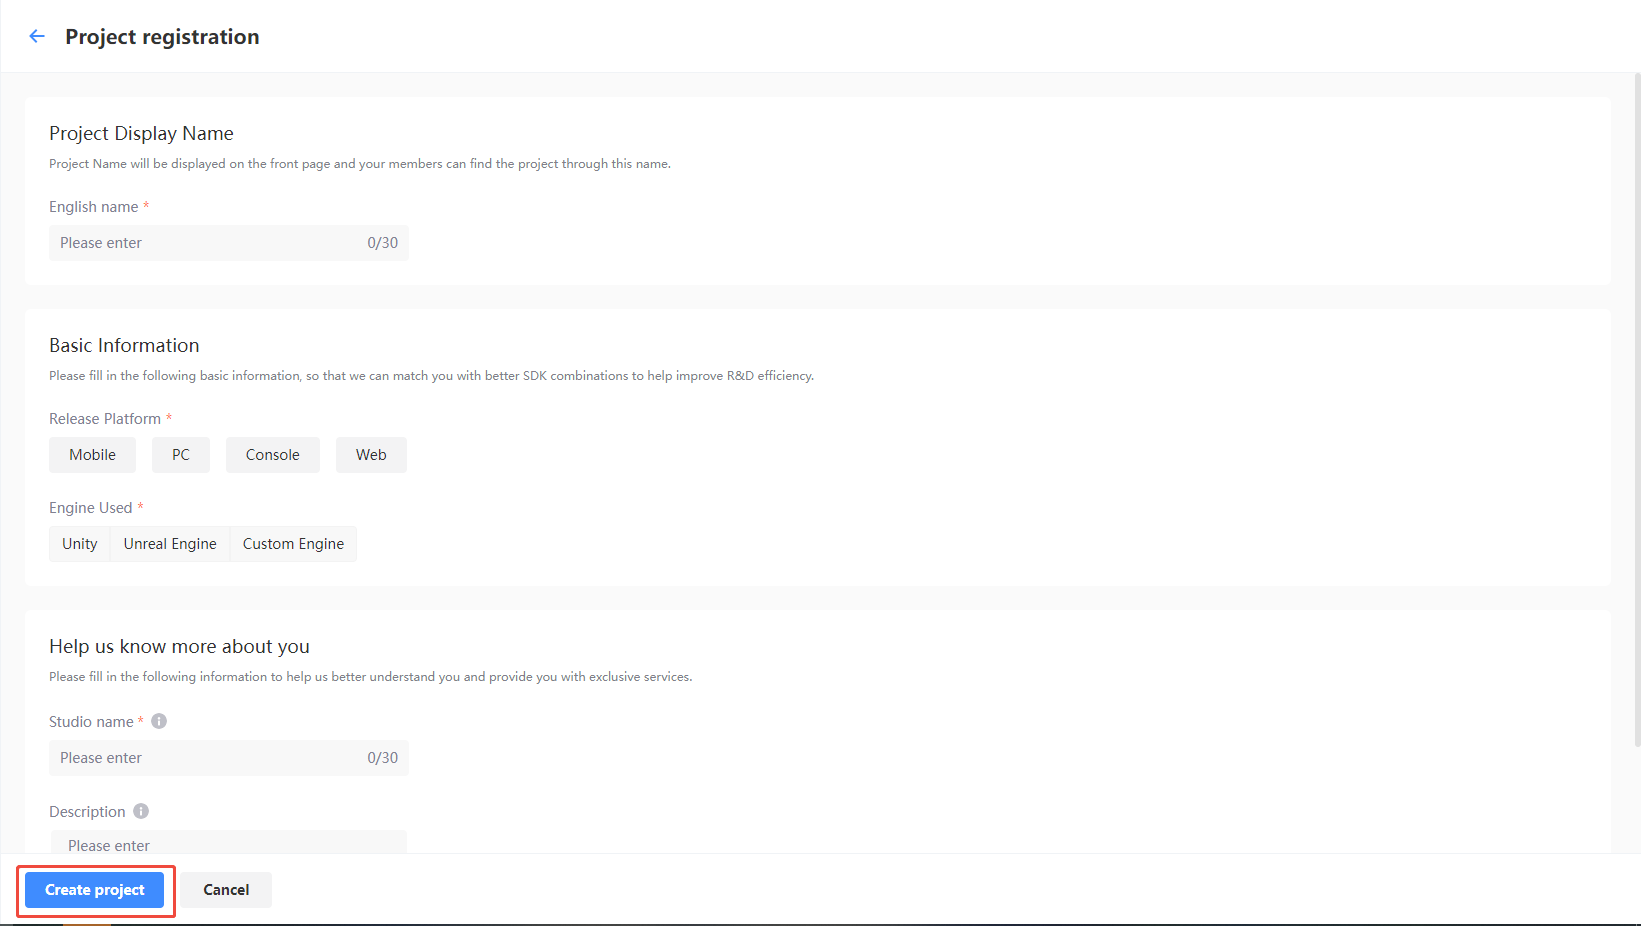
Click Create New projects in the Account Center to enter the Register projects page.
-
Enter basic project information and click Create Project. After that, wait for the Platform Admin to approve the application to complete the registration.
-
After submitting a project creation application, you can check the project’s approval status in the Application Record section of the Account Center page.
-
After the projects creation application is approved/denied, a notification email will be received, and the Player Network message notification will also synchronize the approval result. After the application is approved, you can switch to this projects to complete account-related operations.
After approval, the projects registration is successful and the user who submitted the application automatically becomes the owner of the projects.
For any questions regarding projects approval, please contact the Player Network representative.
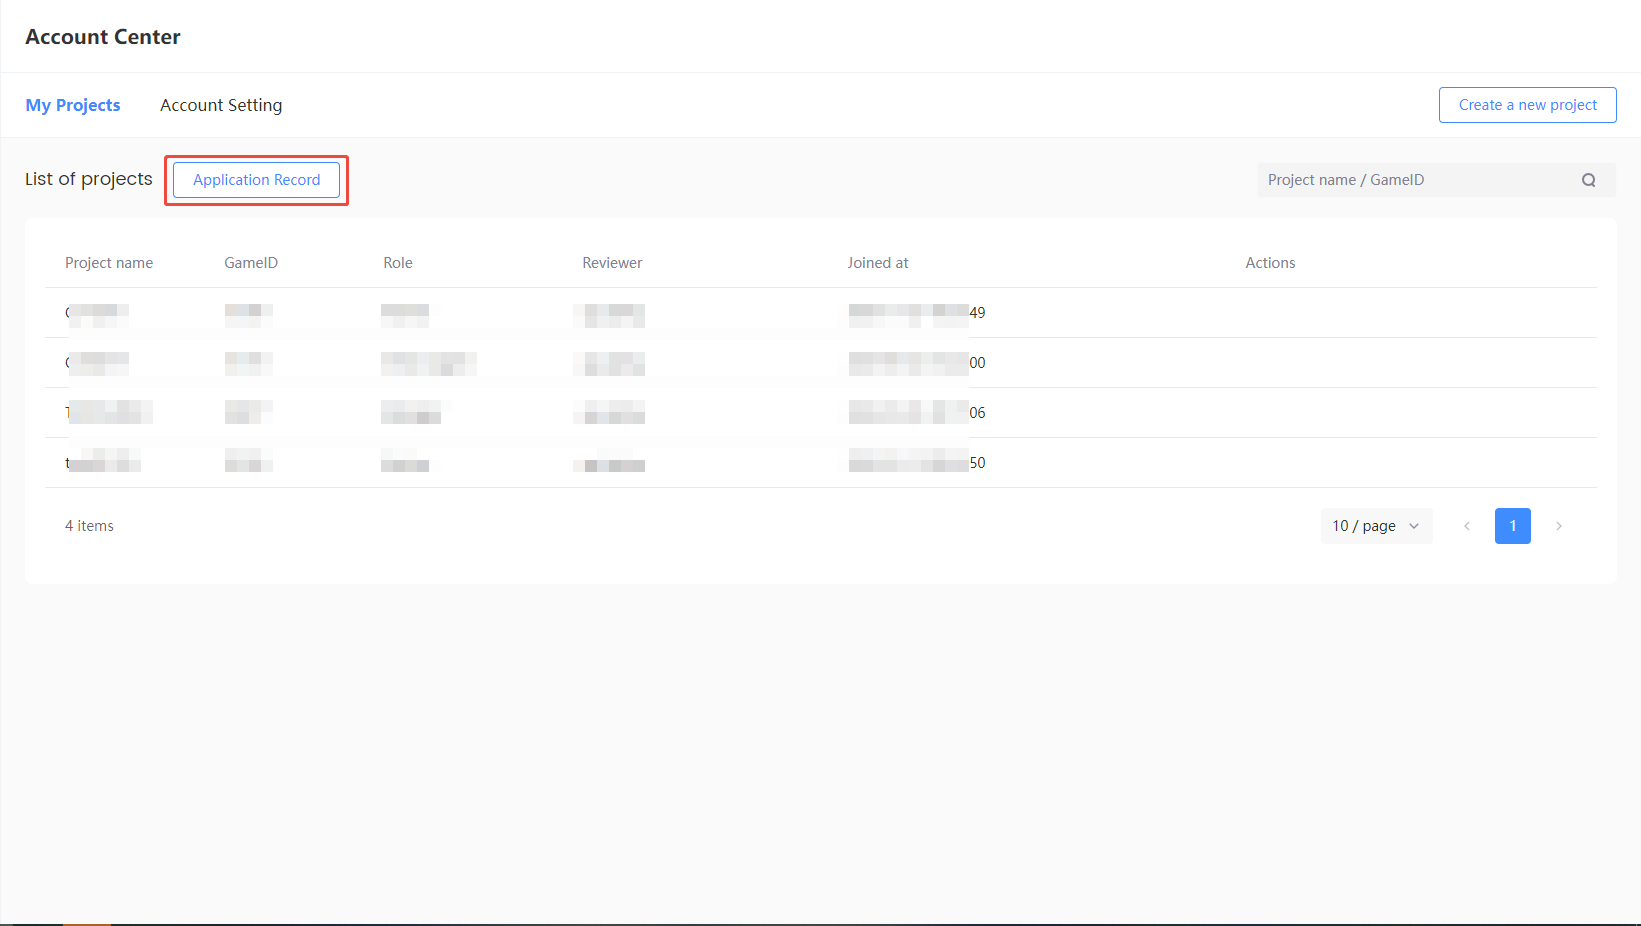
Application Record
If the user currently has project records with the statuses of Pending Review and Rejected, the entry to this feature will be displayed. This feature is only used to query project records.
If you have any questions regarding project approval, you may contact the Player Network Support Team.
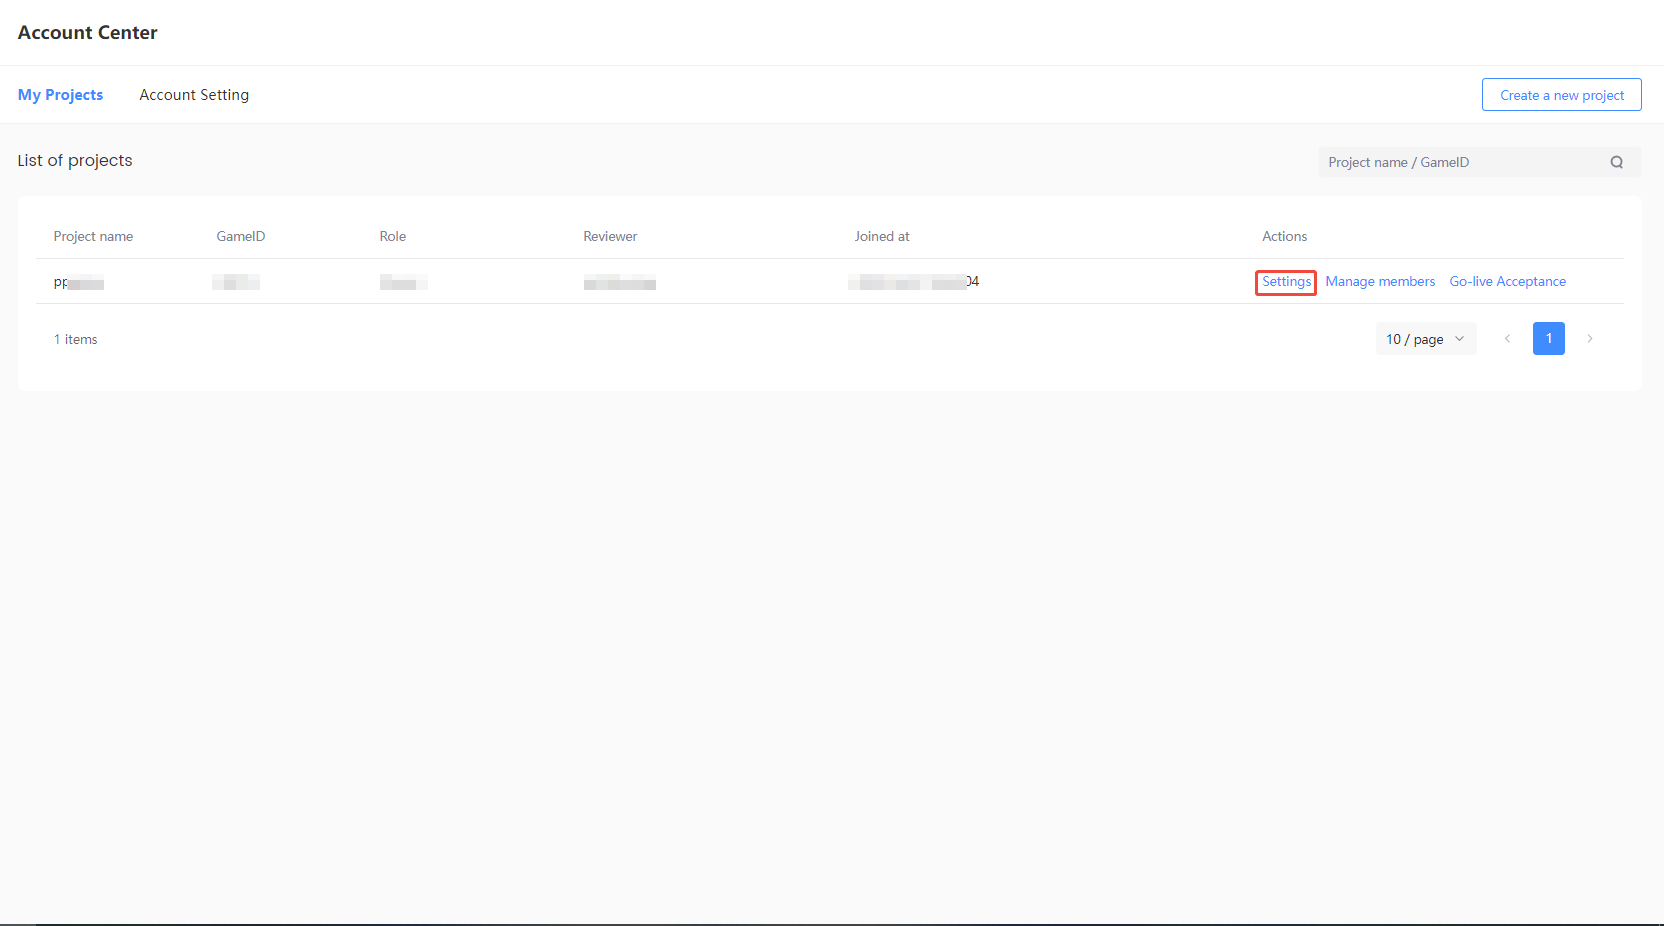
Settings
View project information via Settings, which includes the project's Basic Information and Client Params/Secret Key, such as the publishing platform, game engine, and key information.
- Login to the Player Network Console, enter the Account Center, and click Settings.
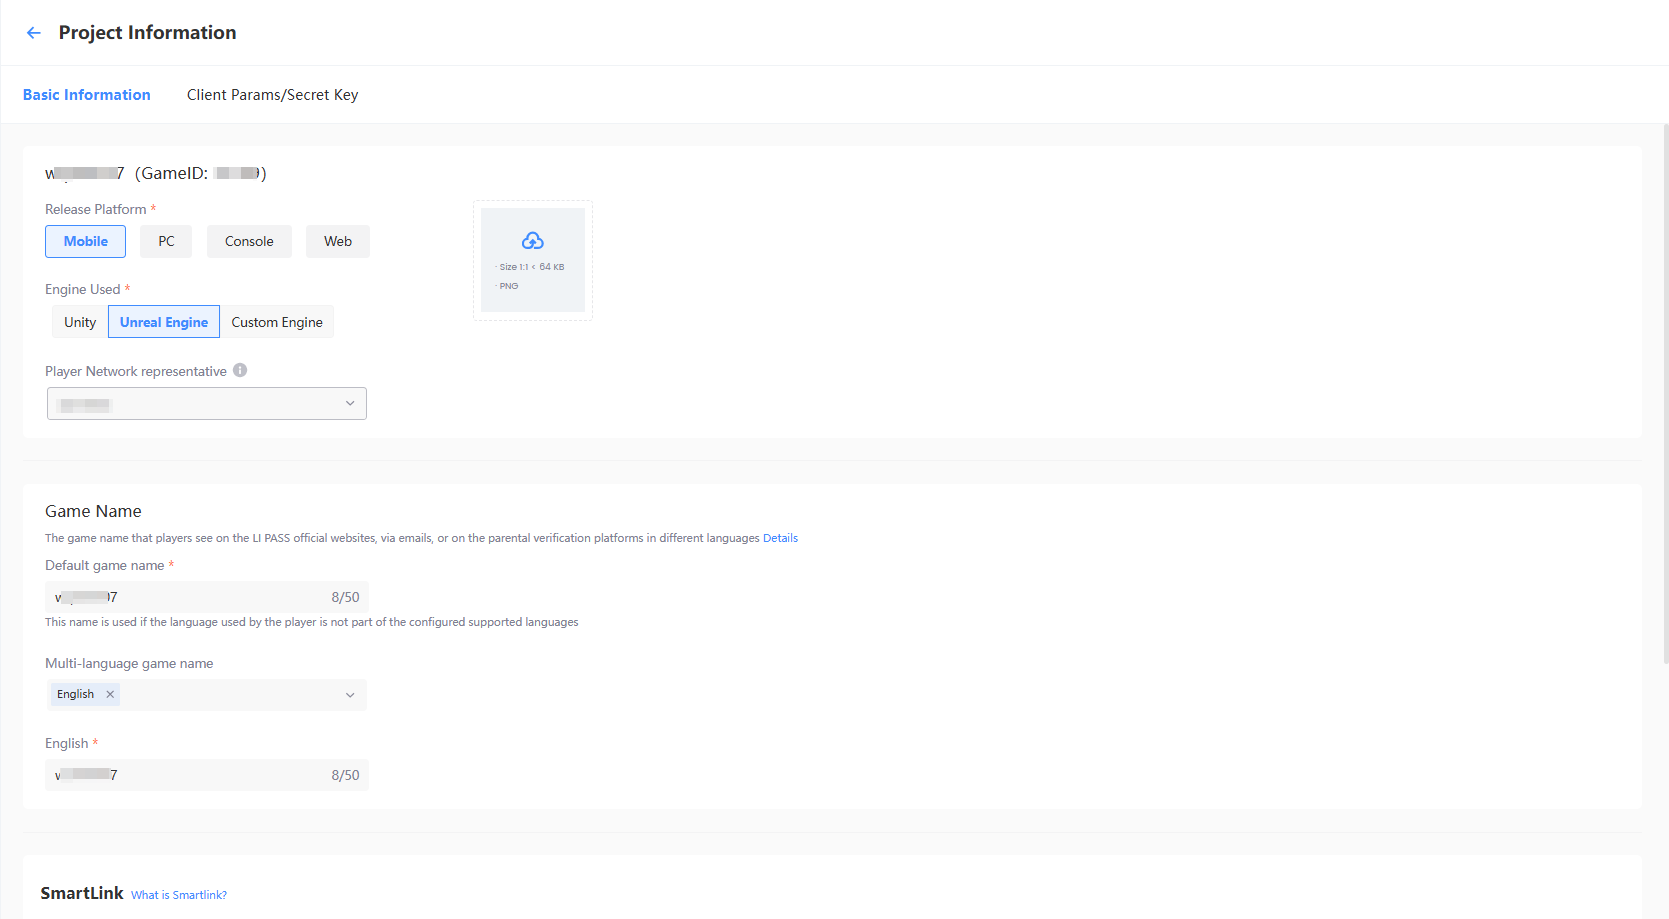
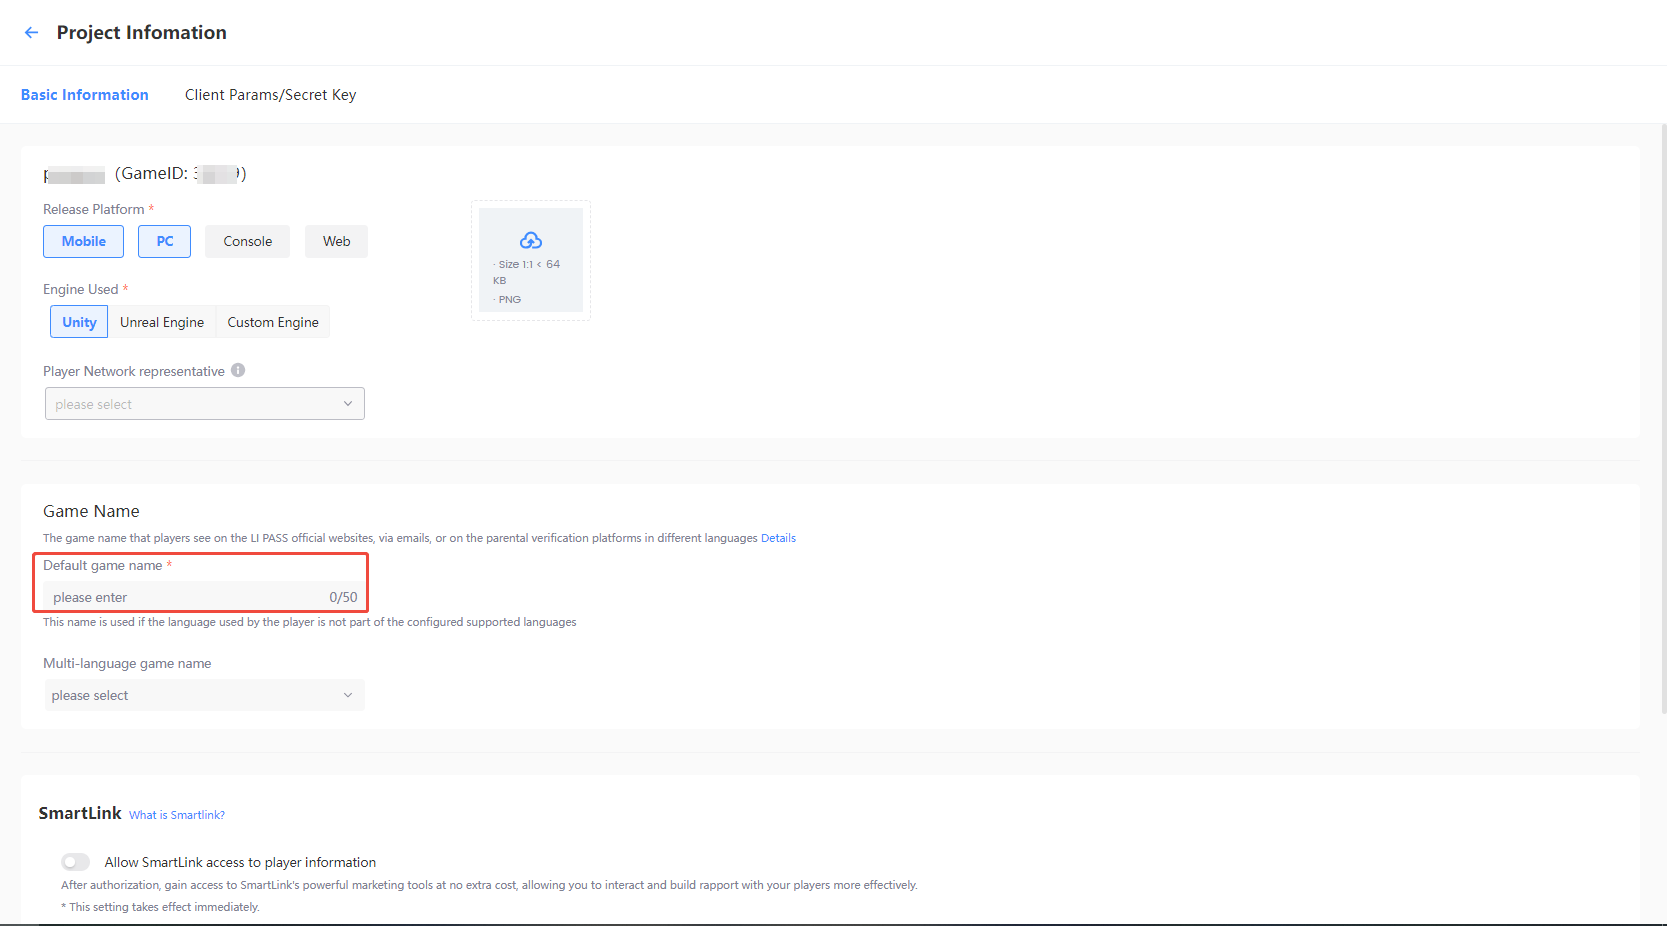
Basic Information
It includes information such as the Project Name, GameID, and Publishing Platform, as well as the Game Name, SmartLink, and deployment cluster information.
Project Name
The project name is what players will see on different languages in the LI PASS official site / email / Parent Authentication platform.
-
Select Game Name under Basic Information.
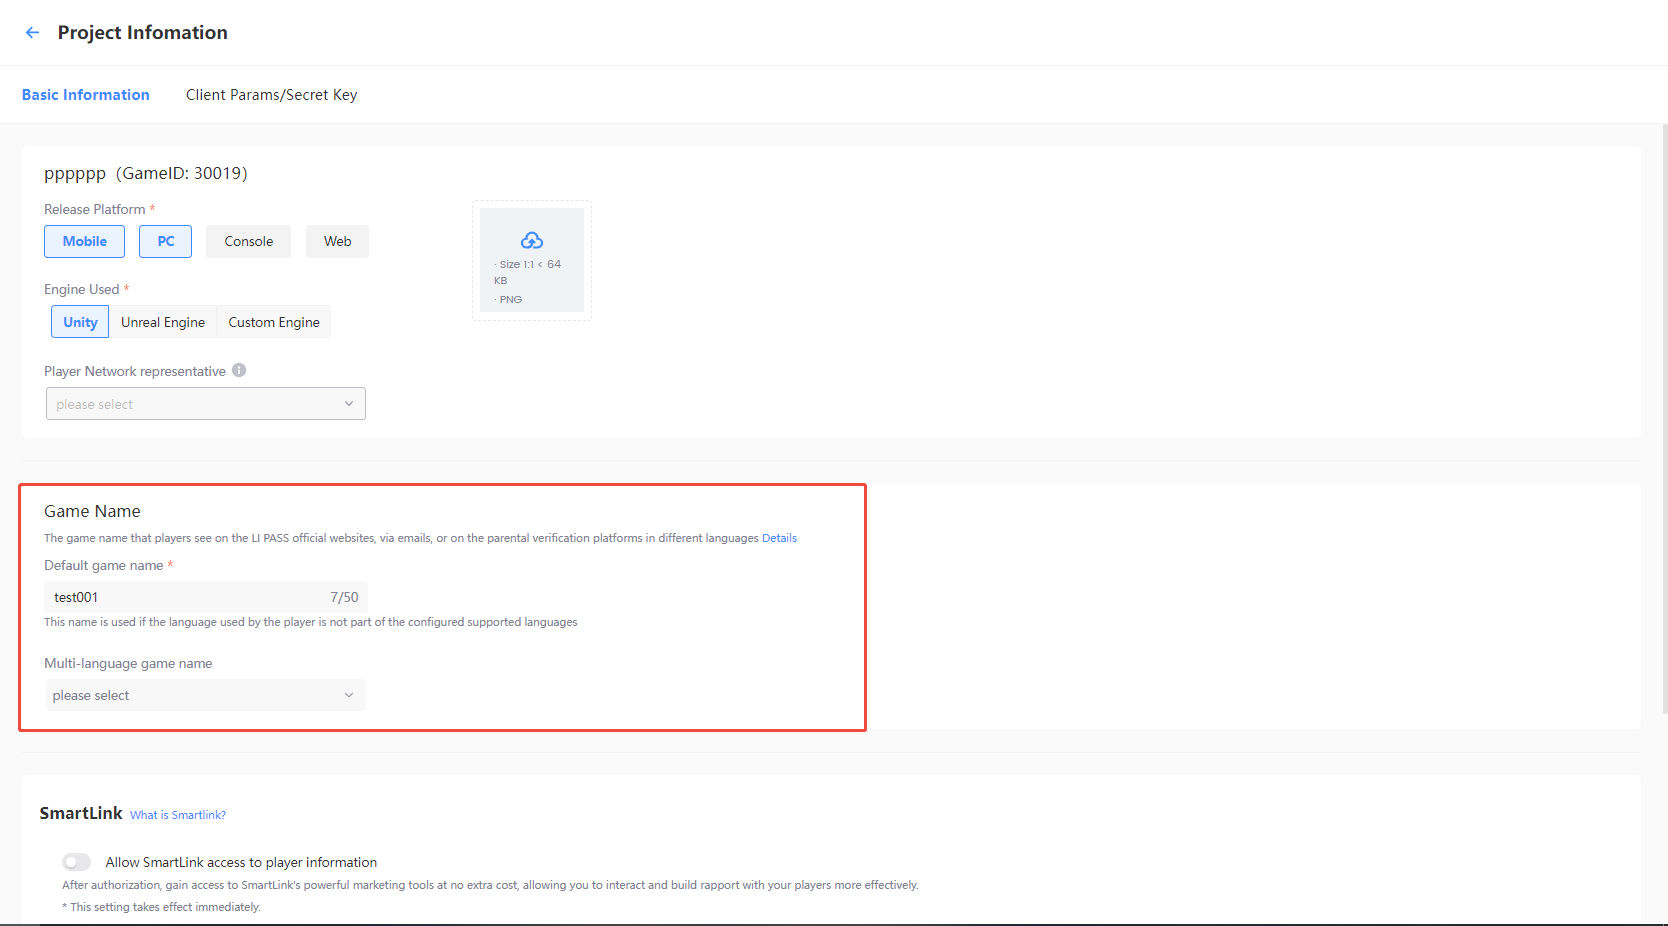
-
Select the language corresponding to the languages supported by the game.If the language used by the player exceeds the configured language range, the Default Game Name will be used.
-
Configure the game name for different languages based on your selection.

SmartLink authorization
After authorization, gain access to SmartLink's powerful marketing tools at no extra cost, allowing you to interact and build rapport with your players more effectively.
If enabled, SmartLink will be able to retrieve the email addresses of your players, assisting you in your targeted marketing operations.
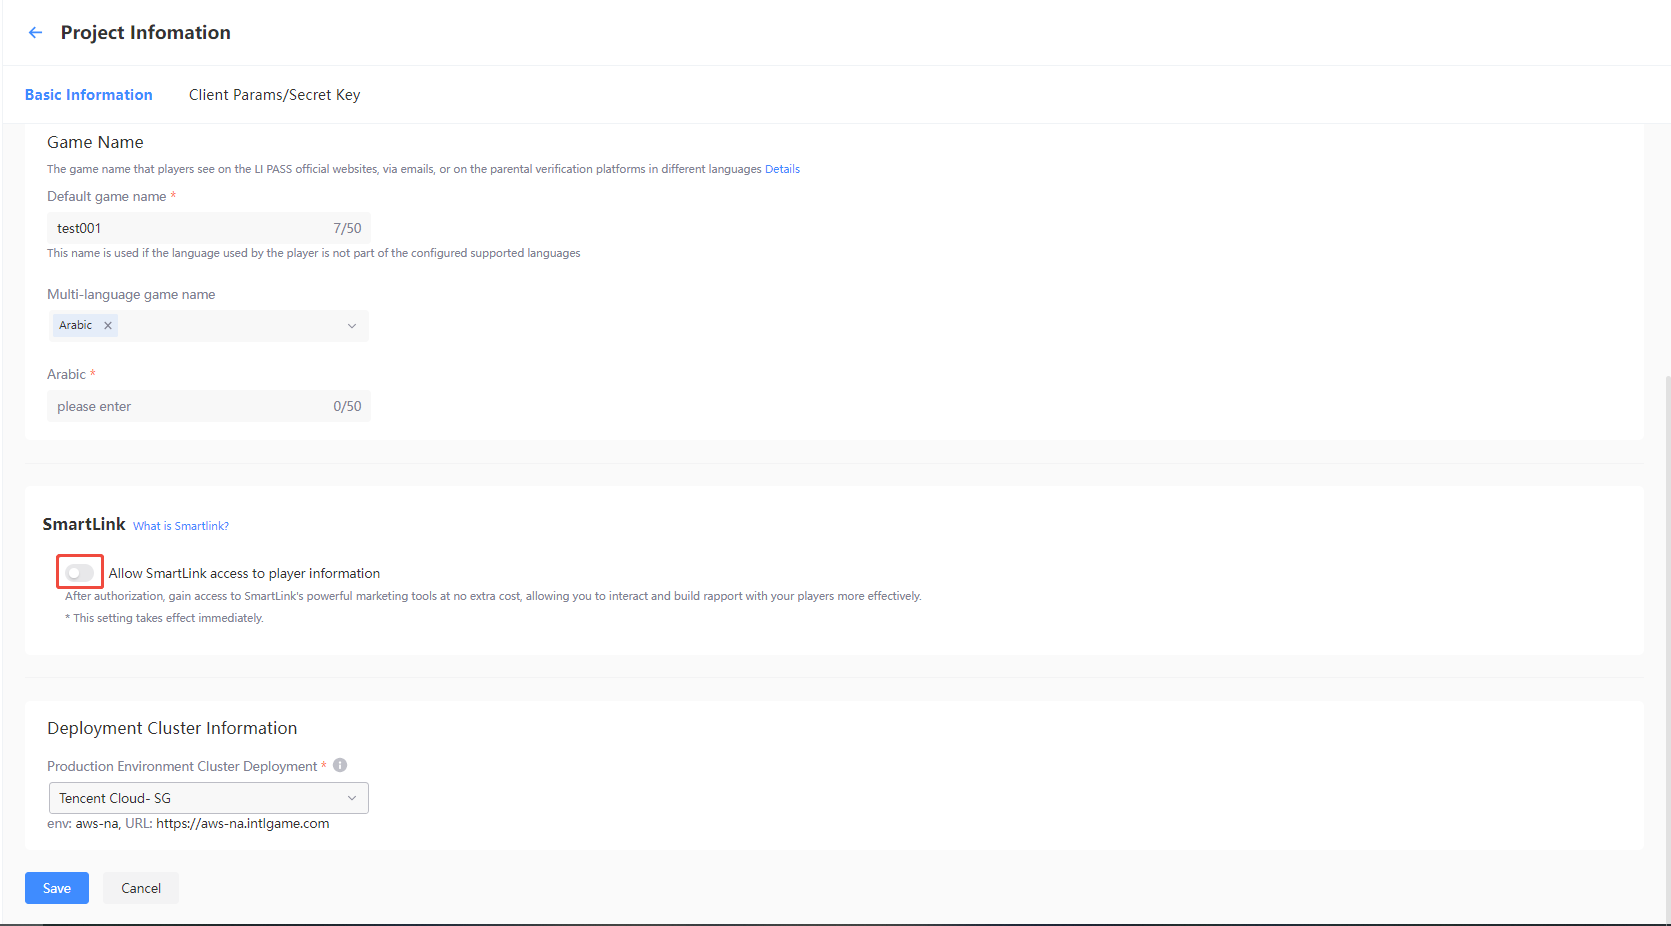
Obtain Deployment Cluster Information
The deployment cluster information of a project can be confirmed on the Project Information page. By default, it is determined by the deployment cluster selected during project registration and the current environment.
- Environment: Represents the value of the
envfield where the SDK runs, required for JSSDK, configured during SDK instantiation. - URL: Represents the value of the
INTL_URLfield for the Player Network SDK back-end service URL, required for Player Network SDK, configured withinINTLConfig.ini.
Obtain Keys
Once the project registration and approval is completed, the Player Network Console will generate the SDK Secret Key and LI PASS Basic Parameters & Secret Key for the Project.
You can view the two sets of key information, SDK Secret Key and LI PASS Basic Parameters & Secret Key, via the Client Params/Secret Key section.
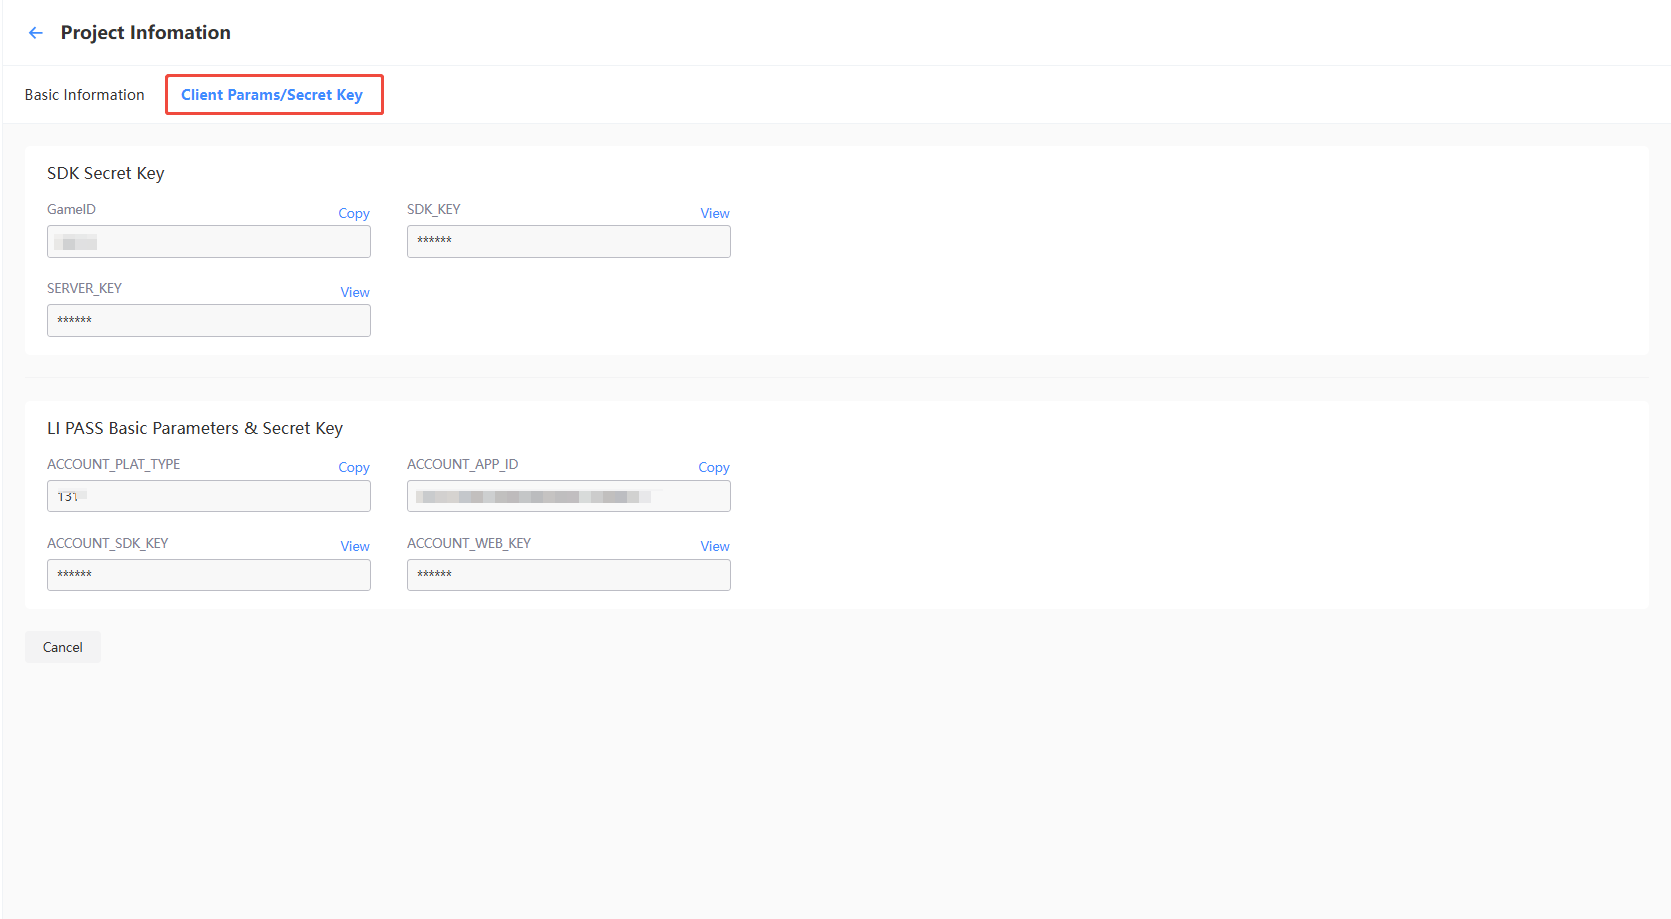
GAME_ID: The unique identifier for the business.SDK_KEY、SERVER_KEY:Keys used for generating signatures on the client, backend server, and Web end respectively.ACCOUNT_PLAT_TYPE,ACCOUNT_APP_ID,ACCOUNT_SDK_KEY,ACCOUNT_WEB_KEY: for login configuration.
Only the Owner and Admin have permission to obtain these key details.Ordinary users, please contact the project Admin to request key information.
You may verify whether you have the appropriate permissions via the My Projects page in the Account Center.
Invite Users to Join projects
The Owner and Admin of the project can directly invite other users to join the project. Invitees do not need to apply for project permissions; they will gain access directly.
Users can be invited through the following methods:
- User Invitation: Send an email to invite users to join the project. Unregistered users need to create a Player Network account first.
- User Authorization: Directly grant project permissions to registered Player Network users.
For more information, see Roles and Permissions.
User Invitation
-
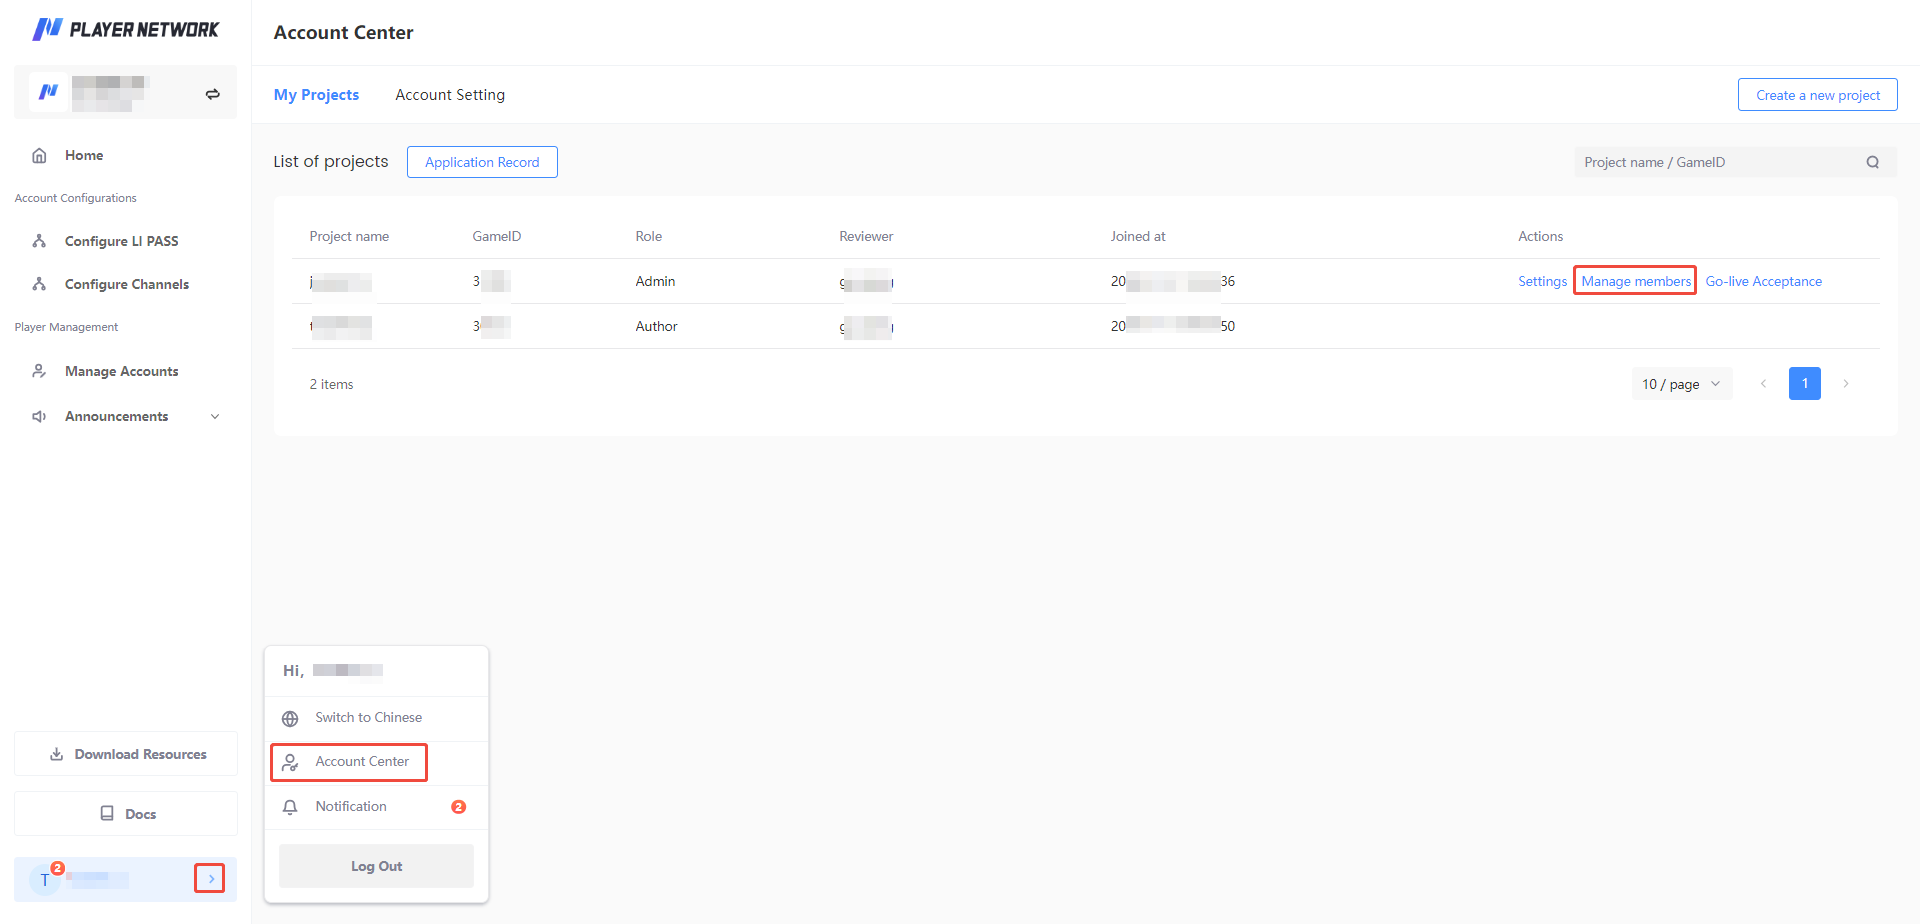
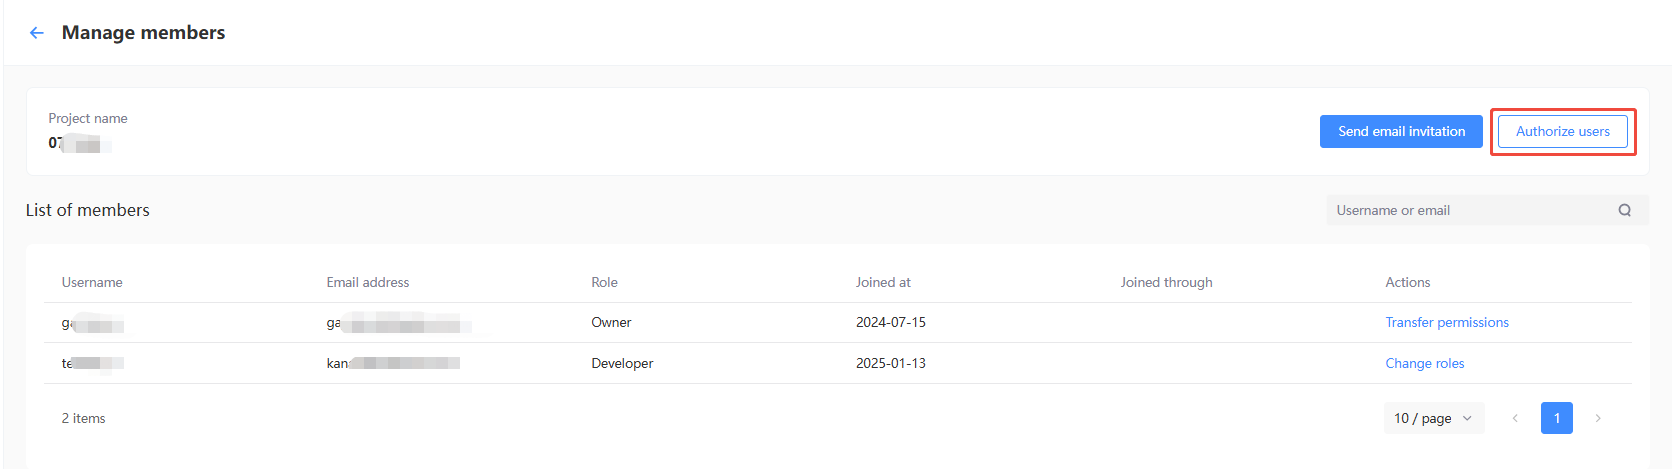
Go to My Project page from Account Center and click Members Management.
-
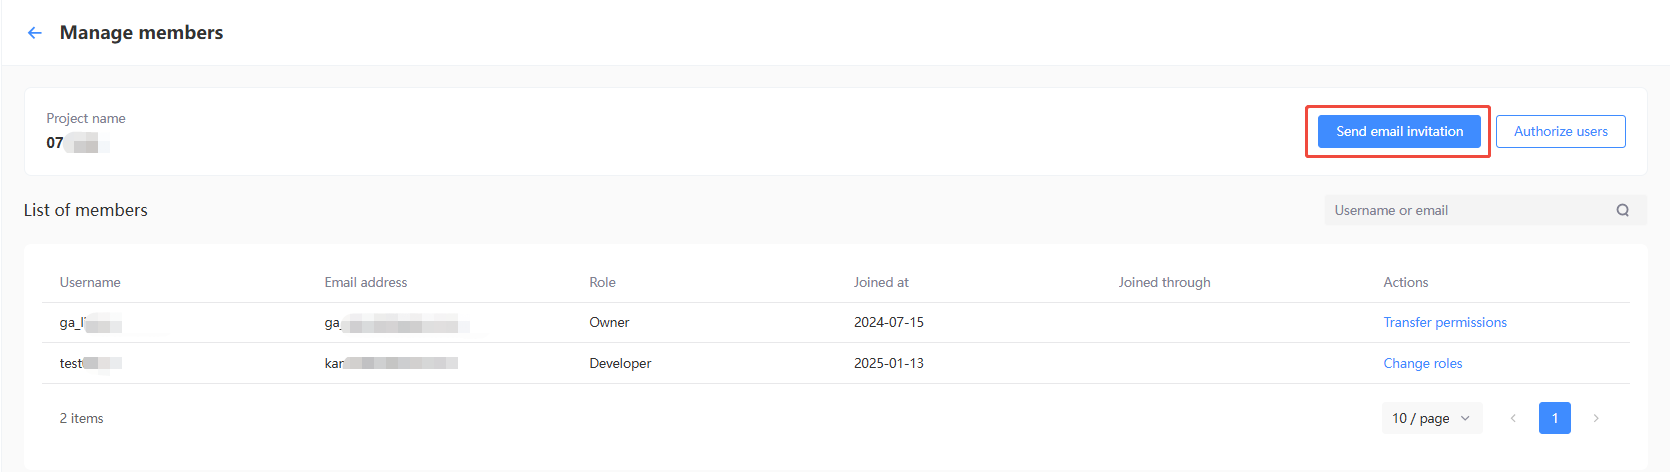
Under Member List, click User Invitation.
-
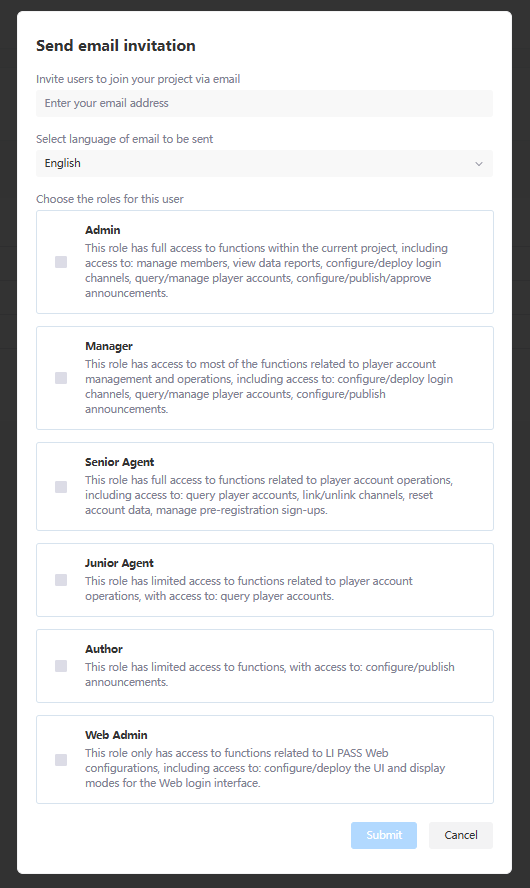
In the pop-up window, enter the email of the invitee, select the corresponding role, and click Submit.
-
After the invitation email is sent, the invitee can check the email invitation and click Join Now to enter the Player Network Console.
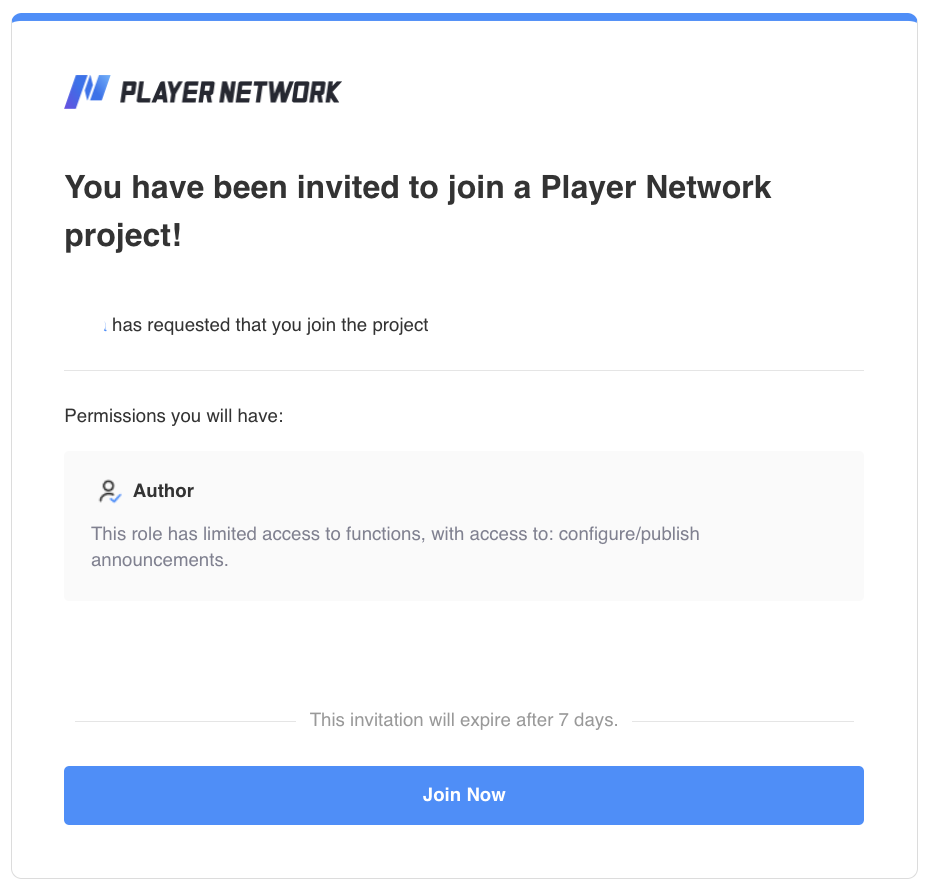
If the invitee already has a Player Network account, they can bind an existing account to join the project.
If the invitee does not have a Player Network account, please refer to Create Account or Log in via iOA Account. create a Player Network account, join the project.
User Authorization
-
Go to My Project page from Account Center and click Members Management.
-
Under Member List, click User Invitation.
-
In the pop-up window, enter the email of the invitee, select the corresponding role, and click Submit.Please ensure the username entered is correct and complete.
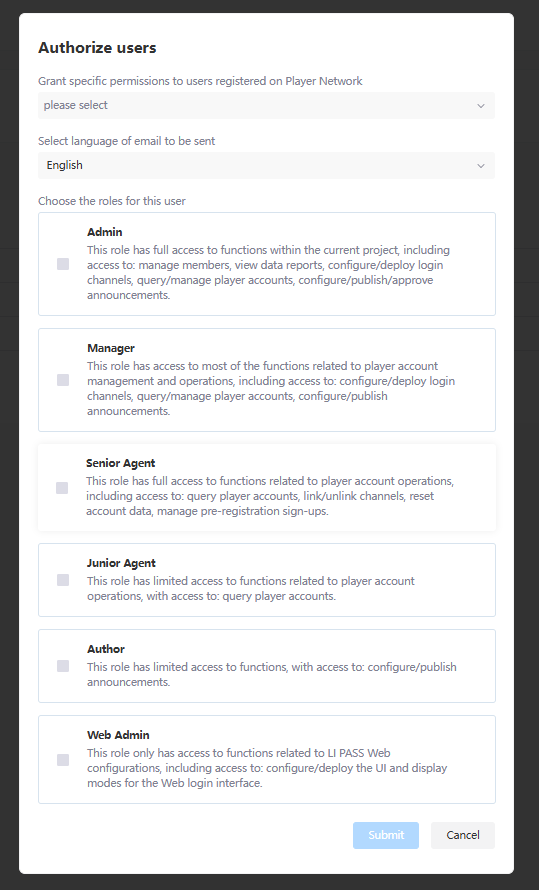
You can enter multiple usernames in the input field to authorize several users at once.
Only registered users of Player Network can be authorized. If the user is not registered, please first refer to Create Account or Log in via iOA Account to create a Player Network account.
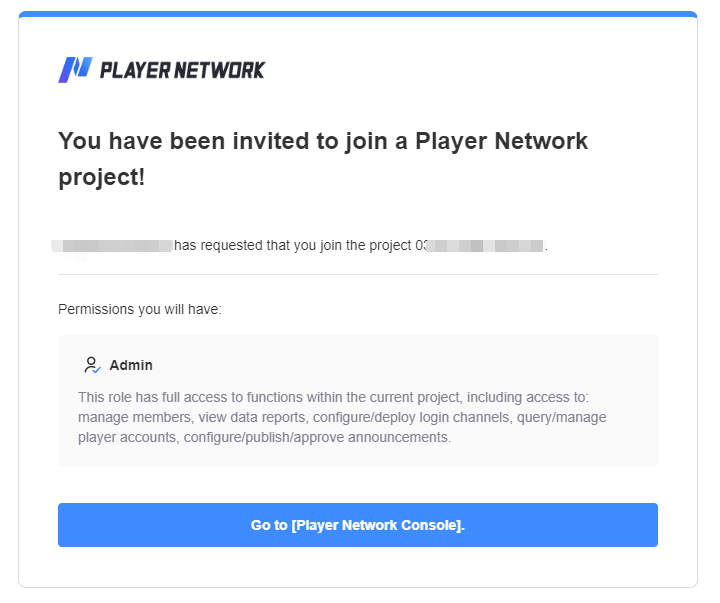
- After authorization is complete, the authorized user will receive an invitation email. Click Go to [Player Network Console] to enter the Player Network Console.
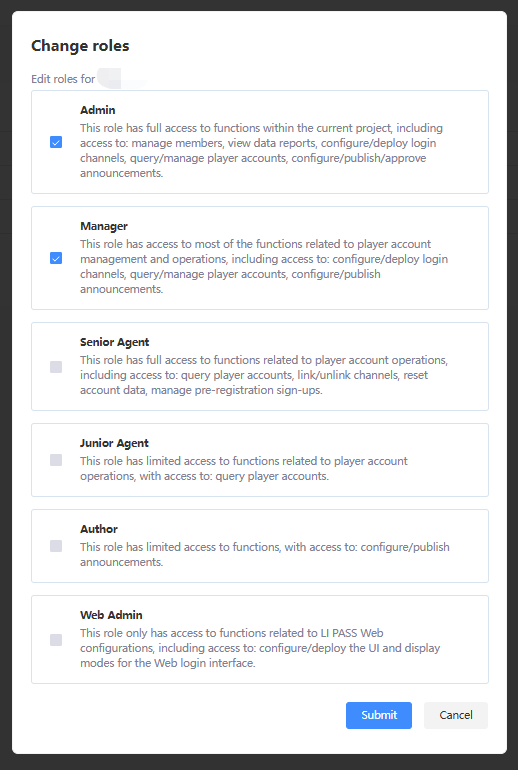
Change User Role
The Owner and Admin of the project can change the Role of Users in the same project.Only the Owner can change users to the Admin role.
-
Go to My Project page from Account Center and click Members Management.
-
On the Member List page, click Change Role.
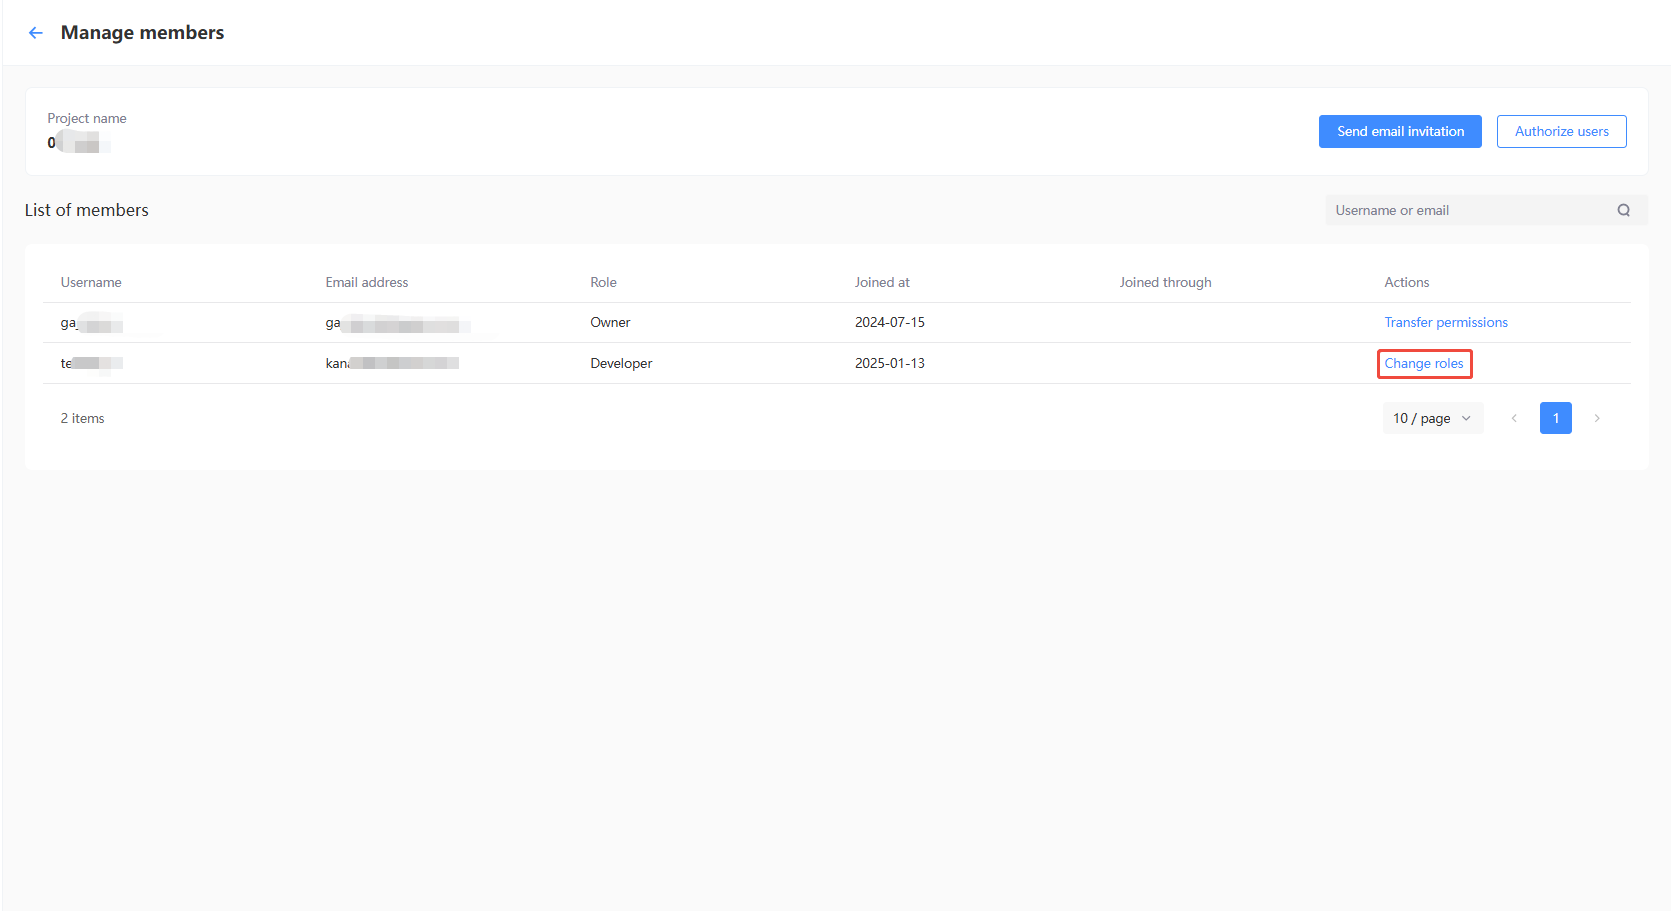
-
In the pop-up window, check the role to be adjusted, and click Submit to complete the user role change.
Role changes do not require approval and take effect immediately after submission.
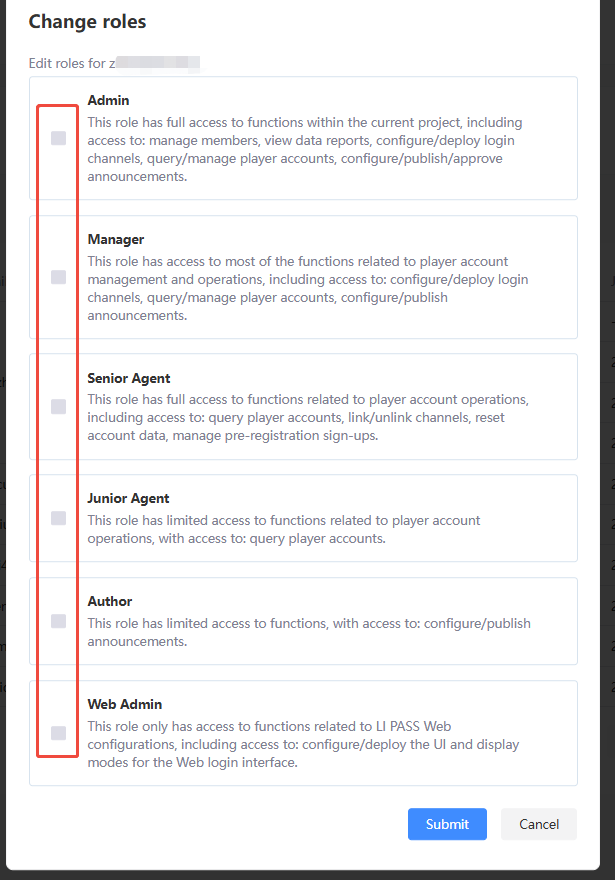
Delete User Role
The Owner and Admin of the project can remove roles from other users.Only the Owner can remove the Admin role.
-
Enter the My Projects page from the Account Center, and click Member Management in the Operations column of the projects.
-
On the Member List page, click Change Role.
-
In the pop-up window, uncheck the user's role and click Submit.Removing all permissions from a user under the projects can effectively remove the user.
Transfer Permissions
The Owner of the project can transfer their role to another user. Only the Owner can perform this operation.The Owner of the projects can transfer their role to another user. Only the Owner can perform this operation.If the Owner of the projects is no longer able to perform this operation, please contact the Player Network contact for assistance.
-
Enter the My Projects page from the Account Center, and click Member Management in the Operations column of the projects.
-
On the Member List page, click Permission Transfer.
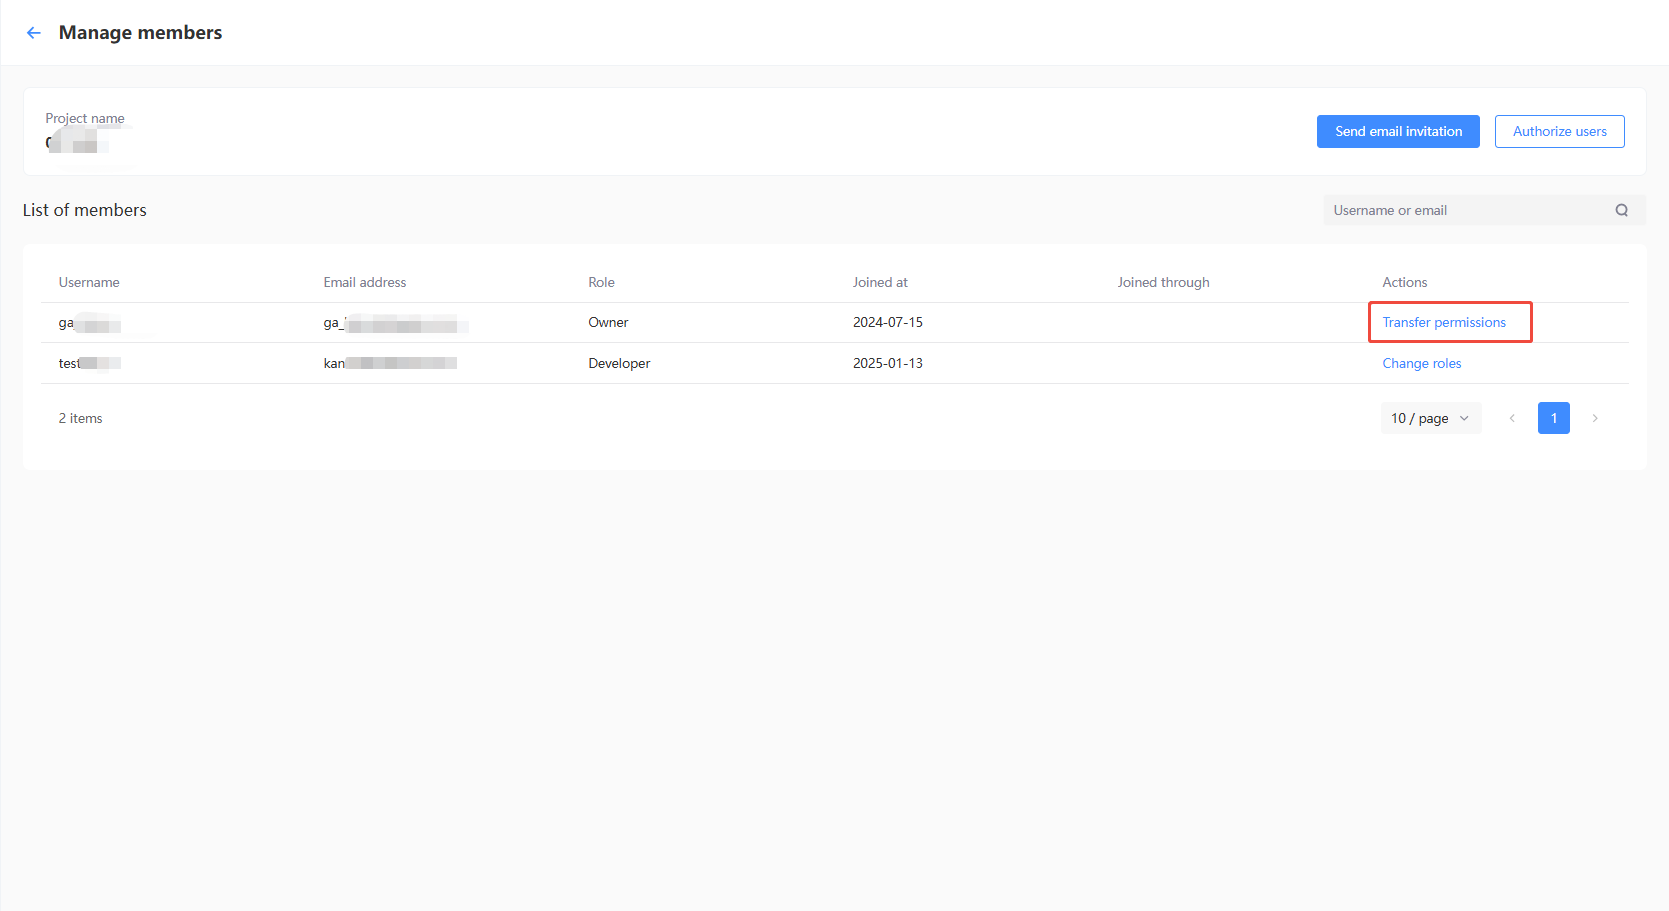
-
In the pop-up window, select another member from the member list to become the new Owner. If the user is not currently in the member list, you must first invite the user and grant them a member role.
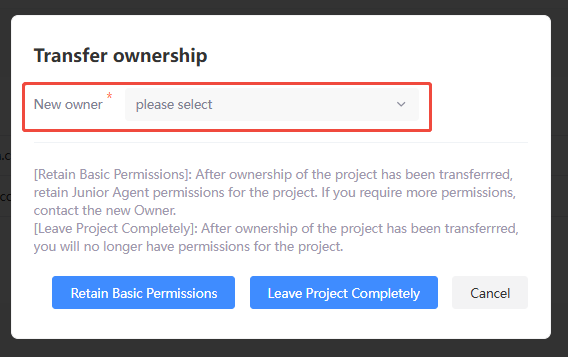
-
You can choose to Convert to Customer Support or Exit projects as appropriate.
- Convert to Customer Support: After the ownership permission is transferred, you will automatically be assigned the Customer Support role. If you need access to additional features, please contact the new Owner to request a role change.
- Exit project: After the owner permissions are transferred, you will no longer hold any roles under this project.
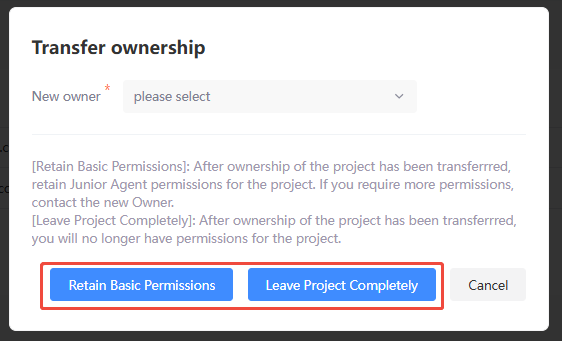
- Click Confirm in the confirmation popup to complete permission transfer.


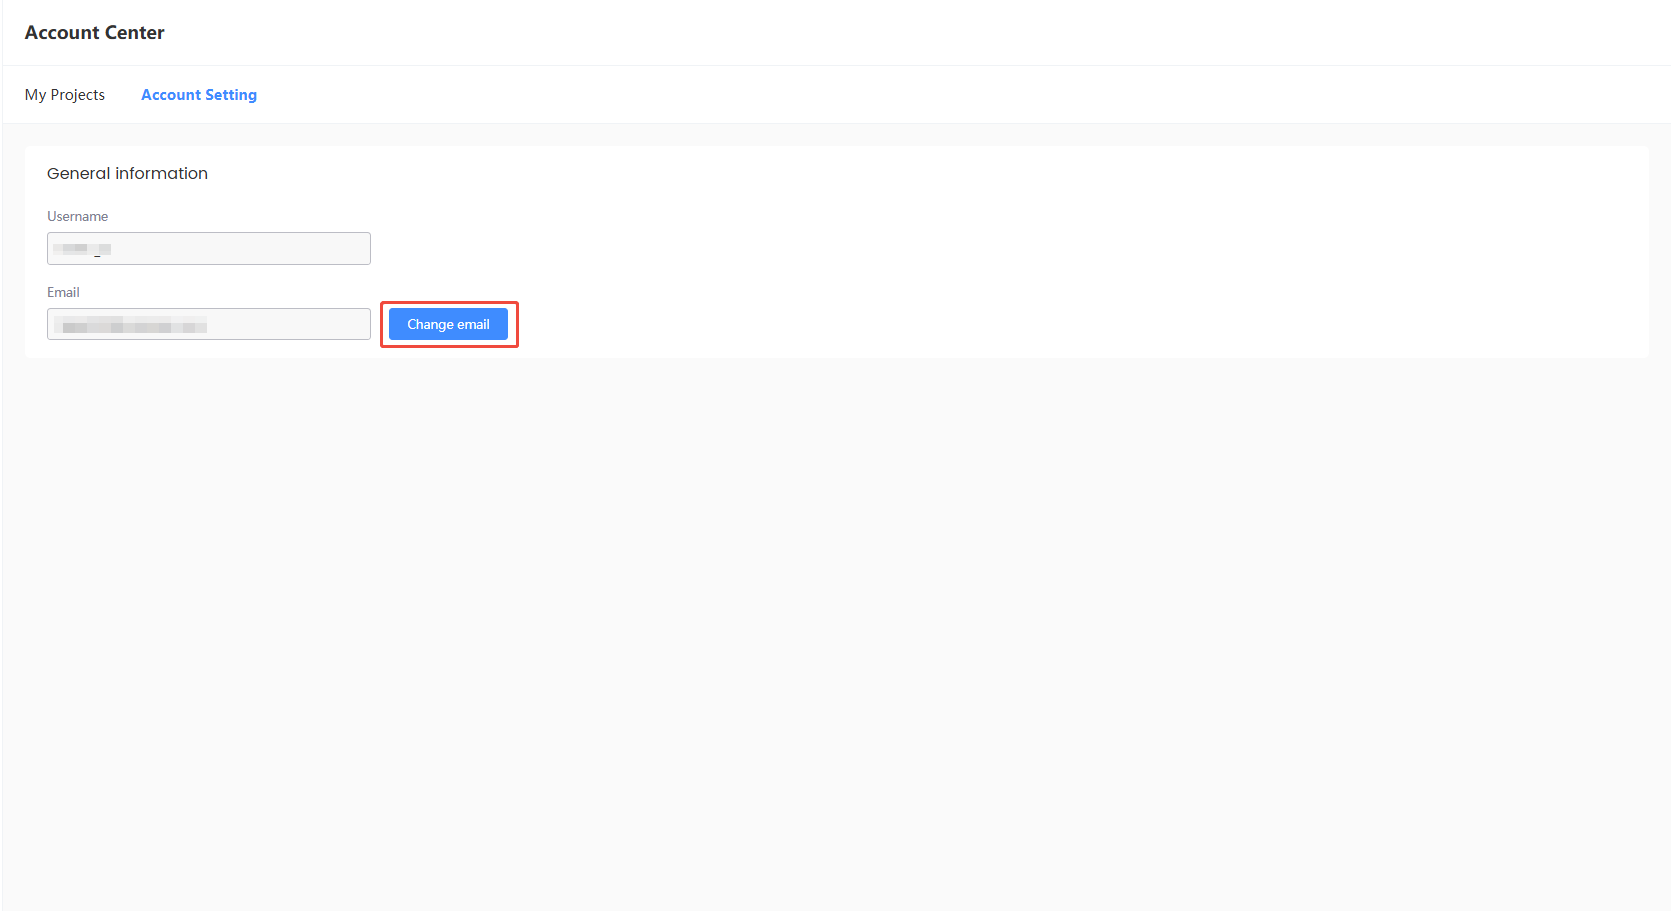
Account Setting
-
In the Account Center, click Account Setting to view account-related settings, such as username and email.

-
If your current login email is no longer in use, you can change it using Change Email.
-
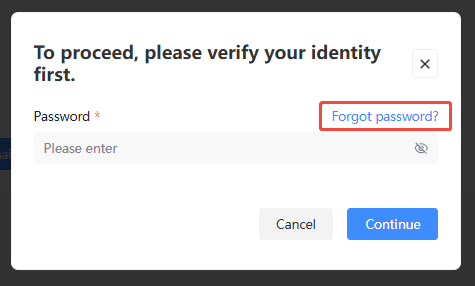
Enter your account password to verify your identity, then click Next after successful verification.
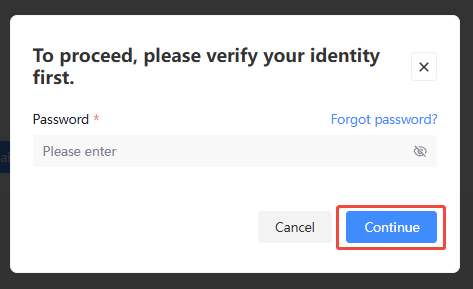
-
[Optional] If you have forgotten your account password, click Forgot Password to reset it.
-
Enter new email, click Send Verification code.

-
Enter the Verification Code received by the new email address.

-
Click Change Now, and the email change will take effect immediately.

Message Notification
The message notifications in the Player Network Console cover notification scenarios such as account publishing results, projects creation results, announcements, Player Network version releases, and more, facilitating quick viewing and processing for projectses.

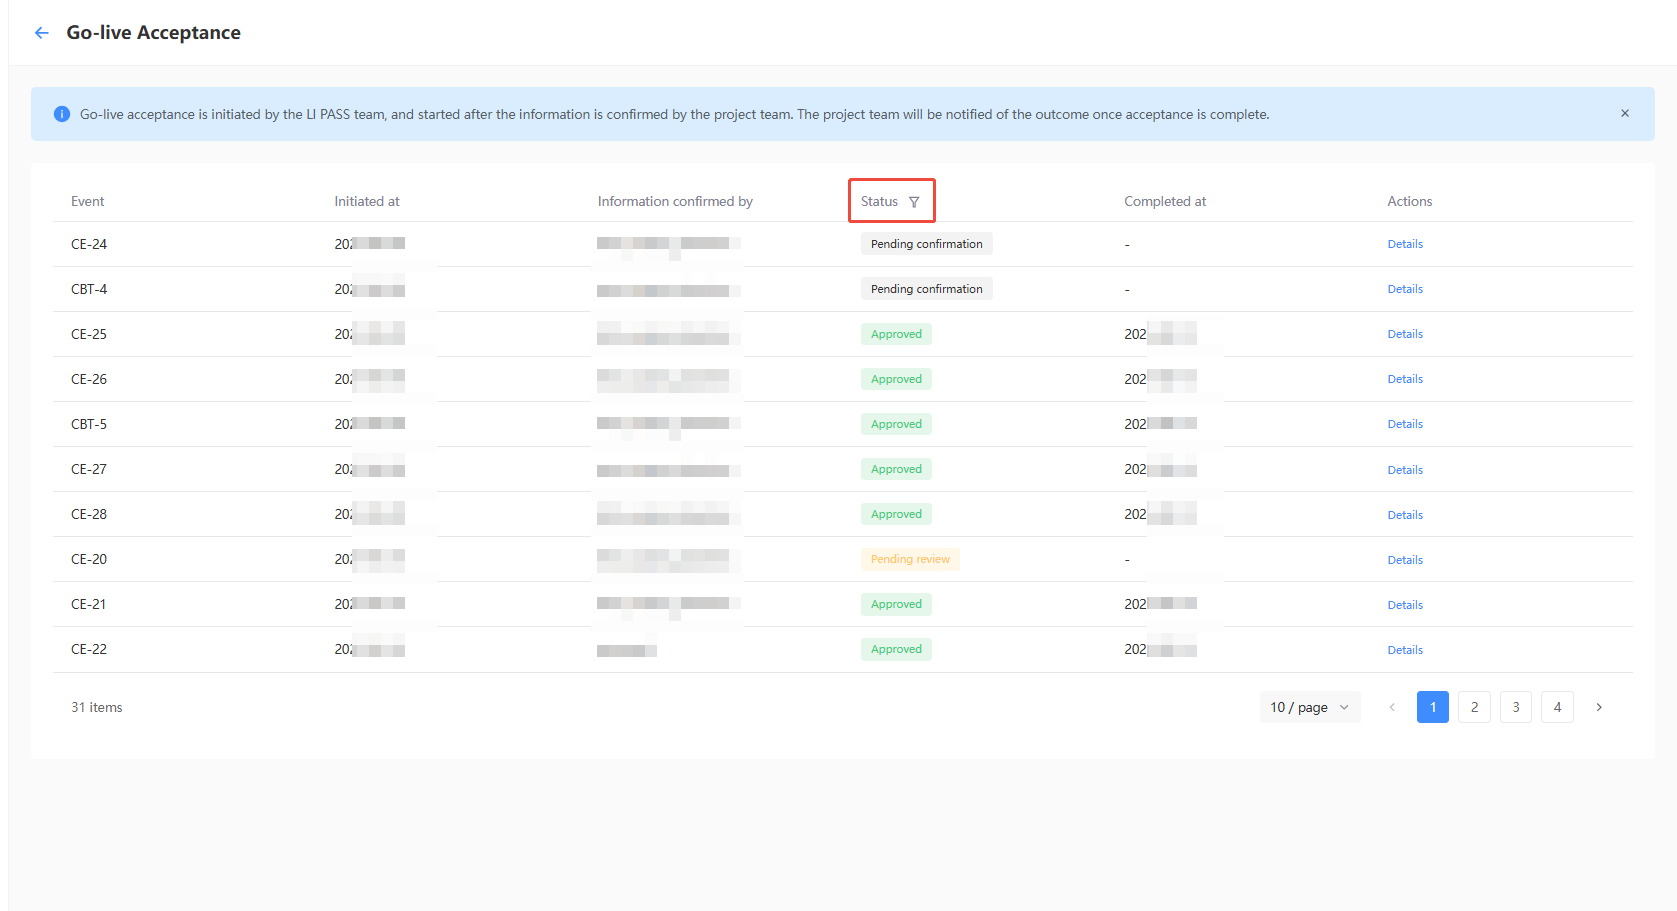
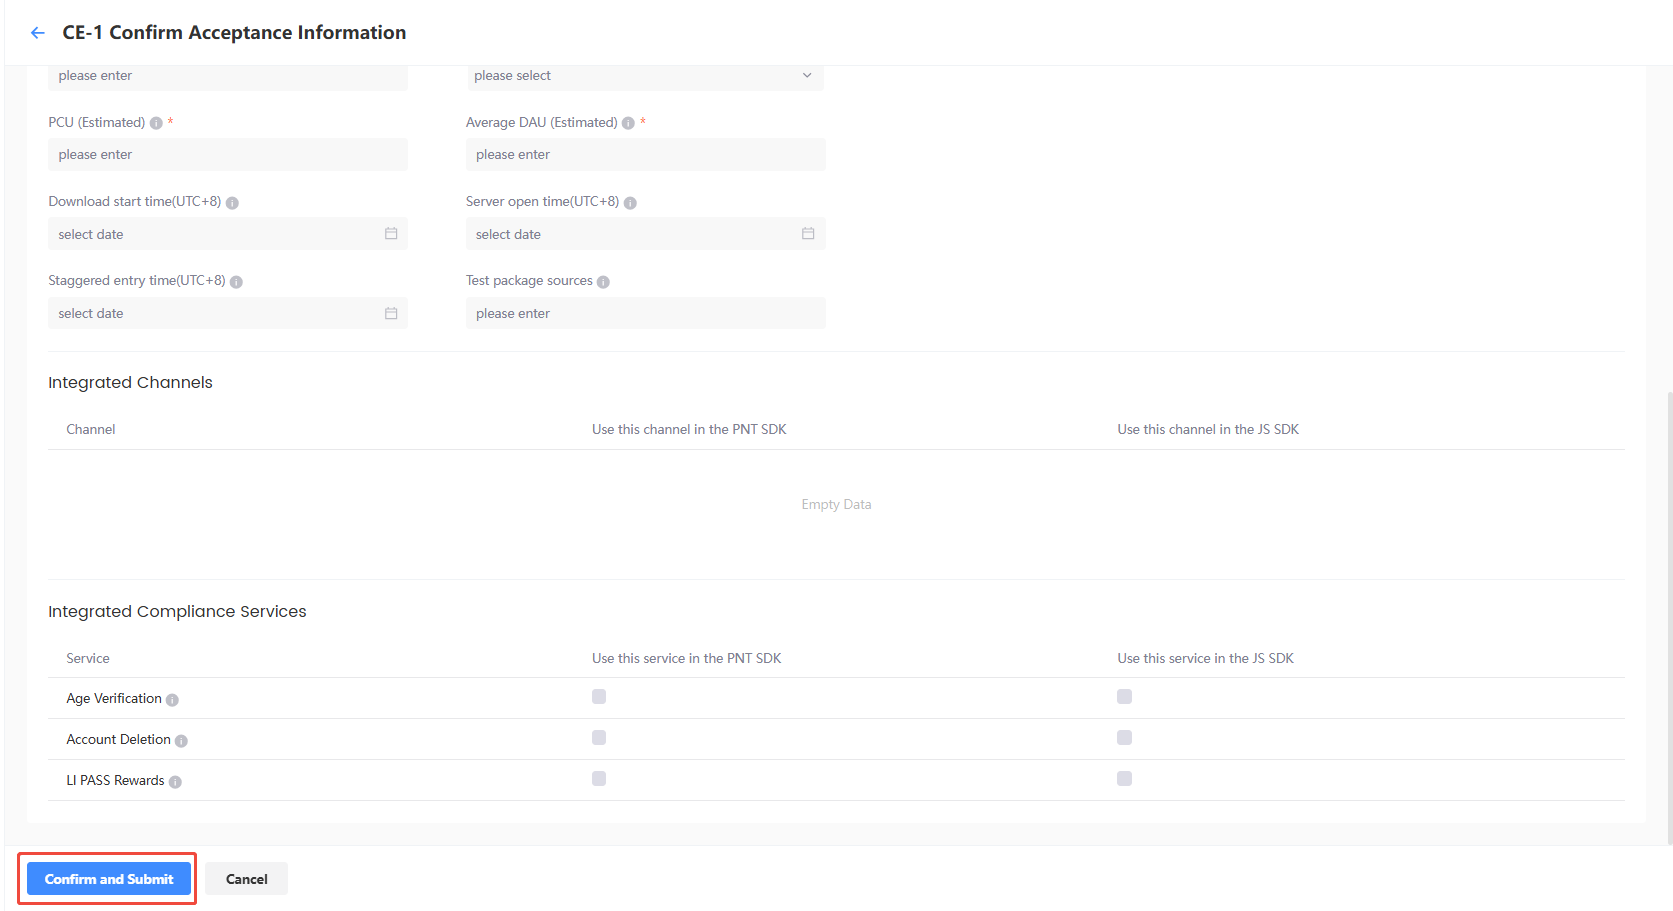
Go-live Acceptance
According to the project's needs, the LI PASS team can provide pre-launch acceptance assistance at critical points such as CBT, SL, etc.Approximately 30 days before the official acceptance begins, the LI PASS team will send an email to the designated acceptance person on the projects side to facilitate the provision of relevant information for this acceptance.
For specific acceptance content, consult the Player Network Assistant.
Only Owners and Admins are authorized to handle go-live acceptance.
You may verify whether you have the appropriate permissions via the My Projects page in the Account Center. If you lack permissions, the Go-live Acceptance in the Operations column will not be displayed.
-
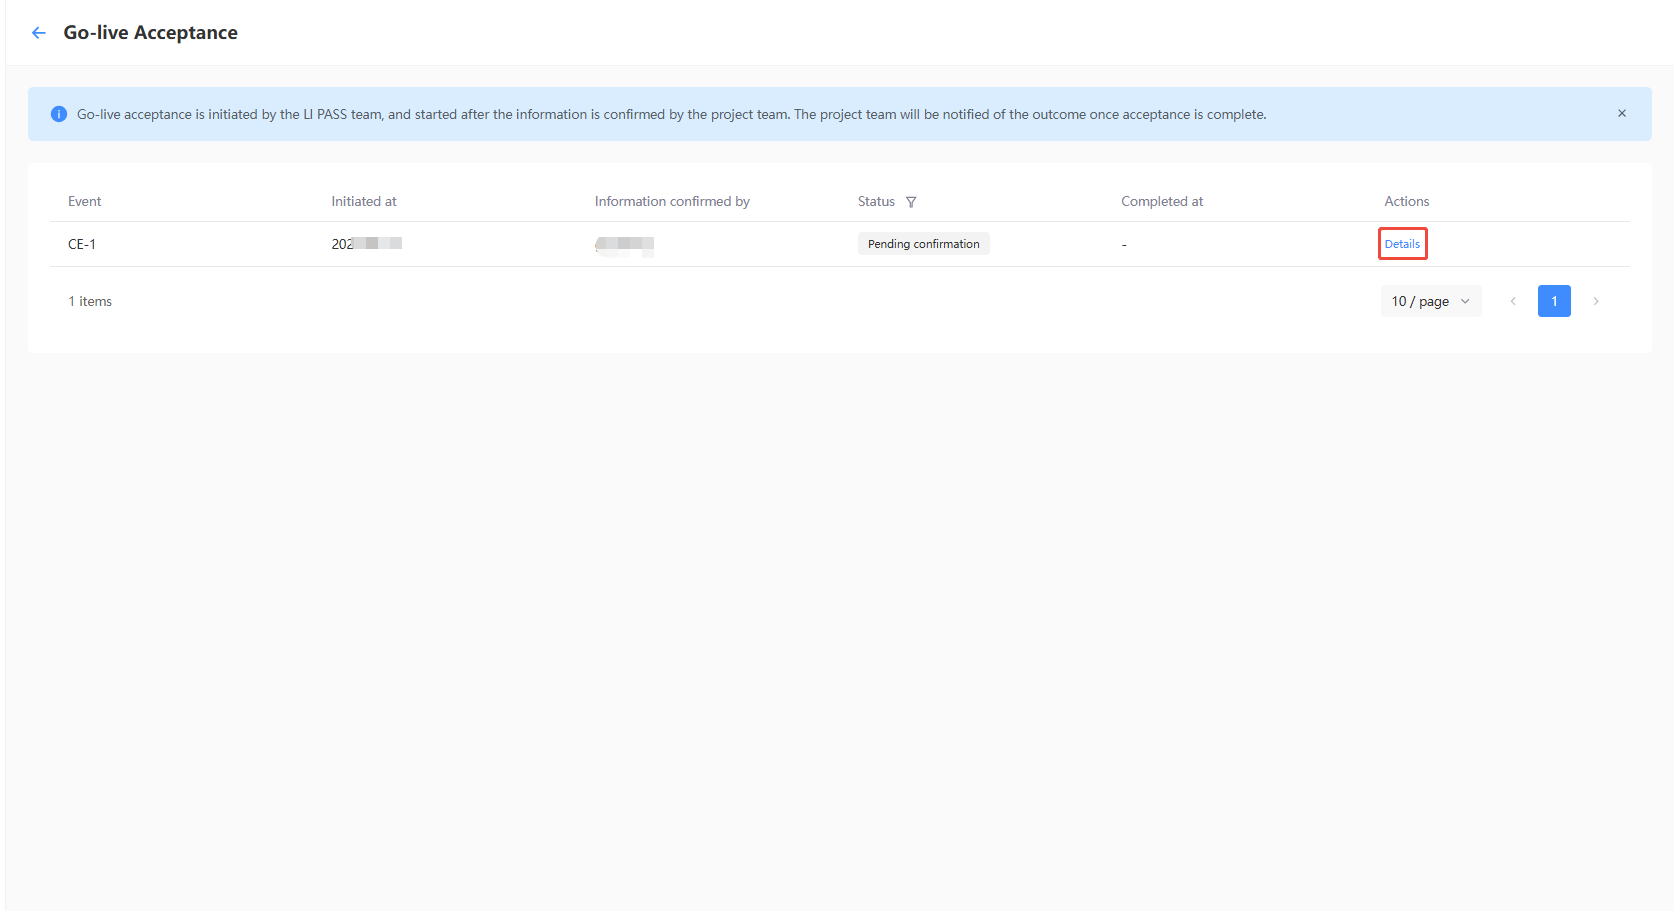
Enter the My Projects page from the Account Center, and click Go-live Acceptance in the Operations column of the projects.
-
On the Go-live Acceptance list page, you can see all past acceptance events. If the acceptance status of an event is To Be Confirmed, you need to confirm the details of the acceptance.In the Operations column, click Details to view the information you need to supplement and confirm.
-
After completing the required content, click Confirm the Above Information, and the LIPASS team will start the acceptance based on the confirmed information.
-
Follow up on the Online Acceptance page and contact Player Network Assistant for any questions.