iOS
The purpose of this article is to describe how to set up Game Center authentication so that your game can be logged in through the Game Center channel using the Player Network login authentication service.
Prerequisites
1. Configure iOS Applications on Apple Developer
1. Create App ID
-
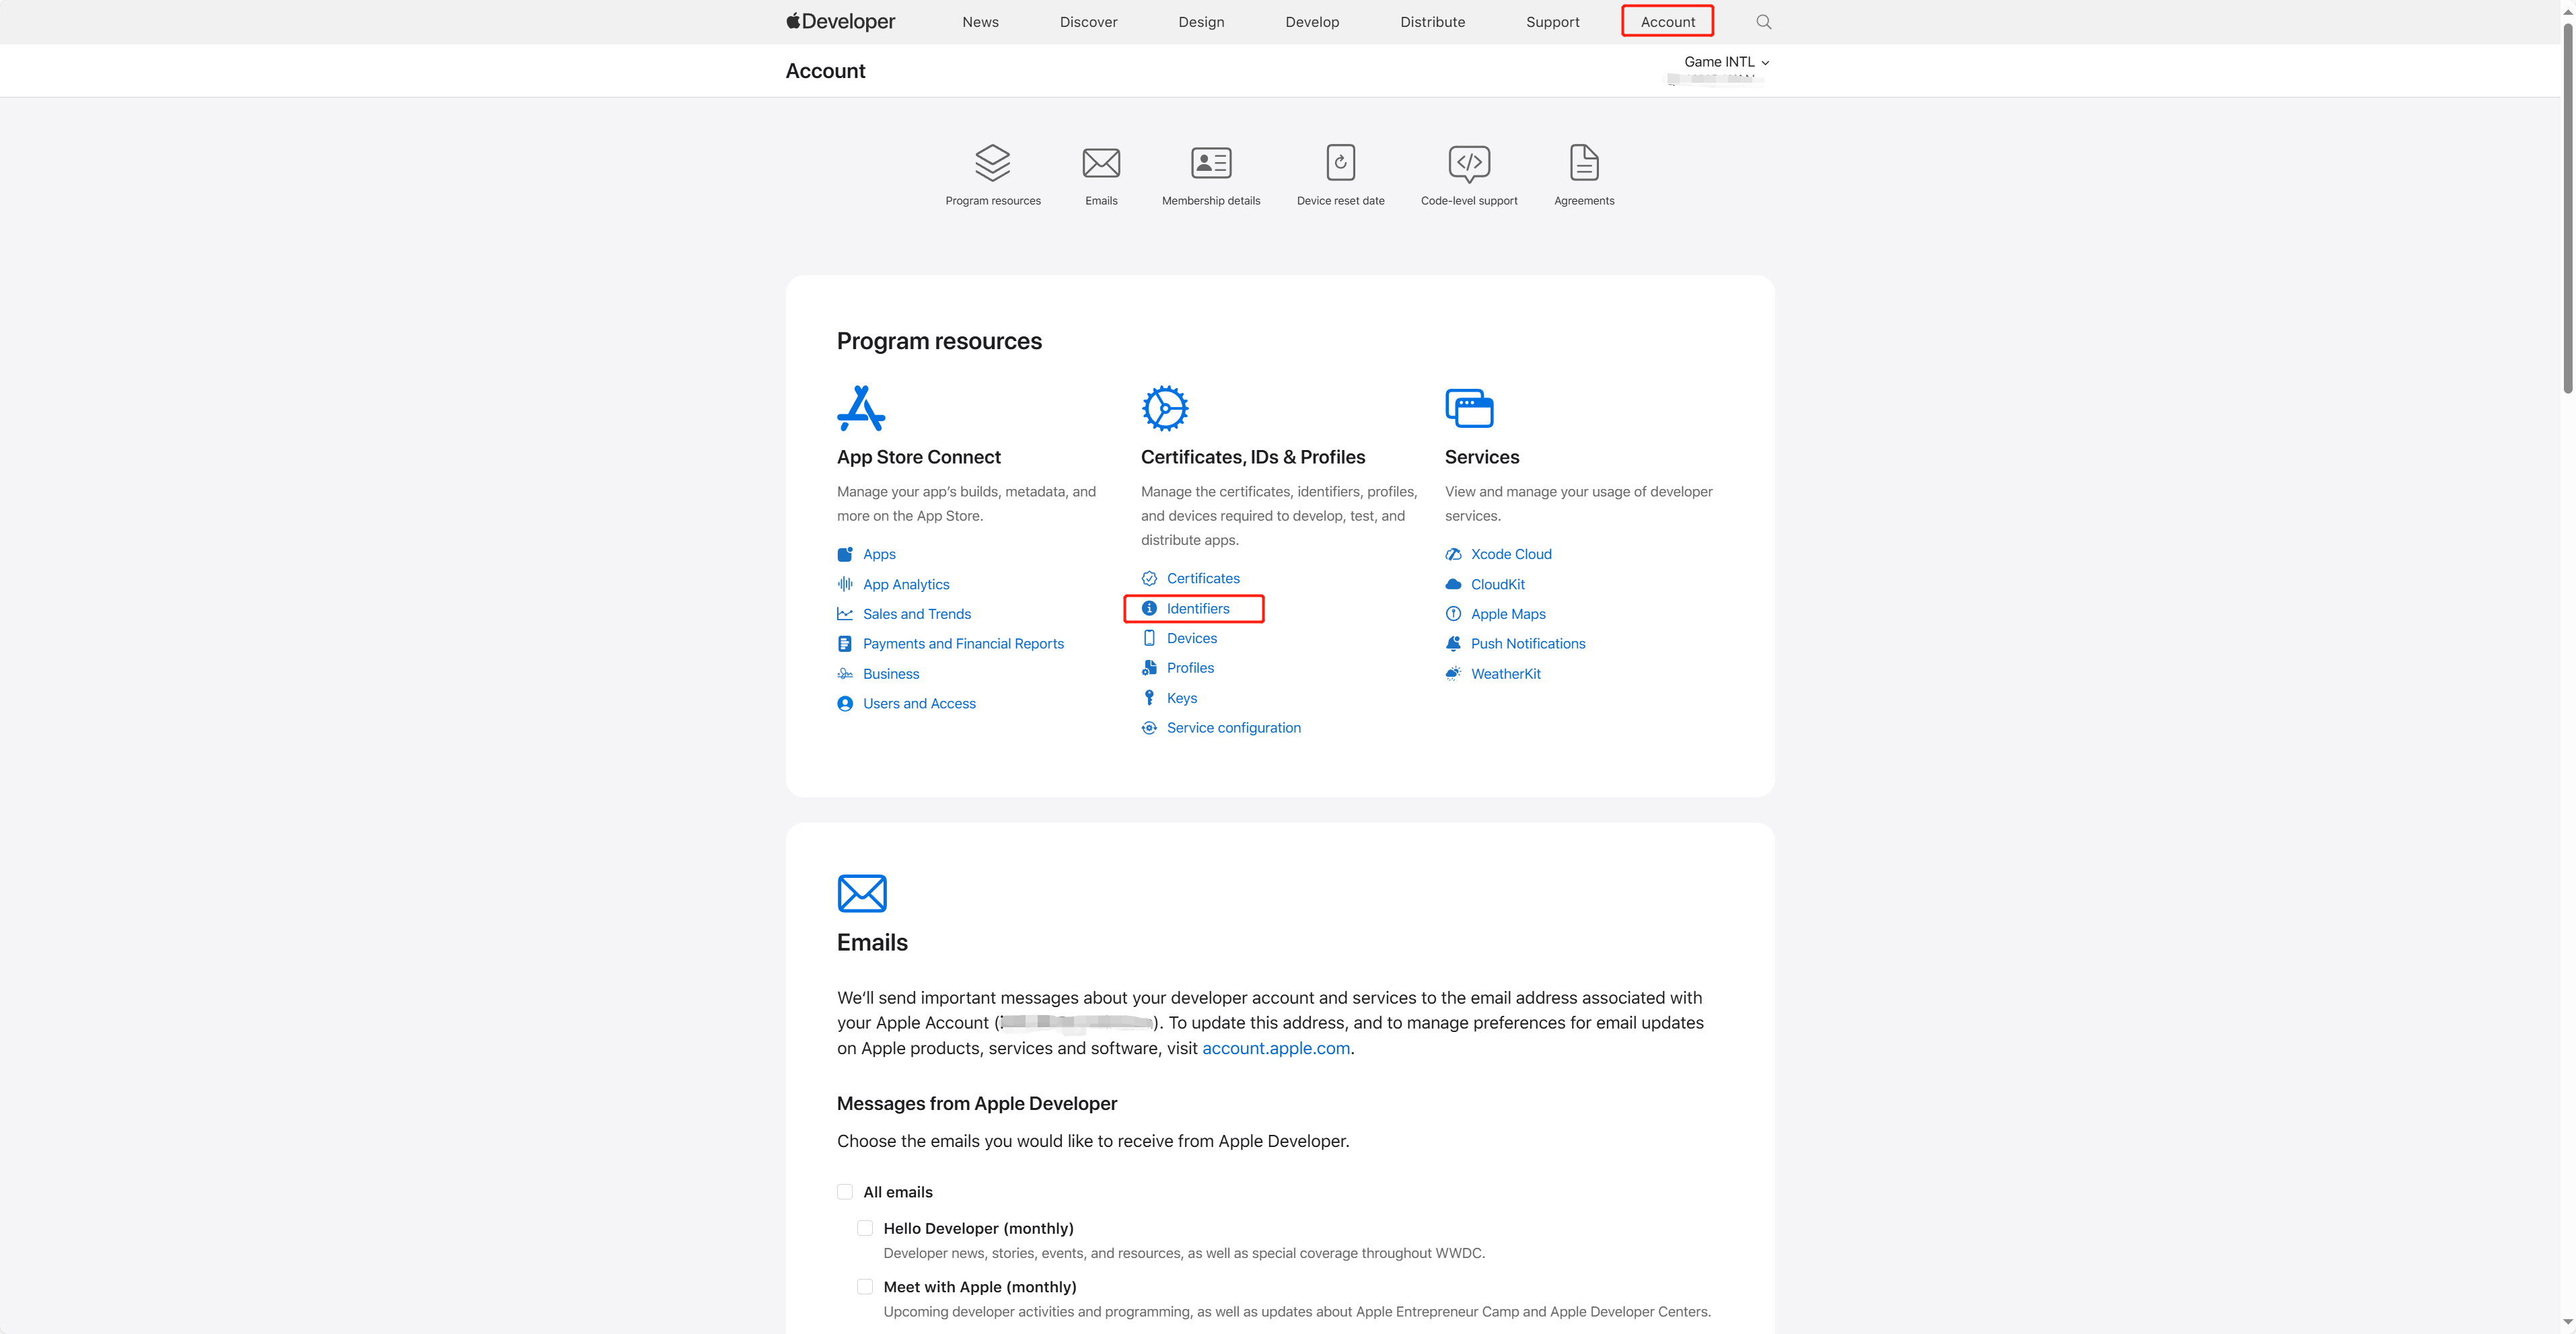
Register and sign in for an Apple Developer account on the Apple Developer Platform (https://developer.apple.com/account).
-
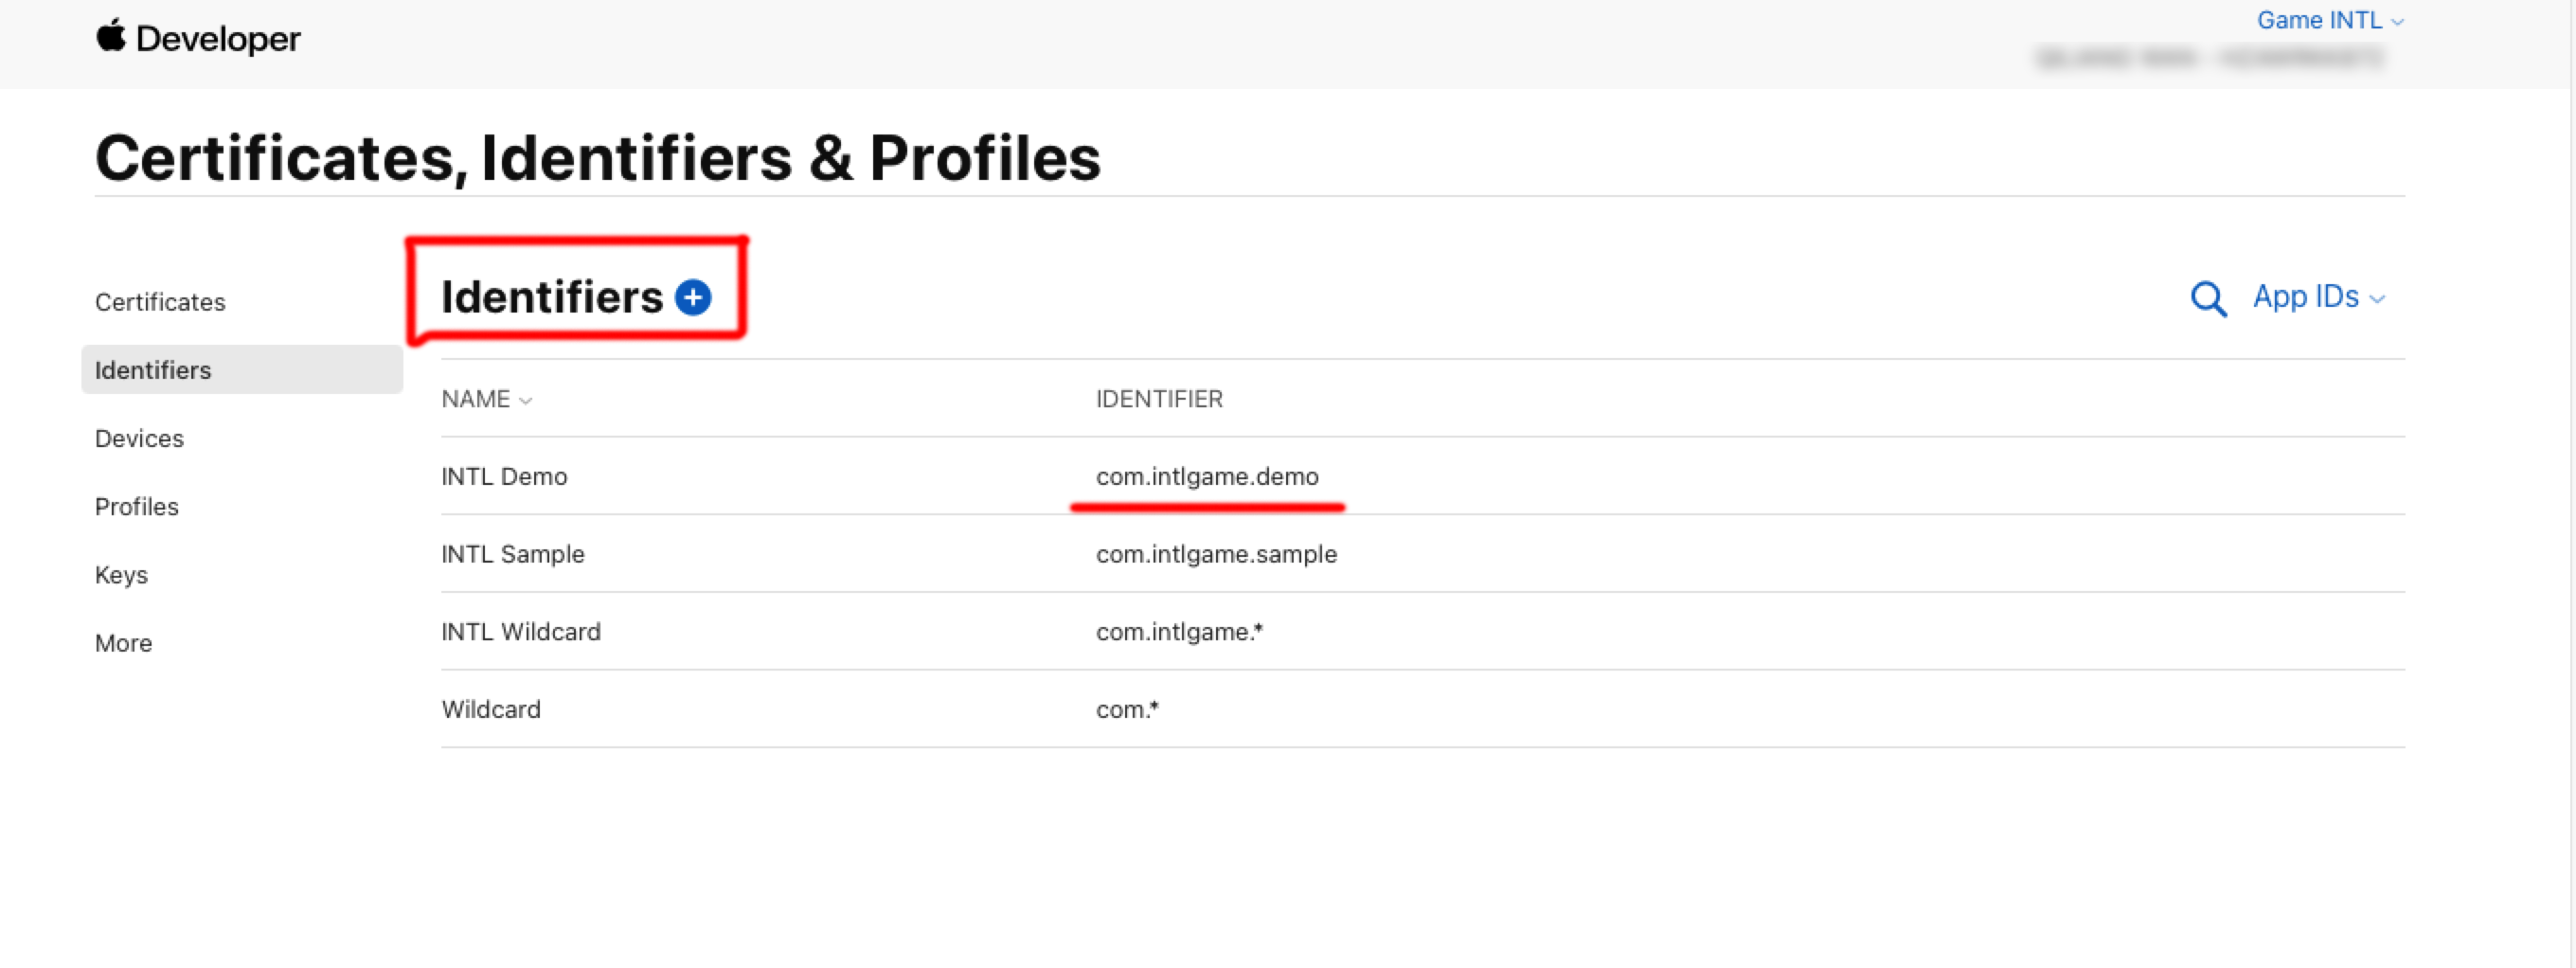
Click Account in the top navigation bar and select Identifiers under Certificates, IDs & Profiles.
-
Click the blue add icon (+).
-
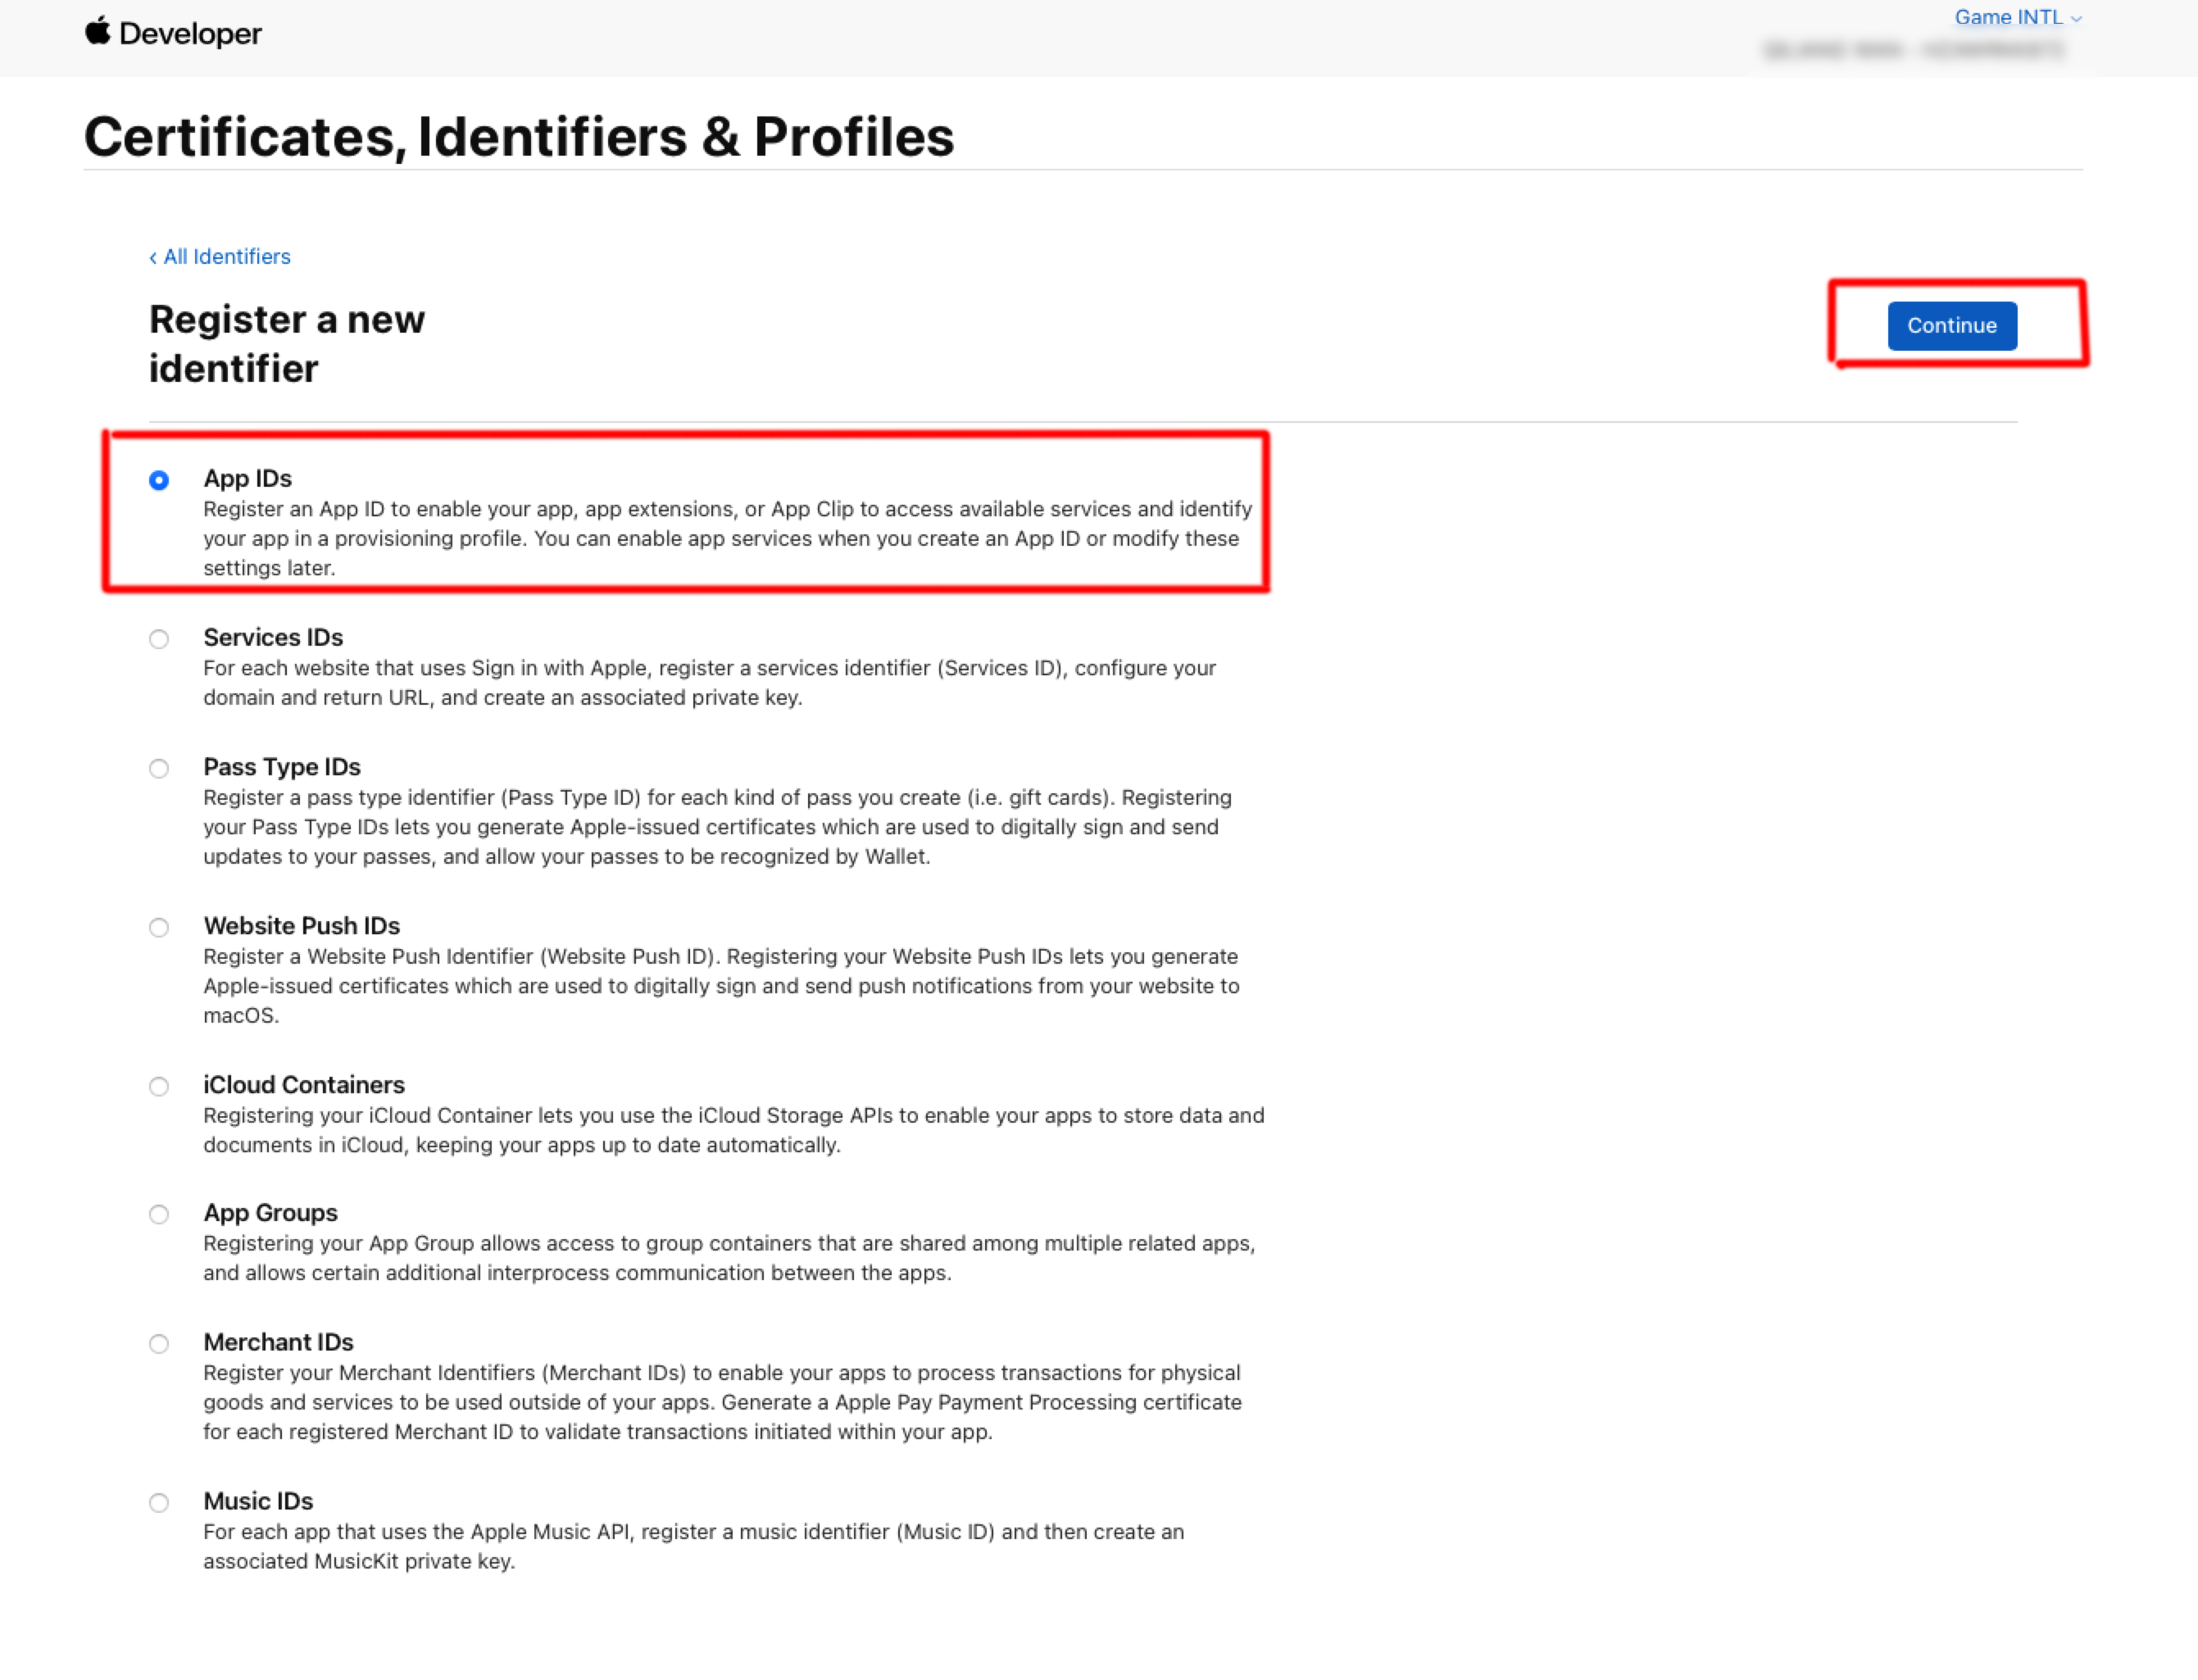
After selecting App IDs, click Continue.
-
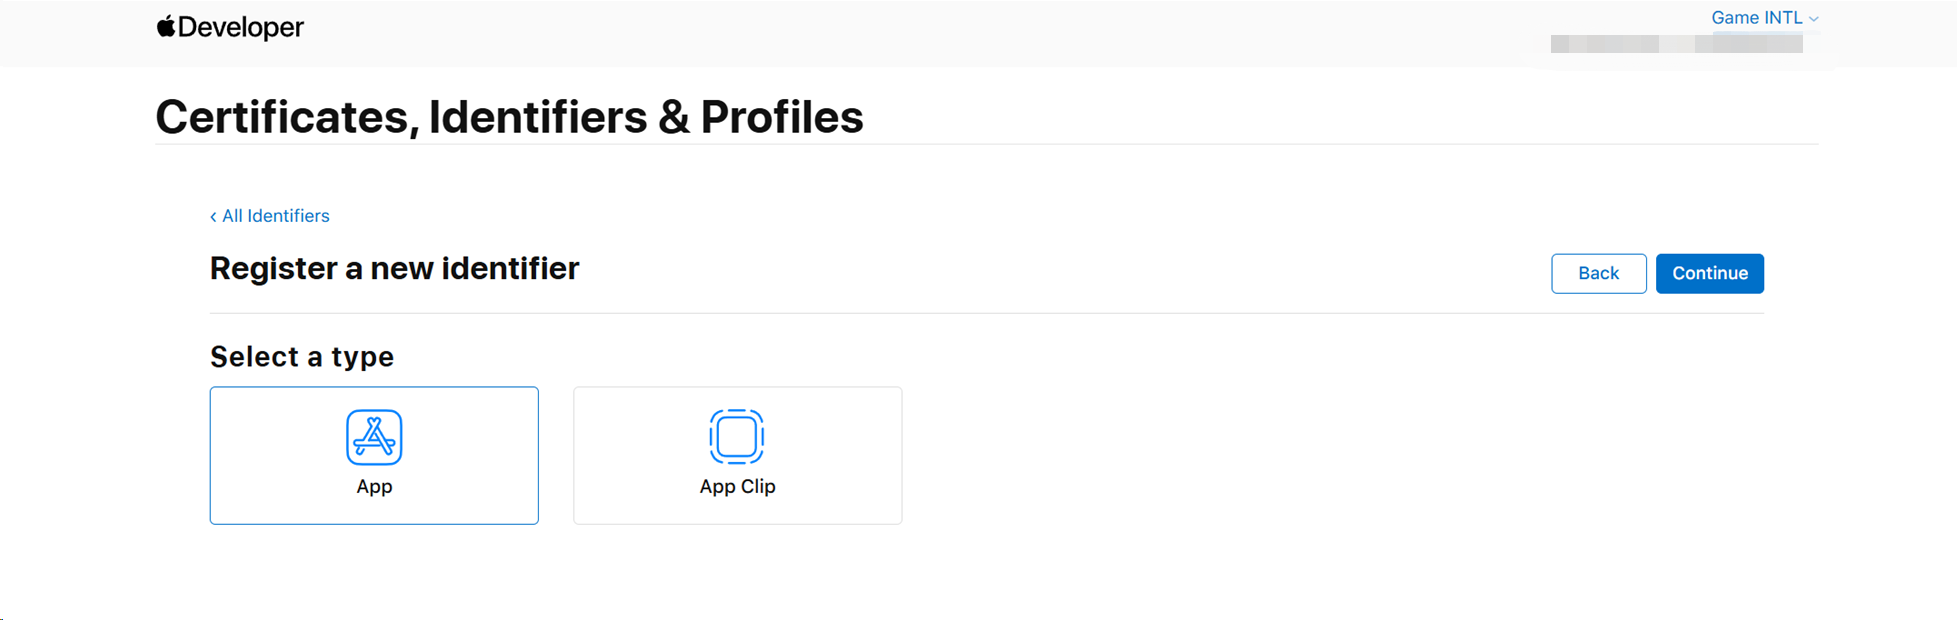
After selecting App, click Continue.
-
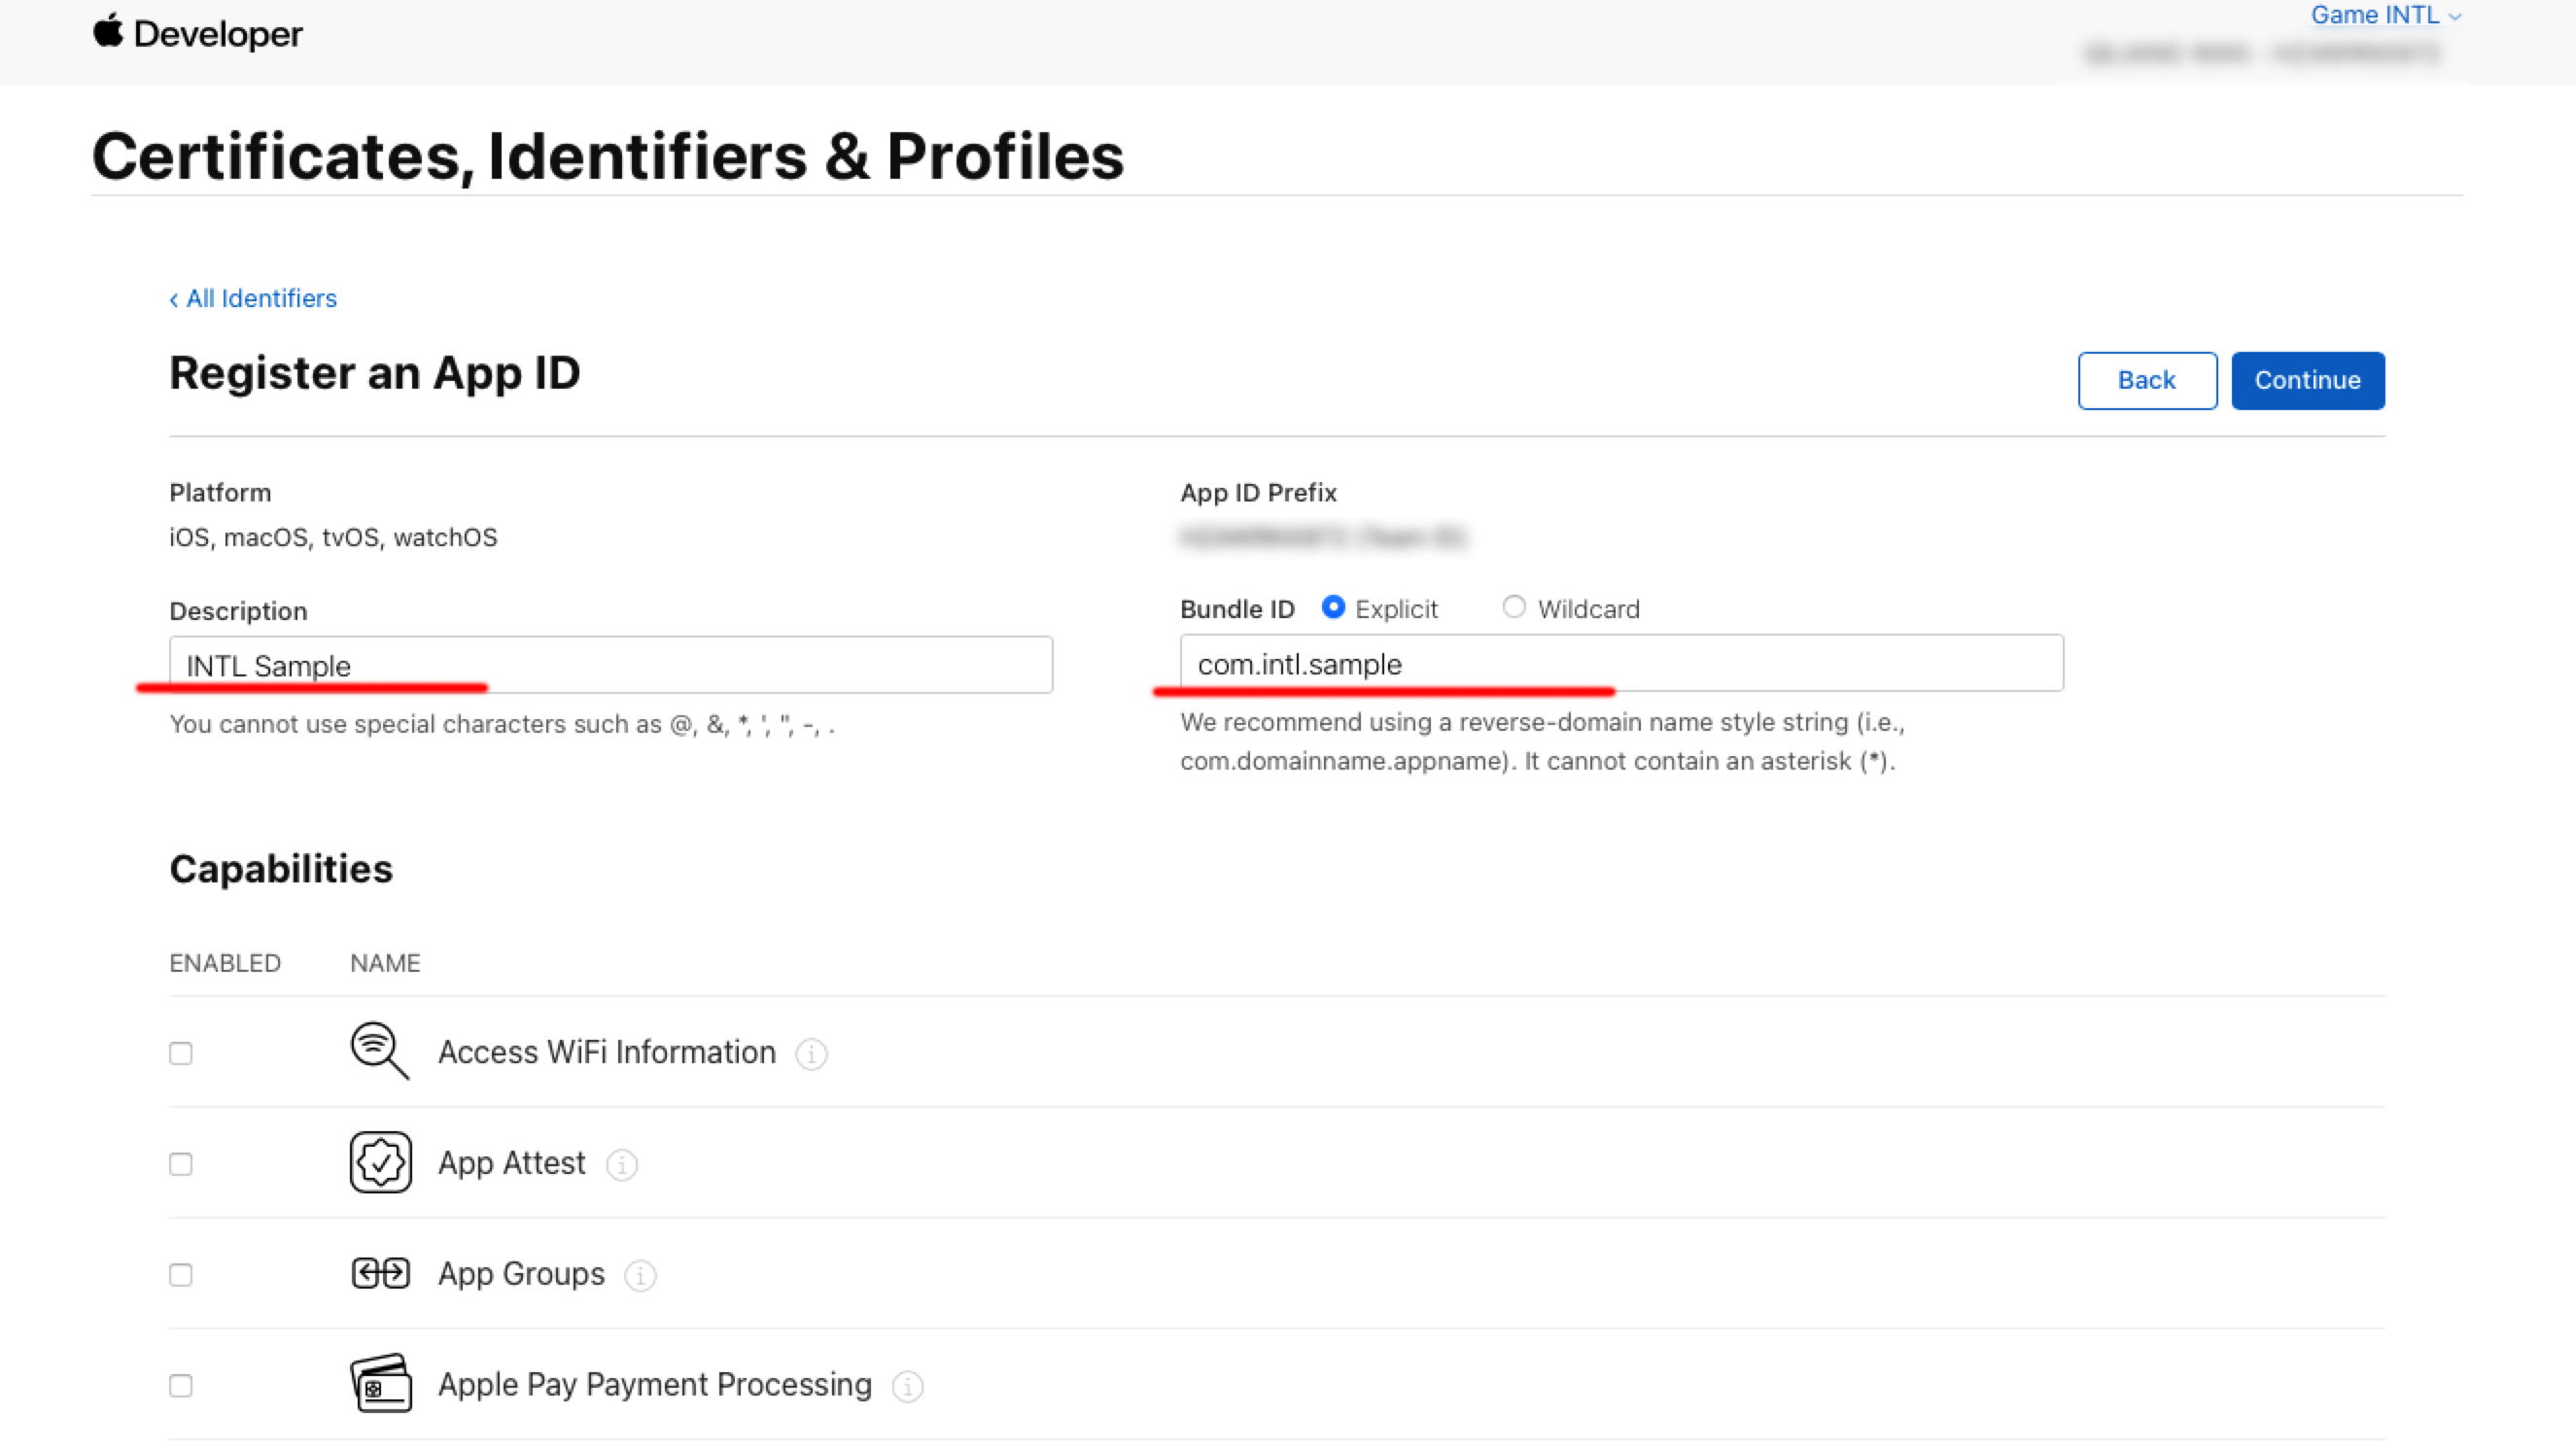
Enter Description and Bundle ID.
- Description: The name or description of the game app.
- Bundle ID: The unique identifier of the game app included in the App ID.
-
Under Capabilities, select Sign in with Apple and click Continue.
-
Click Register to create the App ID.
2. Setting up App Store Connect
-
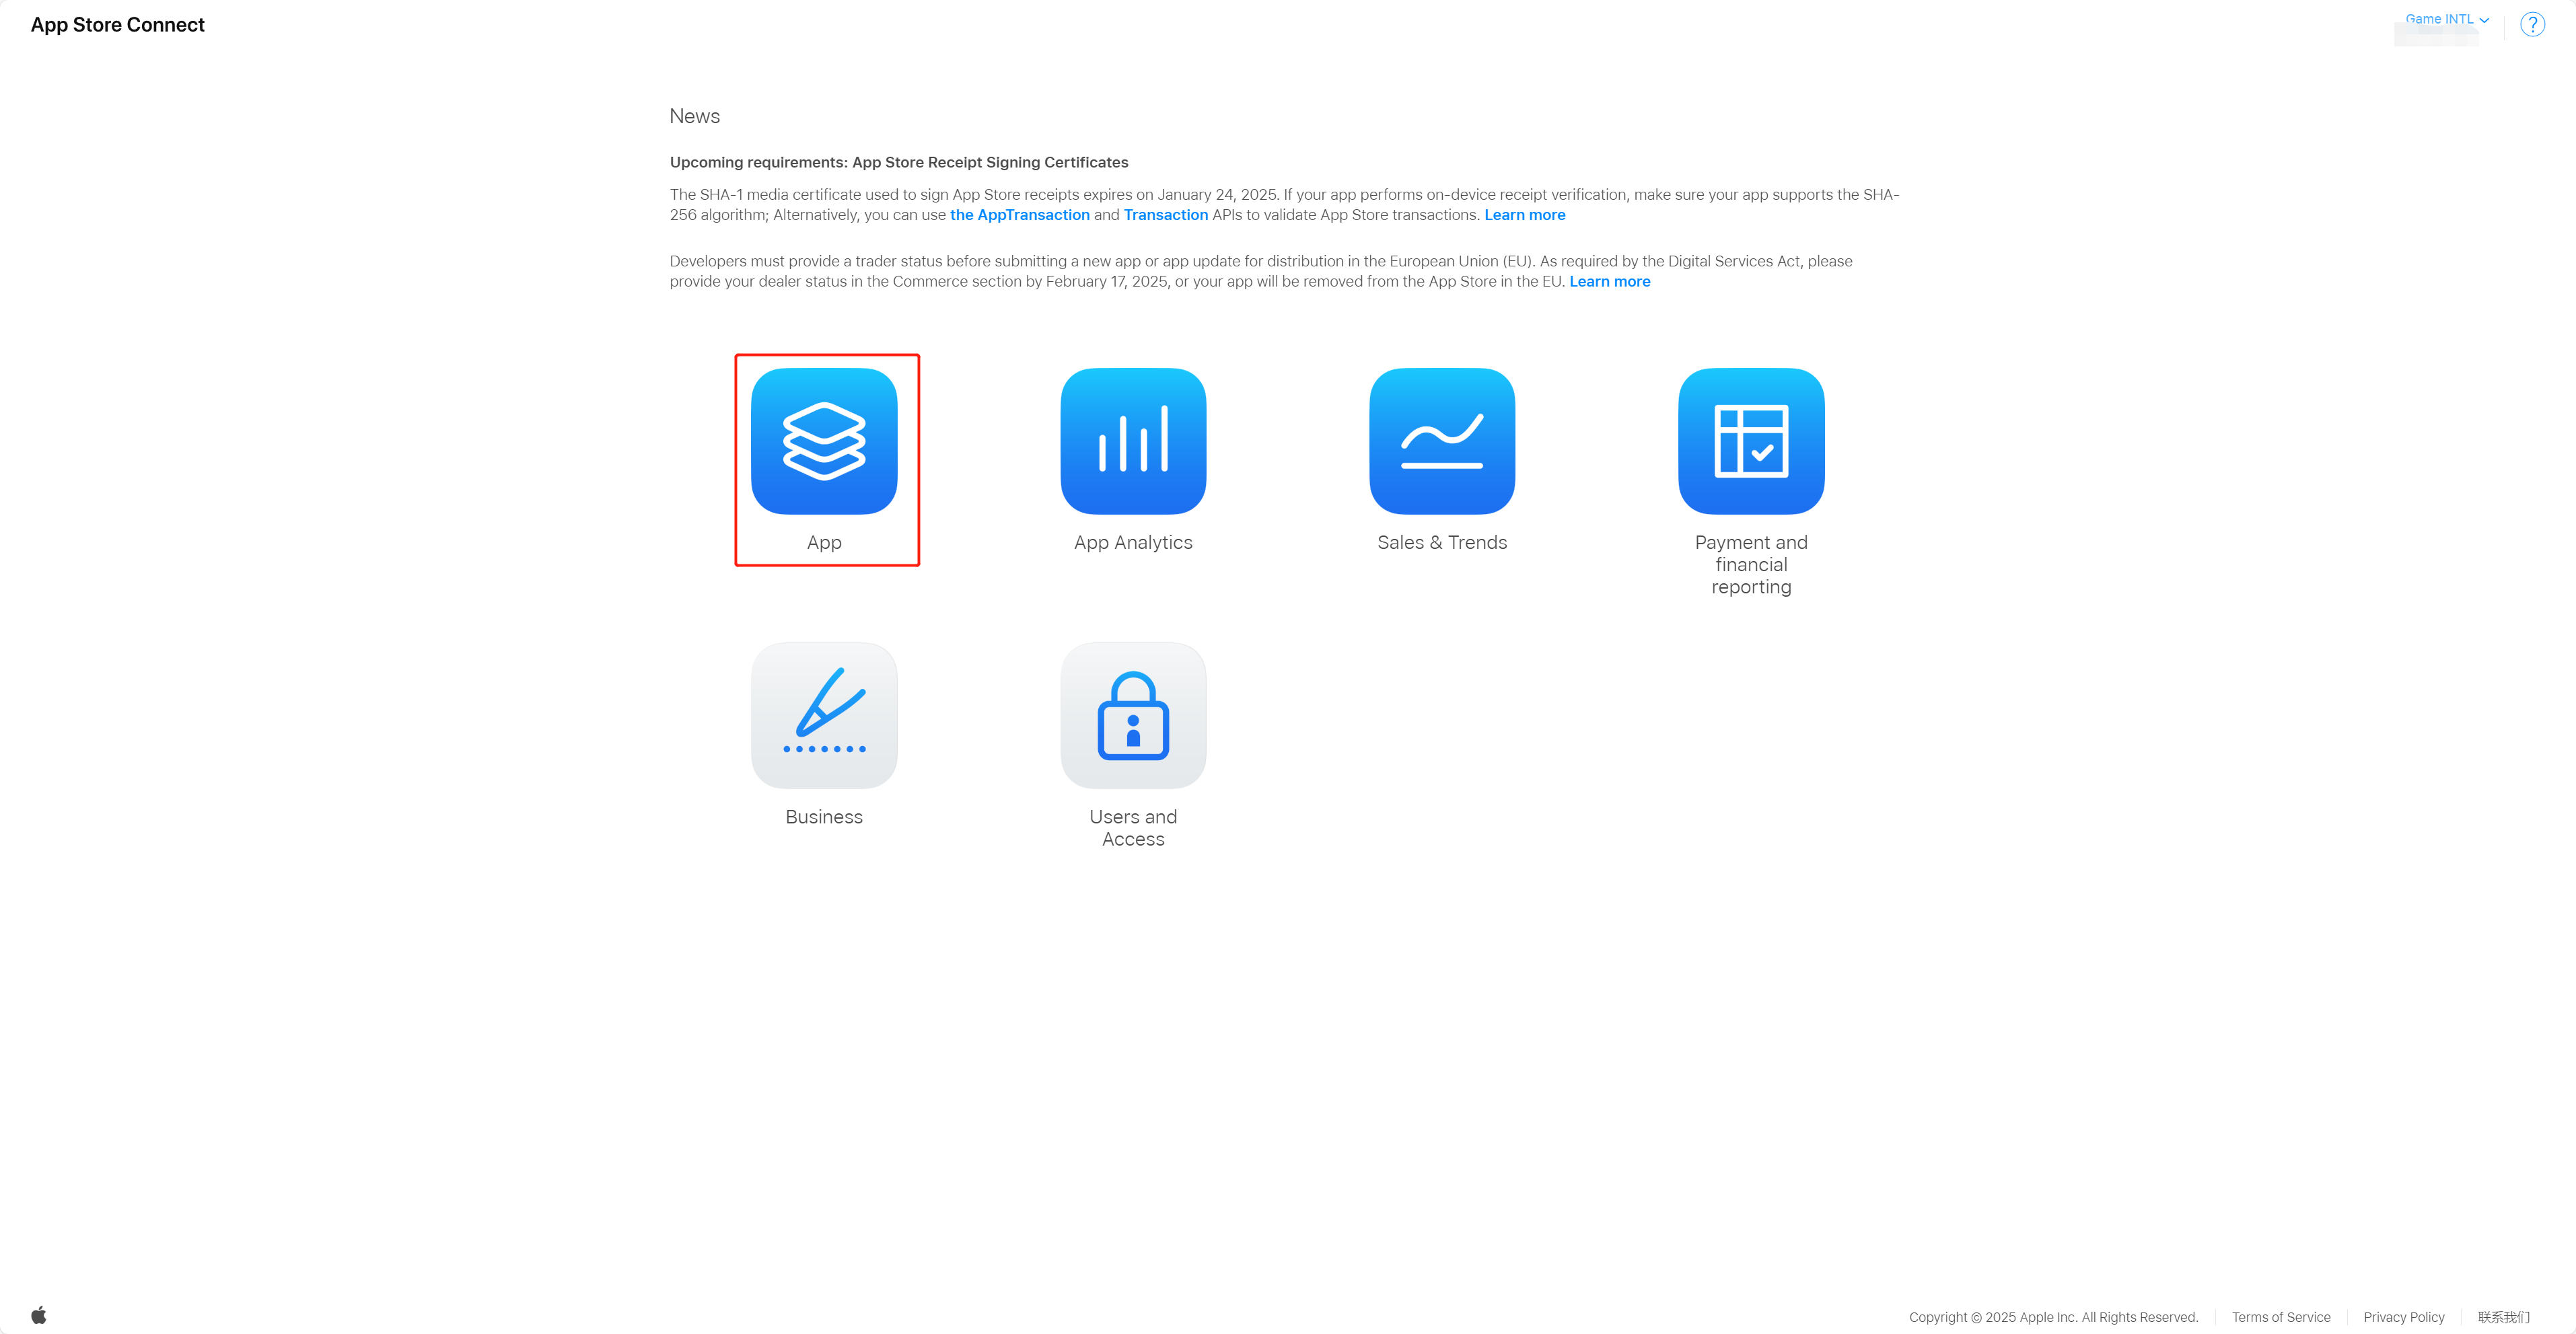
Log in to [App Store Connect] (https://appstoreconnect.apple.com/).
-
Select App.
-
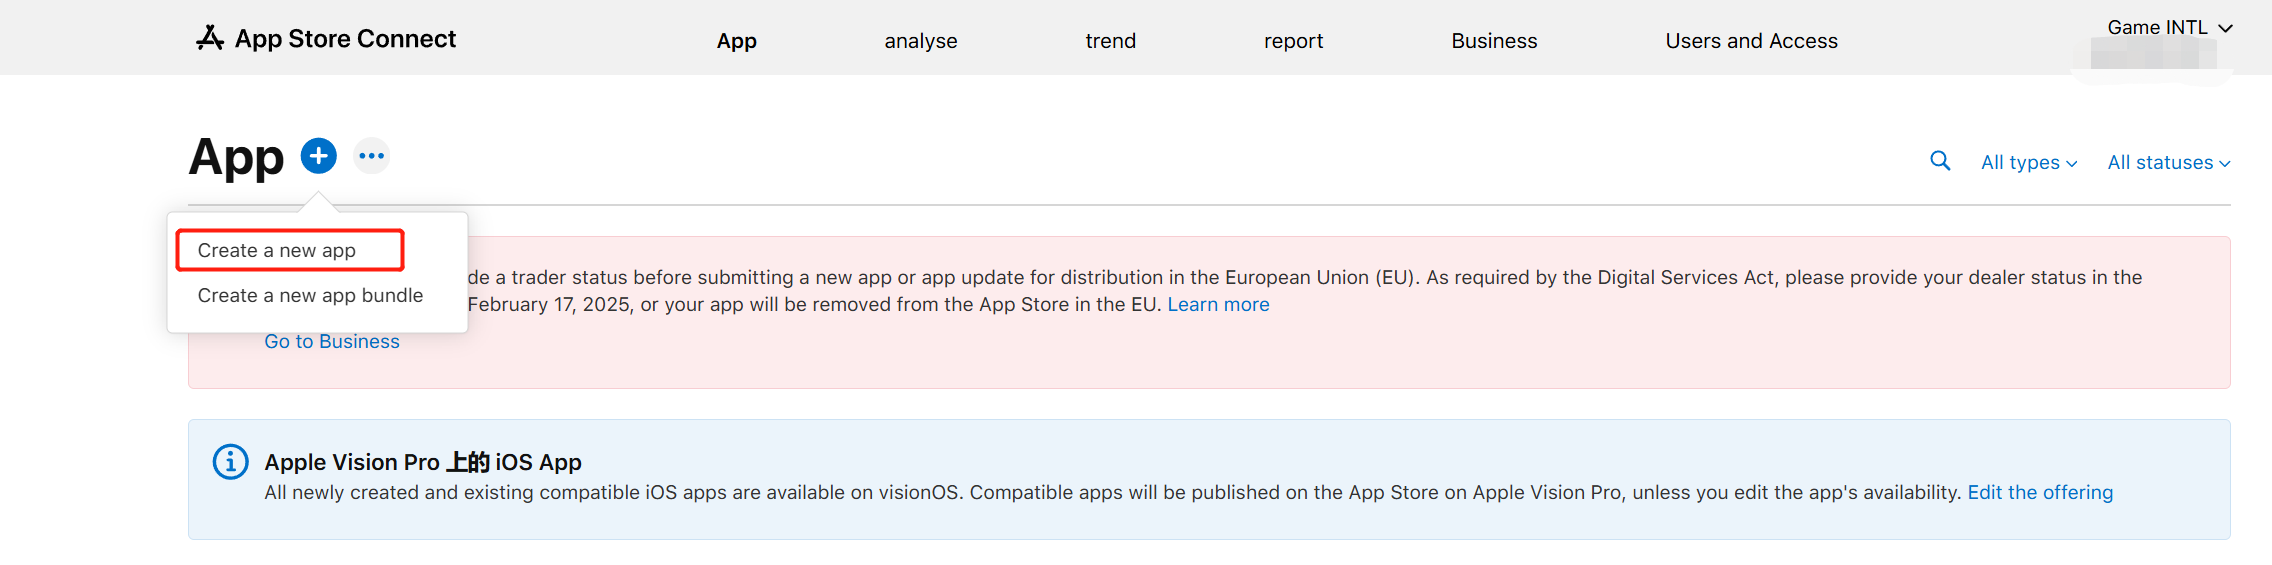
Click App (+) and select Add App.
-
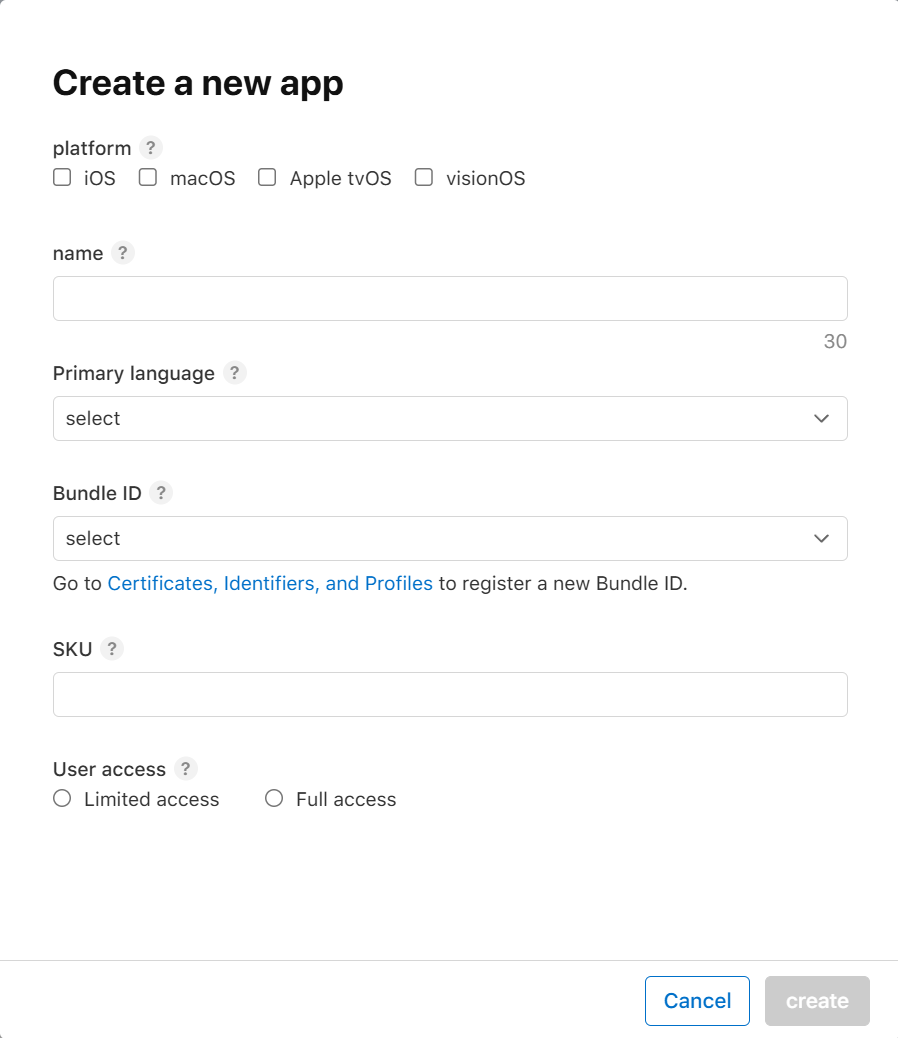
Create an App Store Connect App based on the Bundle ID obtained in step 1.
-
Select Feature > Game Center to enter the Game Center configuration page.
-
Enable the Game Center feature.
For more information, see:https://developer.apple.com/help/app-store-connect/
the charts (of best-sellers)
- Select Game Center in the left navigation bar and on the right side select Add leaderboards to create a new leaderboard or Add an achievement to add an achievement setting.
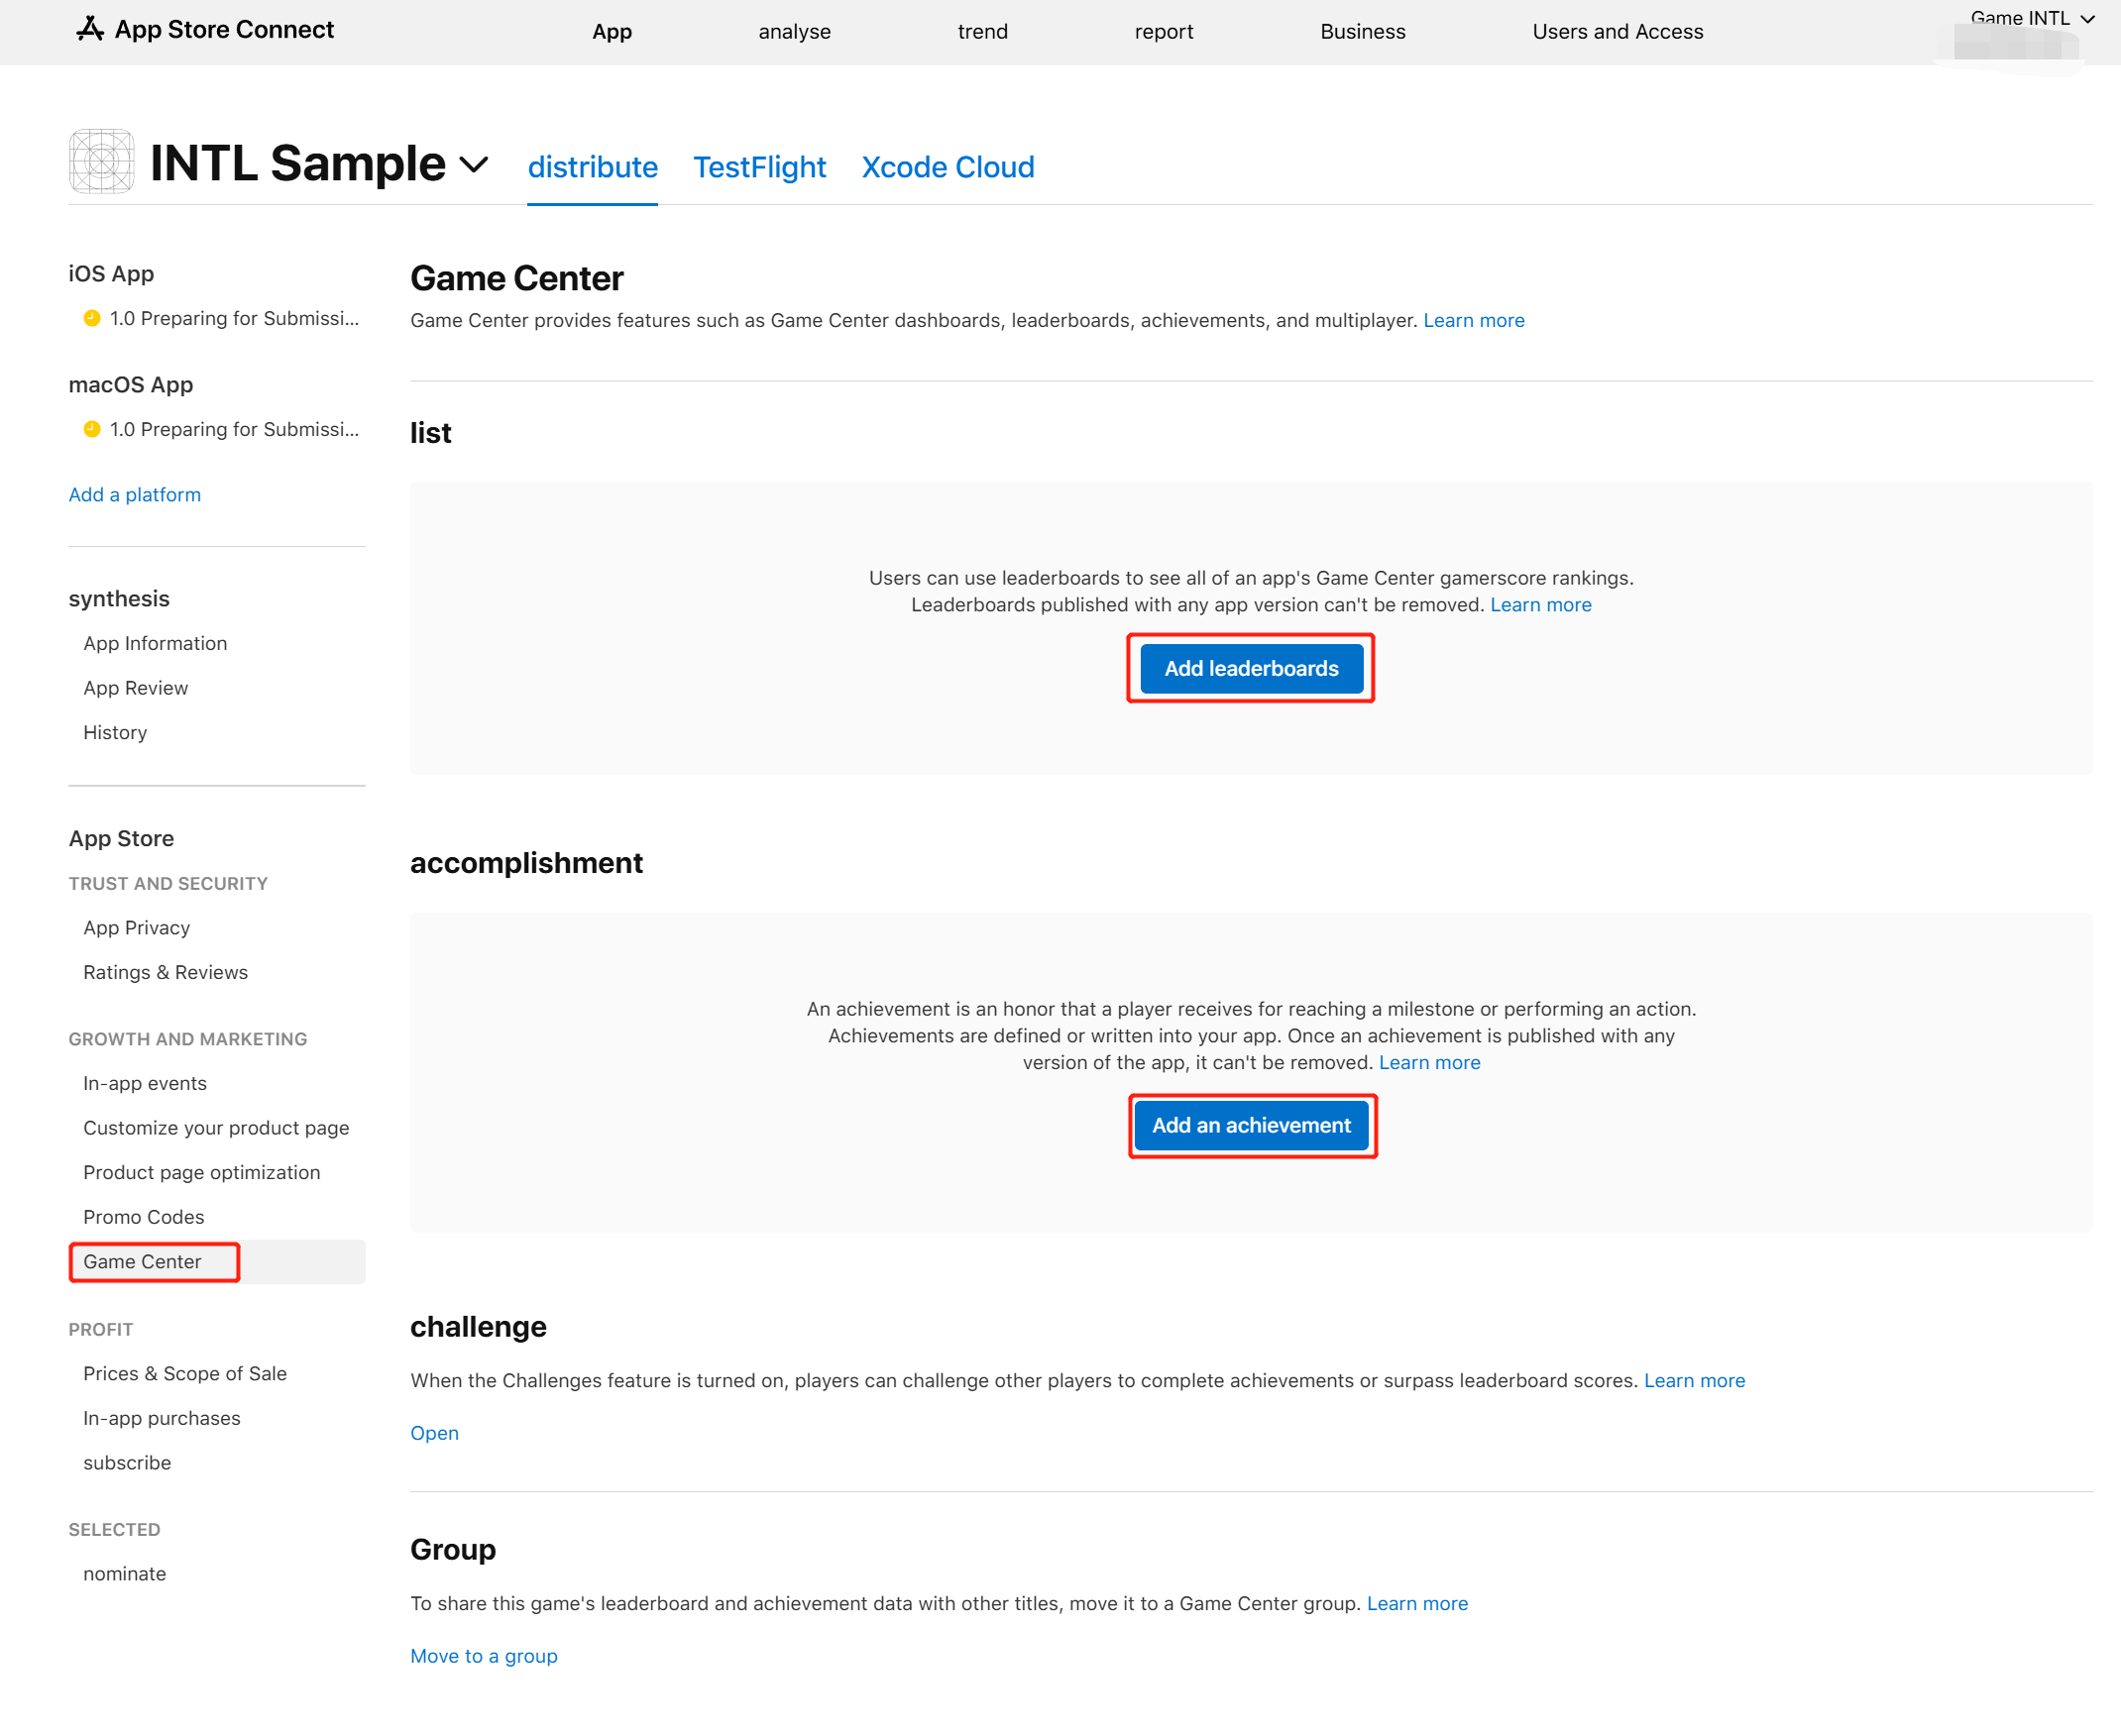
- Enter details as required.
Click on the question mark (**?) icon next to each field entry box. **) icon, a detailed explanation will be given.
- Click Storage to save the configured leaderboard.
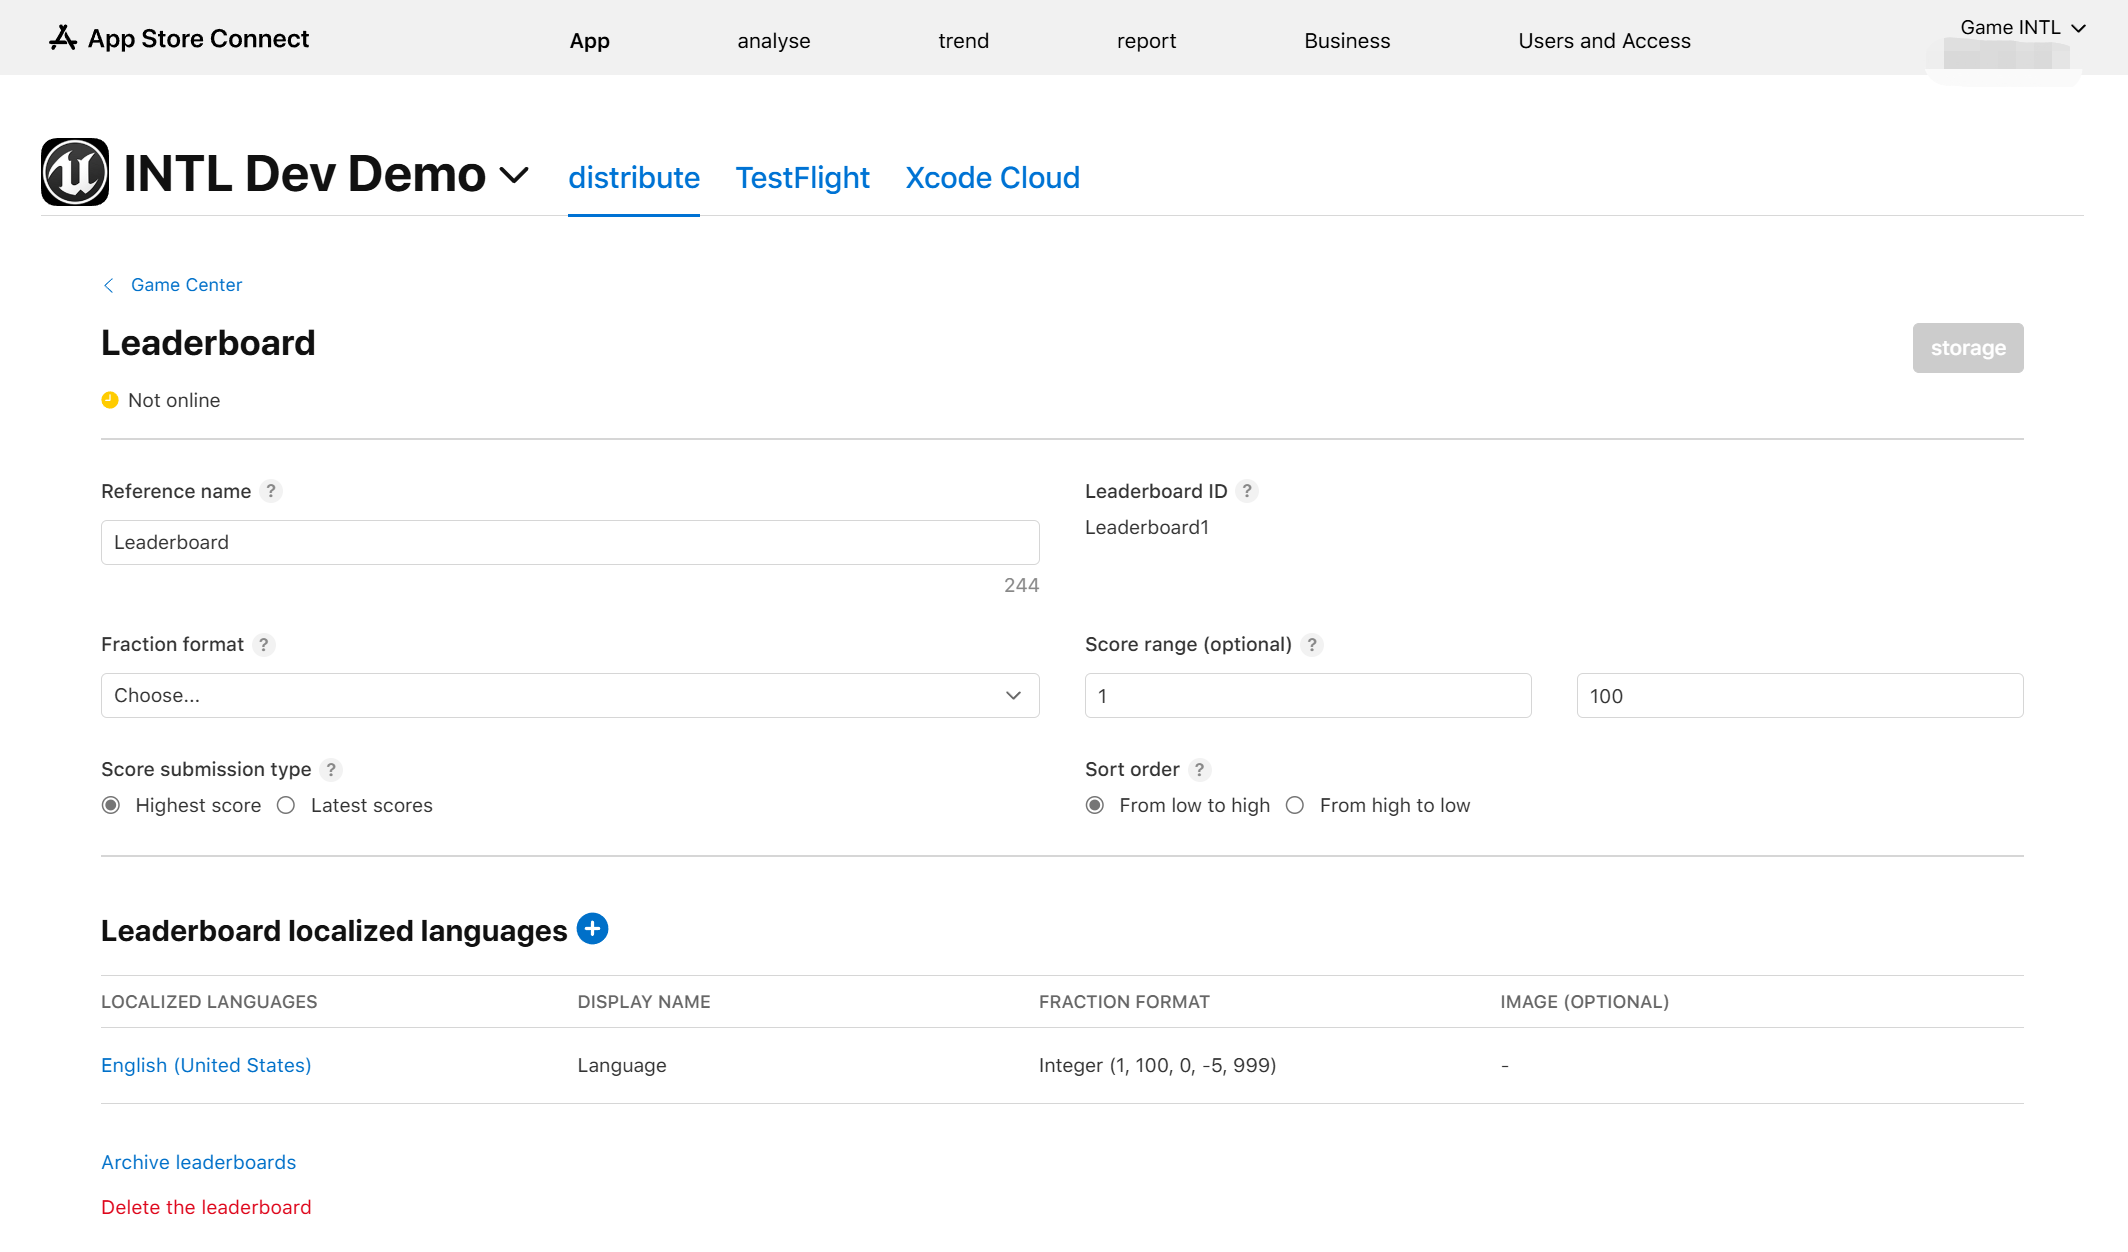
Users can add as many leaderboards as needed.The leaderboard supports multiple languages, each of which must be added separately.Achievement settings are similar to leaderboard settings.
- Obtain Player Network Console login account.
- Create a new project for your game, or join an existing one.
- Download SDK.
- Integrate SDK.
- Add Game Center as the login authentication method for business in the Player Network console.
Step 1:Configure the SDK for Game Center login
-
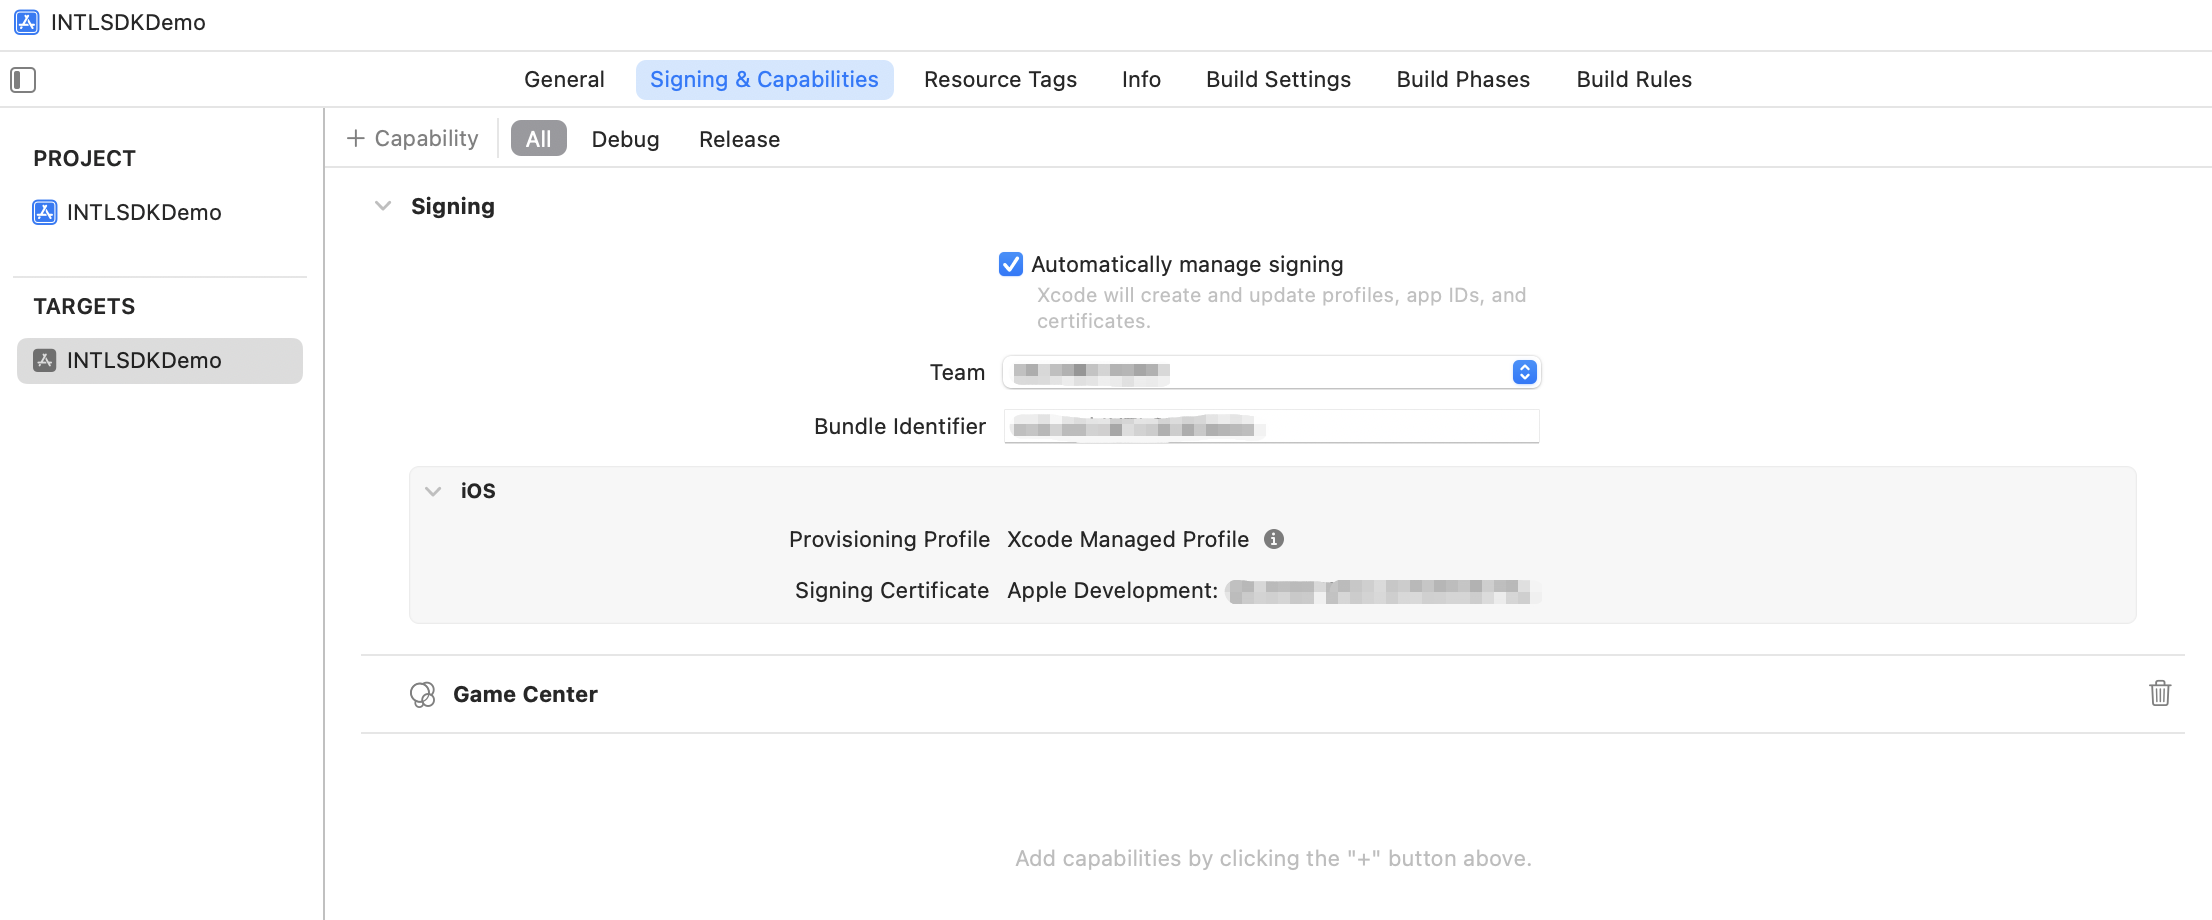
On the Signing & Capabilities page of the target project, the Bundle Identifier must be a registered iOS App app in App Store Connect.
Otherwise, when users log in to Game Center, they will receive an error message indicating that Game Center is not supported. -
On the Signing & Capabilities page of the target project, add + Capability Add Game Center.
The system library dependency GameKit.framework is automatically added to the project dependencies in Xcode.
Step 2:Add Game Center login
In versions after iOS 10, Game Center will continue to exist as a service, but there will no longer be a separate Game Center app on users' devices.Users can go to Settings > Game Center to log in and continue using the features.
There are two main scenarios for users to log into Game Center within a game:
-
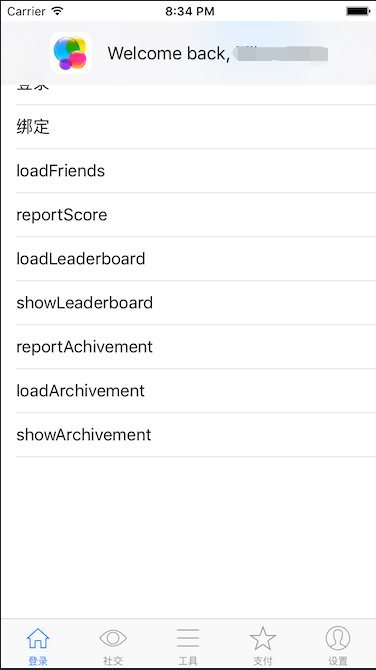
Already performs background login via Settings > Game Center by logging into:and displaying the Welcome back, xxxx banner.The entire login process will not interrupt the game.
-
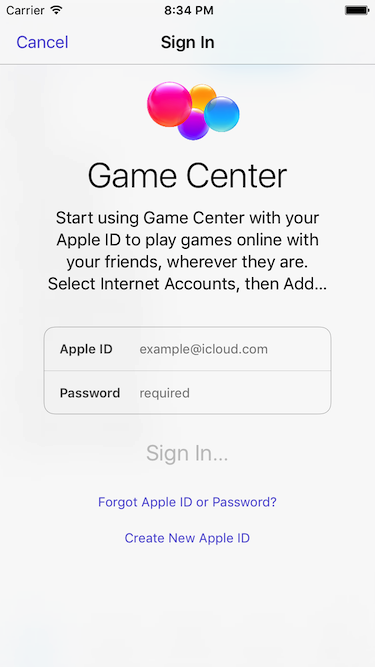
Failed Settings > Game Center Login:A Game Center login box will pop up in-game.If a user cancels their login three times, they will not be able to access the Game Center login box within the game and will need to return to Settings > Game Center to manually login to Game Center.
- Register login-related callbacks.
- Unity
- Unreal Engine
// Add callbacks
public void AddAuthObserver()
{
    INTLAPI.AddAuthResultObserver(OnAuthResultEvent);
}

// Remove callbacks
public void RemoveAuthObserver()
{
    INTLAPI.RemoveAuthResultObserver(OnAuthResultEvent);
}

// Process the INTLAuthResult callback
public void OnAuthResultEvent(INTLAuthResult ret)
{
    Debug.Log($"MethodID: {ret.MethodId}");

    string methodTag = "";
    if (authRet.MethodId == (int)INTLMethodID.INTL_AUTH_LOGIN)
    {
        methodTag = "Login";
    }
    else if (authRet.MethodId == (int)INTLMethodID.INTL_AUTH_BIND)
    {
        methodTag = "Bind";
    }
    else if (authRet.MethodId == (int)INTLMethodID.INTL_AUTH_AUTOLOGIN)
    {
        methodTag = "AutoLogin";
    }
    else if (authRet.MethodId == (int)INTLMethodID.INTL_AUTH_QUERY_USER_INFO)
    {
        methodTag = "QueryUserInfo";
    }
    else if (authRet.MethodId == (int)INTLMethodID.INTL_AUTH_GET_AUTH_RESULT)
    {
        methodTag = "GetAuthResult";
    }
}
C++ Event Handling (above v1.15)
//configure callback
FINTLAuthEvent authEvent;
authEvent.AddUObject(this, &OnAuthResult_Implementation);
UINTLSDKAPI::SetAuthResultObserver(authEvent);
// Remove callbacks
UINTLSDKAPI::GetAuthResultObserver().Clear();
void OnAuthResult_Implementation(FINTLAuthResult ret)
{
    UE_LOG(LogTemp, Warning, TEXT("MethodID: %d"), ret.MethodId);
}
Unreal Event Handling
void OnAuthResult_Implementation(FINTLAuthResult ret)
{
    UE_LOG(LogTemp, Warning, TEXT("MethodID: %d"), ret.MethodId);
}
- Call the
AutoLogininterface to log in automatically.
- Unity
- Unreal Engine
INTLAPI.AutoLogin();
UINTLSDKAPI::AutoLogin();
- If automatic login fails, call the
Logininterface to let the player log in manually.
- Unity
- Unreal Engine
INTLAPI.Login(INTLChannel.GameCenter);
UINTLSDKAPI::Login(EINTLLoginChannel::kChannelGameCenter);
- Synchronize client authentication status with the game backend and wait for the final verification result.
Step 3: Acceptance testing for login functionality
Search for the keyword "AuthResult" in the Player Network SDK logs to confirm whether the channel name and OpenID are returned correctly.If correct, it means the integration configuration is successful, and login functionality has been successfully added.
If you encounter problems during the integration process, please refer to Frequently Asked Questions.
Player Restrictions
After successfully logging into Game Center, the GKLocalPlayer object will provide restriction status information that the game can use to restrict functionality:
- isUnderage:Determines if the player is a minor.
- isMultiplayerGamingRestricted:Determines if the player can join a multiplayer game.
- isPersonalizedCommunicationRestricted:Determines if the player can use the personalized communication feature on the device.
