Web
This document is intended to introduce how to set up X authentication so that your website can use Player Network's login authentication service to log in through the X channel.
Prerequisites
1. Set up your game on the X developer website
1. Create X application
It is recommended to use a Tencent email to register your account to improve the success rate in later applications.
Follow the prompts on the X Developer Website to register as a team developer or individual developer.With a developer account, you can create applications on the Developer Portal.
-
Create a new project.

-
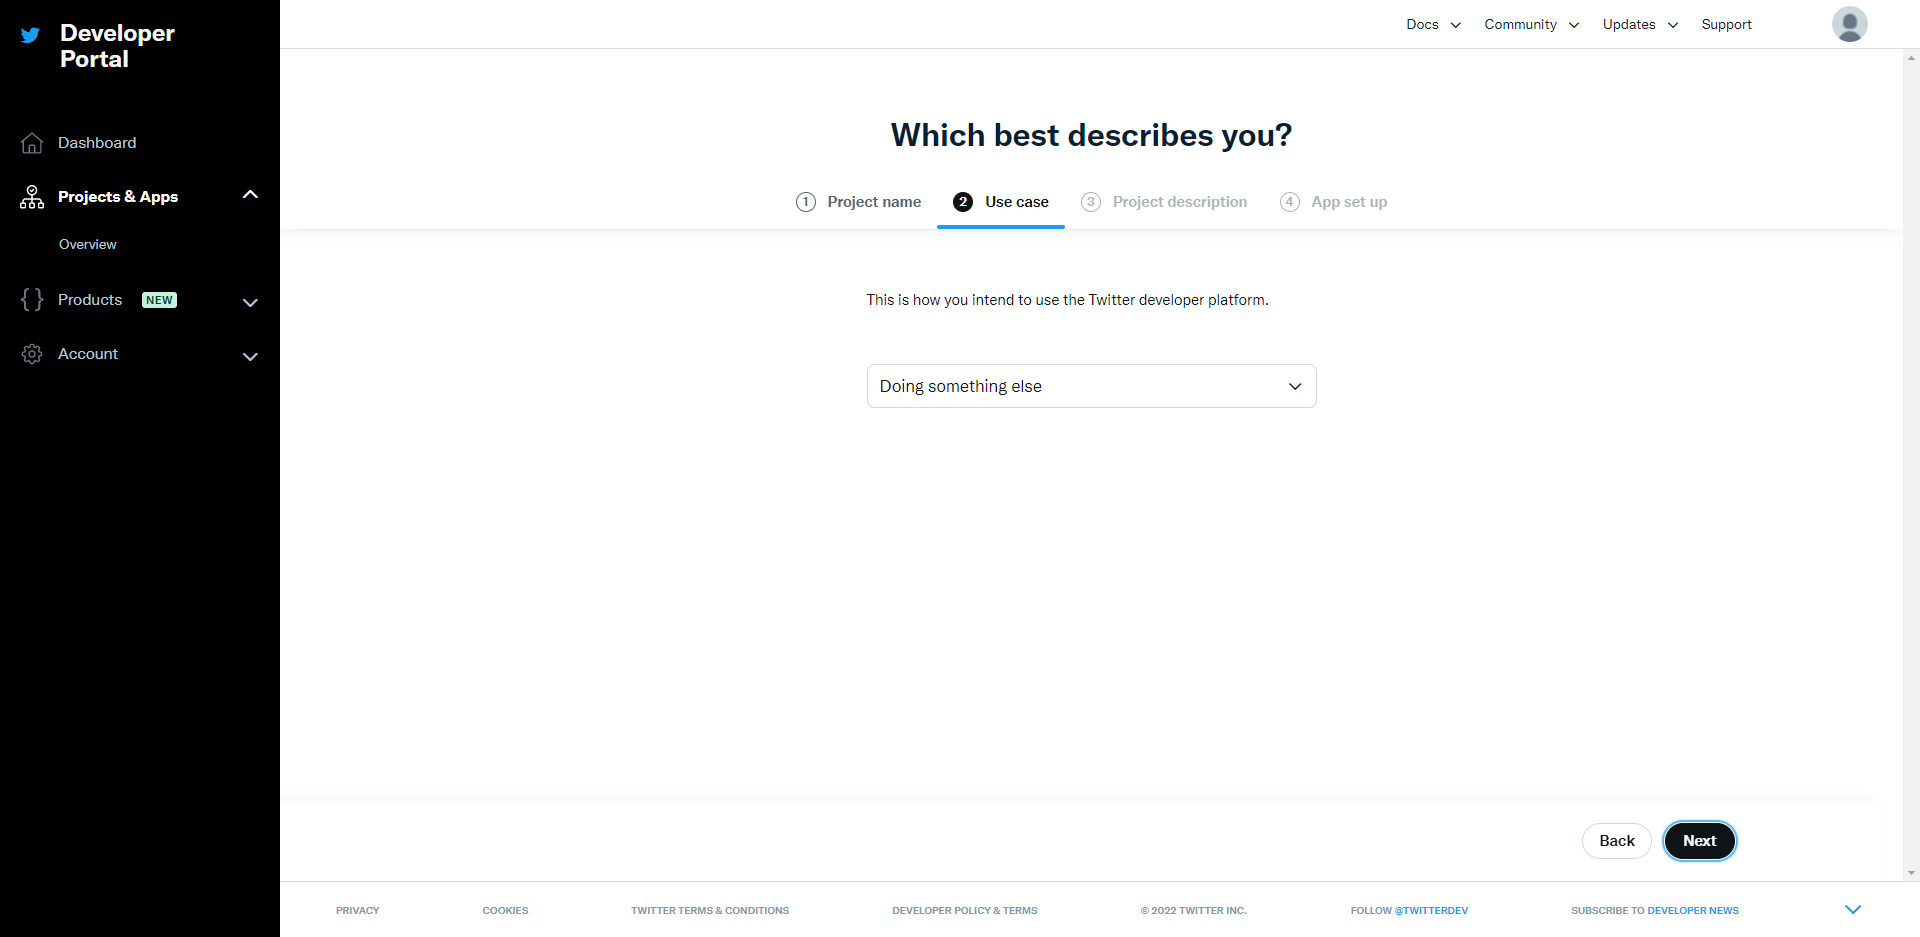
Select a use case.Click Next.
-
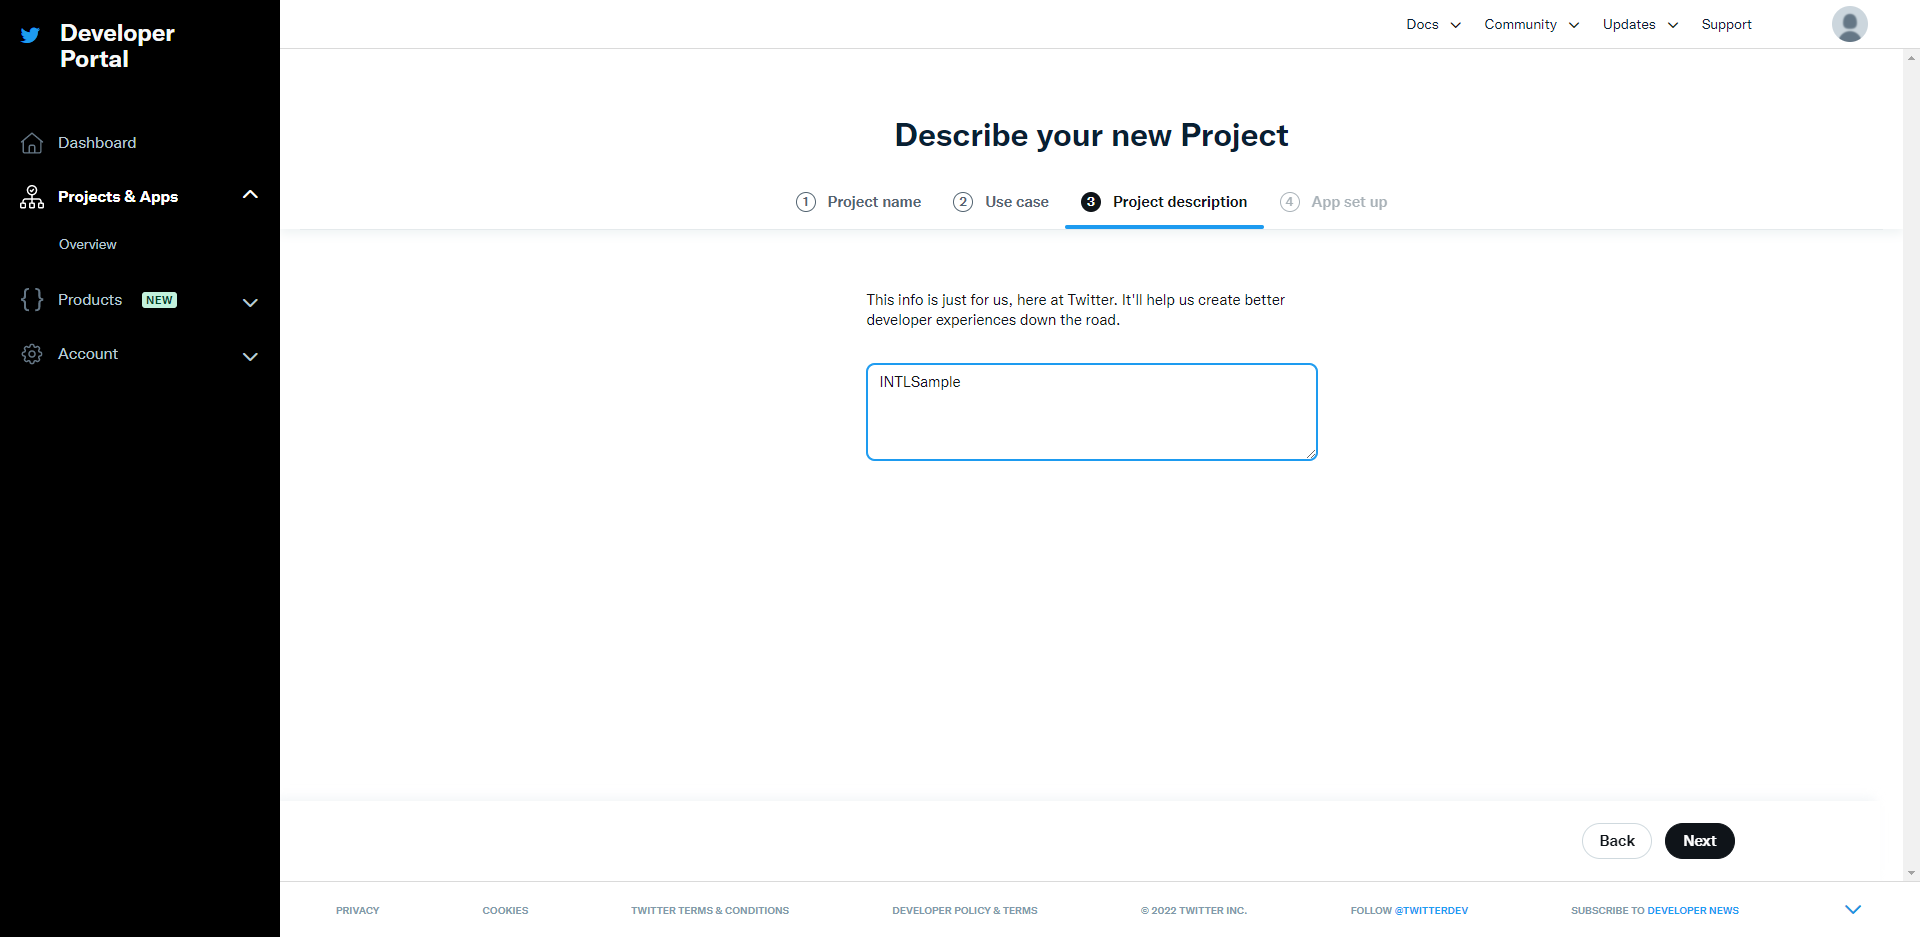
Enter a project description.Click Next.
-
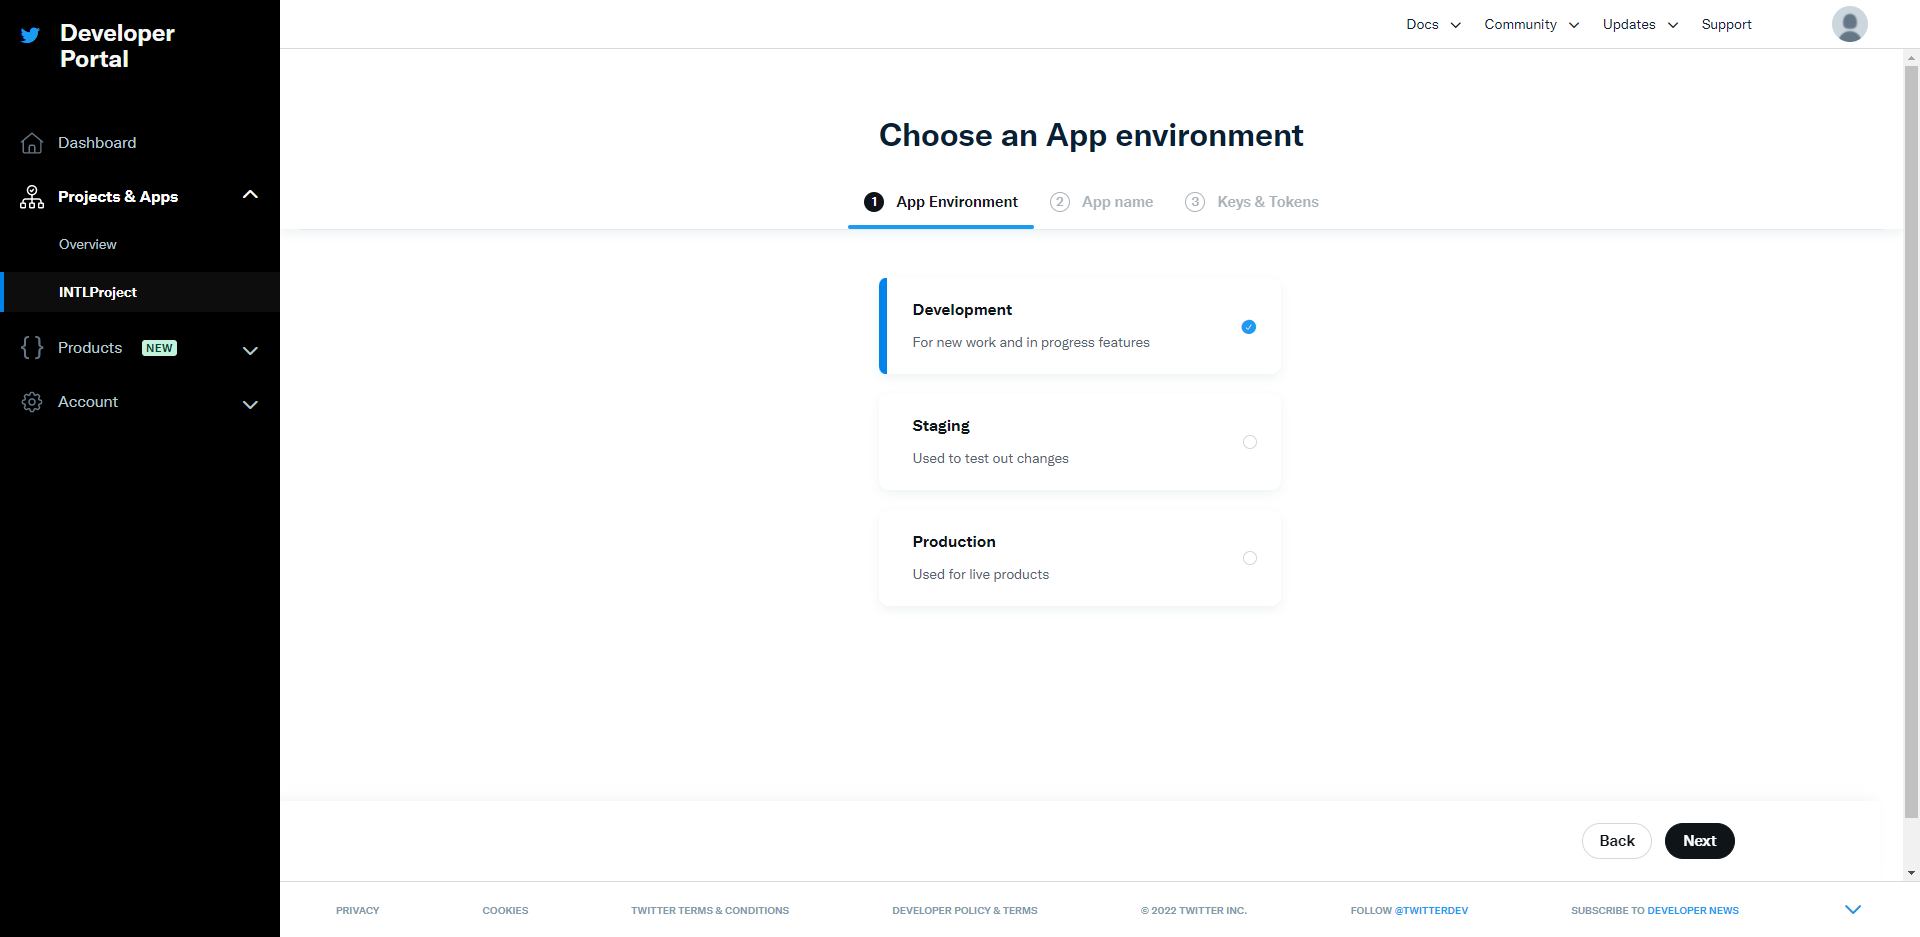
Select application environment.Click Save.
-
Enter your application name.Click Save.

-
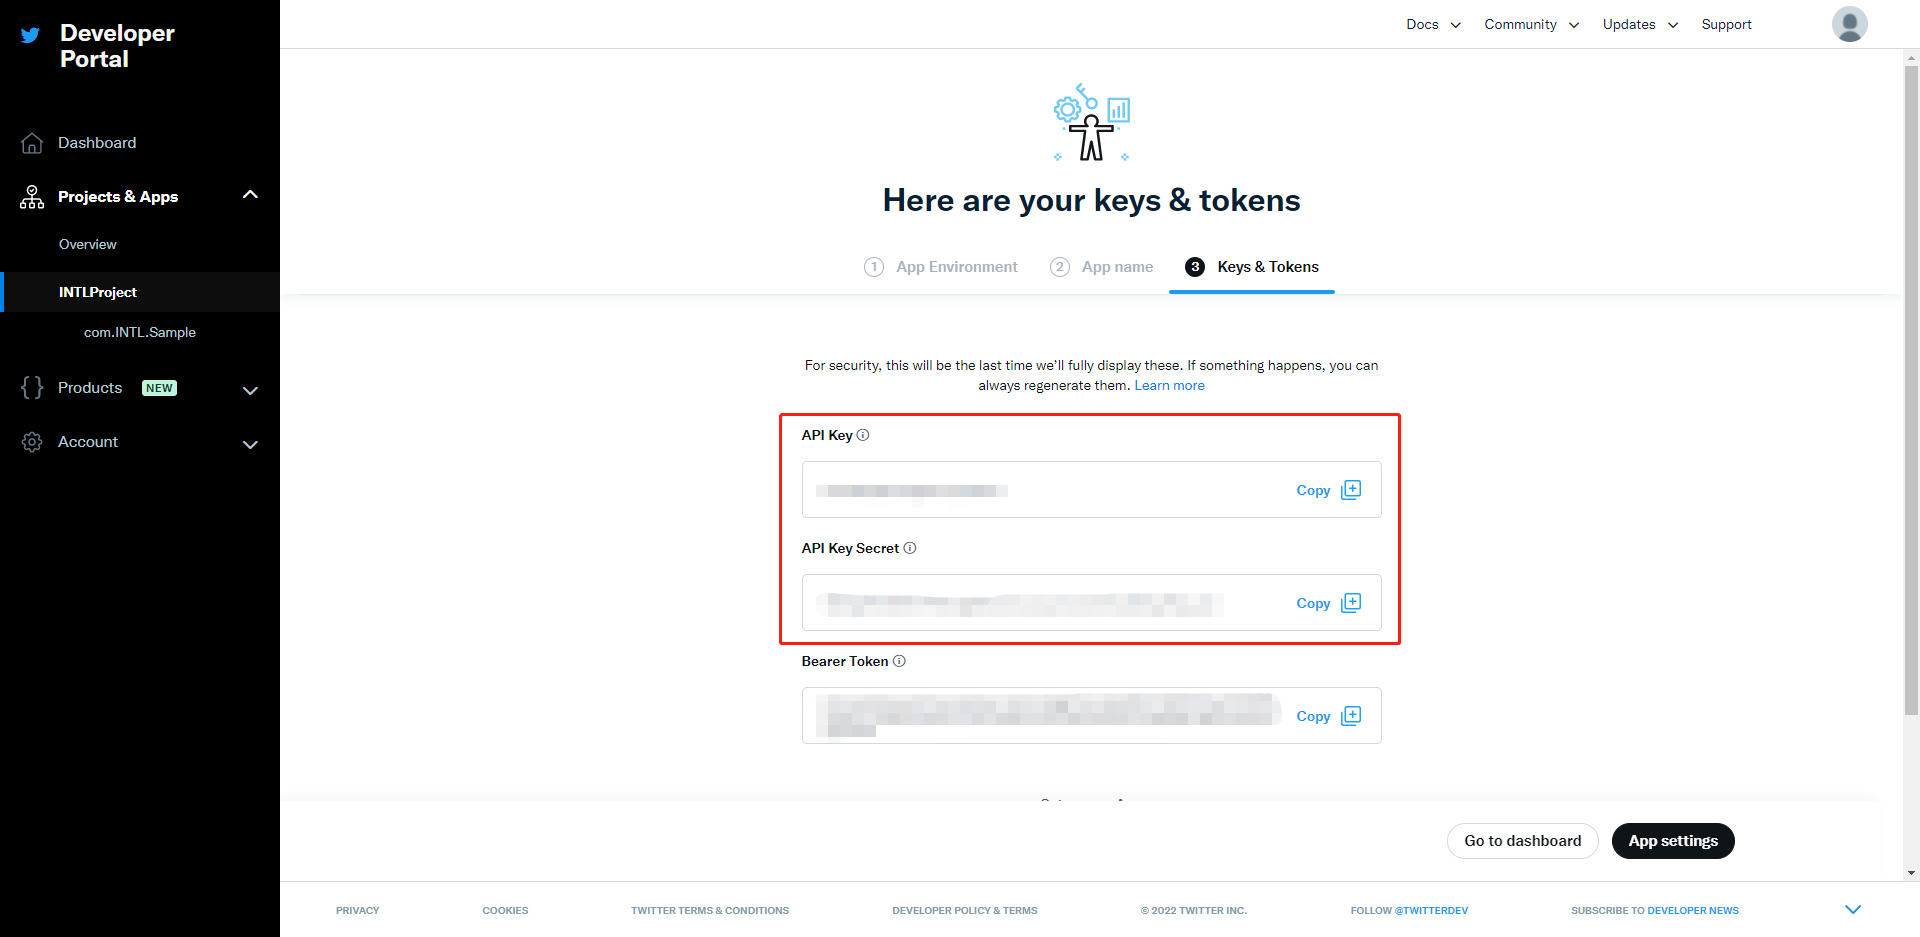
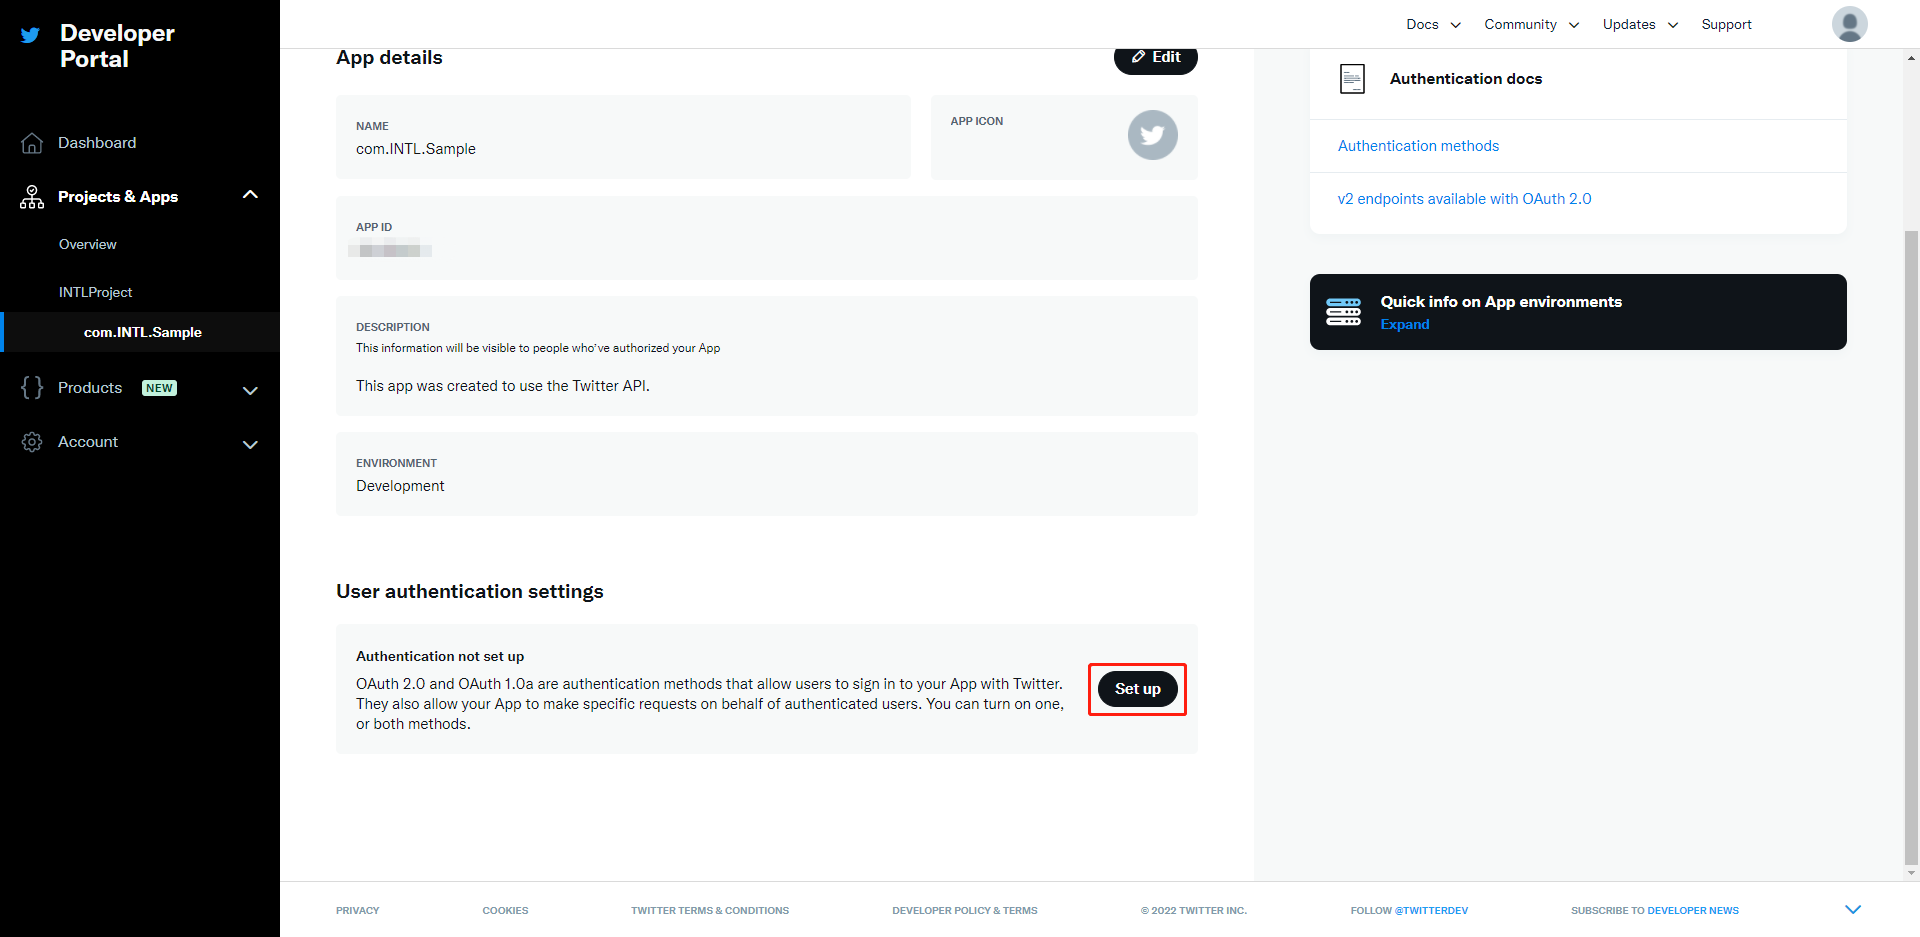
After creating the application, obtain the API key and API secret key.Store this information.Click App Settings.
-
Click Set up.
-
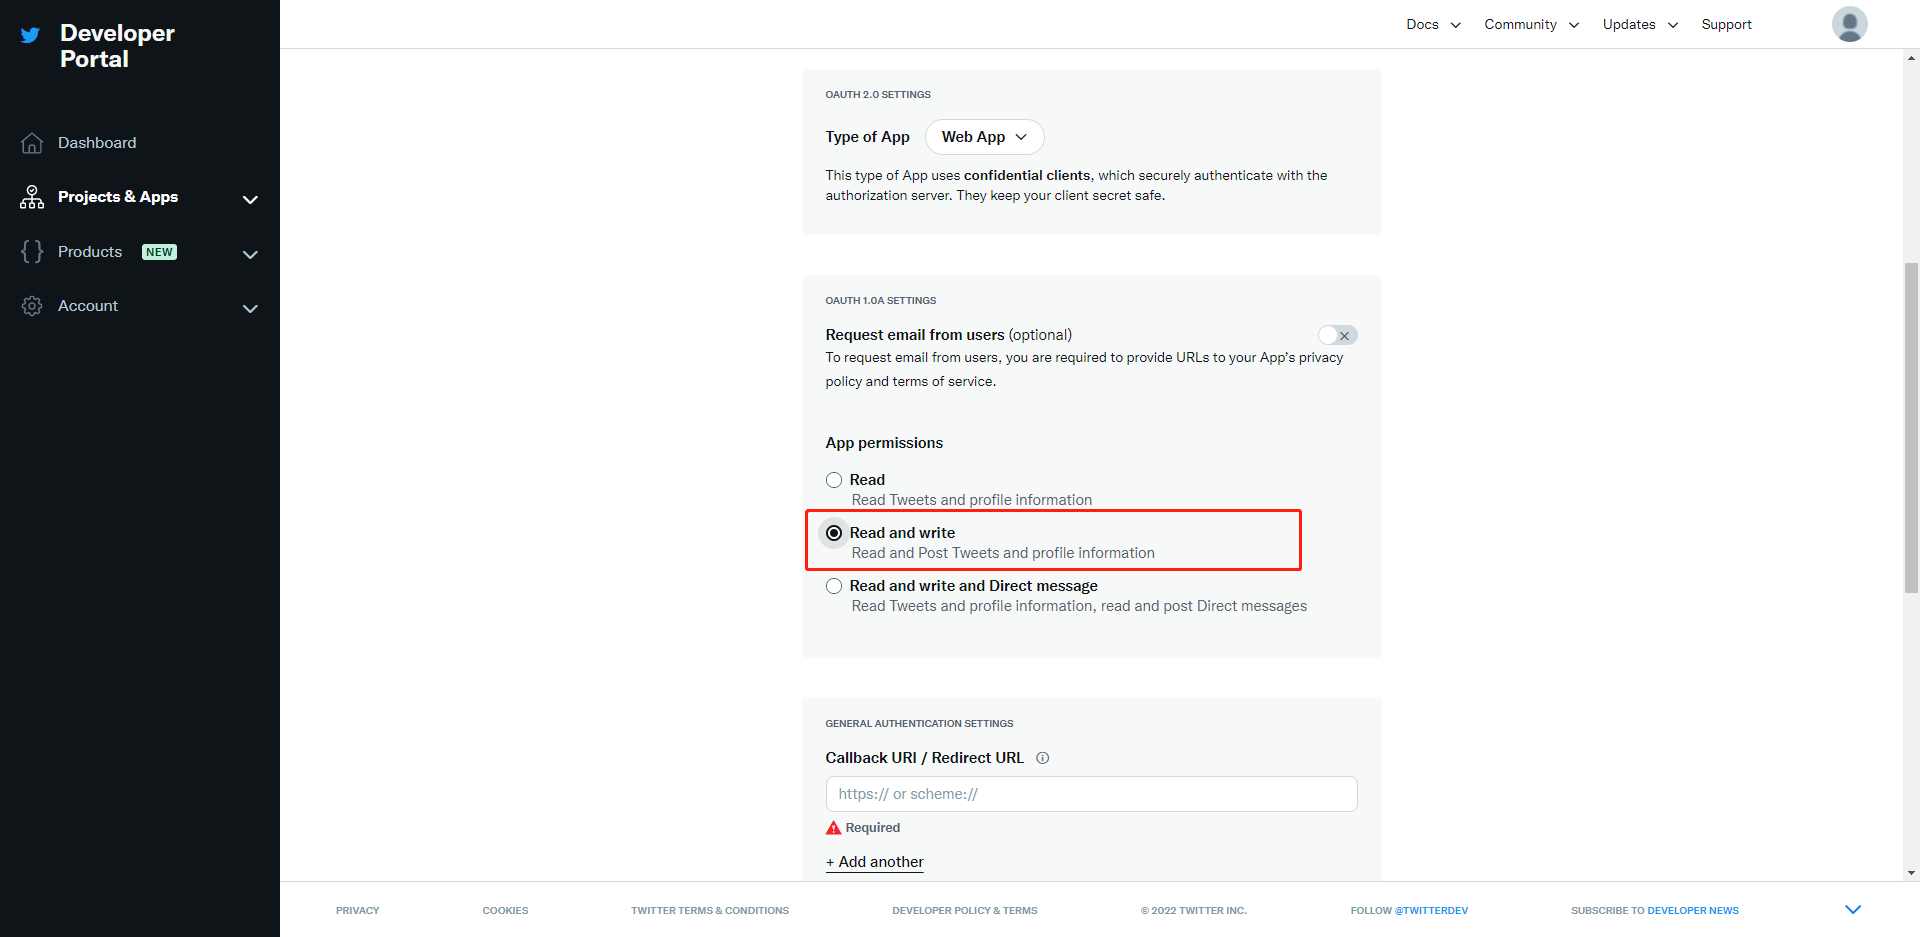
Enable OAuth2.0 and OAuth1.0a.Select Web App under application type.

-
Select Read And Write under application permissions.
-
Enter the URL for both the test environment and production environment as the callback URL.You will be directed to the official website of the game.Click Save.
If the game is already live, you cannot delete the existing callback URL, only add new ones.
Supported for Player Network SDK V1.15 and earlier versions on Android/iOS platforms.
https://image.intlgame.com/v2/test/jssdk/twitterlogincallback.html
https://image.intlgame.com/v2/release/jssdk/twitterlogincallback.html
Supported for Player Network SDK V1.16 and higher versions on Android/iOS platforms and Windows platform.
https://test-common-web.intlgame.com/jssdk/twitterlogincallback.html
https://common-web.intlgame.com/jssdk/twitterlogincallback.html
When TWITTER_CONSUMER_USE_SDK is set to 1, to use the X SDK login specified in INTLConfig.ini, please add the following callback URLs:
twittersdk://
twitterkit-{API Key}://
{API Key} needs to be replaced with the game's API Key, without the curly braces .

2. Retrieve application information
You need the X App ID and secret to add X login channel in Player Network.
- Go to the Player Network Console to create a new project for your game or join an existing one.
- Add X as a login authentication method for your business in the Player Network Console.
For more information on integrating other third-party channels into SDK, please see JavaScript SDK.
Step 1: Import the JavaScript SDK
Both npm package and CDN methods are supported.
- npm
- CDN
$ npm install @intlsdk/account-api
// SDK production version package
<script src="https://common-web.intlgame.com/sdk-cdn/account-api/latest/index.umd.js"></script>
Step 2: Use the SDK
During integration testing, set env to the test environment; when the project goes live, set env to the corresponding production environment.
const accountApi = new IntlgameAccountApi({
  env: "test", // SDK environment
  gameID: 11,
});
| Parameter | Type | Description | Remarks |
|---|---|---|---|
| env | string | SDK environment For more information, see Get deployment cluster information. | Required |
| gameID | number | Player Network unique game ID | Required |
Step 3: Implement web login
After instantiating the accountApi component, call the thirdAuthorize interface to request the access token and access secret for the X channel.
accountApi.thirdAuthorize({
    third_type: 'twitter',
}).then(
(res) => {
    console.log(res);
});
After X returns the access token and key, call the intlAuthorize API to obtain the Player Network SDK OpenID and token to log in to the website.
accountApi.intlAuthorize({
    third_type: 'twitter',
    channel_info: {
        oauth_token: "EAAI2lTrXAZBwBAC"
        oauth_secret: "xxxx"
    }
}).then(
(res) => {
    console.log(res);
});
Call the intlLogout interface to log out from the website.
accountApi.intlLogout({
    token: '4567xsdfsd',
    openid: 'xxxxxxxx',
    channel_id: 9,
}).then(
(res) => {
    console.log(res);
});
