iOS
This article aims to introduce how to set up X authentication, enabling your game to use the Player Network login authentication service to log in through the X channel.
From Spring 2024, developers will have to clearly describe data use in the privacy manifest, showing how required reason APIs will be utilized in apps that are updated or uploaded to Apple App Store Connect. For more information, see Upcoming third-party SDK requirements.
Since the X privacy manifest has not been released yet, the Player Network SDK privacy manifest does not include corresponding content. For details, refer to iOS 17 Privacy Manifest.
Since the Player Network SDK only supports X web login, the INTLTwitter plugin relies on the WebView component's INTLWKWebViewJavascriptBridge to obtain the login information returned from the X login webpage.
Prerequisites
1. Set up your game on X Developer website
1. Create X Application
It is recommended to register your account using a Tencent email to improve the success rate of future applications.
Follow the prompts to register a team or personal developer account on the X Developer website.After obtaining a developer account, you can create an application on the Developer Portal.
-
Create a new project.

-
Select a use case.Click Next.
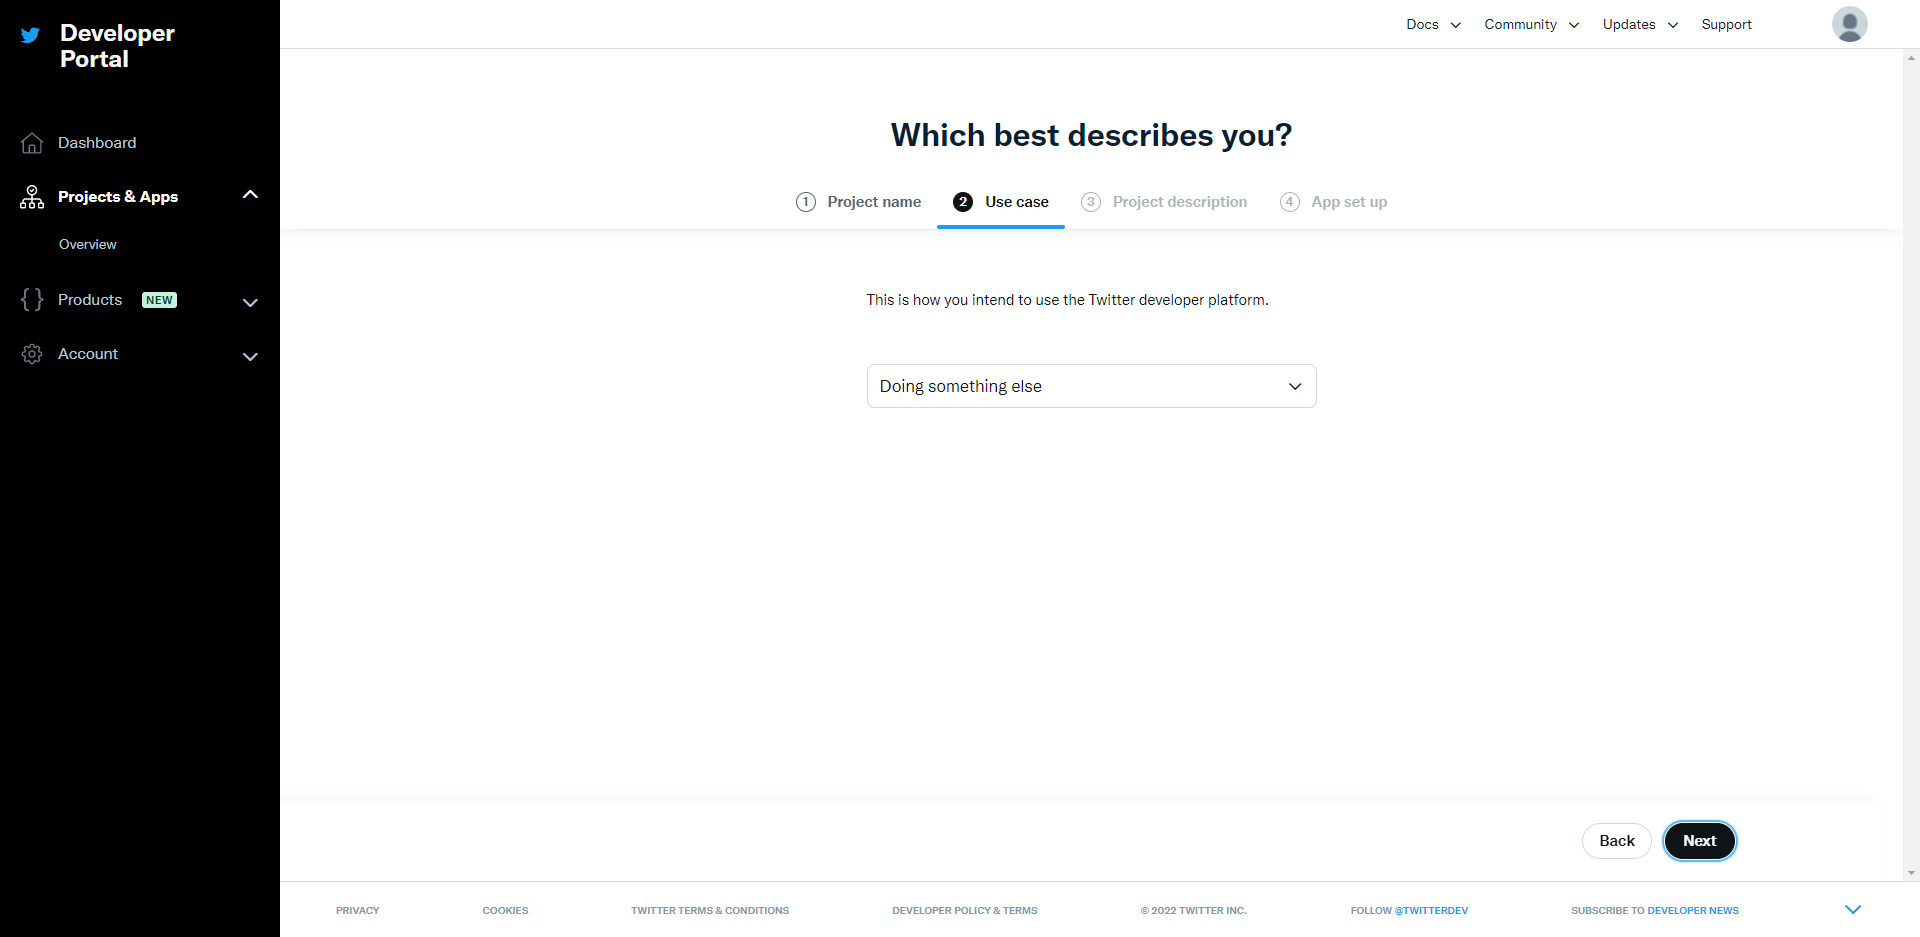
-
Enter a project description.Click Next.
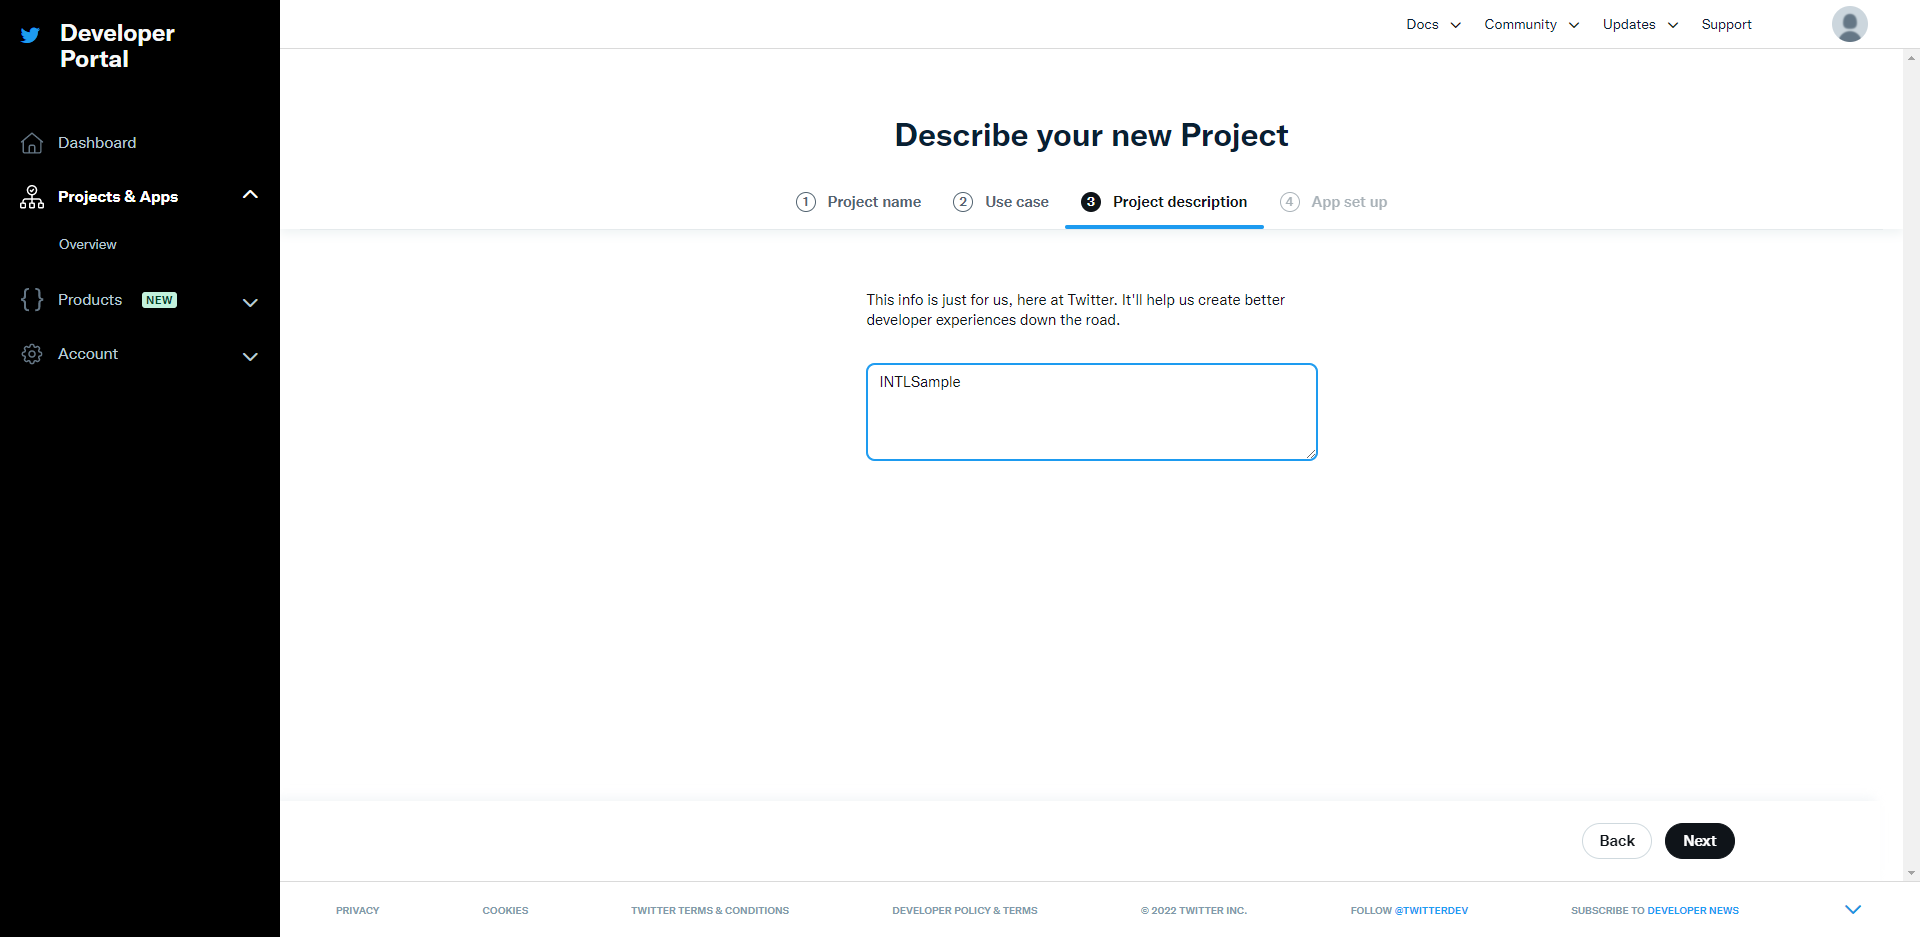
-
Select the application environment.Click Save.
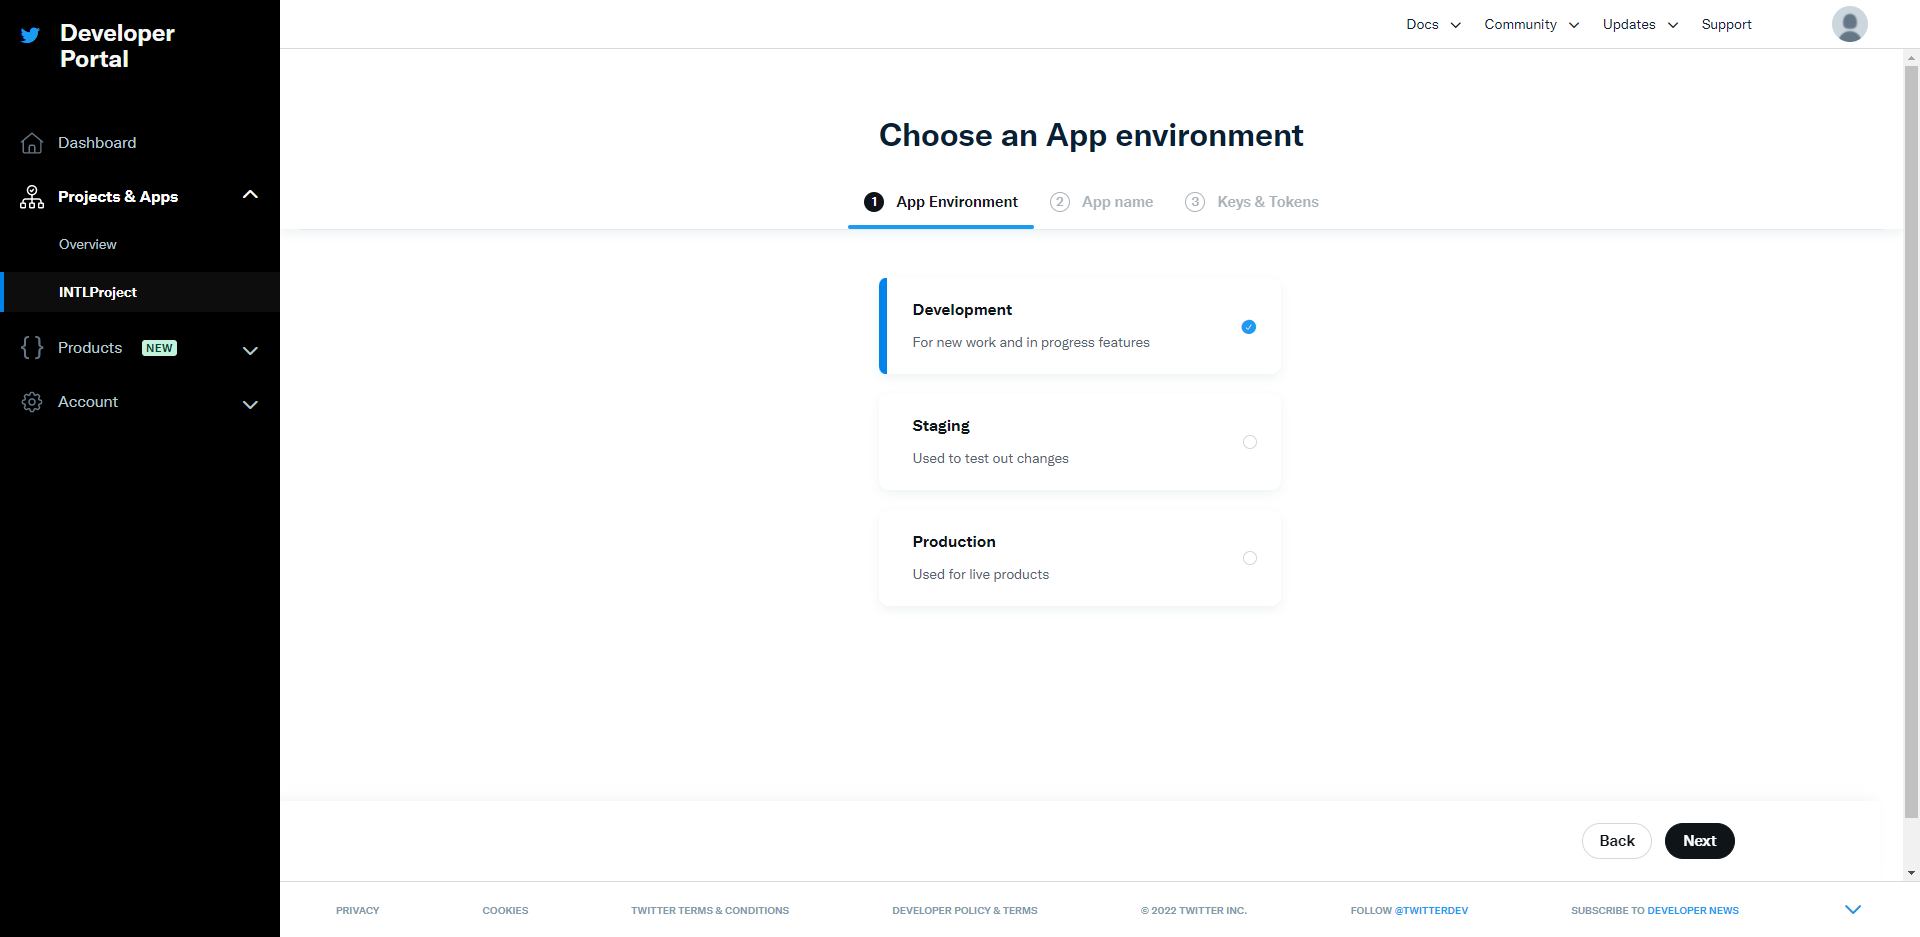
-
Enter the application name.Click Save.

-
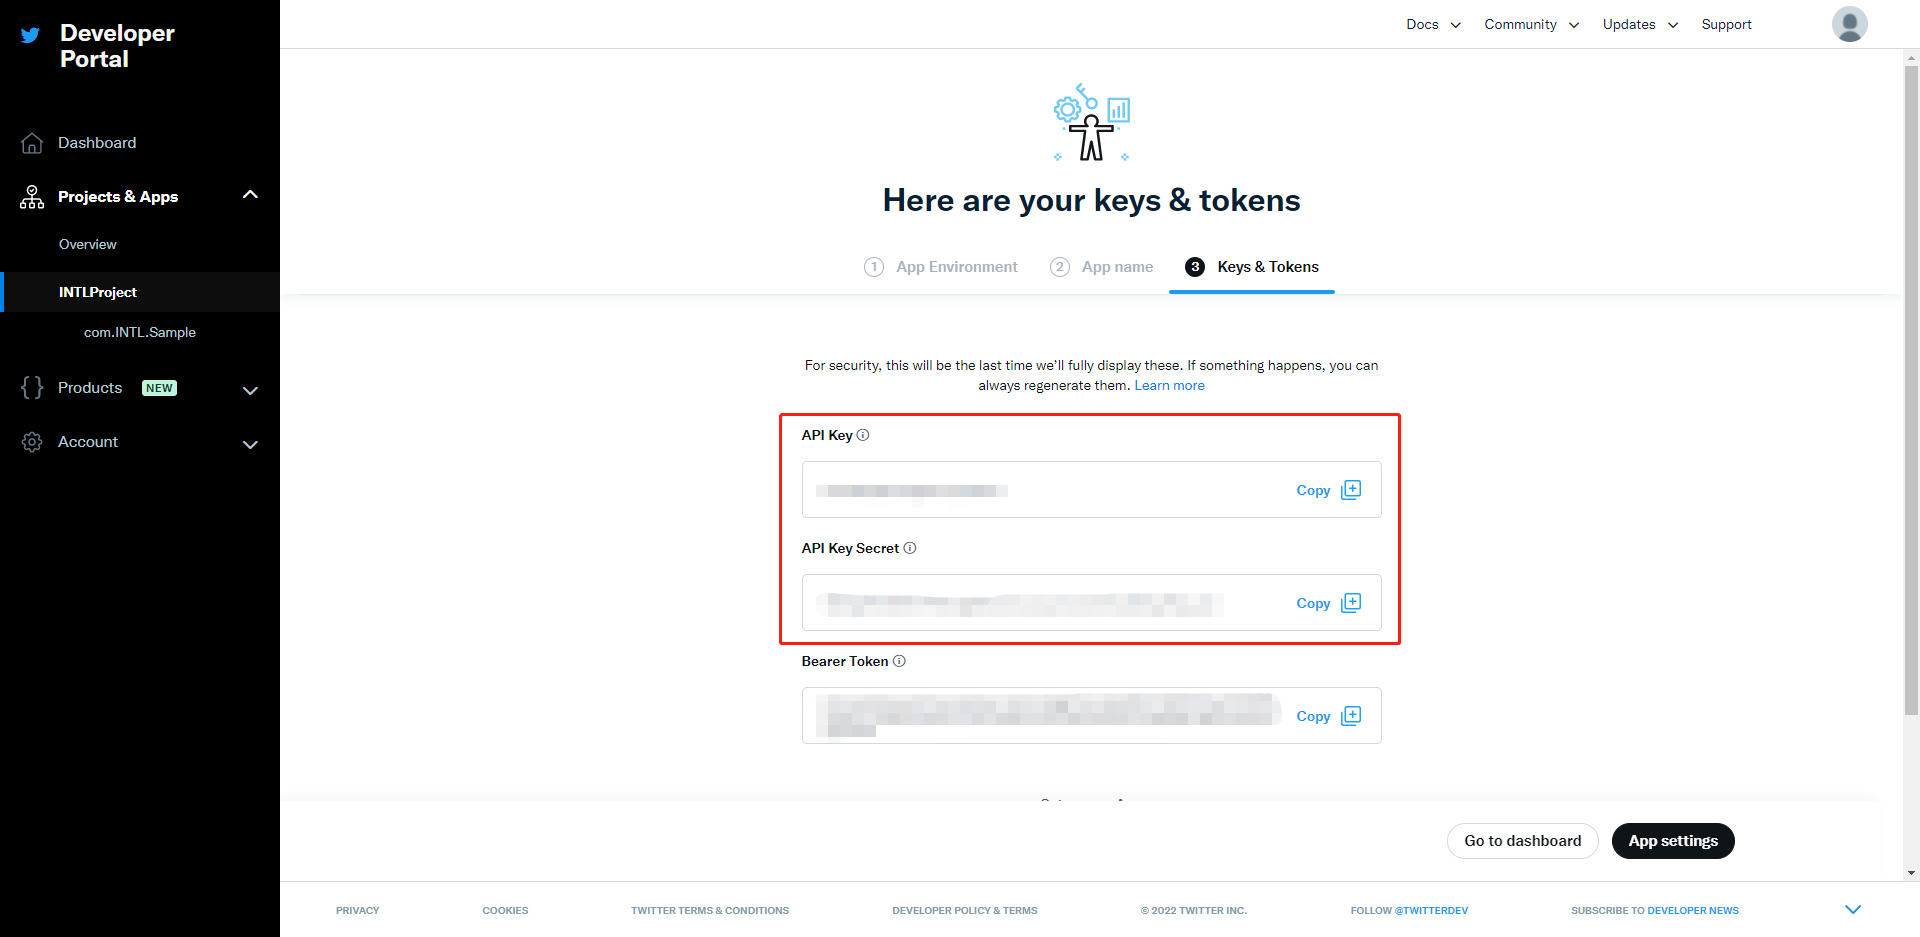
After creating the application, obtain the API key and API secret key.Store this information.Click App Settings.
This page will not be displayed again. Please make sure to save this information.
 7. Click Set up.
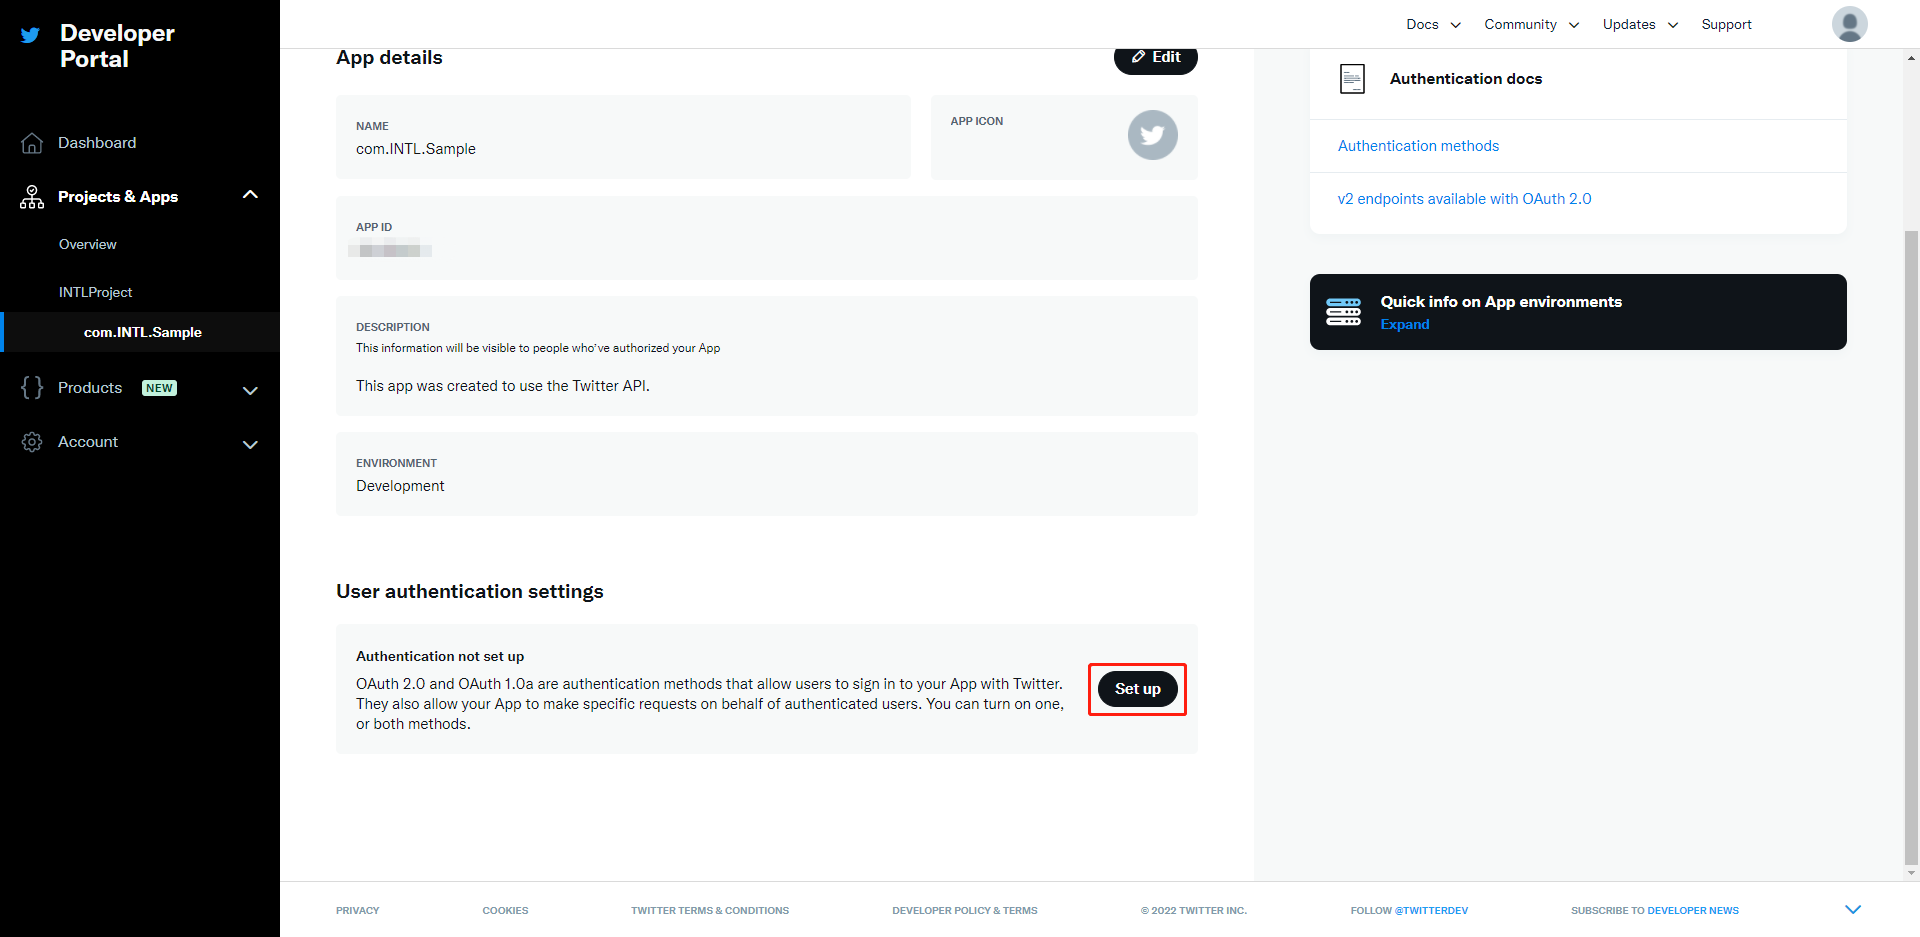 8. Enable OAuth2.0 and OAuth1.0a.Select Web App in the application type.
 9. Select Read And Write in the application permissions.
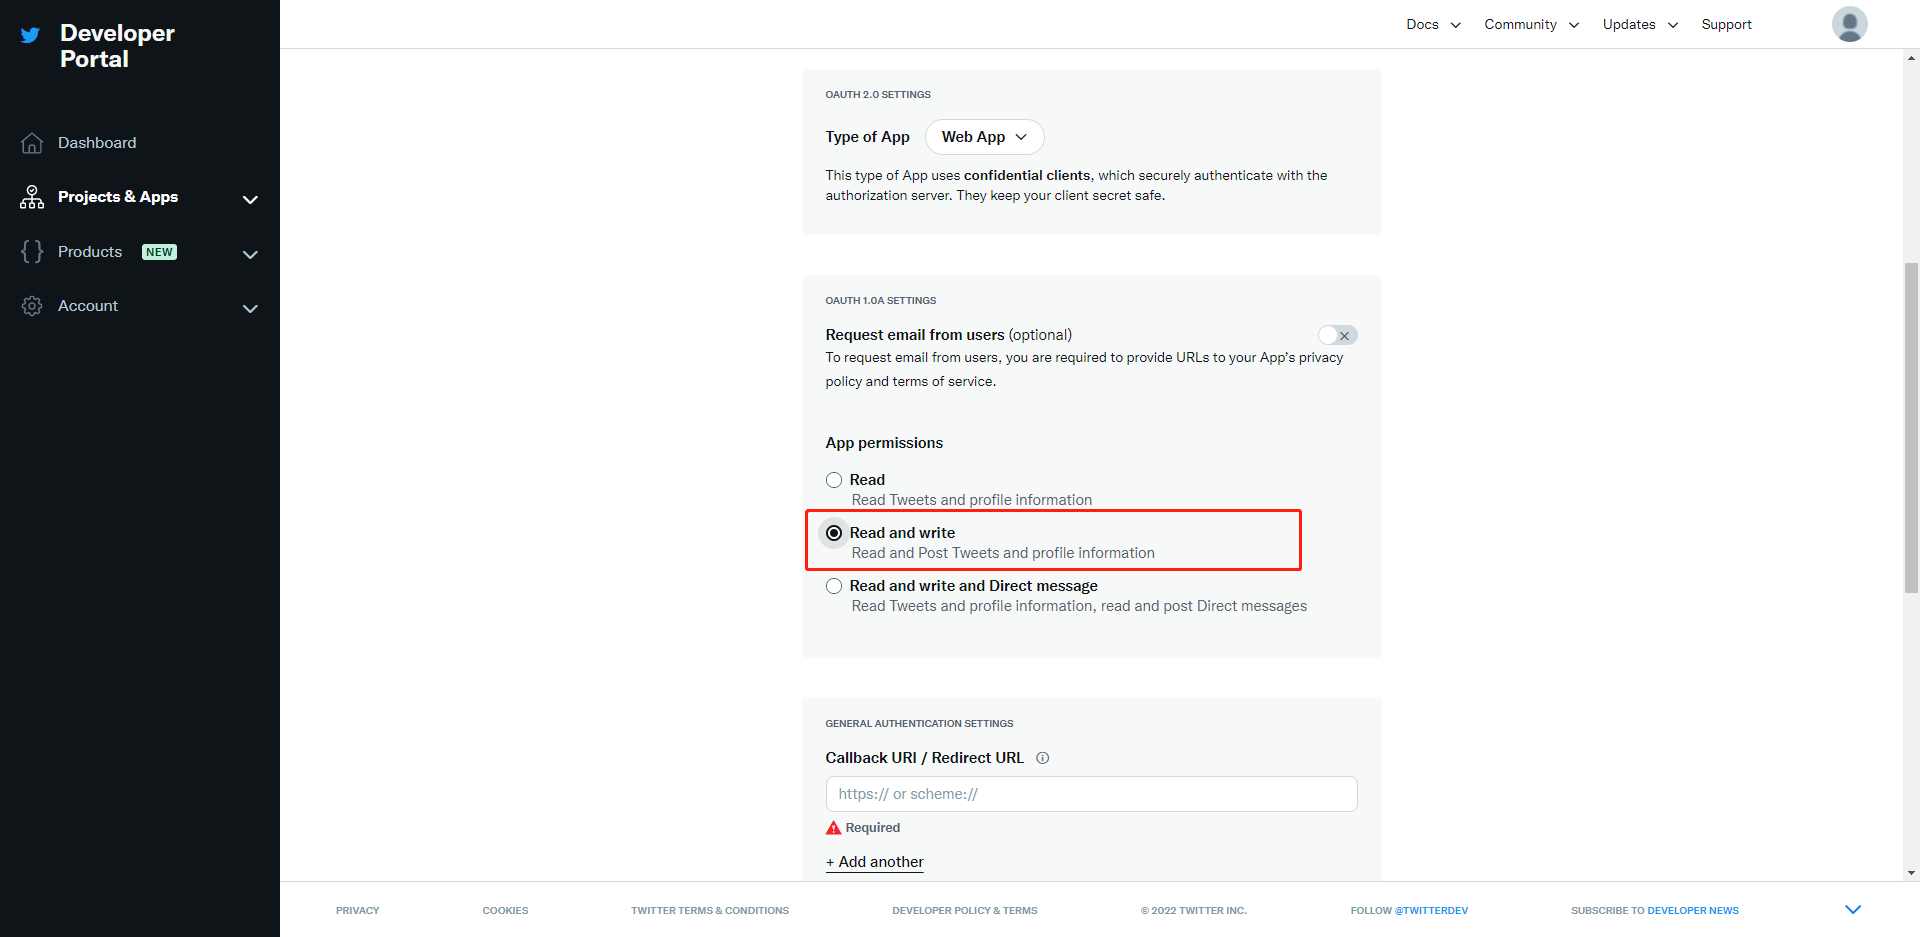 10. Enter the test and production URLs for the callback URL.You will be directed to the official website of the game.Click Save.
If the game is already live, you cannot delete the existing callback URL; you can only add new ones.
For Player Network SDK V1.15 and earlier versions
https://image.intlgame.com/v2/test/jssdk/twitterlogincallback.html
https://image.intlgame.com/v2/release/jssdk/twitterlogincallback.html
For Player Network SDK V1.16 and later versions
https://test-common-web.intlgame.com/jssdk/twitterlogincallback.html
https://common-web.intlgame.com/jssdk/twitterlogincallback.html
When TWITTER_CONSUMER_USE_SDK is 1, to use the X SDK login in INTLConfig.ini, please add the following callback URLs:
twittersdk://
twitterkit-{API Key}://
{API Key} needs to be replaced with your game's API Key, excluding the curly brackets .

2. Retrieve Application Information
You need the X App ID and password to add X as a login channel in Player Network.
- Go to the Player Network console to create a new project for your game or join an existing project.
- Download SDK.
- Integrate SDK.
- Add X as a business login authentication method in the Player Network console.
Step 1: Configure SDK for X login
-
Open the INTLConfig.ini file.
INTLConfig.ini[INTL environment]
# WARNING: You should change this URL to the production environment when you release your game.
INTL_URL = https://test.intlgame.com
GAME_ID = {INTL_GAME_ID}
SDK_KEY = {INTL_SDK_KEY}
[INTL Log]
LOG_LEVEL = 1
LOG_CONSOLE_OUTPUT_ENABLE = 1
LOG_FILE_OUTPUT_ENABLE = 1
LOG_ENCRYPT_ENABLE = 0
LOG_COMPRESS_ENABLE = 0
[X]
TWITTER_CONSUMER_KEY = {INTL_TWITTER_CONSUMER_KEY}
TWITTER_CONSUMER_SECRET = {INTL_TWITTER_CONSUMER_SECRET}- Set the SDK backend environment to
INTL_URL = https://test.intlgame.com. - Replace
{INTL_GAME_ID}and{INTL_SDK_KEY}with the values ofGAME_IDandSDK_KEYassigned by the Player Network console. - Set
LOG_LEVEL = 1,LOG_CONSOLE_OUTPUT_ENABLE = 1,LOG_FILE_OUTPUT_ENABLE = 1,LOG_ENCRYPT_ENABLE = 0, andLOG_COMPRESS_ENABLE = 0to output console logs and log files without encryption or compression. - Replace
{INTL_TWITTER_CONSUMER_KEY}and{INTL_TWITTER_CONSUMER_SECRET}with the X API key and API Key Secret.
- Set the SDK backend environment to
-
Add X to the
Info.plistfile.
- Unity
- Unreal Engine
Before exporting the Xcode project from Unity, check the predefined values in INTLTwitterKit.projmods and replace {INTL_TWITTER_CONSUMER_KEY} with the X API key.
{
    "group": "INTL",
    "Info.plist":{
    "LSApplicationQueriesSchemes":
    [
        "twitter",
        "twitterauth",
    ],
    "CFBundleURLTypes" :
    [
        {
            "CFBundleTypeRole":"Editor",
            "CFBundleURLSchemes":["twitterkit-{INTL_TWITTER_CONSUMER_KEY}"]
        }
    ]
    }
}
- SDK 1.18 and later versions
- Before SDK 1.18
Open the corresponding file according to the SDK version for modification:
- V1.24 and later:
INTLSDK/Source/INTLTwitter/Libs/iOS/INTLTwitter_UPL.xml - V1.18 to V1.23:
INTLSDK/Source/INTLConfig/Configs/iOS/Plist/INTLTwitter.plist
<key>CFBundleURLSchemes</key>
<array>
    <string>twitterkit-{INTL_TWITTER_CONSUMER_KEY}</string>
</array>
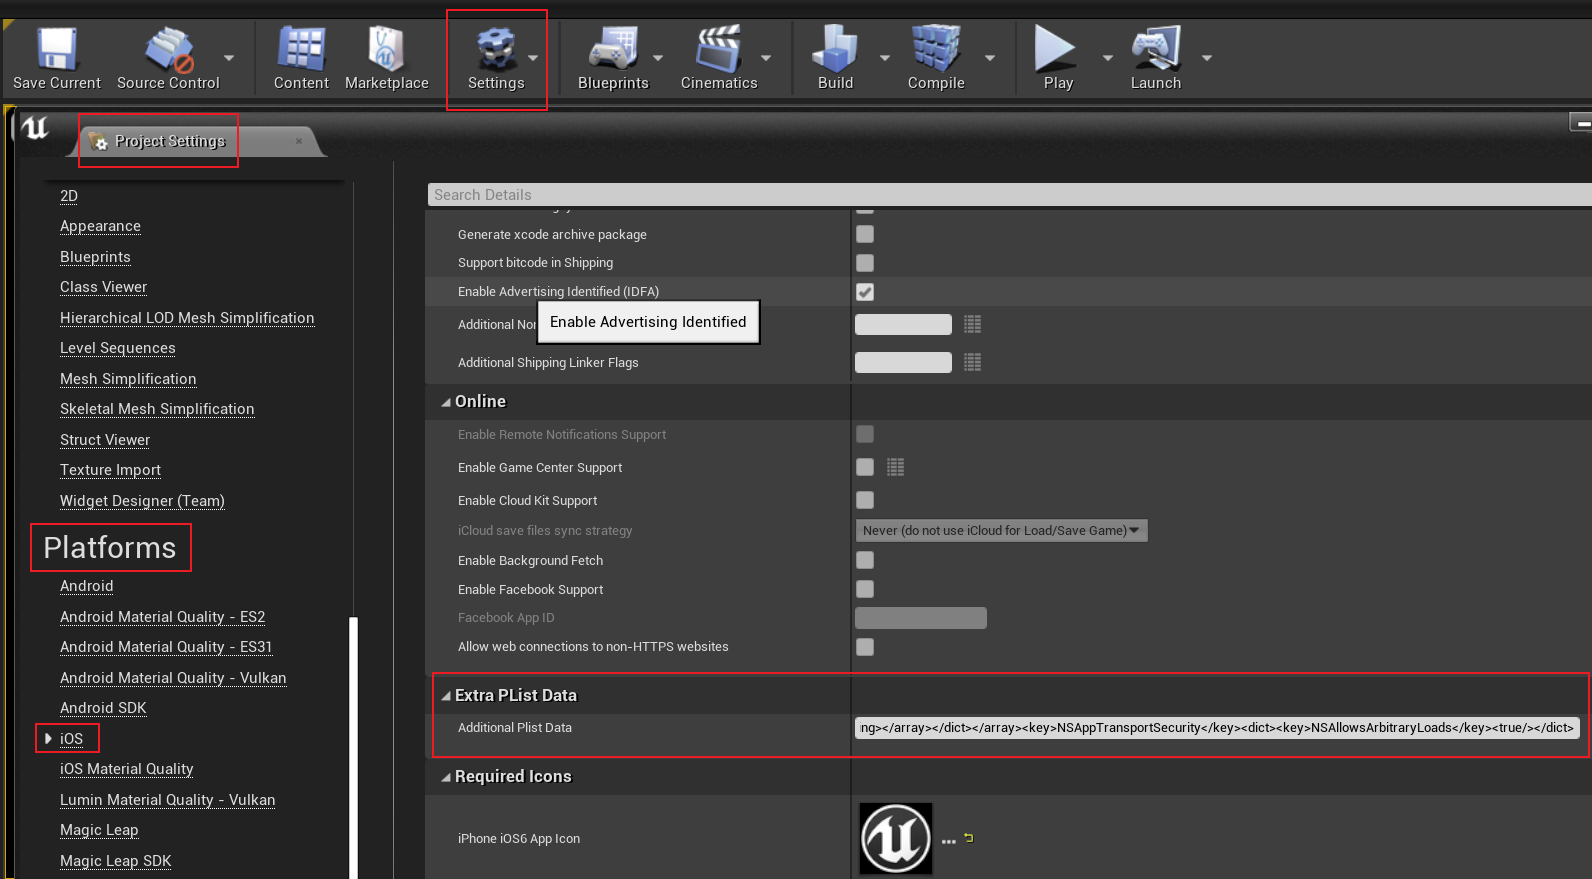
For business, go to Unreal Engine > Settings > Project Settings > Platforms > iOS > Extra Plist Data to modify the configurations and add the SDK to the PLIST file.
<key>CFBundleURLTypes</key>
...
<array>
<dict>
    <key>CFBundleTypeRole</key>
    <string>Editor</string>
    <key>CFBundleURLSchemes</key>
    <array>
        <string>twitterkit-{INTL_TWITTER_CONSUMER_KEY}</string>
    </array>
</dict>
</array>
...
<key>LSApplicationQueriesSchemes</key>
<array>
    <string>twitter</string>
    <string>twitterauth</string>
</array>
Replace {INTL_TWITTER_CONSUMER_KEY} with the X API key.
If you need to call X friends, find the BuildPhrases configuration in the INTLTwitter iOS plugin for the Xcode project and add or modify the following configuration:
MapKit.framework
Accounts.framework
CoreData.framework
Step 2: Add X login
After the user logs in, choose the X channel to proceed with binding.If the user has already used a bound X account, a server error will be prompted.Invoking the Bind interface again will require the user to log in to X again.
- Register login-related callbacks.
- Unity
- Unreal Engine
// Add callbacks
public void AddAuthObserver()
{
    INTLAPI.AddAuthResultObserver(OnAuthResultEvent);
}

// Remove callbacks
public void RemoveAuthObserver()
{
    INTLAPI.RemoveAuthResultObserver(OnAuthResultEvent);
}

// Process the INTLAuthResult callback
public void OnAuthResultEvent(INTLAuthResult ret)
{
    Debug.Log($"MethodID: {ret.MethodId}");

    string methodTag = "";
    if (authRet.MethodId == (int)INTLMethodID.INTL_AUTH_LOGIN)
    {
        methodTag = "Login";
    }
    else if (authRet.MethodId == (int)INTLMethodID.INTL_AUTH_BIND)
    {
        methodTag = "Bind";
    }
    else if (authRet.MethodId == (int)INTLMethodID.INTL_AUTH_AUTOLOGIN)
    {
        methodTag = "AutoLogin";
    }
    else if (authRet.MethodId == (int)INTLMethodID.INTL_AUTH_QUERY_USER_INFO)
    {
        methodTag = "QueryUserInfo";
    }
    else if (authRet.MethodId == (int)INTLMethodID.INTL_AUTH_GET_AUTH_RESULT)
    {
        methodTag = "GetAuthResult";
    }
}
C++ Event Handling (above v1.15)
//configure callback
FINTLAuthEvent authEvent;
authEvent.AddUObject(this, &OnAuthResult_Implementation);
UINTLSDKAPI::SetAuthResultObserver(authEvent);
// Remove callbacks
UINTLSDKAPI::GetAuthResultObserver().Clear();
void OnAuthResult_Implementation(FINTLAuthResult ret)
{
    UE_LOG(LogTemp, Warning, TEXT("MethodID: %d"), ret.MethodId);
}
Unreal Event Handling
void OnAuthResult_Implementation(FINTLAuthResult ret)
{
    UE_LOG(LogTemp, Warning, TEXT("MethodID: %d"), ret.MethodId);
}
- Invoke the
AutoLogininterface to log in automatically.
- Unity
- Unreal Engine
INTLAPI.AutoLogin();
UINTLSDKAPI::AutoLogin();
- When automatic login fails, invoke the
Logininterface to allow players to log in manually.
- Unity
- Unreal Engine
INTLAPI.Login(INTLChannel.Twitter);
UINTLSDKAPI::Login(EINTLLoginChannel::kChannelTwitter);
- Synchronize the client's authentication status with the game backend and await the final validation result.
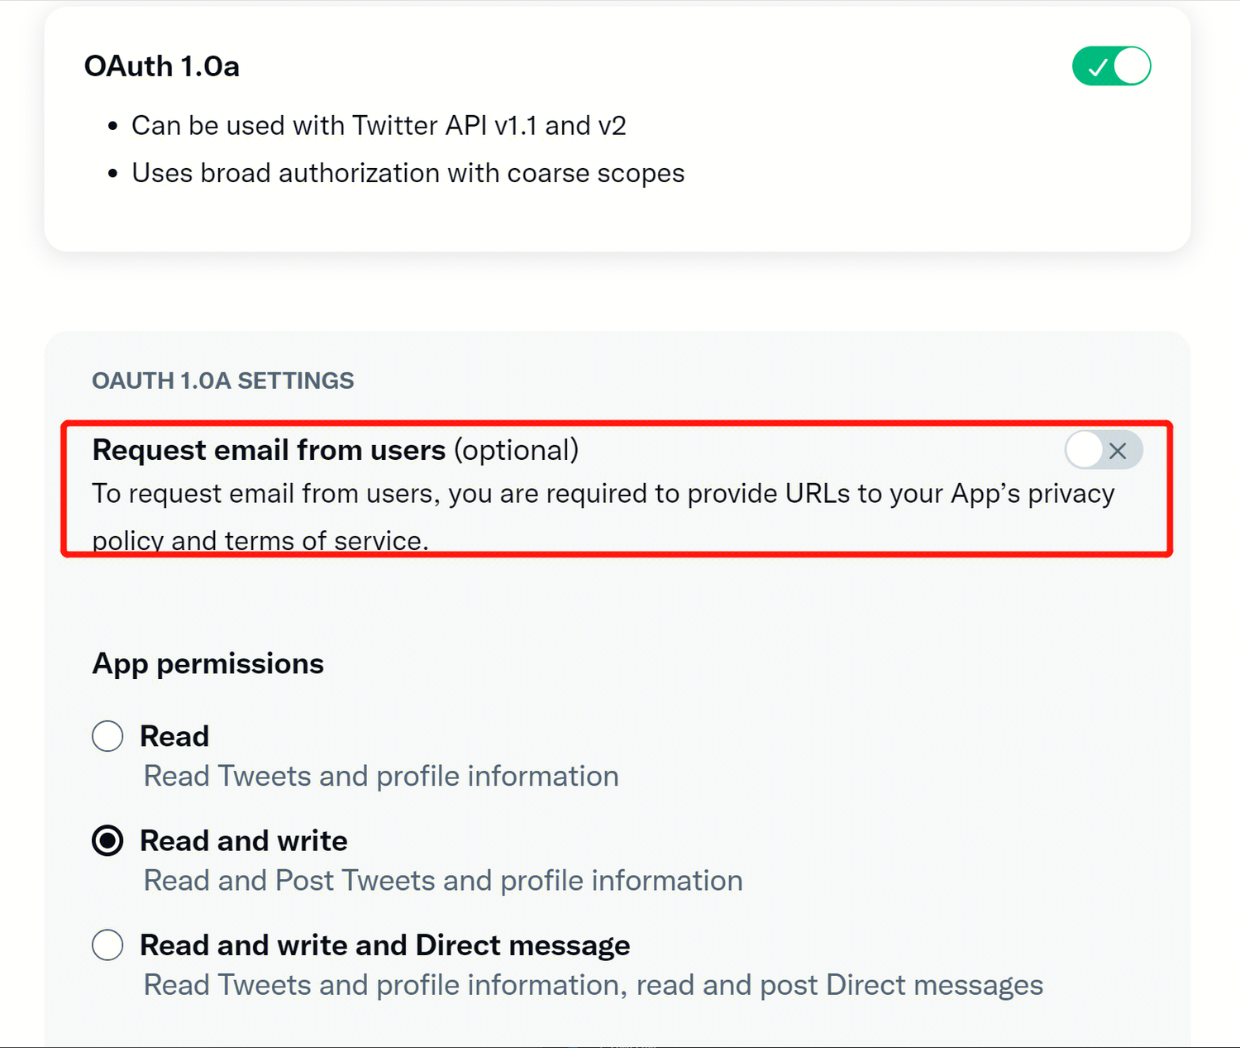
[Optional] Set email permissions
To obtain the player's email during X login, you must first enable the corresponding permission. After enabling, email will be returned in the ChannelInfo of AuthResult.
- For compliance considerations, you can mask the returned
emailfor specific sources. If needed, please contact Player Network Assistant to enable. - You can report
base64(sha256(email))in backend logs after hashing. If needed, please contact Player Network Assistant to enable. - Can be used to verify whether player information or the bind list contains
emailinformation. If needed, please contact Player Network Assistant to enable. - Can be used for iOS Firebase's Private Set Membership (PSM) feature. See Firebase iOS Project Configuration.
-
On the X Developer Platform, under User authentication settings, check Request email from users.
-
Enable email return in the Player Network Console by setting return_email to YES. For details, please see Third-party channel configuration.
Step 3: Acceptance of Login Functionality
Search for the keyword "AuthResult" in the Player Network SDK log to confirm whether the channel name and OpenID are returned correctly.If they are correct, it means the integration is successful and the login function has been successfully added.
If you encounter problems during integration, refer to FAQs.
