iOS
This article is intended to introduce how to set up QQ authentication, allowing your game to use Player Network login authentication service via the QQ channel.
Prerequisites
1. Configure your game on the QQ Connect platform
1. Create a QQ application
-
Log in to QQ Connect.
-
Click Create Application.

-
Enter Application Information.
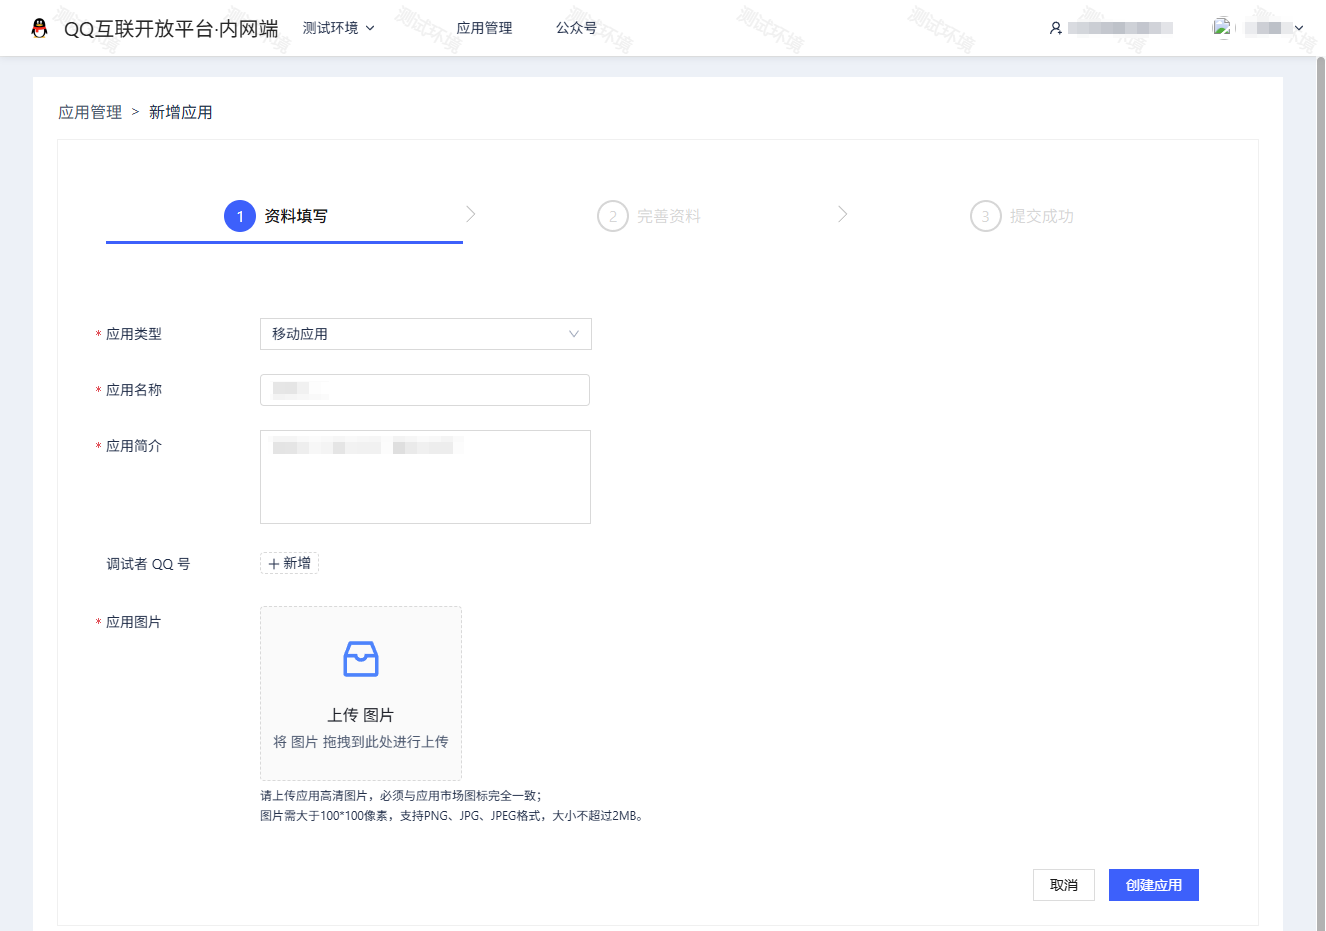
-
Under Complete Information, enter your iOS application details.
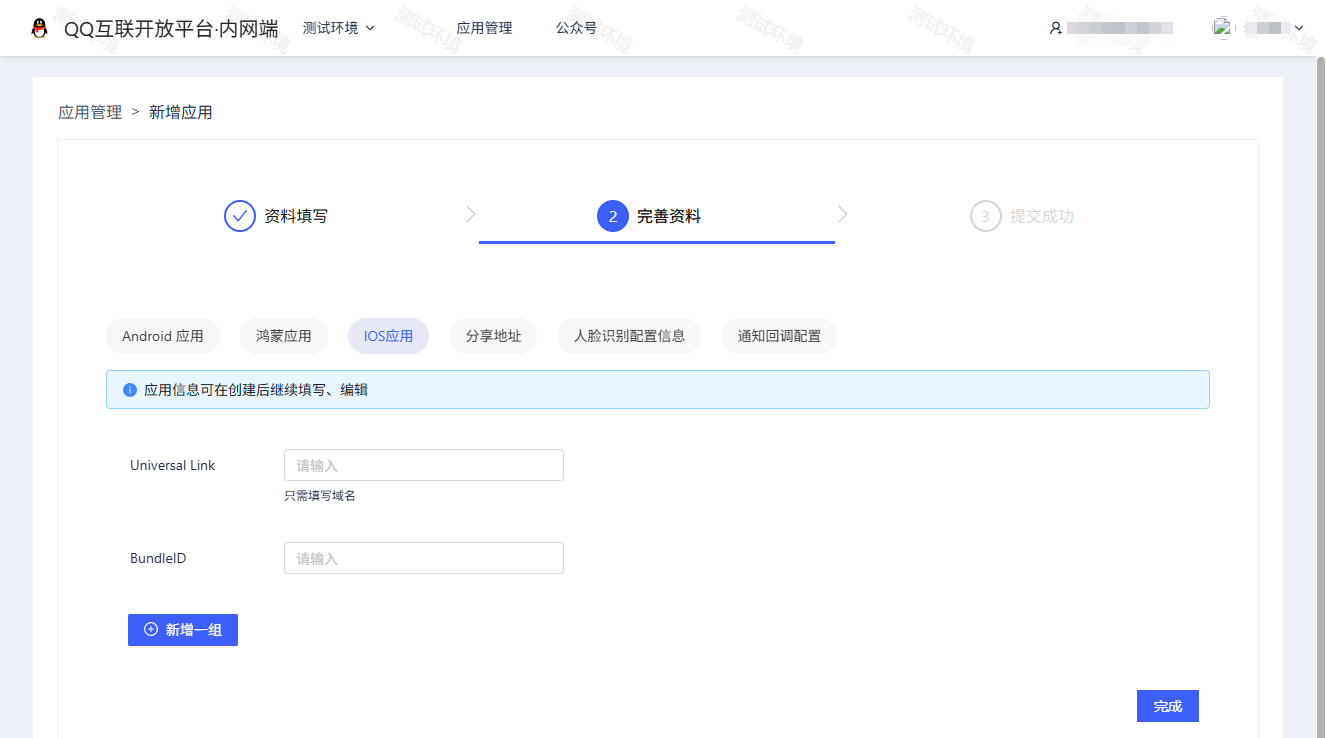
2. Retrieve application information
-
Log in to QQ Connect.
-
Click All Applications.
-
In the Actions column of the corresponding application, click View.
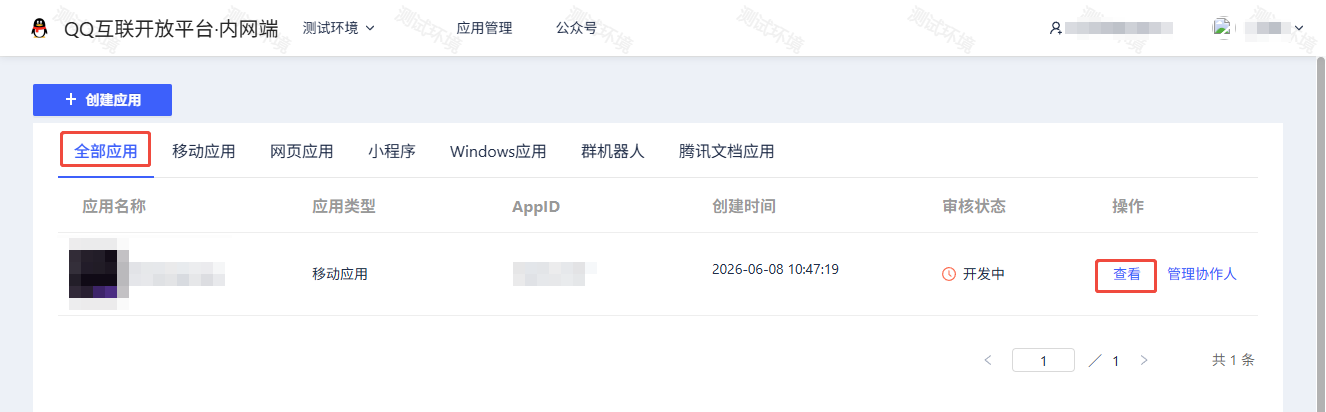
-
On the application page, confirm the QQ application's AppID and AppKey.
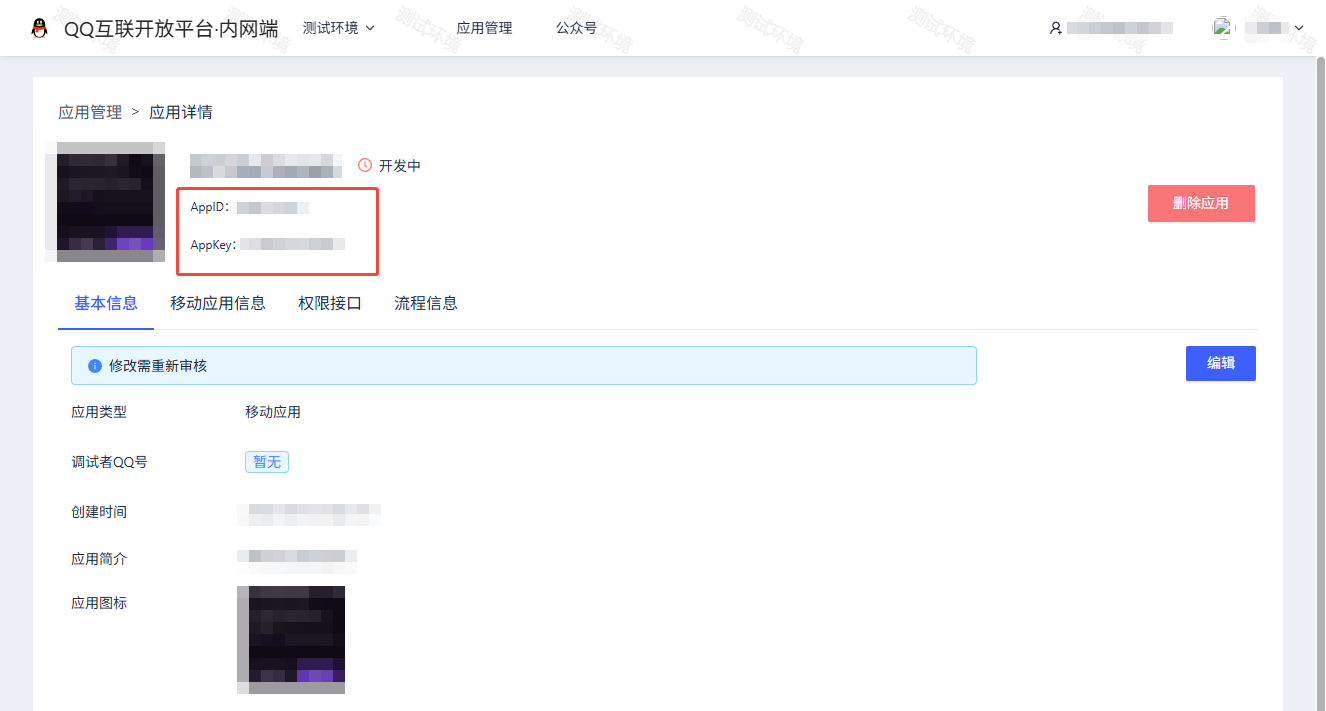
- Enter the Player Network Console to create a new project for your game or join an existing one.
- Download SDK.
- Integrate the SDK.
- Add QQ as a login authentication method for your business in the Player Network Console.
Step 1: Configure SDK for QQ login
-
Open your project's INTLConfig.ini file:
INTLConfig.ini[INTL environment]
# WARNING: You should change this URL to the production environment when you release your game.
INTL_URL = https://test.intlgame.com
GAME_ID = {INTL_GAME_ID}
SDK_KEY = {INTL_SDK_KEY}
[INTL Log]
LOG_LEVEL = 1
LOG_CONSOLE_OUTPUT_ENABLE = 1
LOG_FILE_OUTPUT_ENABLE = 1
LOG_ENCRYPT_ENABLE = 0
LOG_COMPRESS_ENABLE = 0
[QQ channel configuration]
QQ_APP_ID = {INTL_QQ_APP_ID}- Set the SDK backend environment to
INTL_URL = https://test.intlgame.com. - Replace
{INTL_GAME_ID}and{INTL_SDK_KEY}with theGAME_IDandSDK_KEYvalues assigned by the Player Network Console. - Set
LOG_LEVEL = 1,LOG_CONSOLE_OUTPUT_ENABLE = 1,LOG_FILE_OUTPUT_ENABLE = 1,LOG_ENCRYPT_ENABLE = 0andLOG_COMPRESS_ENABLE = 0to output console logs and log files without encrypting or compressing the output without encrypting or compressing the output. - Replace
{INTL_QQ_APP_ID}with the AppID assigned by QQ.
- Set the SDK backend environment to
-
Add QQ configuration.
- Unity
- Unreal Engine
Open INTLCoreKit.projmods and replace {INTL_QQ_APP_ID} with the QQ AppID before exporting the Xcode project from Unity.
{
    "group": "INTL",
    "libs": [
        "libz.tbd",
        "libstdc++.tbd",
        "libiconv.tbd",
        "libsqlite3.tbd"
    ],
    "frameworks": [
        "Security.framework",
        "SystemConfiguration.framework",
        "CoreTelephony.framework",
        "CoreGraphics.framework"
    ],
    "files": [],
    "folders": [],
    "excludes": [
        "^.*.meta$",
        "^.*.mdown$",
        "^.*.pdf$"
    ],
    "headerpaths": [],
    "build_settings": {
        "OTHER_LDFLAGS": ["-ObjC"],
        "ENABLE_BITCODE": "NO"
    },
    "system_capabilities": {},
    "Info.plist": {
        "LSApplicationQueriesSchemes": [
            "tim",
            "mqq",
            "mqqapi",
            "mqqwpa",
            "mqqbrowser",
            "mttbrowser",
            "mqqOpensdkSSoLogin",
            "mqqopensdkapiV2",
            "mqqopensdkapiV3",
            "mqqopensdkapiV4",
            "wtloginmqq2",
            "mqzone",
            "mqzoneopensdk",
            "mqzoneopensdkapi",
            "mqzoneopensdkapi19",
            "mqzoneopensdkapiV2",
            "mqqapiwallet",
            "mqqopensdkfriend",
            "mqqopensdkdataline",
            "mqqgamebindinggroup",
            "mqqopensdkgrouptribeshare",
            "tencentapi.qq.reqContent",
            "tencentapi.qzone.reqContent"
        ],
        "NSAppTransportSecurity": {
            "NSAllowsArbitraryLoads": true
        },
        "CFBundleURLTypes": [
            {
                "CFBundleTypeRole": "Editor",
                "CFBundleURLName": "tencent",
                "CFBundleURLSchemes": ["tencent{INTL_QQ_APP_ID}"]
            }
        ]
    }
}
- SDK 1.24 and later
- SDK versions before 1.24
Open INTLSDK/Source/INTLQQ/Libs/iOS/INTLQQ_UPL.xml and replace {INTL_QQ_APP_ID} with the actual QQ AppID.
<dict>
    <key>CFBundleURLName</key>
    <string>tencent</string>
    <key>CFBundleTypeRole</key>
    <string>Editor</string>
    <key>CFBundleURLSchemes</key>
    <array>
        <string>tencent{INTL_QQ_APP_ID}</string>
    </array>
</dict>
Open INTLSDK/Source/INTLConfig/Configs/iOS/Plist/INTLQQ.plist and replace {INTL_QQ_APP_ID} with the actual QQ AppID.
<dict>
    <key>CFBundleURLName</key>
    <string>tencent</string>
    <key>CFBundleTypeRole</key>
    <string>Editor</string>
    <key>CFBundleURLSchemes</key>
    <array>
        <string>tencent{INTL_QQ_APP_ID}</string>
    </array>
</dict>
Replace {INTL_QQ_APP_ID} with the AppID assigned by QQ.
Step 2: Add QQ login
Pass in permissions when calling INTLAPI.Login.Pass in permissions when calling INTLAPI.Login.It is recommended to pass in "all", which indicates all platform-side permissions previously requested have been granted.
| Permissions | Description |
|---|---|
| get_simple_userinfo | QQ login permission (obtain QQ user information on mobile) |
- Register login-related callbacks.
- Unity
- Unreal Engine
// Add callbacks
public void AddAuthObserver()
{
    INTLAPI.AddAuthResultObserver(OnAuthResultEvent);
}

// Remove callbacks
public void RemoveAuthObserver()
{
    INTLAPI.RemoveAuthResultObserver(OnAuthResultEvent);
}

// Process the INTLAuthResult callback
public void OnAuthResultEvent(INTLAuthResult AuthResult)
{
    Debug.Log($"MethodID: {AuthResult.MethodId}");

    string methodTag = "";
    switch (AuthResult.MethodId)
    {
        case (int)INTLMethodID.INTL_AUTH_LOGIN:
            methodTag = "Login";
            break;
        case (int)INTLMethodID.INTL_AUTH_BIND:
            methodTag = "Bind";
            break;
        case (int)INTLMethodID.INTL_AUTH_AUTOLOGIN:
            methodTag = "AutoLogin";
            break;
        case (int)INTLMethodID.INTL_AUTH_QUERY_USER_INFO:
            methodTag = "QueryUserInfo";
            break;
        case (int)INTLMethodID.INTL_AUTH_GET_AUTH_RESULT:
            methodTag = "GetAuthResult";
            break;
    }
}
C++ Event Handling (above v1.15)
//configure callback
FINTLAuthEvent authEvent;
authEvent.AddUObject(this, &OnAuthResult_Implementation);
UINTLSDKAPI::SetAuthResultObserver(authEvent);
// Remove callbacks
UINTLSDKAPI::GetAuthResultObserver().Clear();
void OnAuthResult_Implementation(FINTLAuthResult ret)
{
    UE_LOG(LogTemp, Warning, TEXT("MethodID: %d"), ret.MethodId);
}
Unreal Event Handling
void OnAuthResult_Implementation(FINTLAuthResult ret)
{
    UE_LOG(LogTemp, Warning, TEXT("MethodID: %d"), ret.MethodId);
}
- Call the
AutoLogininterface to log in automatically.
- Unity
- Unreal Engine
INTLAPI.AutoLogin();
UINTLSDKAPI::AutoLogin();
- If automatic login fails, call the
Logininterface to let the player log in manually.
- Unity
- Unreal Engine
INTLAPI.Login(INTLChannel.QQ, "all", "");
UINTLSDKAPI::Login(EINTLLoginChannel::kChannelQQ, "all", "");
- Synchronize client authentication status with the game backend and wait for the final verification result.
Scan code login
Player Network SDK V1.26.00 supports QQ code scanning login for both Android and iOS platforms.
By default, if QQ app is installed on the phone, it will launch QQ app for login directly. If QQ app is not installed, it will automatically switch to code scanning login.To change the default behavior, you can specify the qrcode_mode parameter in extraJson:
| qrcode_mode | Description |
|---|---|
| auto | Auto mode (default): Prioritize QQ app login. If QQ app is not installed, use code scanning login. |
| force_app | Force QQ app login: Login will fail if QQ app is not installed. |
| force_qrcode | Force code scanning login: Code scanning will be used for login regardless of whether QQ app is installed. |
- Unity
- Unreal Engine
string permissions = "";
string extraJson = "{\"qrcode_mode\" : \"force_qrcode\"}";
INTLAPI.Login(INTLChannel.QQ, permissions, extraJson);
FString Permissions = TEXT("");
FString Extra_JSON = TEXT("{\"qrcode_mode\" : \"force_qrcode\"}");
UINTLSDKAPI::Login(EINTLLoginChannel::kChannelQQ);
Step 3: Acceptance testing for login functionality
Search for the keyword "AuthResult" in the Player Network SDK logs to confirm whether the channel name and OpenID are returned correctly.If correct, it means the integration configuration is successful, and login functionality has been successfully added.
If you encounter problems during the integration process, please refer to Frequently Asked Questions.

