Web
The purpose of this article is to describe how to set up Discord authentication so that your web pages can log in through the Discord channel using the Player Network login authentication service.
As the Discord SDK has stopped maintaining a license method for pulling up Discord Apps, there may be subsequent impacts on Discord App licensing.To ensure that Discord authorization is stable and available, it is recommended to use WebView for web authorization, see Configuring DISCORD_LOGIN_USING_WEB for details.
Prerequisites
1. Configuring the application on the Discord Developer Platform
1. Create Discord Application
Before creating a Discord application, register an account on the official Discord website and follow the prompts to complete account authentication (via email).
- Enter Discord Developer Platform.
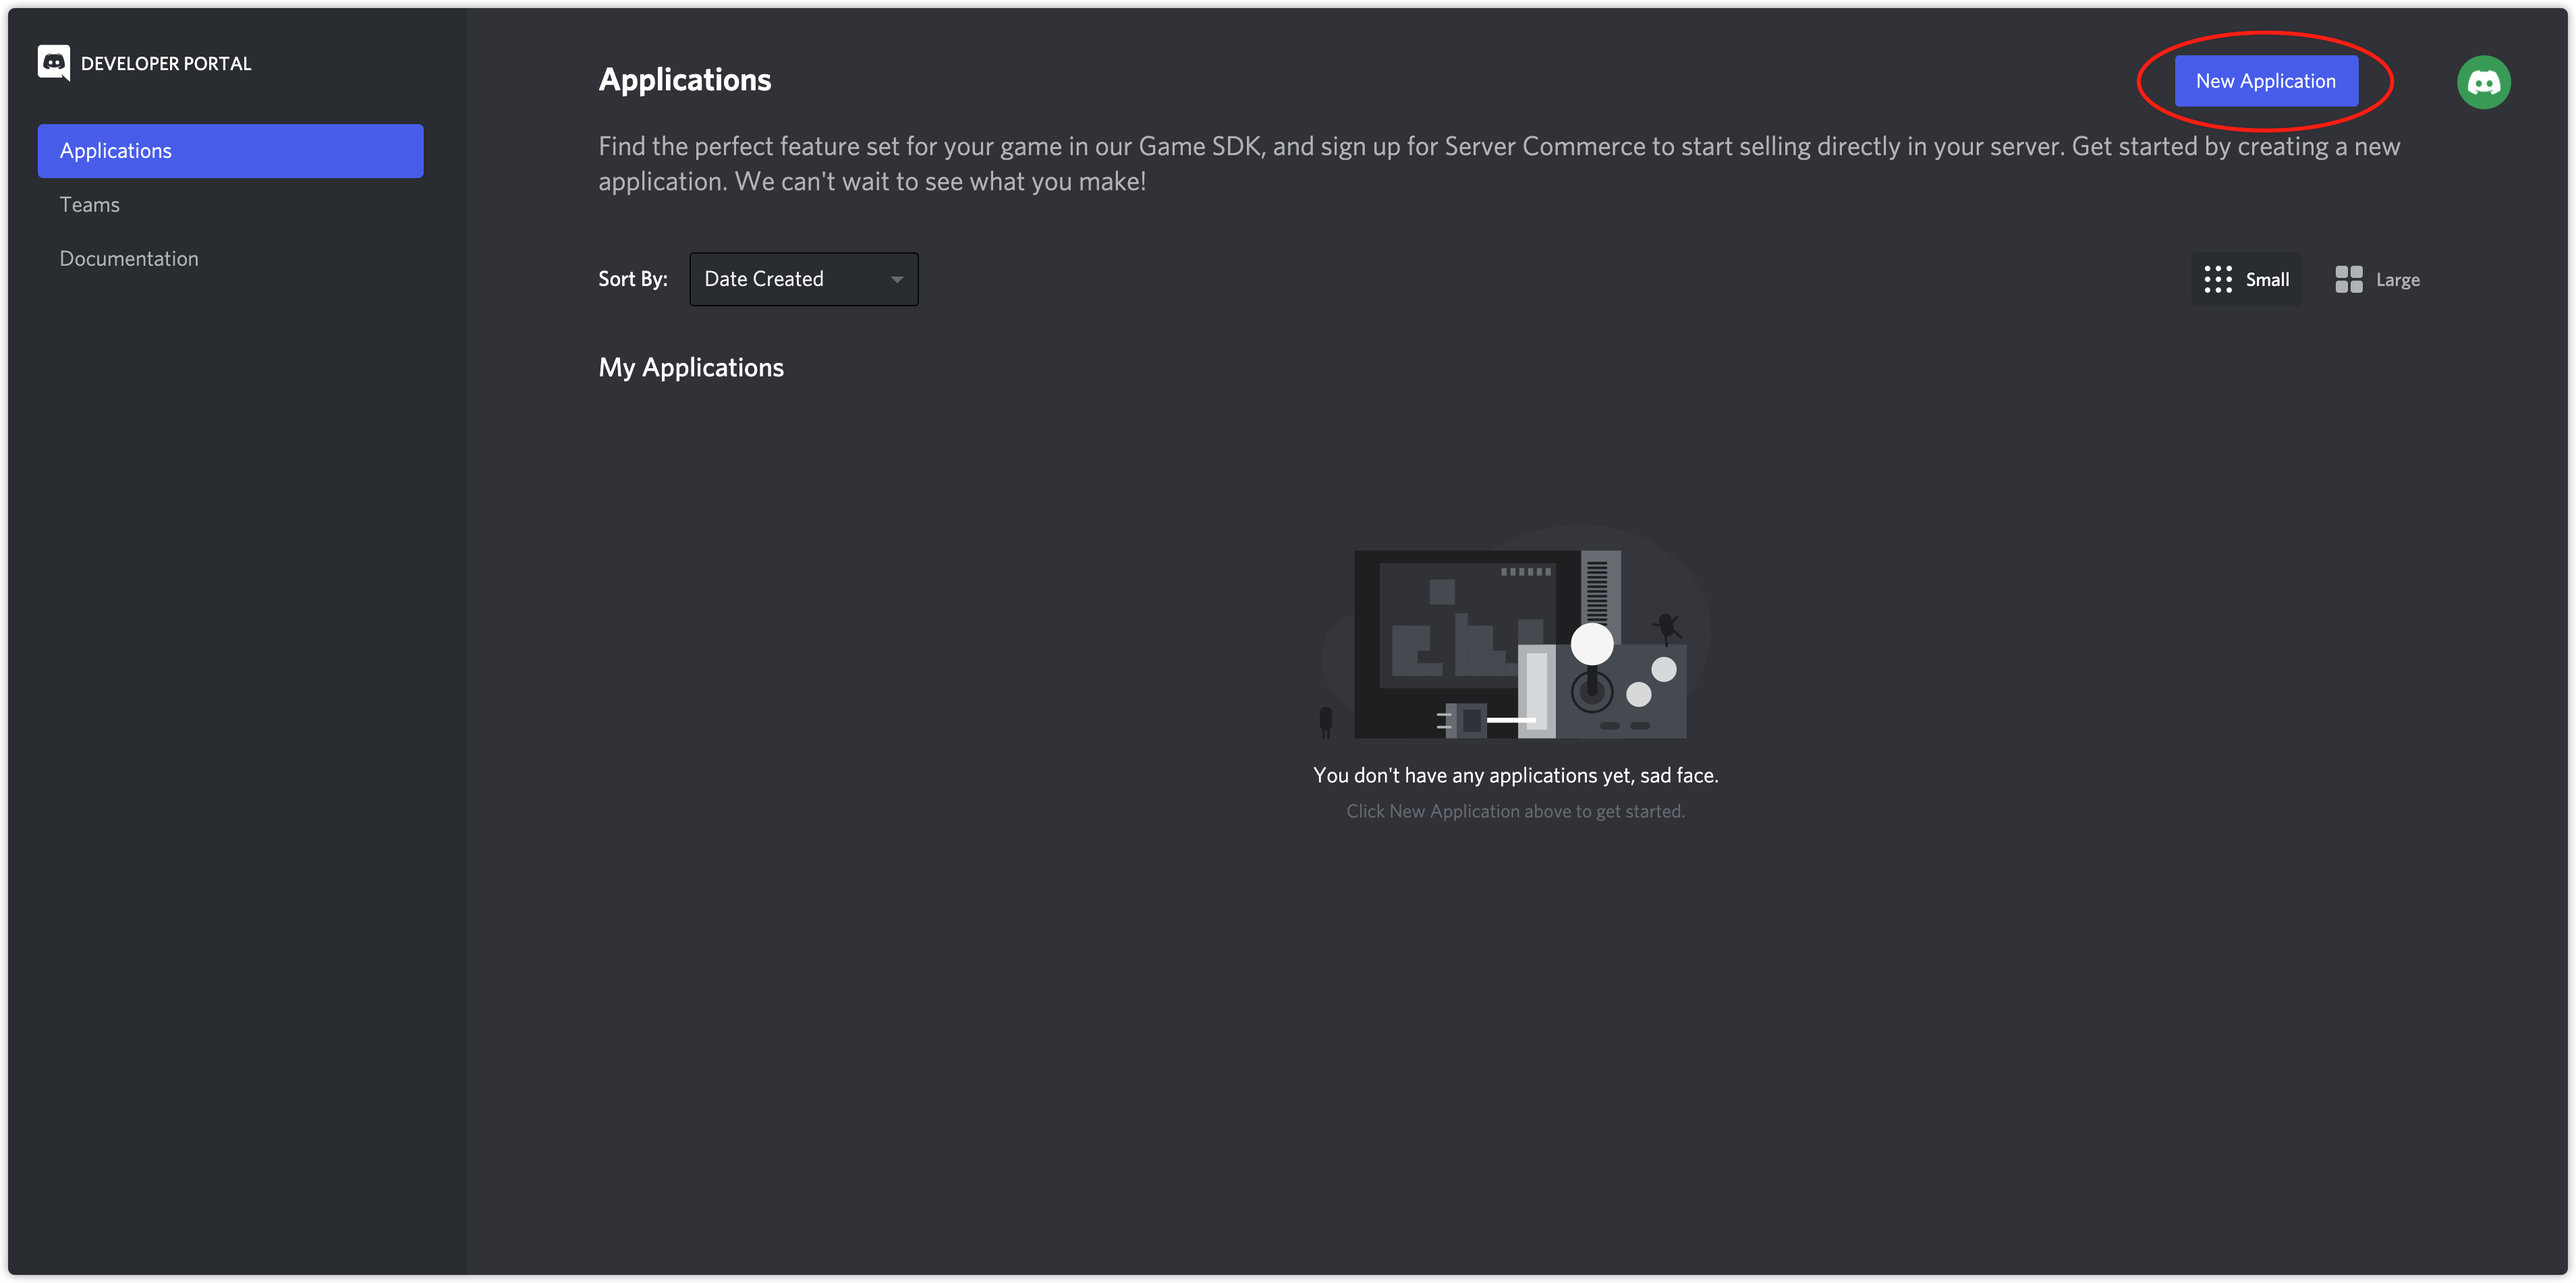
When logging in for the first time, users may need to verify that they are not a robot.You can do this after email verification. - In the upper right corner of the Applications page, click New Application.
- In the application creation window that pops up, enter the application name and click Create.
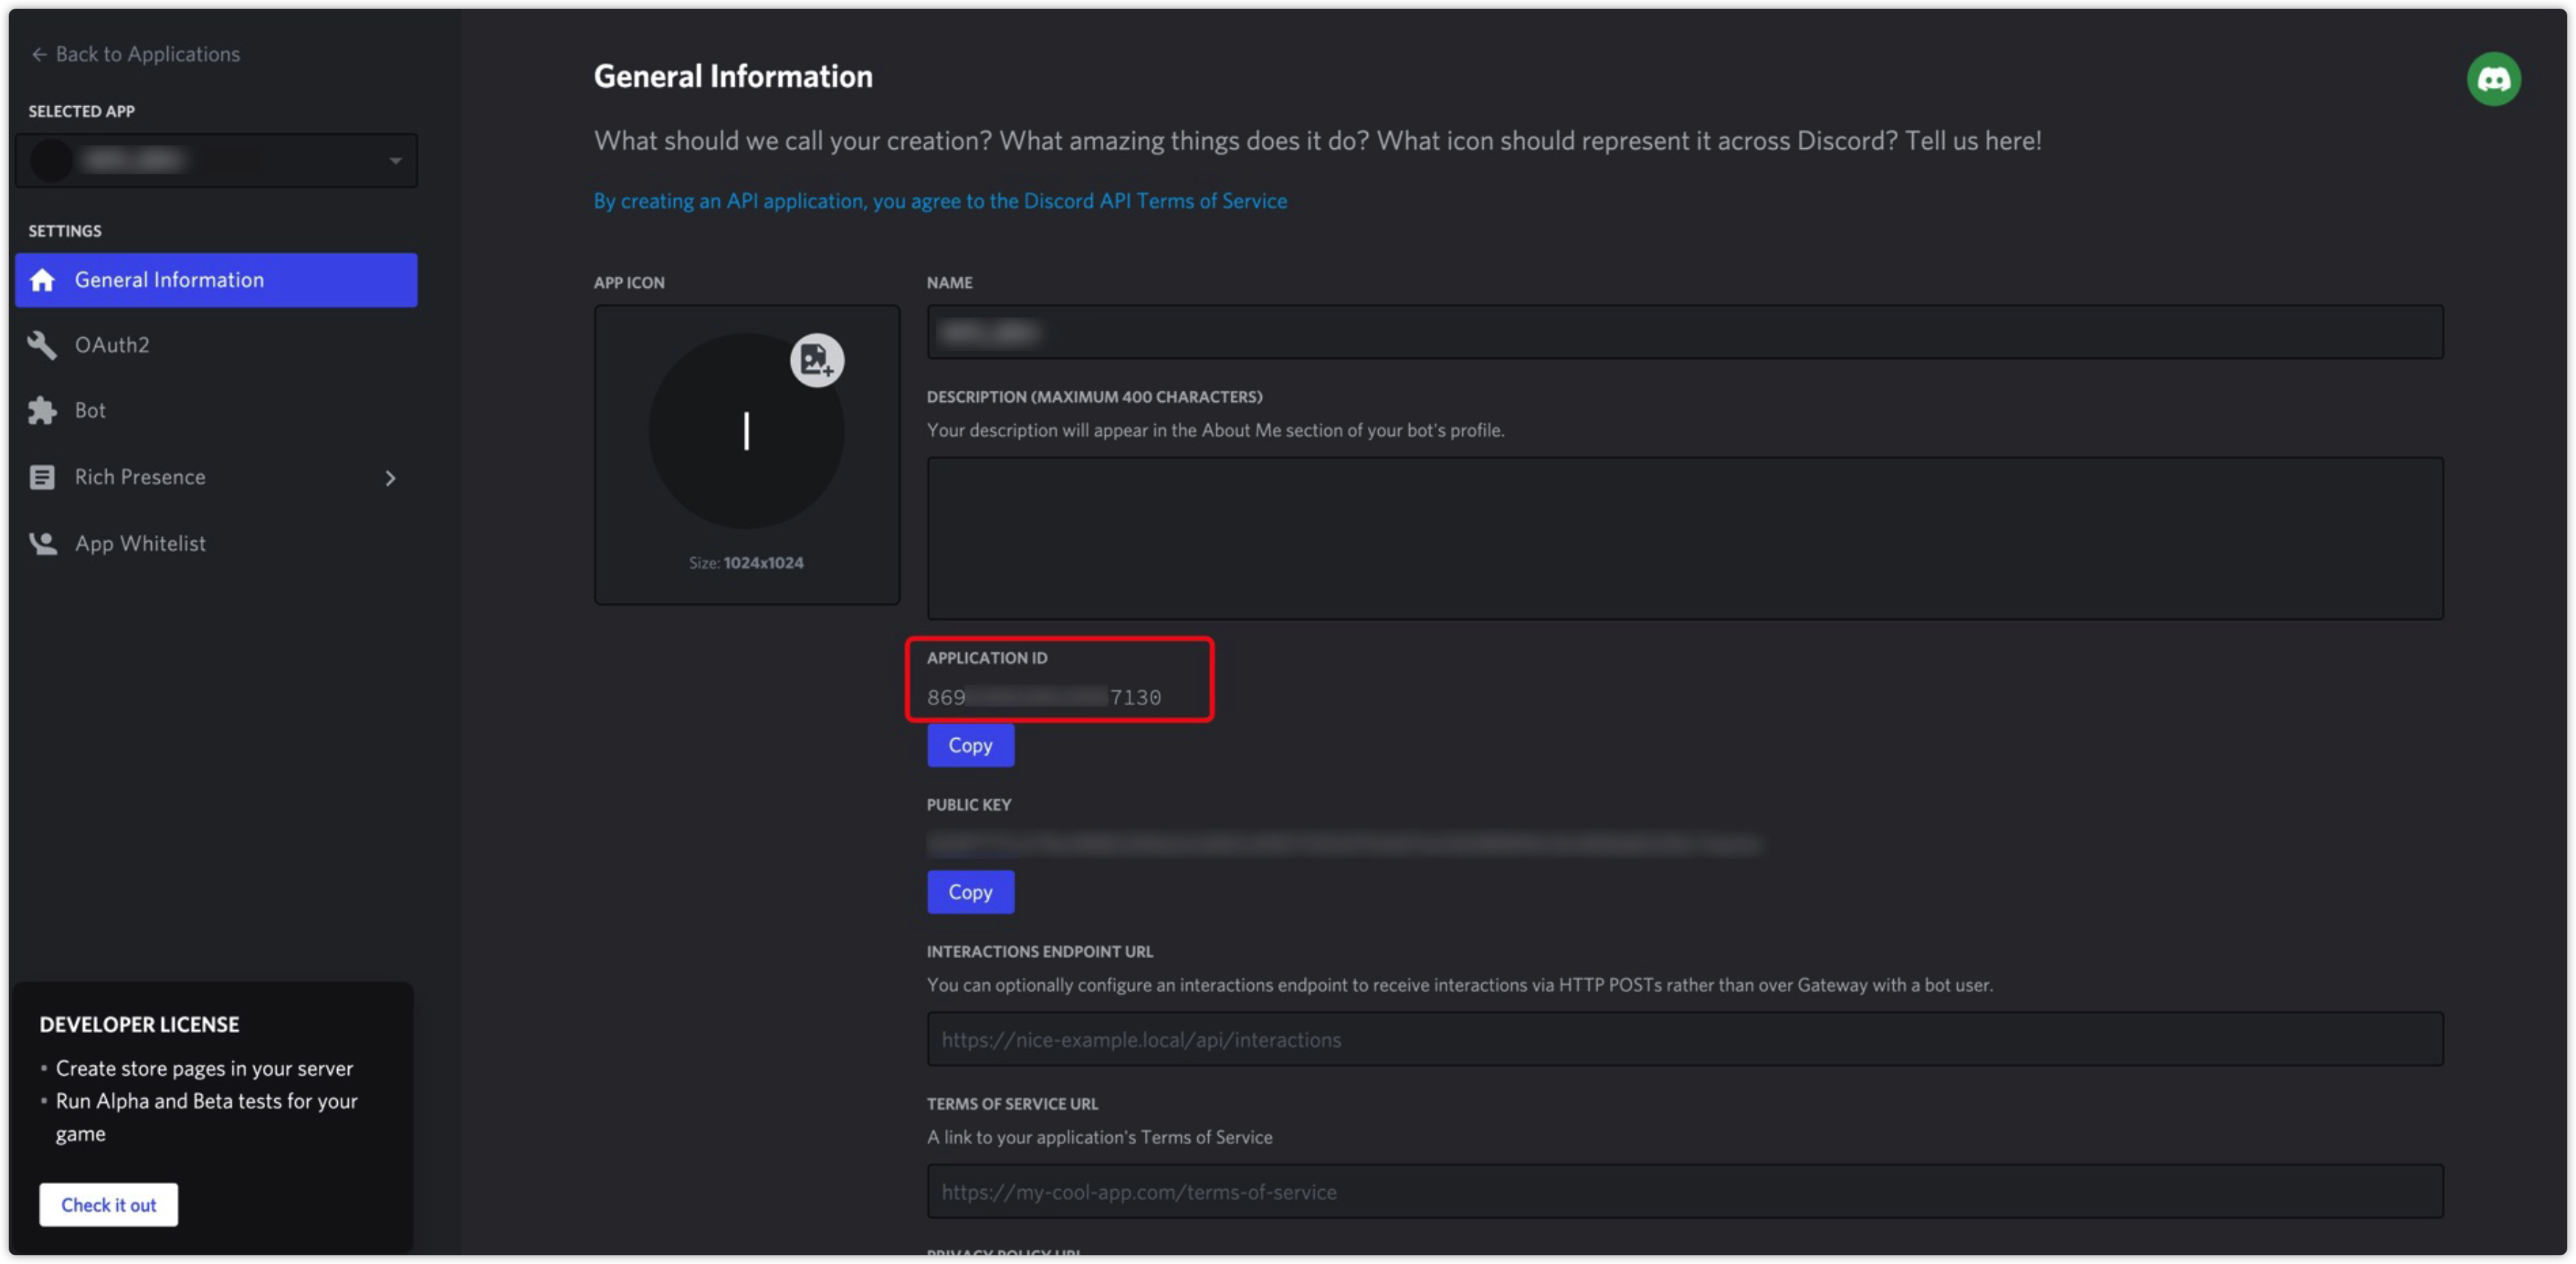
- On the General Information page, view the APPLICATION ID.
The user must configure the App ID in the INTLConfig.ini file.
2. Configure Application
-
Go to Discord Developer Platform.
-
Click the application to configure on the Applications page.
-
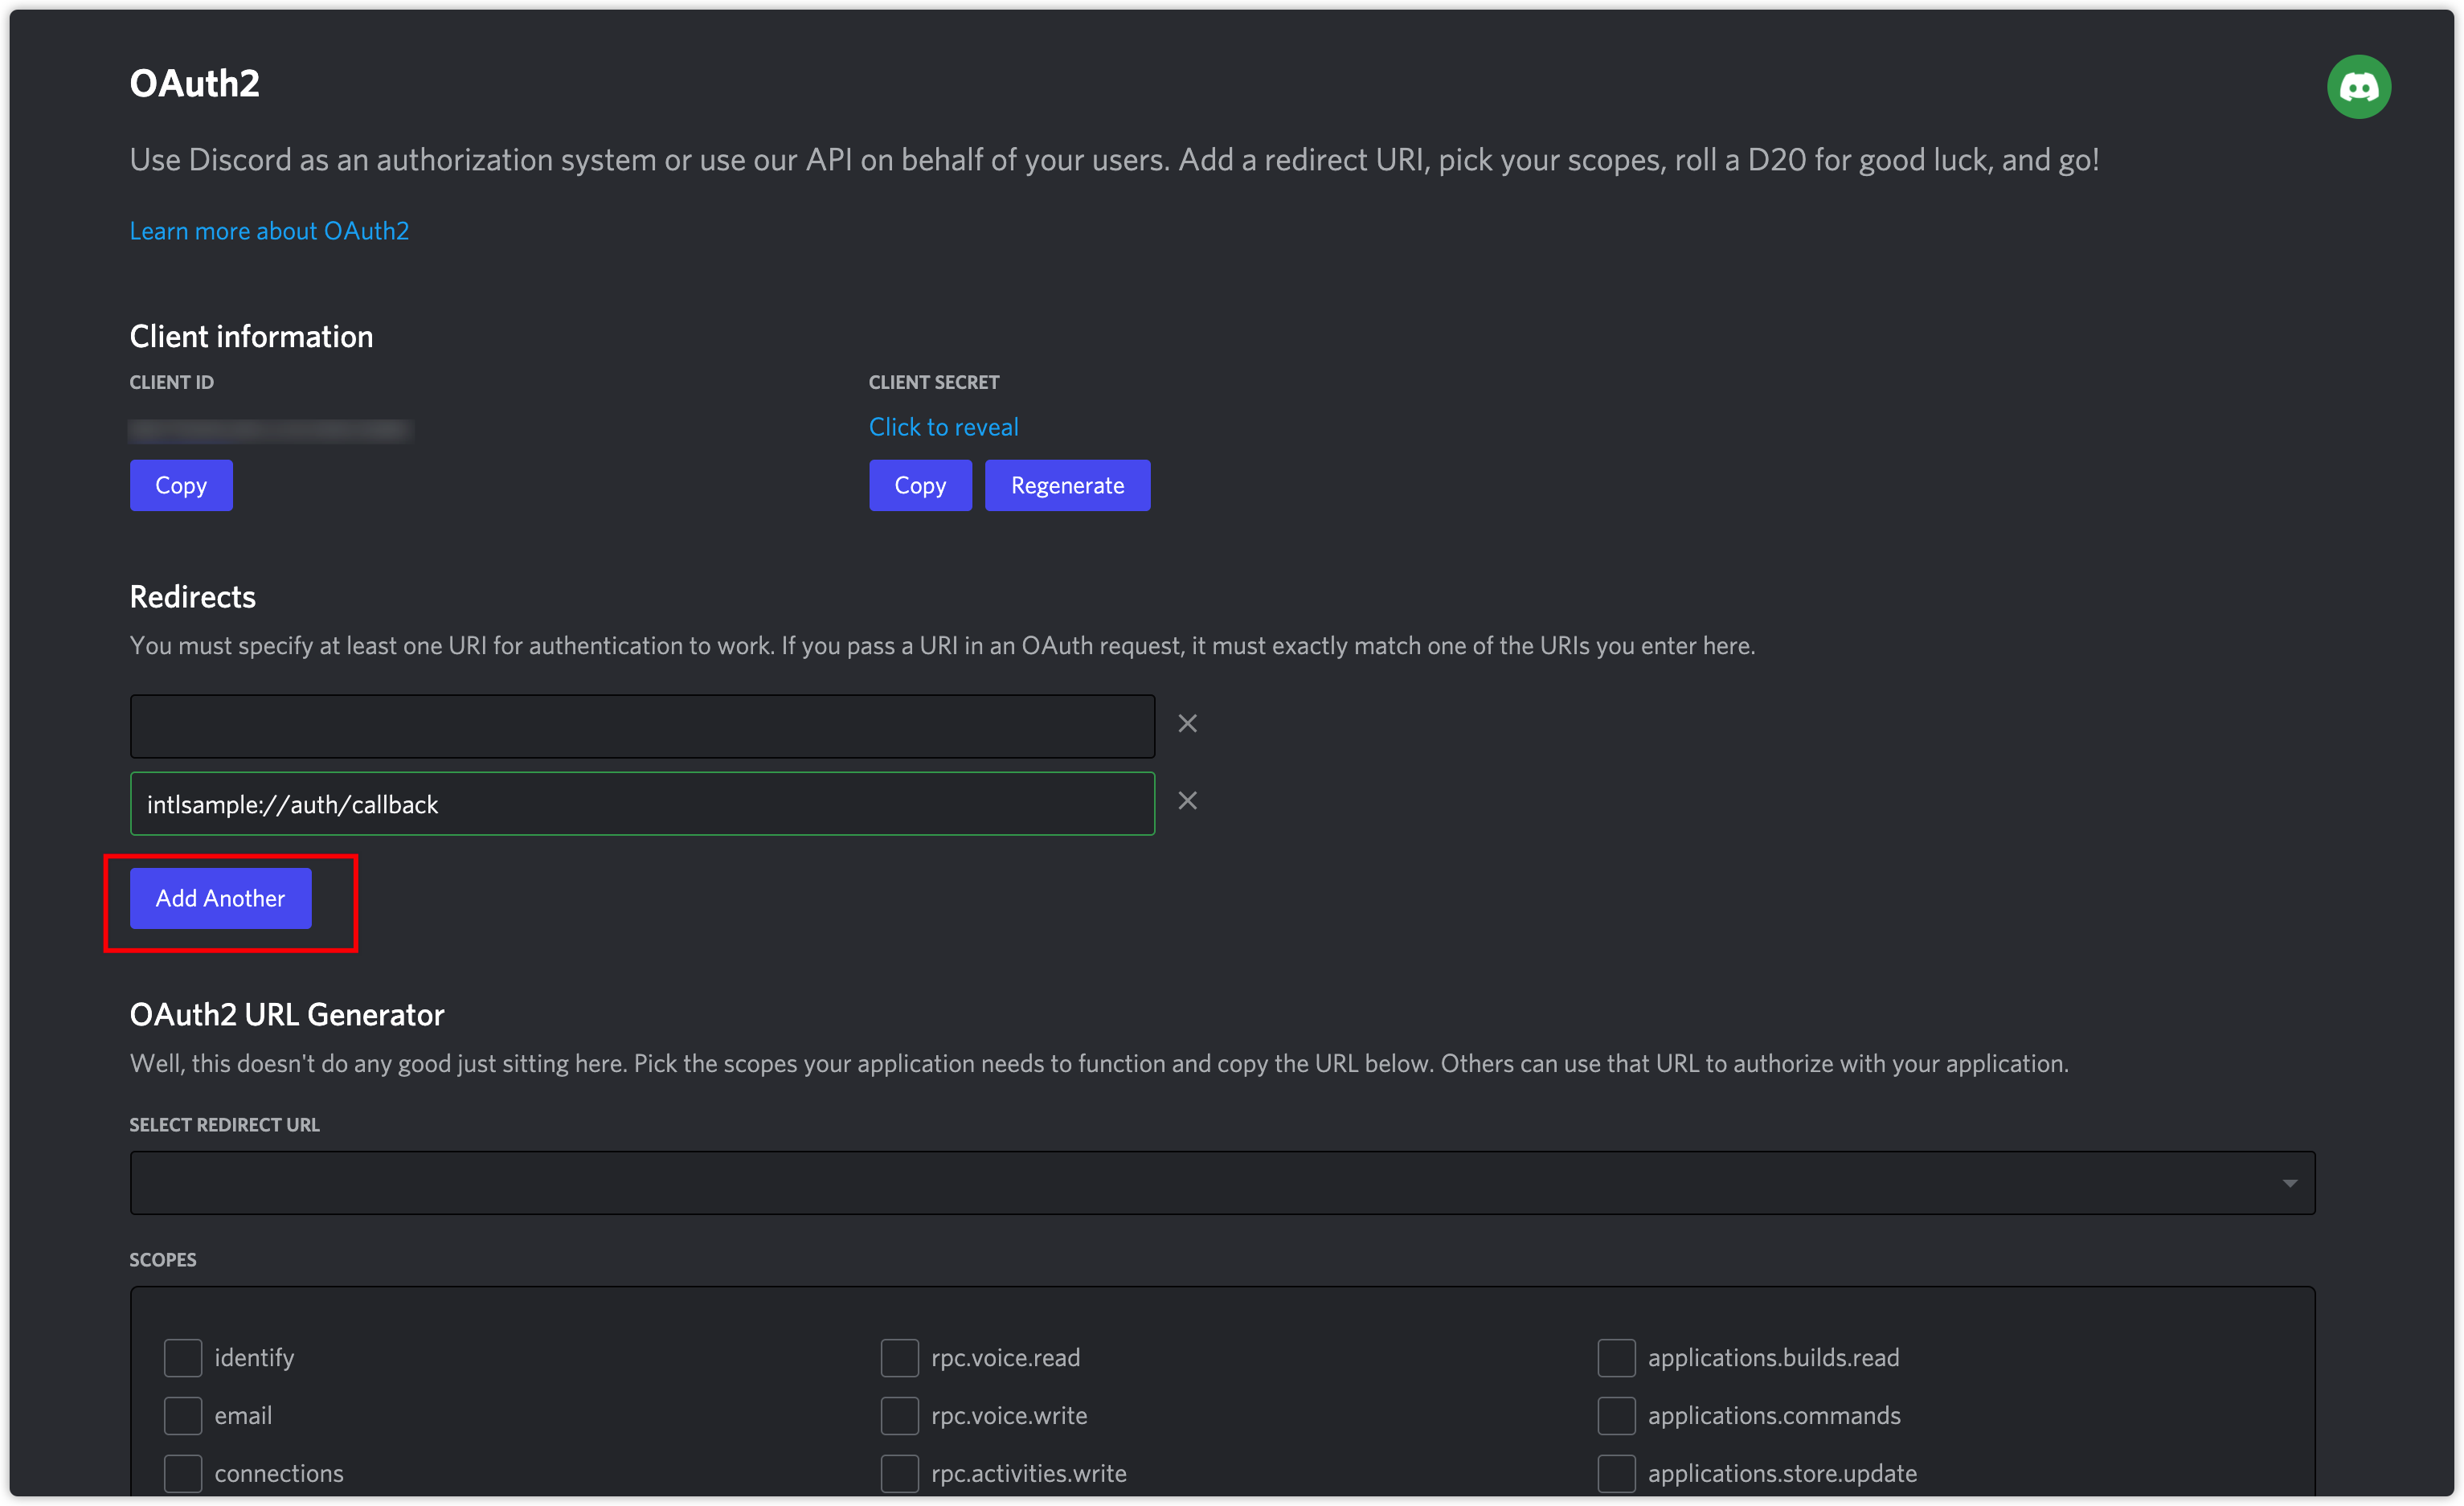
Click OAuth2 in the left navigation bar and go to OAuth2 > General.
-
Configure the following redirect URLs under Redirects to receive callbacks after Discord authorization by clicking Add Another to add the cell:
- https://common-web.intlgame.com/jssdk/discordlogincallback.html
- https://test-common-web.intlgame.com/jssdk/discordlogincallback.html
-
Click Rich Presence in the left navigation bar and enter Rich Presence Art Assets page.
-
Click Add Image(s) to configure the application's image resources.
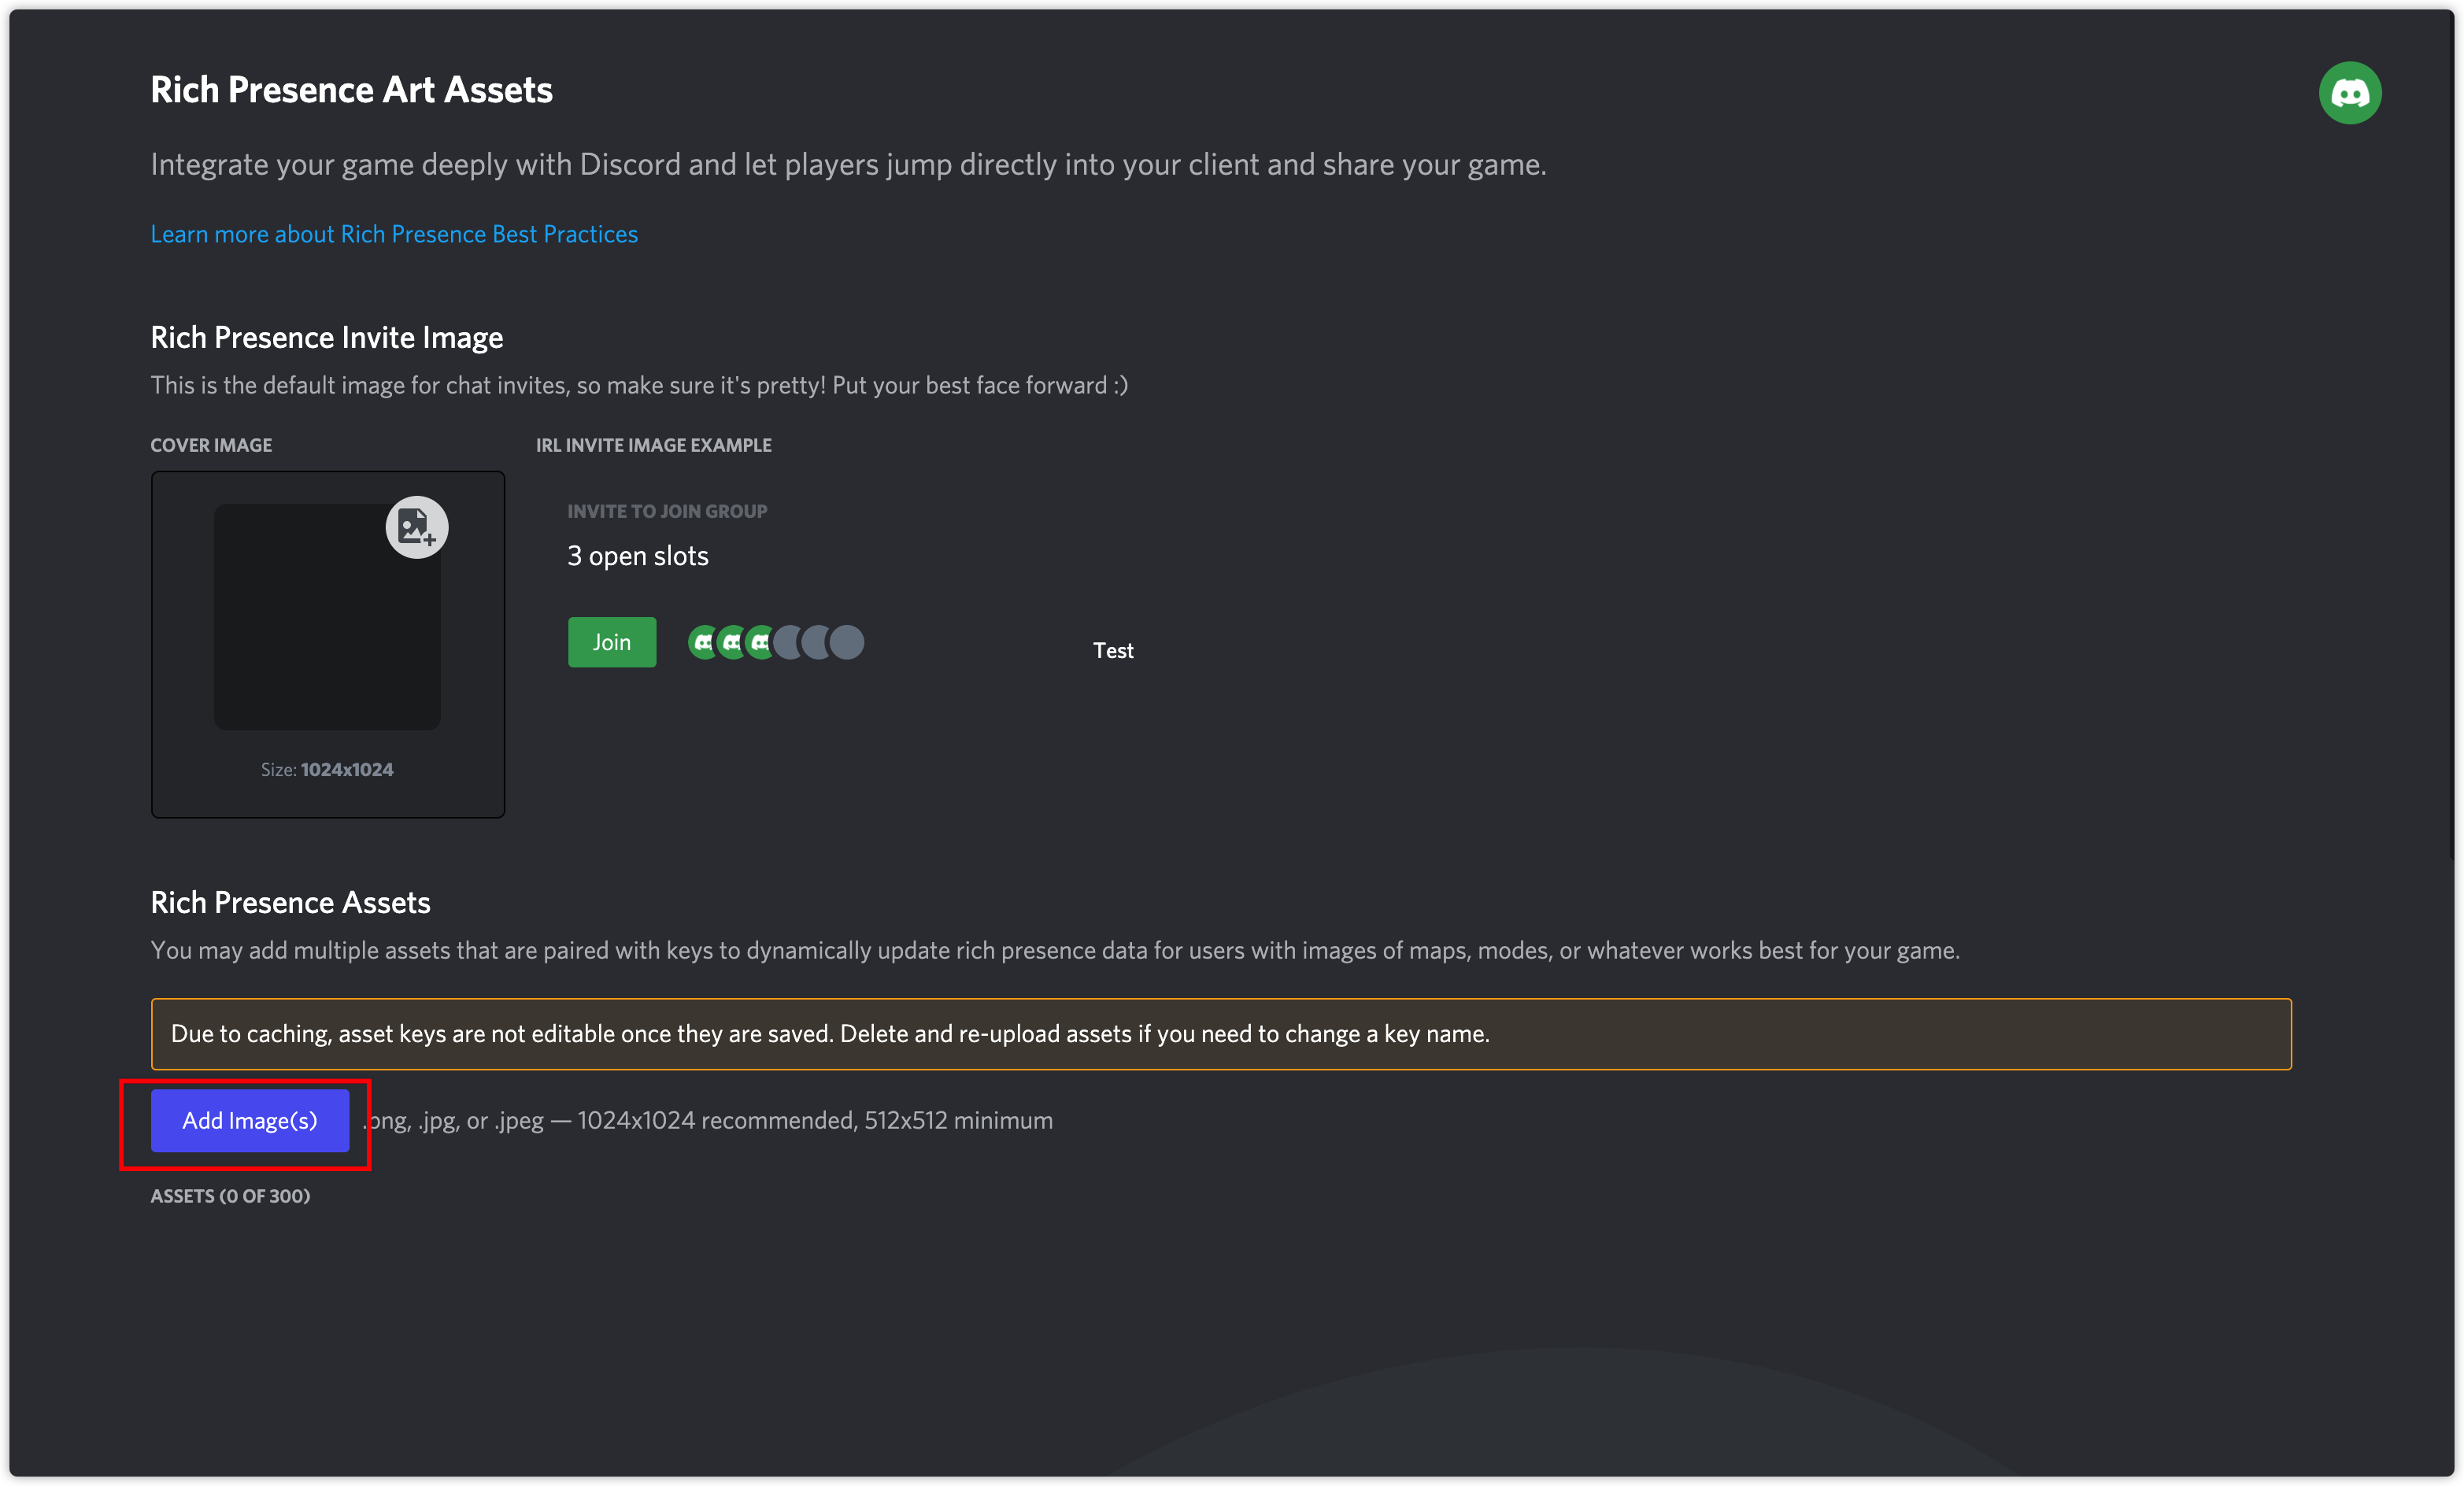
All image resources used in the application must be configured on this page, including the cover photo for friend invitations.
- Obtain Player Network Console login account.
- Create a new project for your game, or join an existing one.
- Add Discord as the login authentication method for the service in the Player Network Console.
For more information about integrating other third-party channels into the SDK, see JavaScript SDK.
Step 1: Introduce JavaScript SDK
During project integration testing, import the debugging SDK package, which is intended only for integration testing.For project launch, the official SDK package must be imported.
Currently, both npm package method and CDN method are supported.
- npm
- CDN
$ npm install @intlsdk/account-api
// SDK debug version package
<script src="https://test-common-web.intlgame.com/sdk-cdn/account-api/latest/index.umd.js"></script>
// SDK official version package
<script src="https://common-web.intlgame.com/sdk-cdn/account-api/latest/index.umd.js"></script>
Step 2: Use SDK
During integration testing, set env to test environment; when the project goes live, set env to the corresponding official environment.
const accountApi = new IntlgameAccountApi({
  env: "test", // SDK environment
  gameID: 11,
});
| Parameters | Type | Description | Note |
|---|---|---|---|
| env | string | SDK environment For more information, see Obtain deployment cluster information. | Requir ed |
| gameID | number | Player Network unique game ID | Mandatory |
Step 3: Implement Web Login
After instantiating the accountApi component, call the thirdAuthorize interface to request an access token for the Discord channel.
accountApi.thirdAuthorize({
    third_type: 'discord',
}).then(
(res) => {
    console.log(res);
});
When Discord returns the access token, call the intlAuthorize interface to get the Player Network SDK OpenID and token to log into the site.
accountApi.intlAuthorize({
    third_type: 'discord',
    channel_info: {
        access_token: "EAAI2lTrXAZBwBAC"
        refresh_token: "EAAI2lTrXAZBwBAC"
        expires_in: "EAAI2lTrXAZBwBAC"
        redirect_uri: "EAAI2lTrXAZBwBAC"
    }
}).then(
(res) => {
    console.log(res);
});
Call the intlLogout API to log out from the website.
accountApi.intlLogout({
    token: '4567xsdfsd',
    openid: 'xxxxxxxx',
    channel_id: 26,
}).then(
(res) => {
    console.log(res);
});
