AI Translation
Users can manage translation content in AI Translation and view the Dashboard.
Translation Content Management
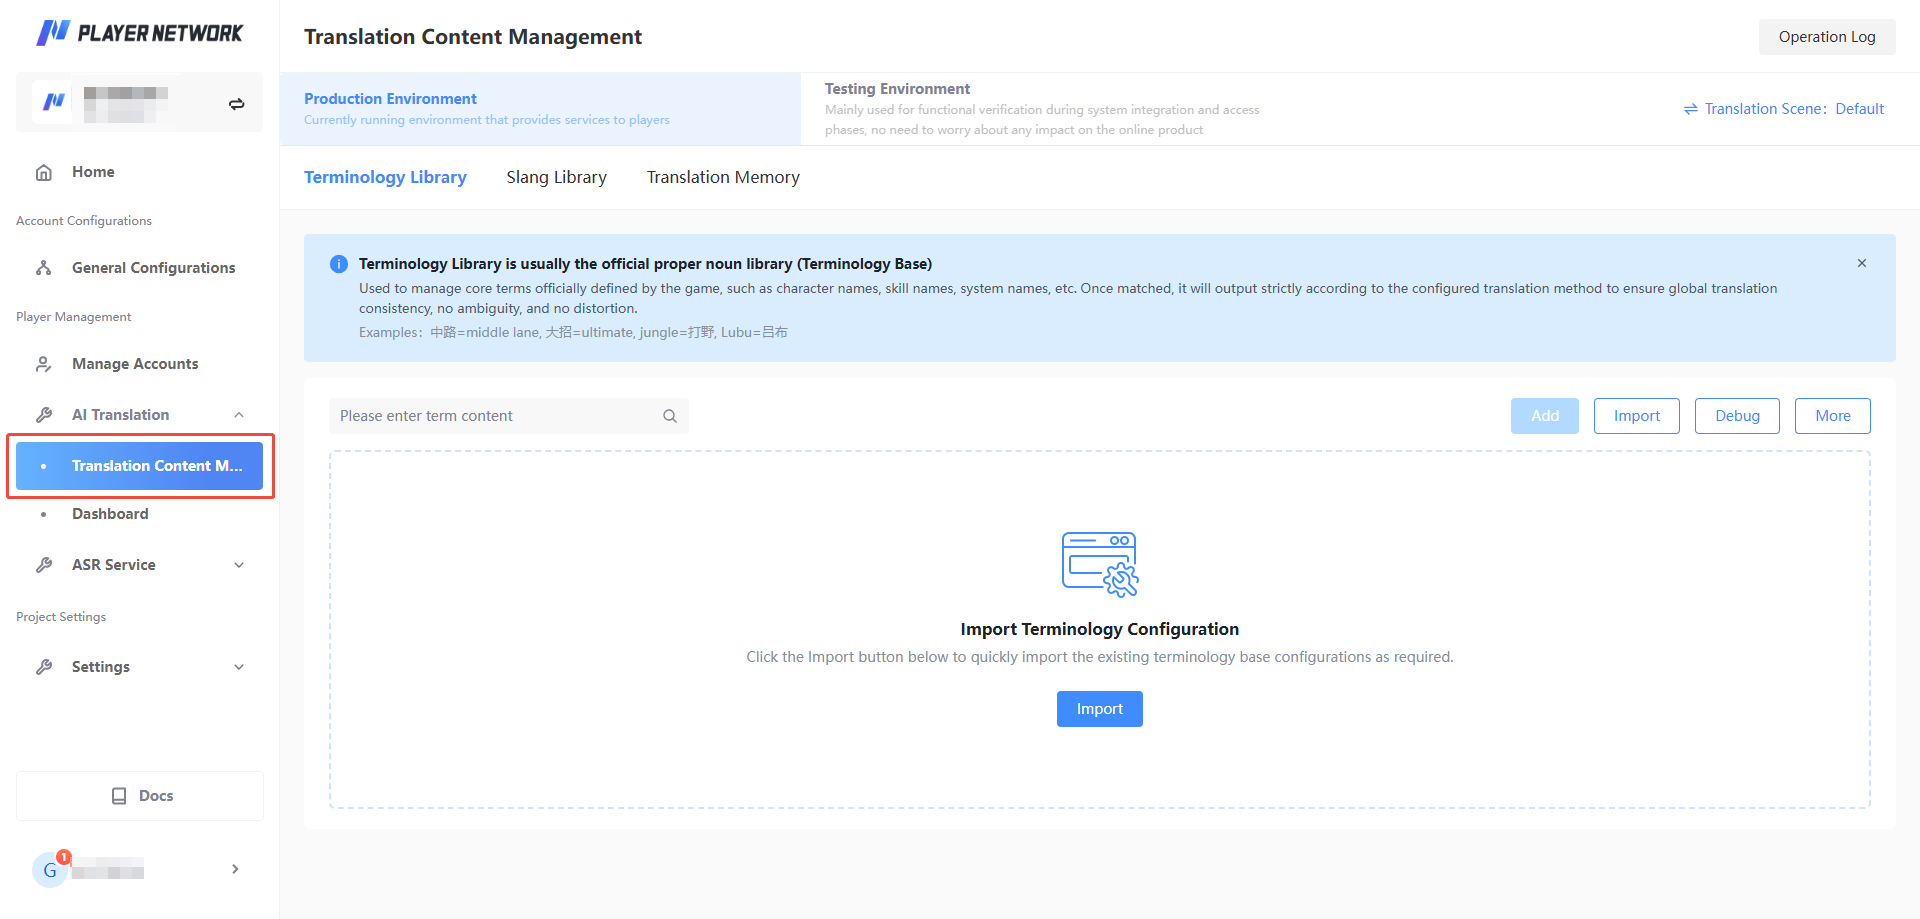
View the terminology library, slang library, translation memory, and manage translation scenarios through Translation Content Management.
Initialization
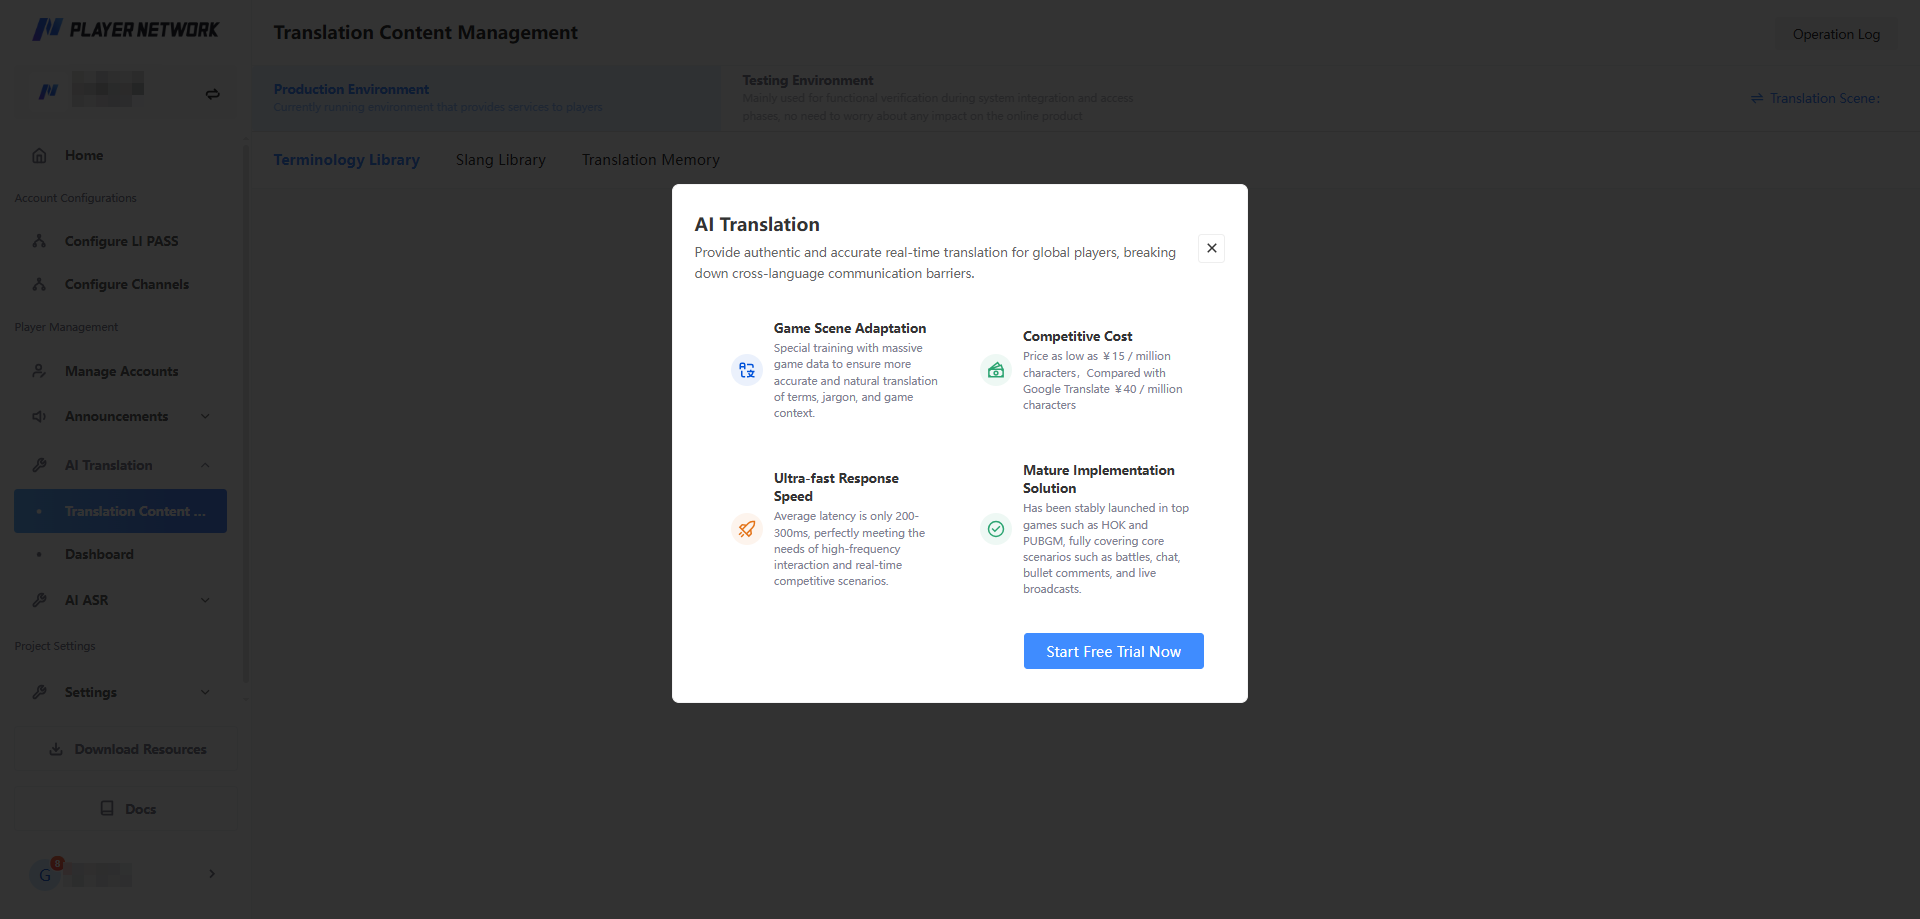
The AI Translation Feature can be officially used only after initialization.
-
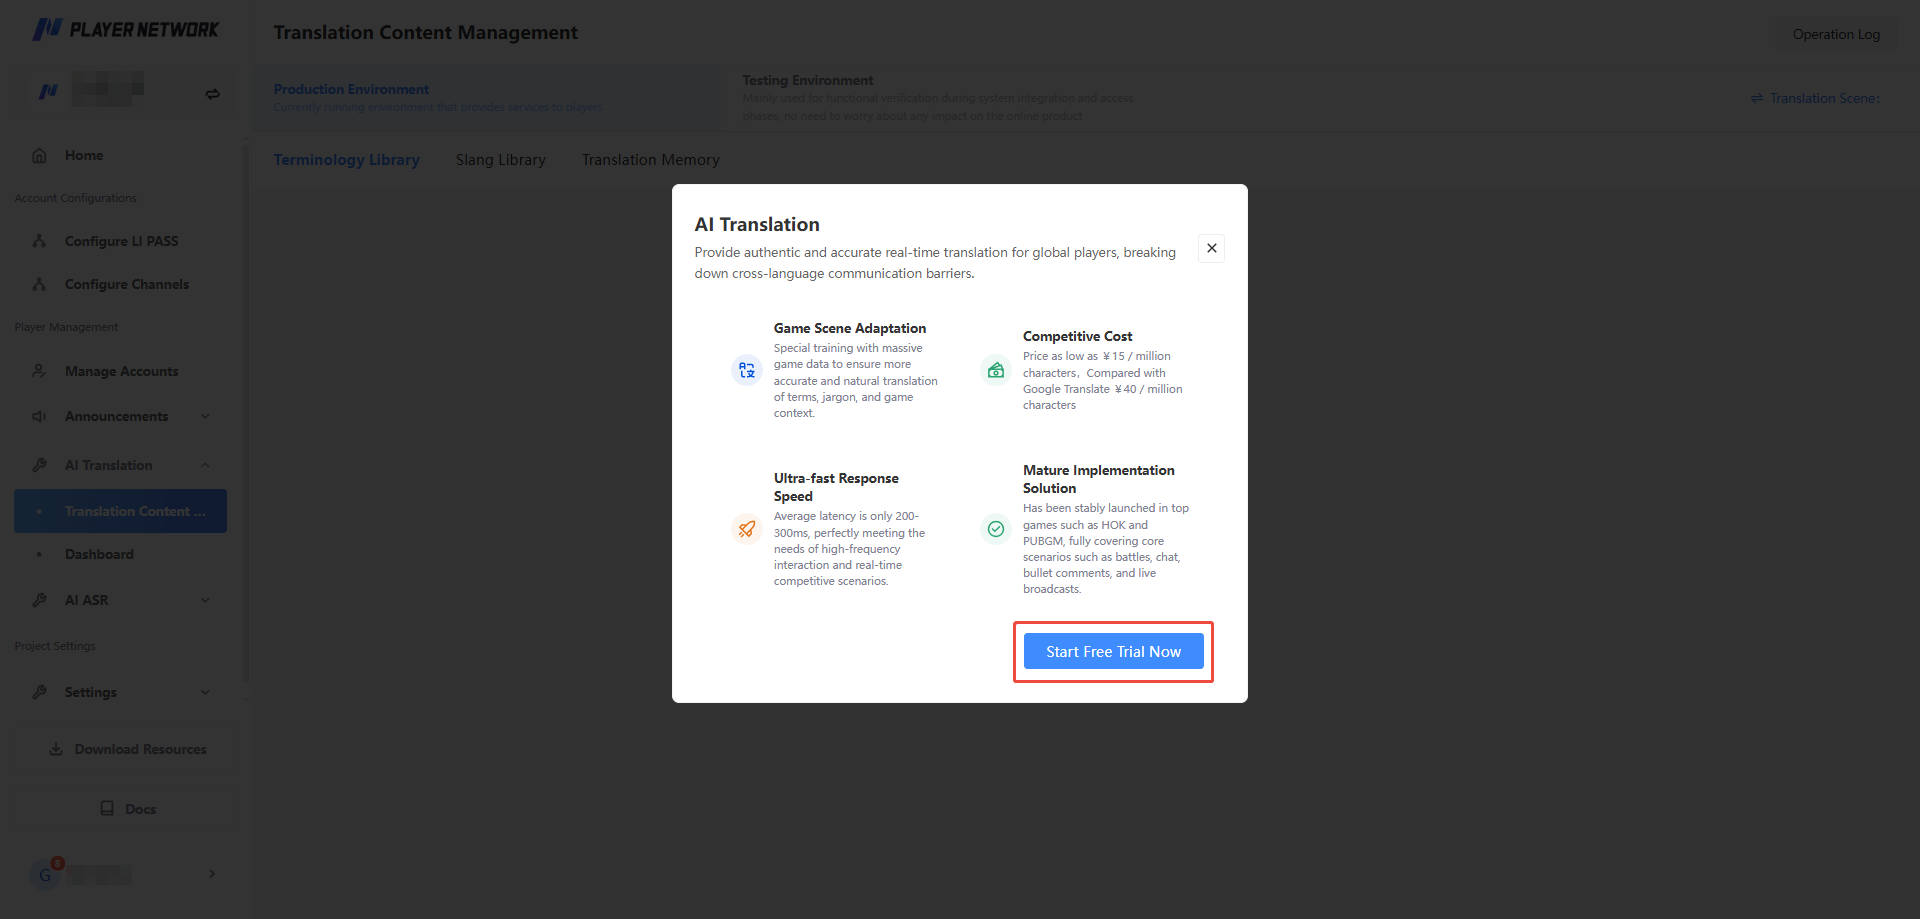
When entering Translation Content Management for the first time, click Free Trial Now to initialize.
-
After initialization, the default translation scenario will be automatically generated, and an initialization success message will be displayed on the page.
Translation Scenario
When the client calls the translation service, this parameter is used to obtain the corresponding translation resources. Multiple translation scenarios are supported, making it easy to operate across different project scenes and versions.
-
Login to the Player Network Console and click Translation Content Management under AI Translation in the left column.
-
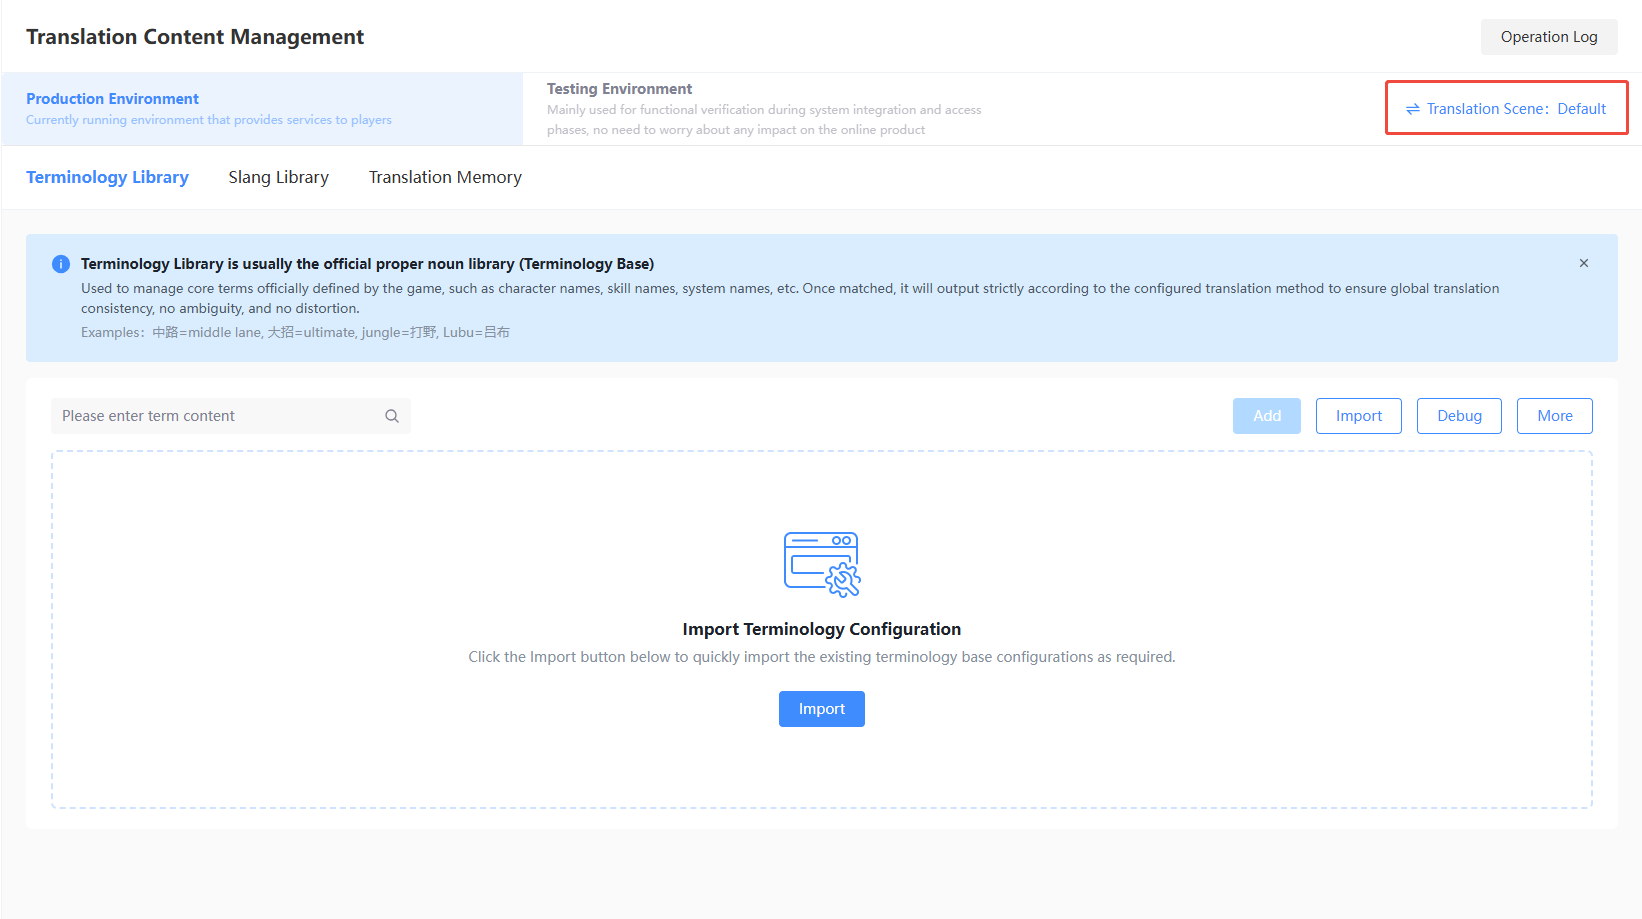
Under Translation Content Management, click Translation Scenario.
-
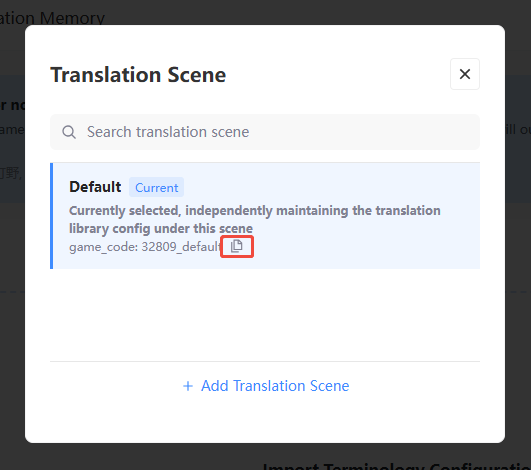
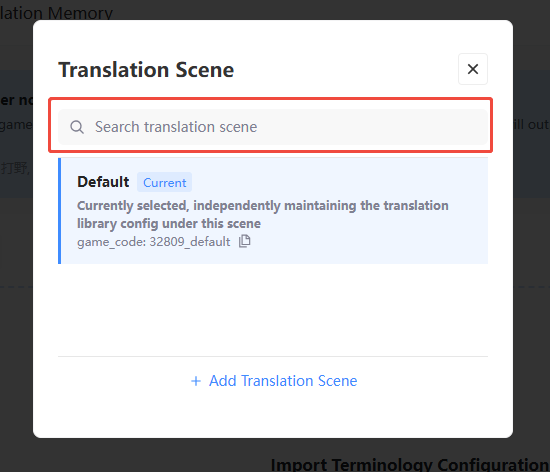
After initialization, the system will automatically create the Default Translation Scenario, allowing one-click copy of the game_code for project side invocation.
-
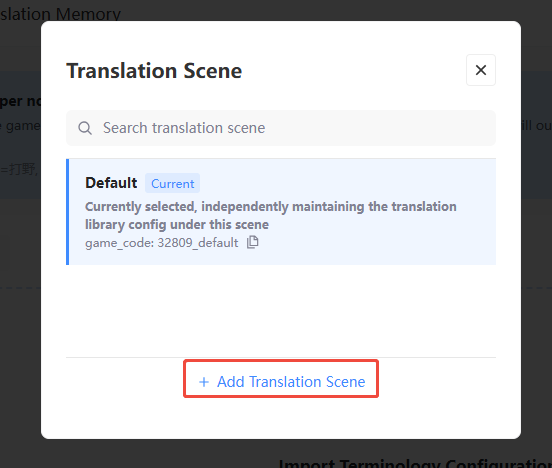
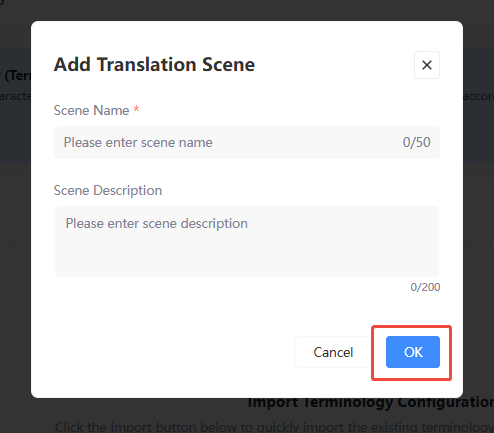
If you need more scenarios, click Add Translation Scenario in the popup to configure translation scenarios.
-
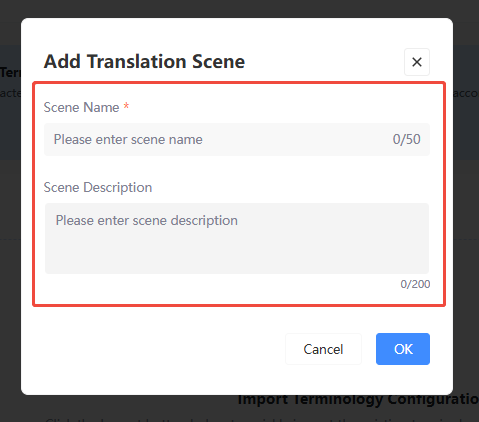
After filling in the Scenario Name, it is recommended to add a Scenario Description for easy team identification.
-
Click Confirm to save the translation scenario.
-
[Optional] If there are multiple translation scenarios, you can search by Scenario Name to quickly locate translation scenarios.
Terminology Library
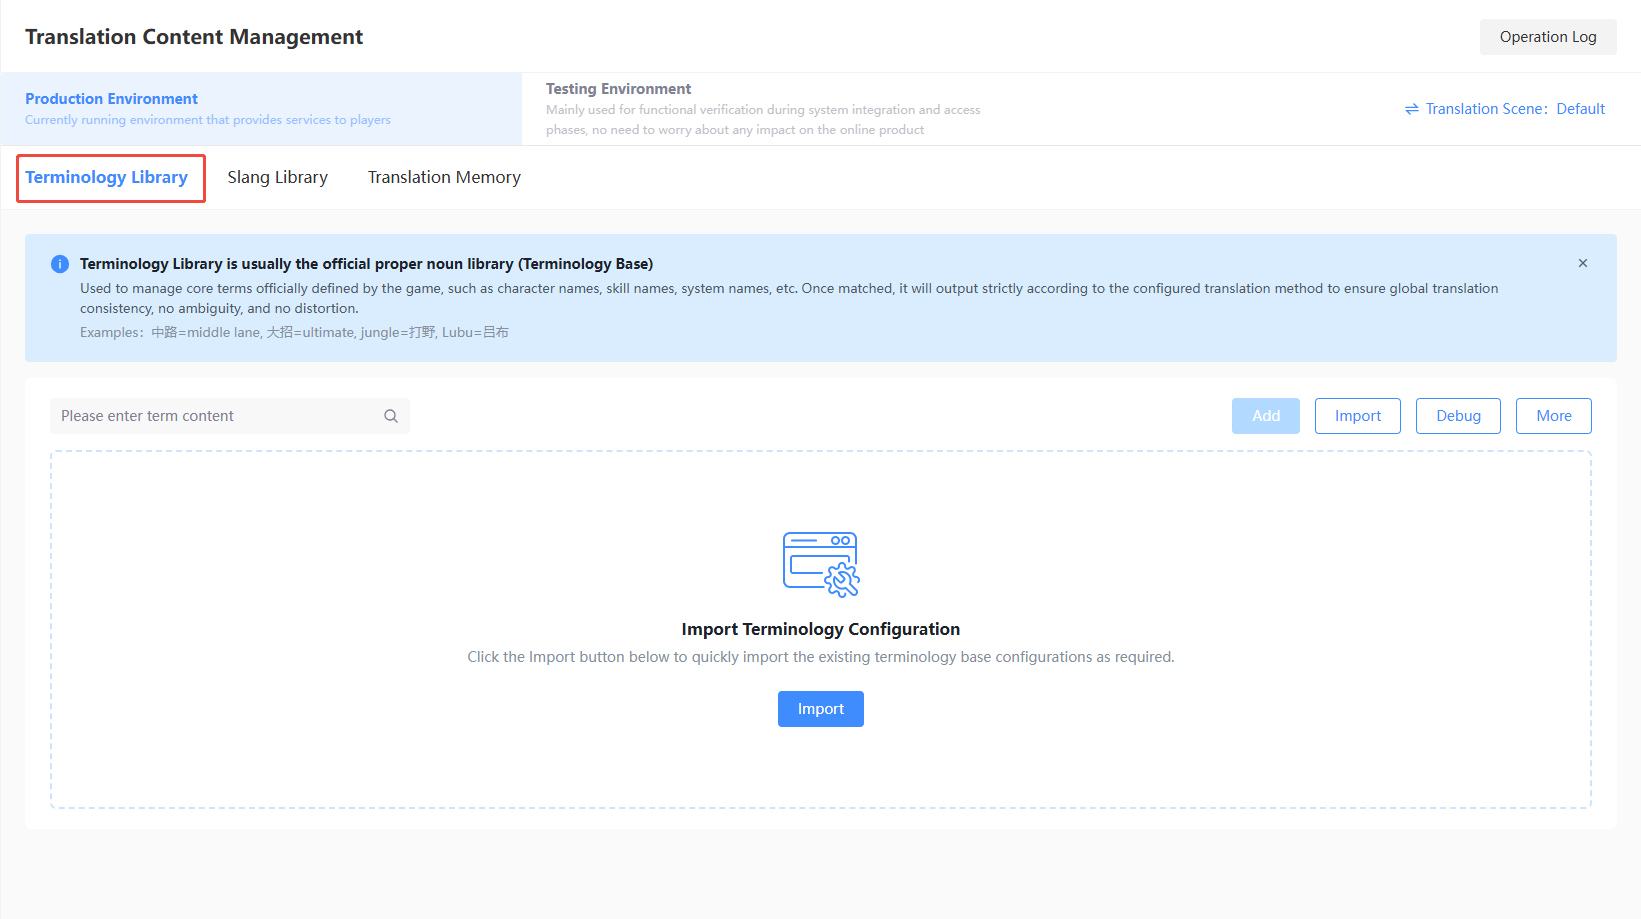
The terminology library is usually the official terminology base (Terminology Base).It manages core terms such as character names, skill names, and system names officially defined for the project. Once matched, the outputs will strictly follow the configured translations to ensure global consistency, clarity, and precision.
Example: 中路=middle lane, 大招=ultimate, jungle=打野, Lubu=吕布
Import
-
Login to the Player Network Console and click Translation Content Management under AI Translation in the left column.
-
Under Translation Content Management, click Terminology Library.
-
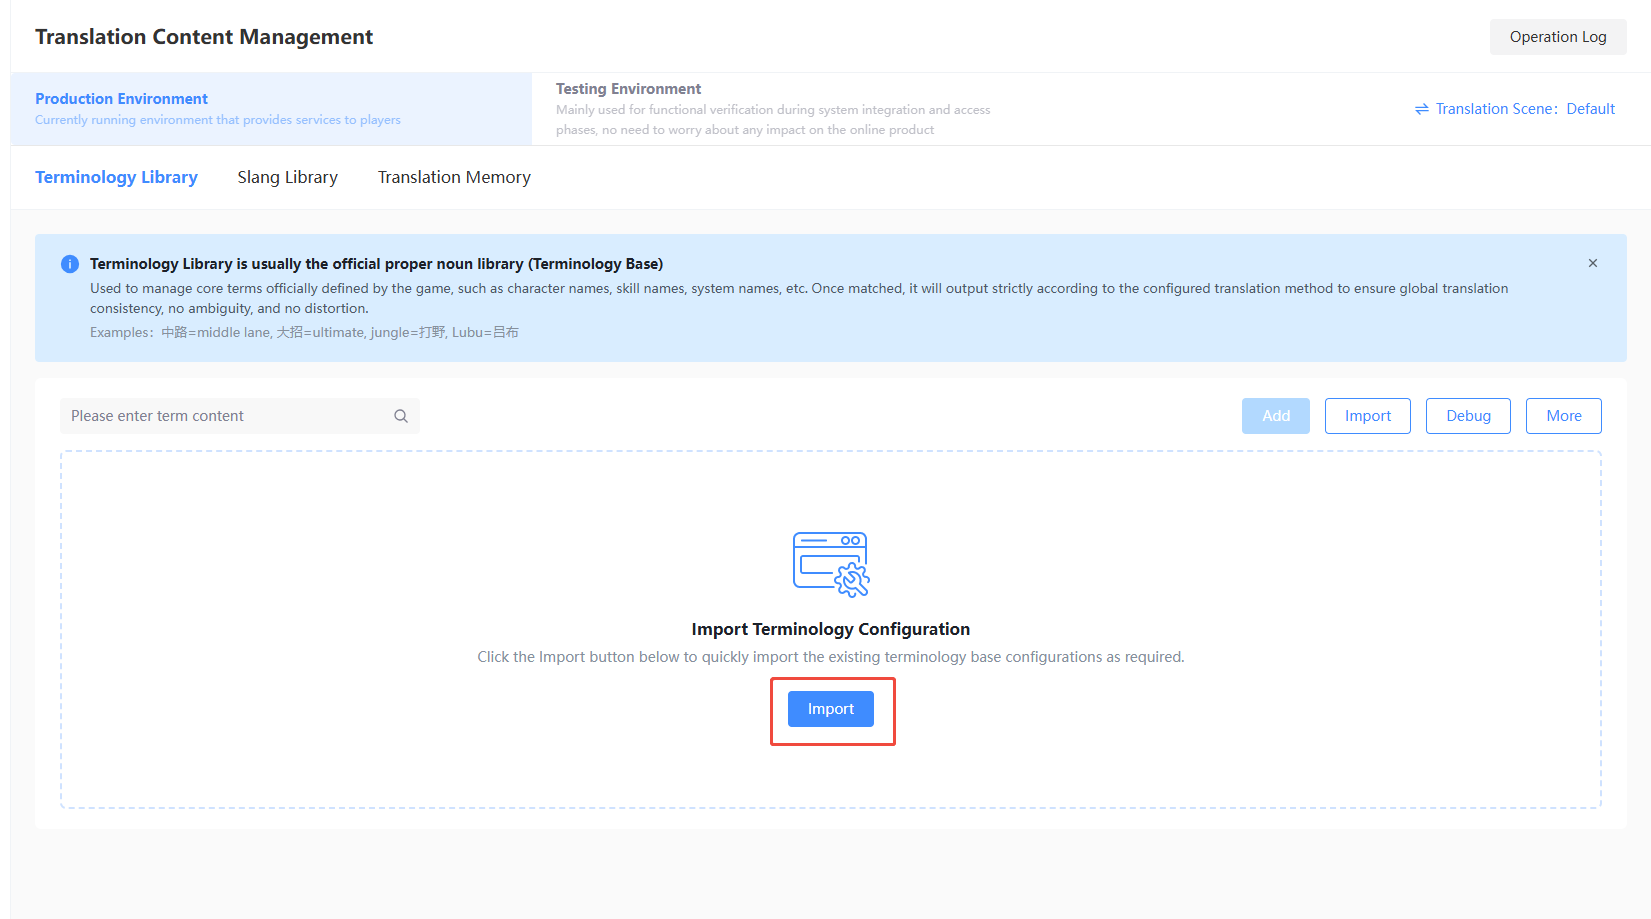
Click Import.
If this is your first time, please Download Terminology Template & Format Specifications to configure the content.
-
[Optional] The template can be configured based on requirements; unused language fields can be left blank.

-
Select the desired import method. Currently, Local File Import and Import from Production/Test Environment are supported.
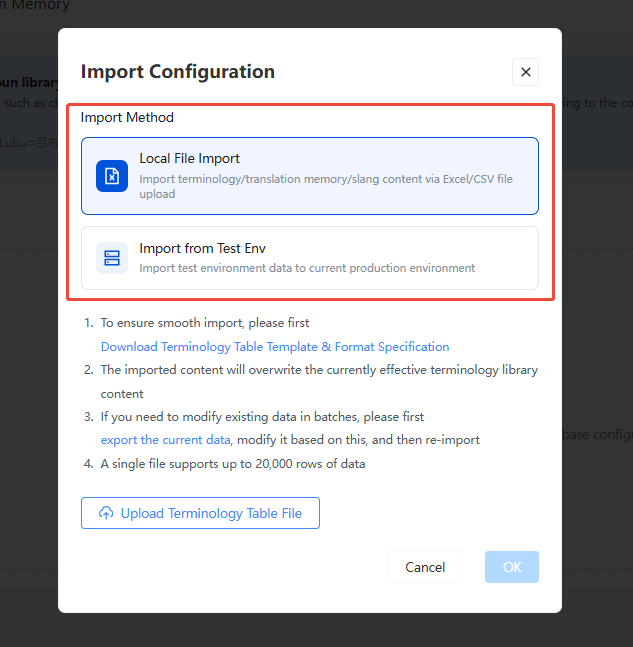
Local File Import
-
Select Local File Import, click Upload Terminology File to choose and upload a file.
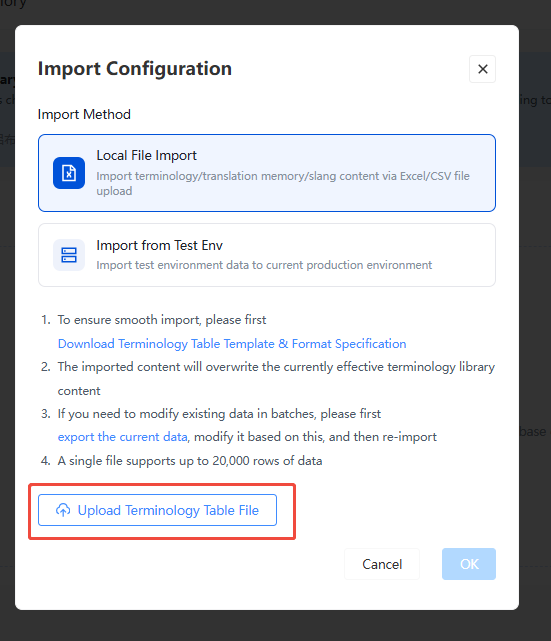
-
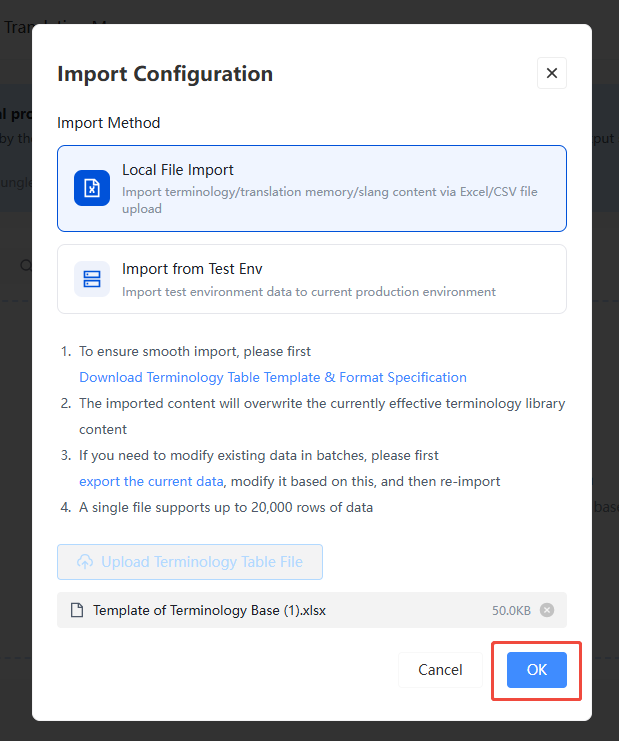
Click Confirm to start parsing the document.
If previous translation content exists, this import will overwrite the current active terminology library content.
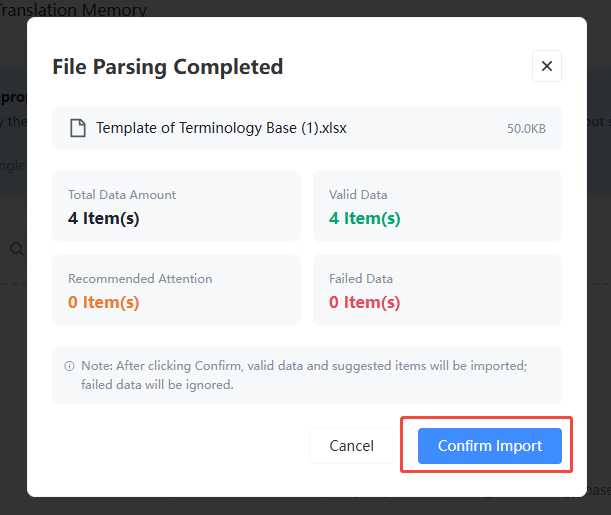
- After the file is parsed, click Confirm Import. After a secondary confirmation, the list page will display the imported content.
Please carefully review the imported data. Only [Valid Data] and [Recommended Entries] are supported for import; failed entries will not be imported.
Import from Production/Test Environment
-
If there is already configured terminology library content in the production/test environment, you can import from there.
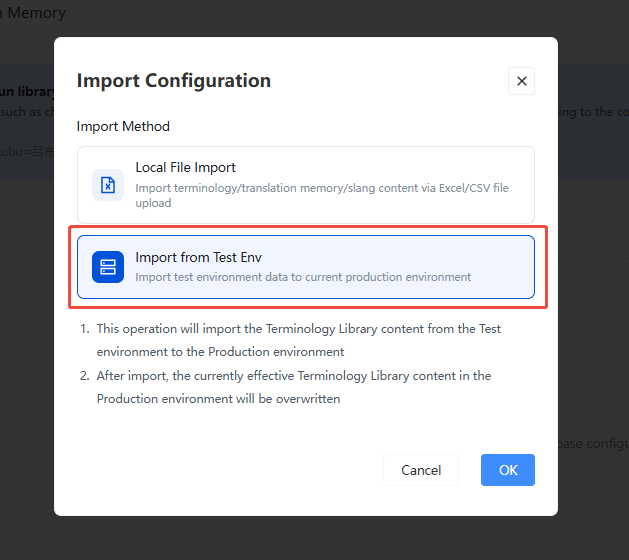
-
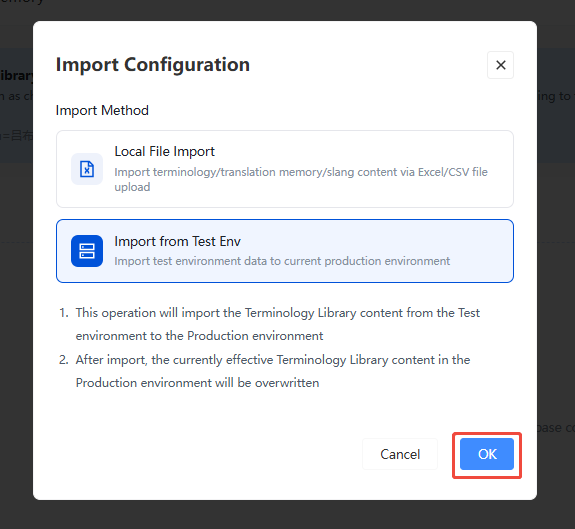
Click Confirm to start parsing the document.
If previous translation content exists, this import will overwrite the current active terminology library content.
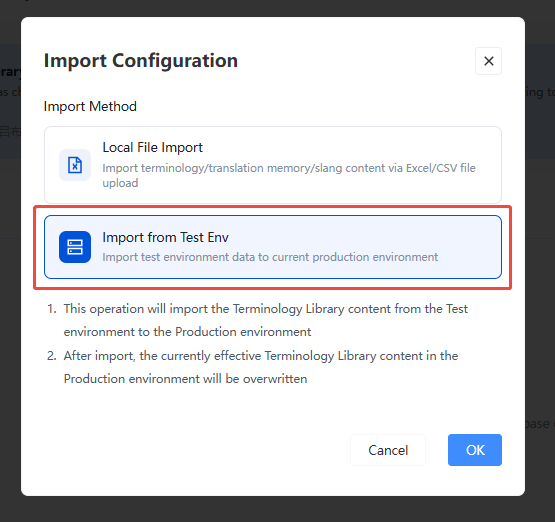
-
After the file is parsed, click Confirm Import. After a secondary confirmation, the list page will display the imported content.
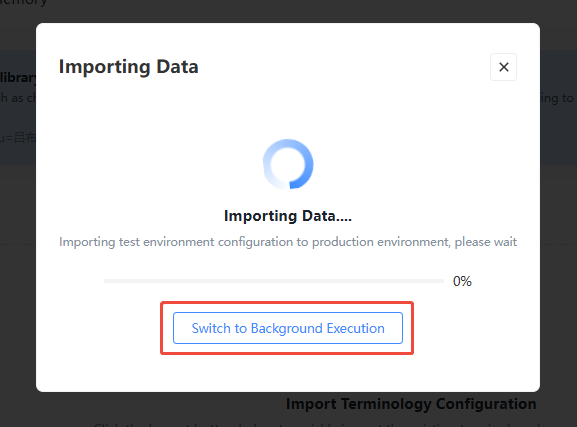
-
[Optional] If the content is extensive, parsing in the background is supported and does not affect other operations on the front end.
-
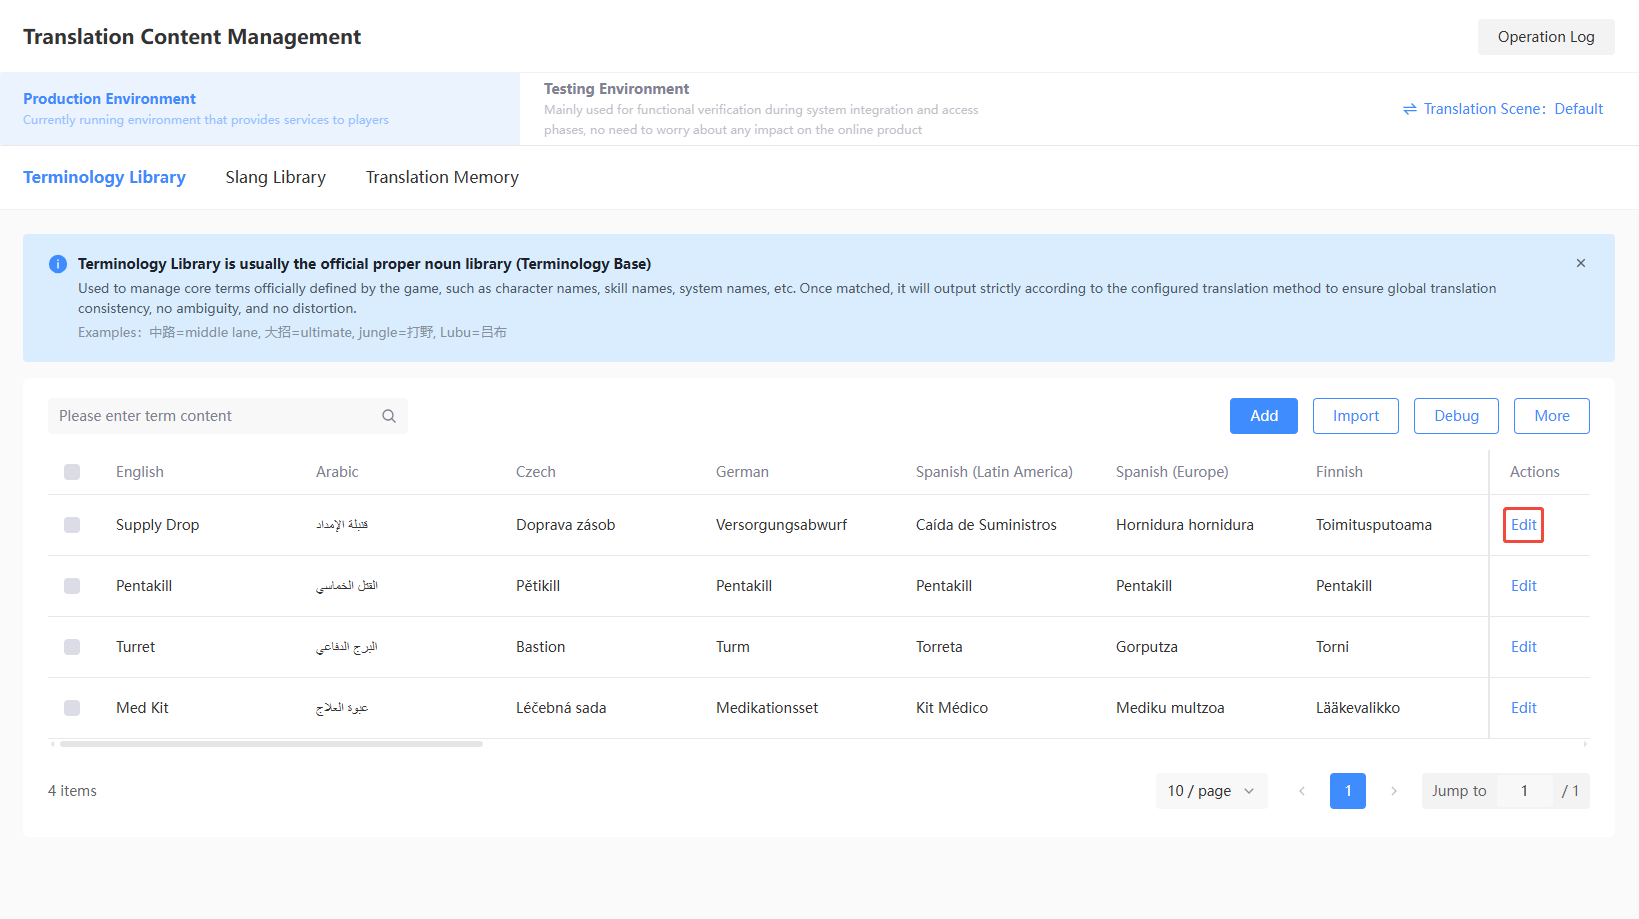
[Optional] Single entry editing is supported.
Add
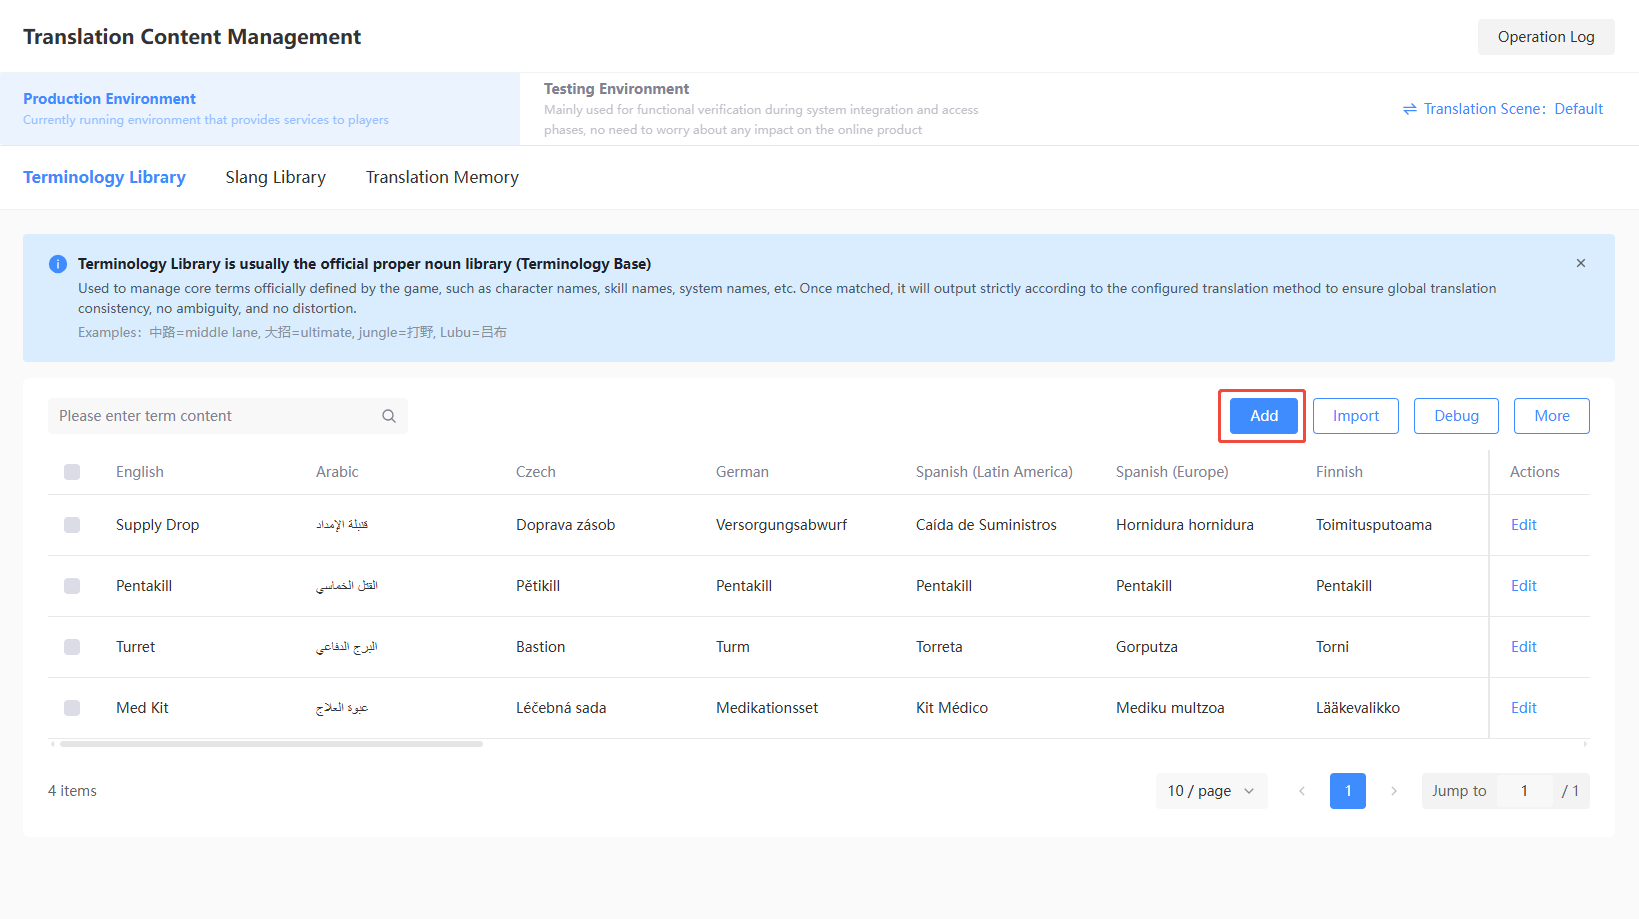
If you only need to add a single translation entry, you can manually configure it to avoid batch export and editing operations.
-
Under Terminology Library, click Add.
-
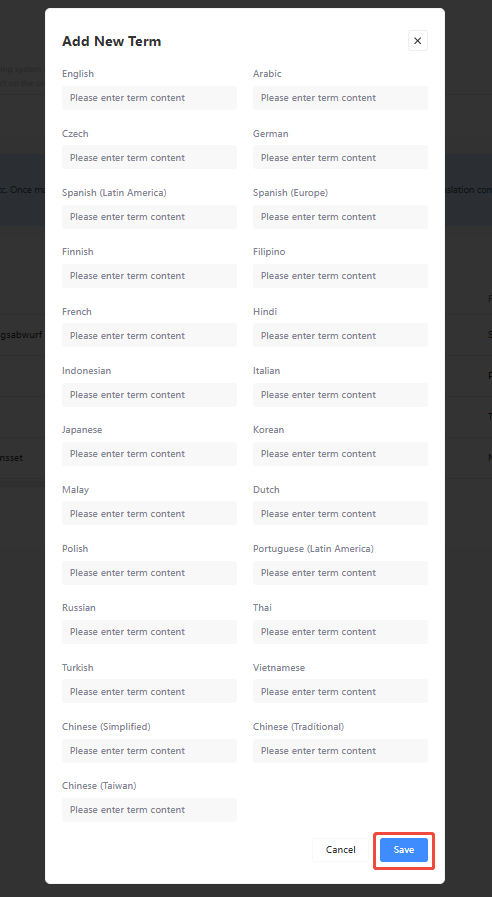
Fill in the required multilingual entries as needed and click Save.
Debug
Operations staff can quickly check whether translation content configuration meets expectations.
-
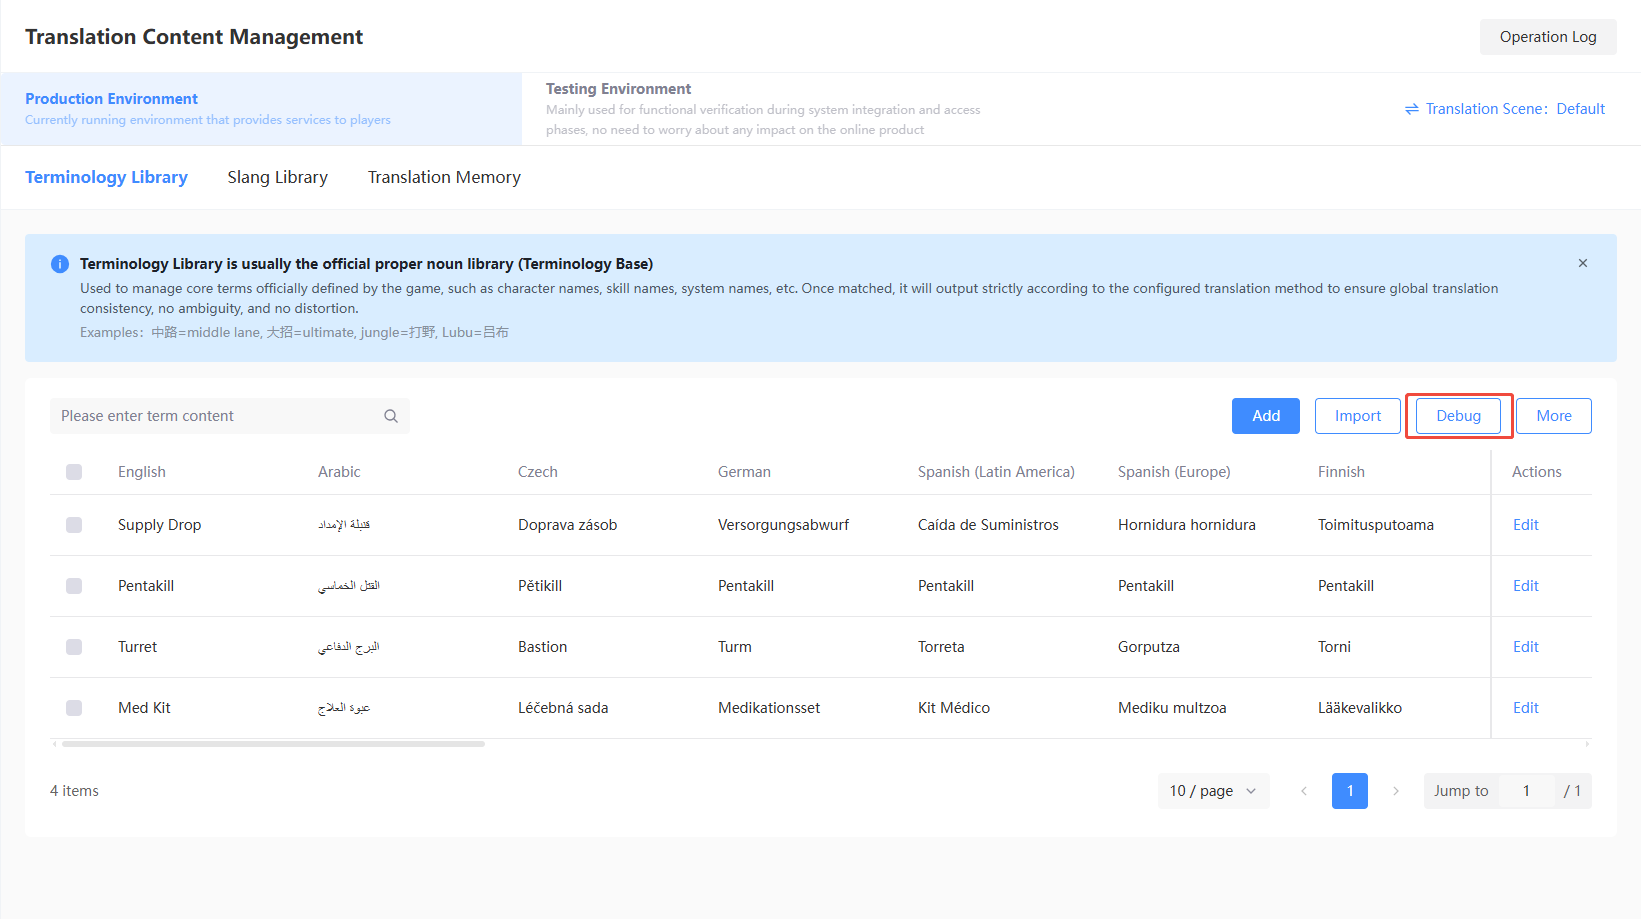
Under Terminology Library, click Debug.
-
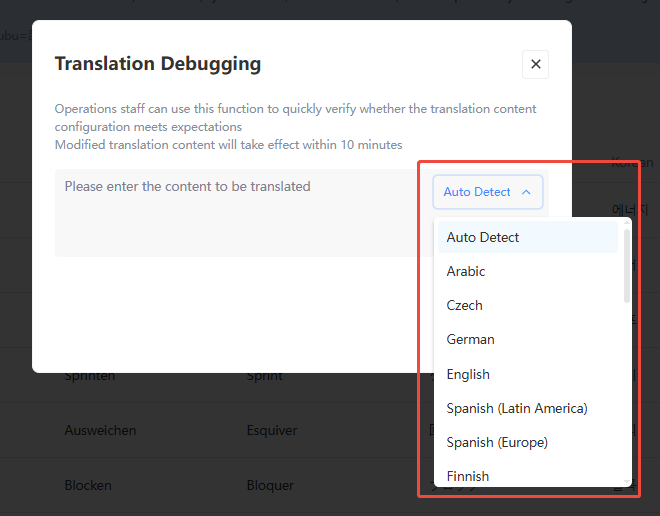
Enter the entry to check. Supports automatic detection or specifying a language as the input source.
-
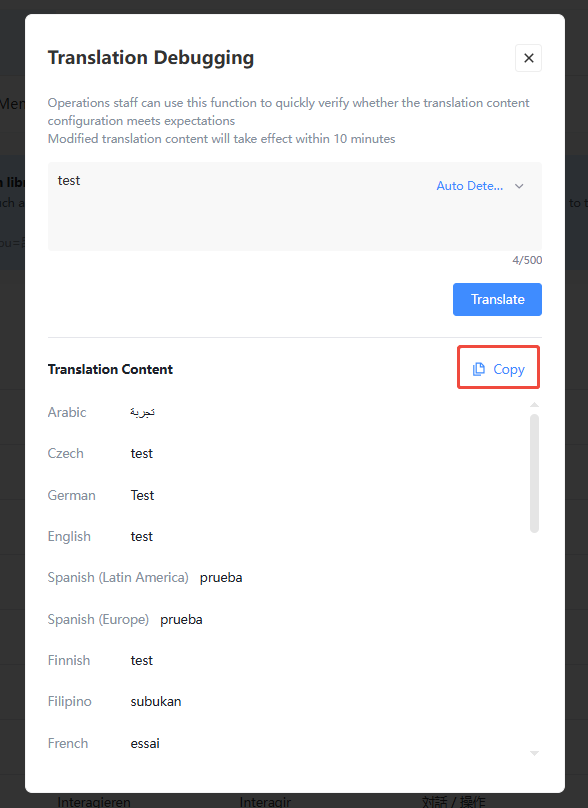
[Optional] If you think the translation is correct, you can click Copy to copy in one click, making document maintenance easier.
More
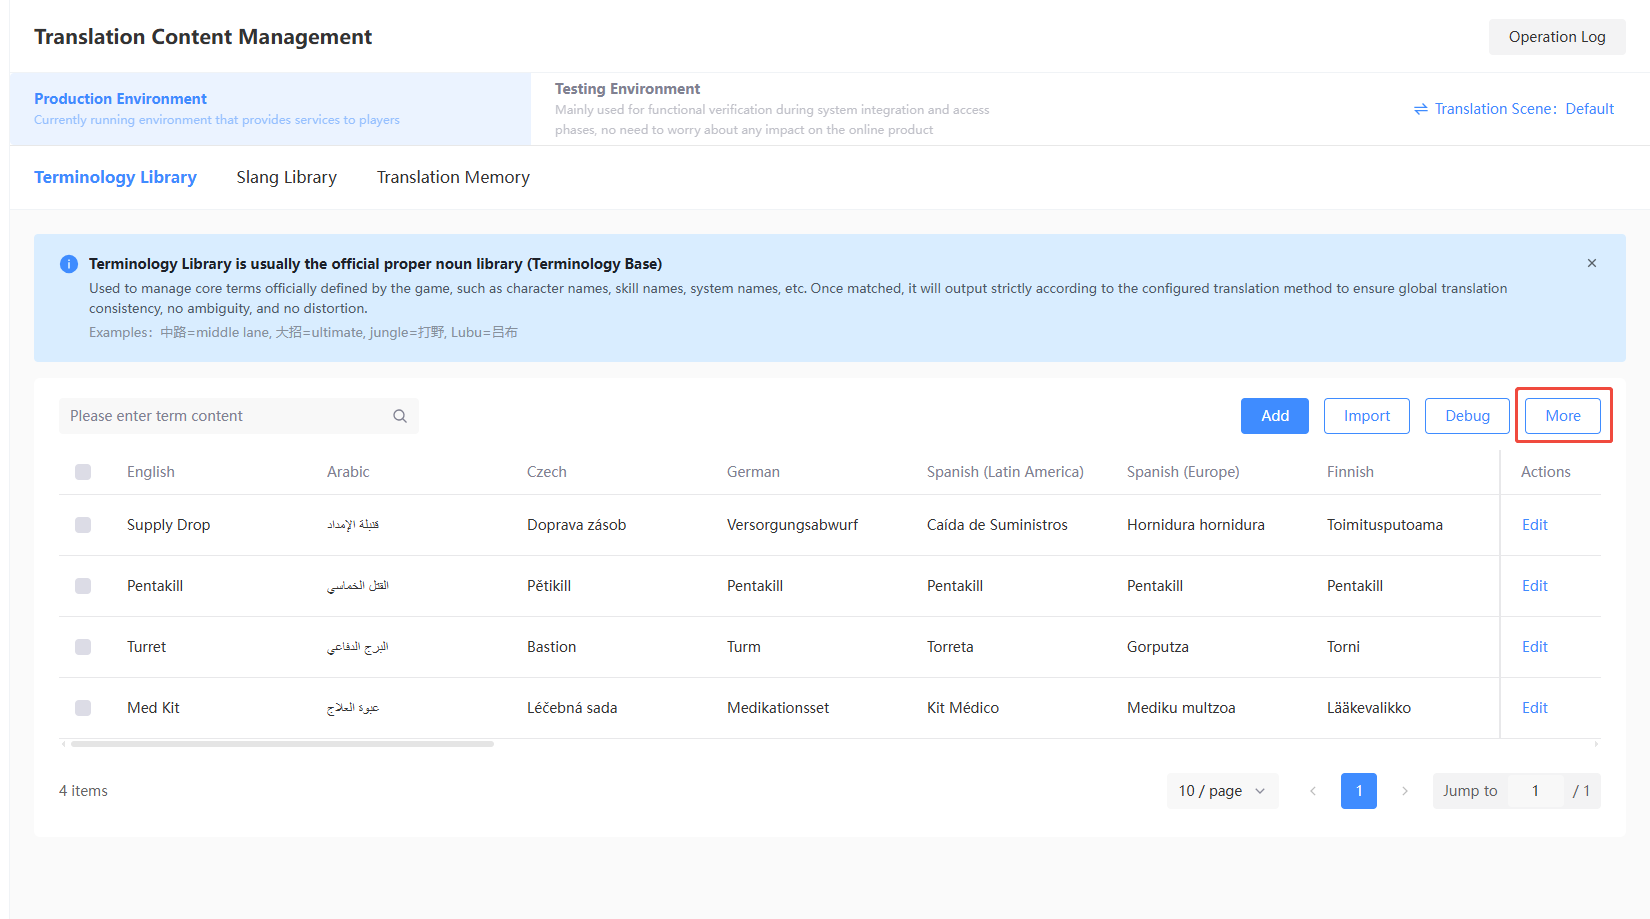
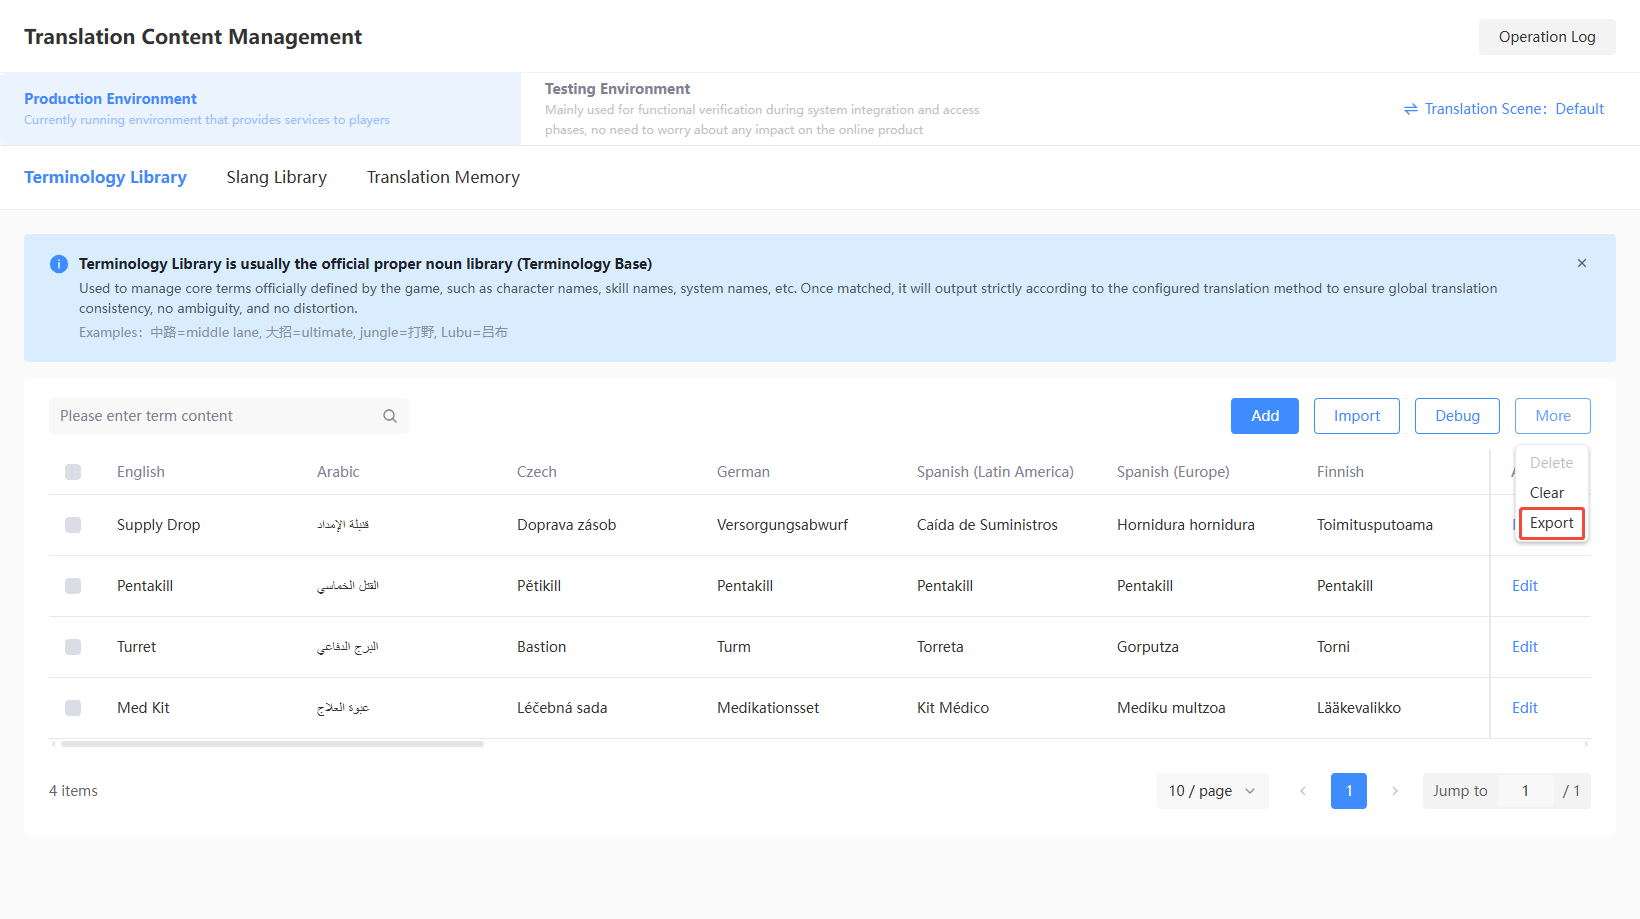
Under Terminology Library, click More. Supports single/batch data deletion, clearing all current configuration entries, and exporting existing content.
Delete
-
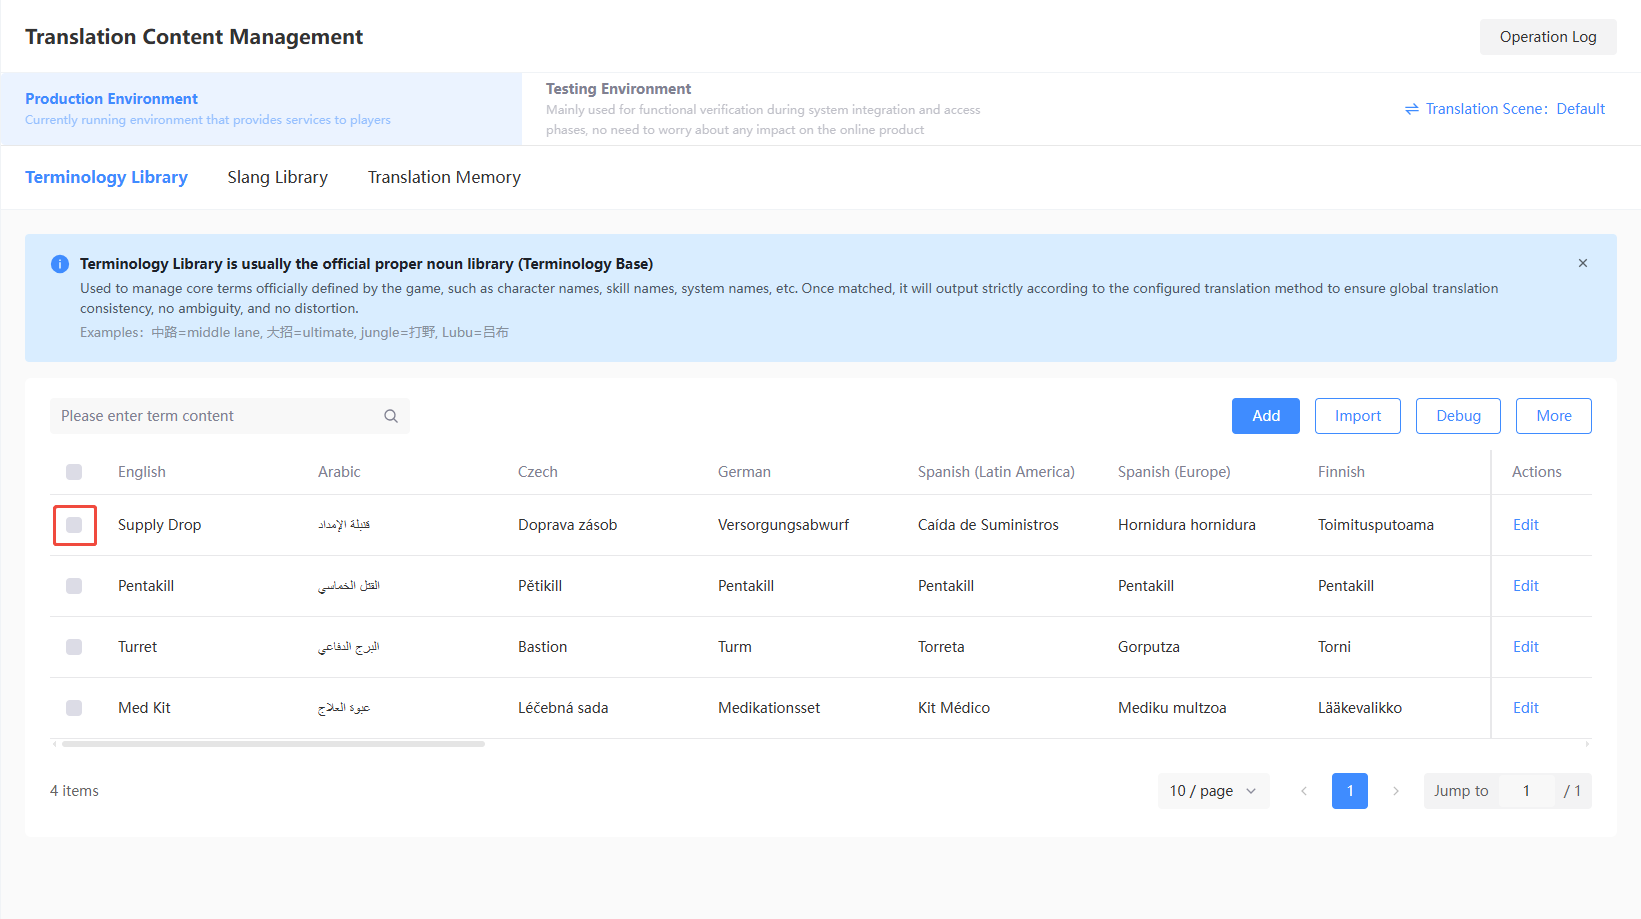
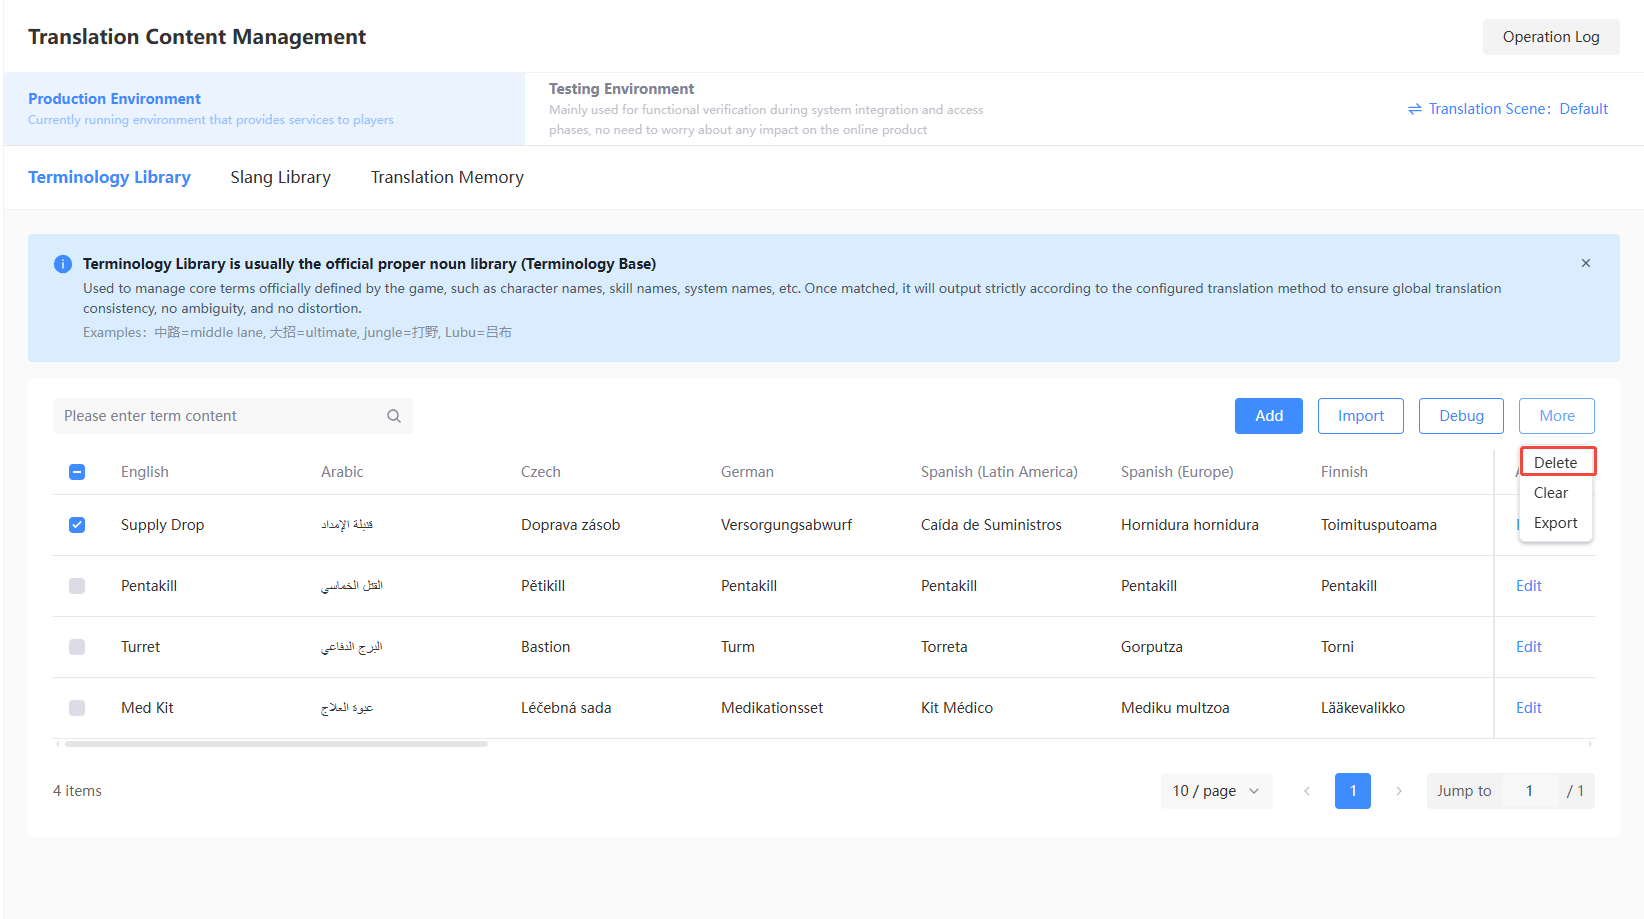
Select the entries to delete in the Terminology Library List.
-
Click Delete under More.
-
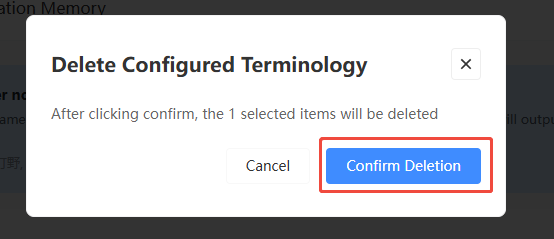
Verify the number of entries to delete, click Confirm Delete to immediately delete the selected entries.
Clear
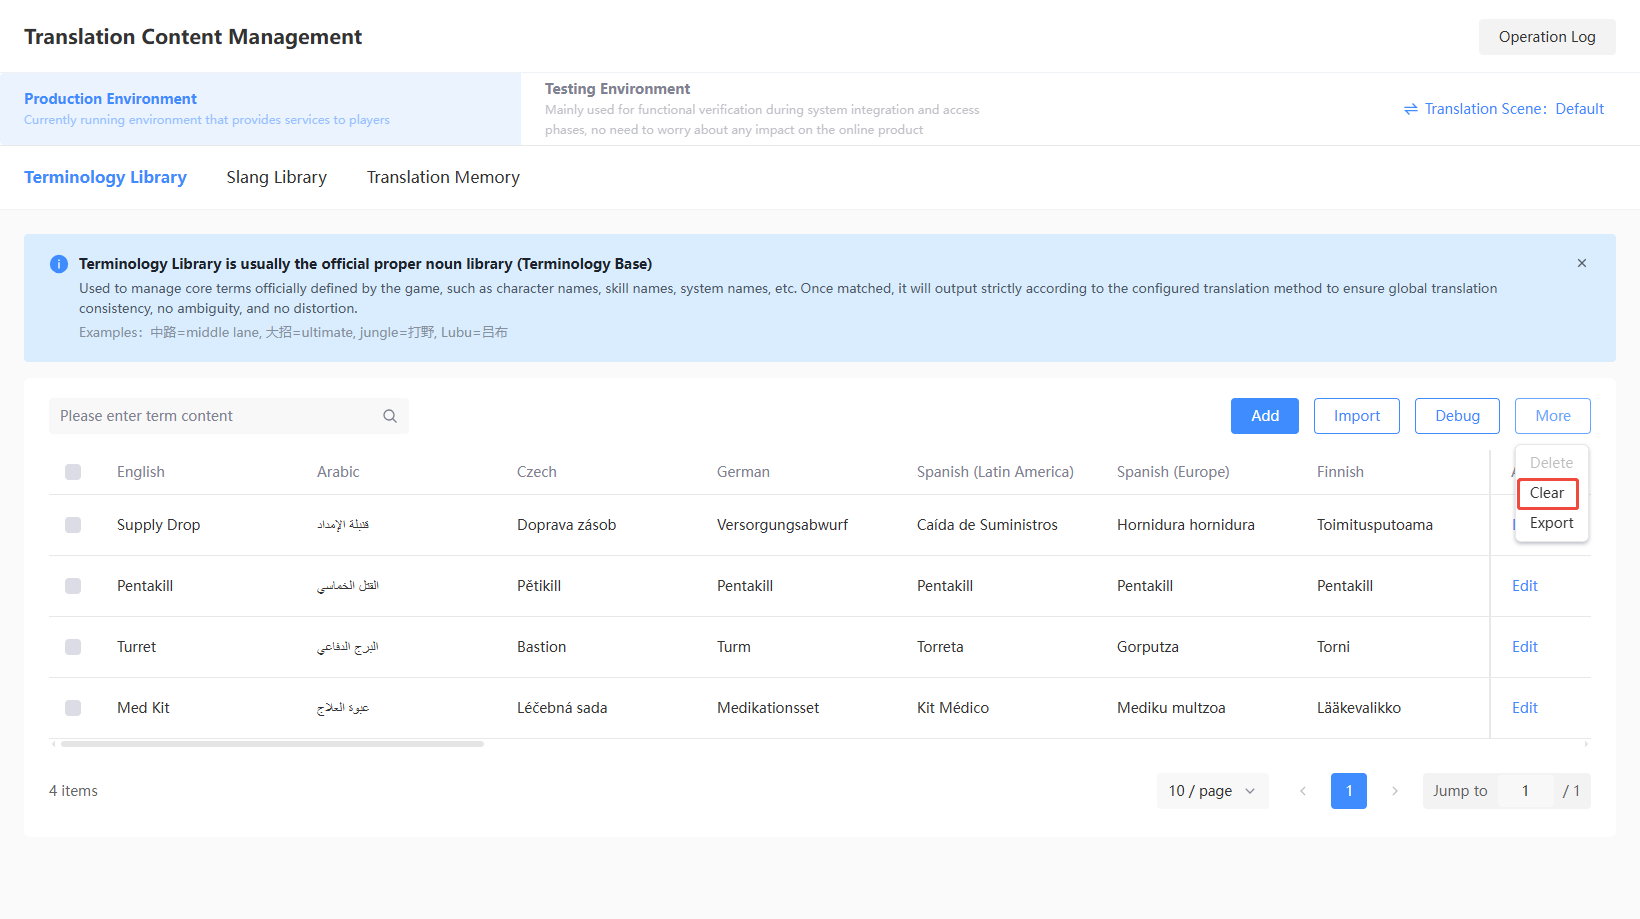
The clear operation will delete all current terminology library content. Please proceed with caution.
-
Click Clear under More.
-
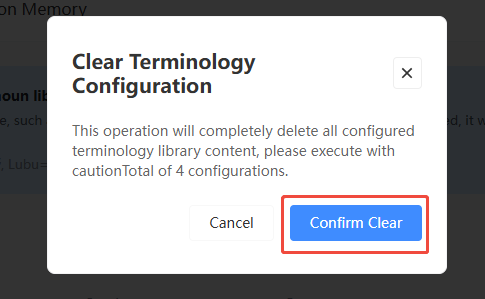
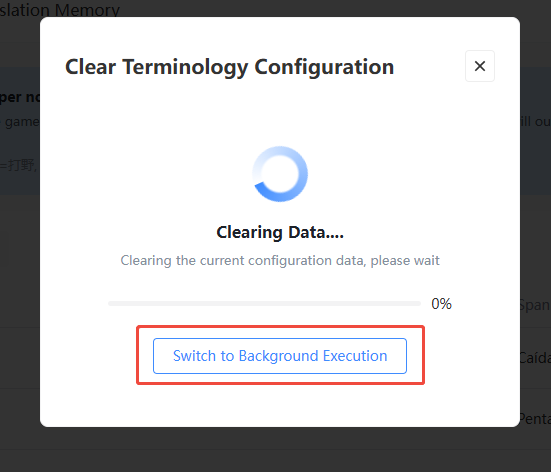
In the popup, click Confirm Clear to immediately clear all current terminology library content.
-
[Optional] When the content is extensive, clearing in the background is supported and does not affect front-end operations.
Export
Export existing terminology library content as an Excel file, which can be used for subsequent translation content management.
-
Click Export under More.
-
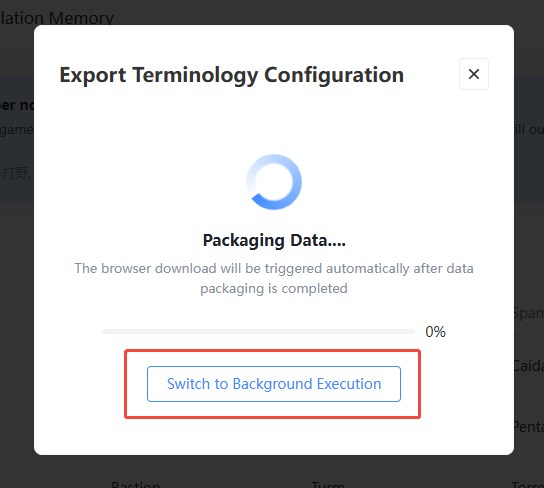
[Optional] When the content is extensive, exporting in the background is supported and does not affect front-end operations.
-
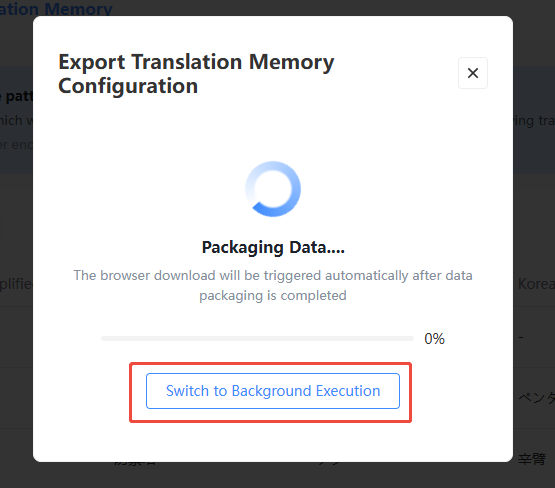
The popup will display data packaging progress. Once completed, the browser will automatically download it.

Slang Library
The slang library is usually the player jargon / commonly used term collection (Slang).It manages jargon, spoken language, and common communication expressions already established among players, making translation results more natural and sound like "players talking".
示例:蓝 = 蓝buff、蓝爸爸=蓝buff、carry=带飞、AFK=挂机、like for like = 互相点赞
Import
-
Login to the Player Network Console and click Translation Content Management under AI Translation in the left column.
-
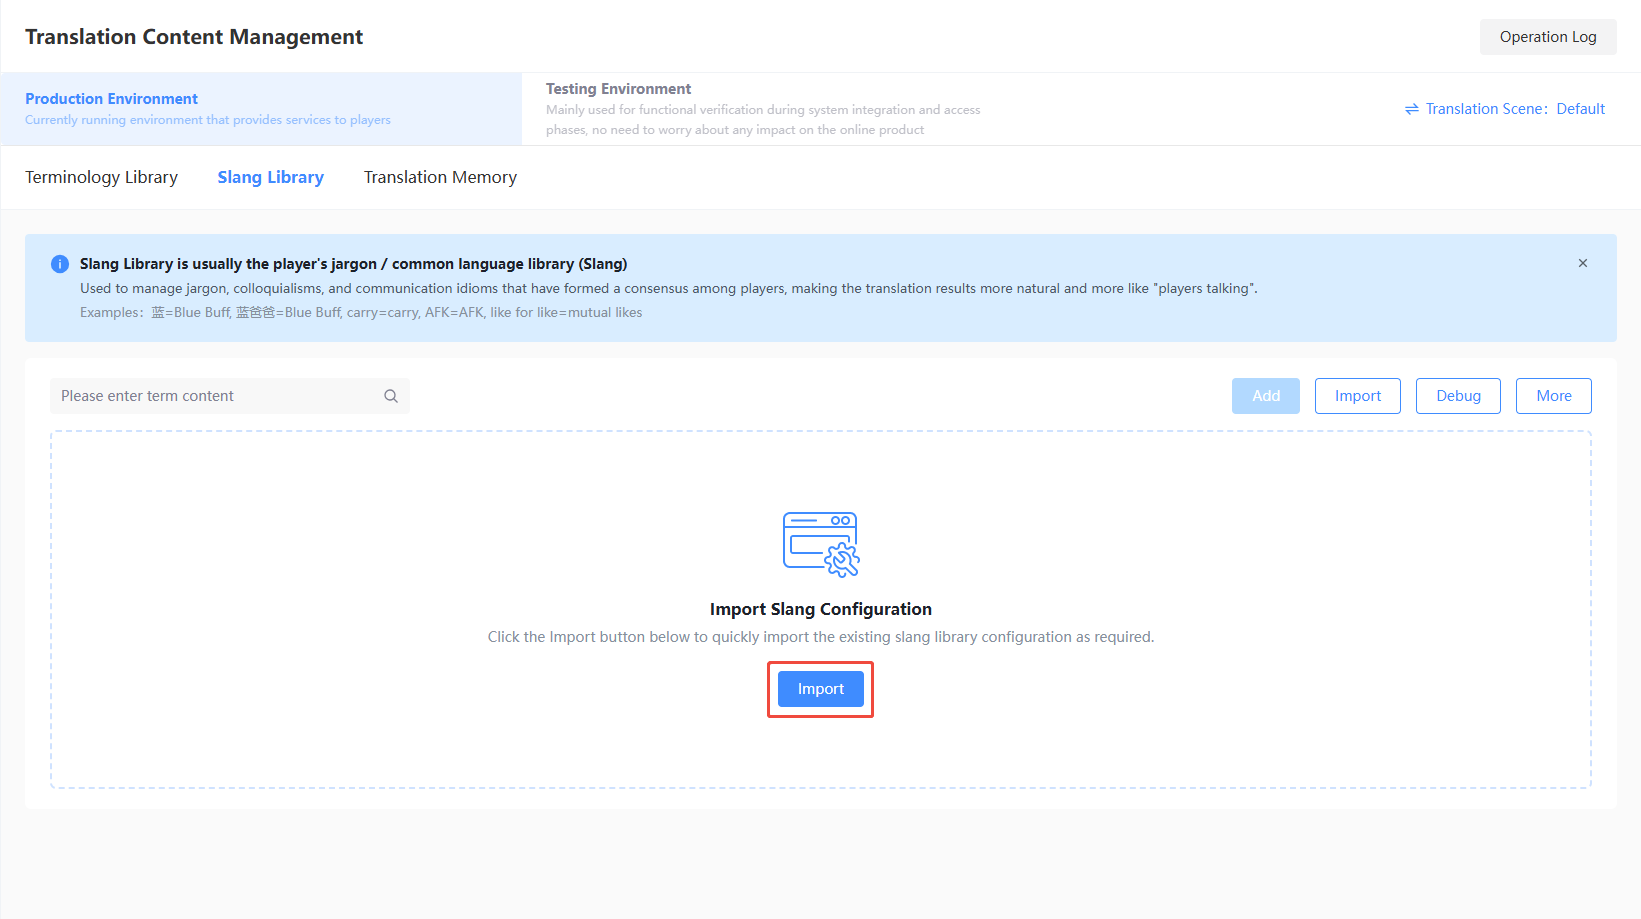
Under Translation Content Management, click Slang Library.
-
Click Import.
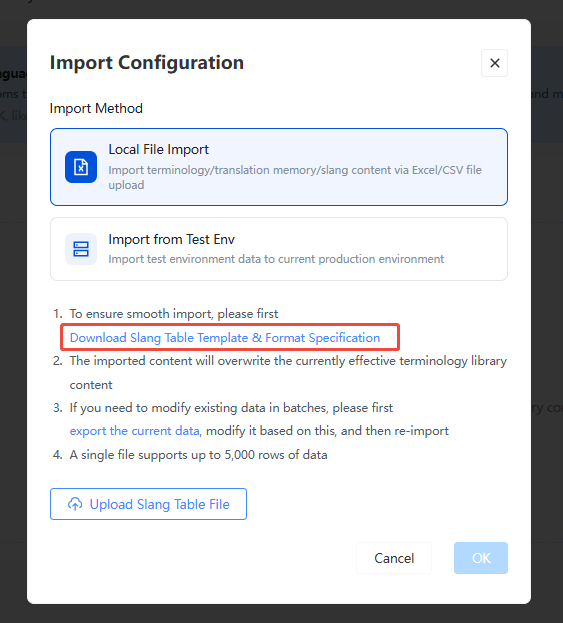
If this is your first time, please Download Slang Template & Format Specification to configure the content.
[Optional] The template can be configured based on requirements; unused language fields can be left blank.

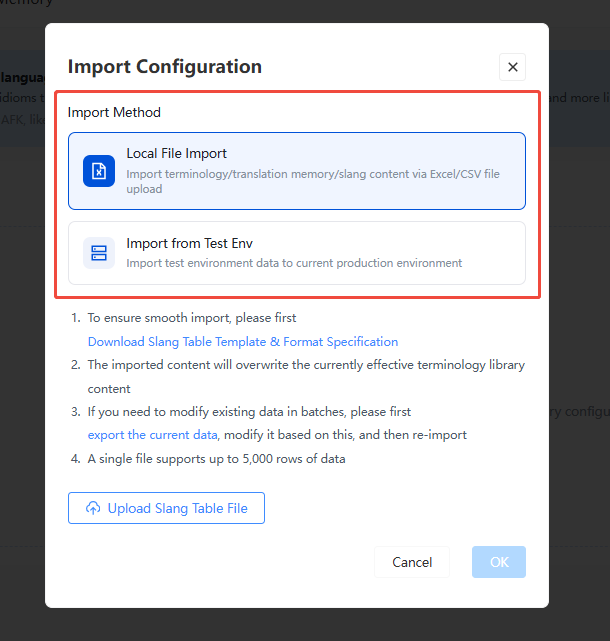
- Select the desired import method. Currently, Local File Import and Import from Production/Test Environment are supported.
Local File Import
-
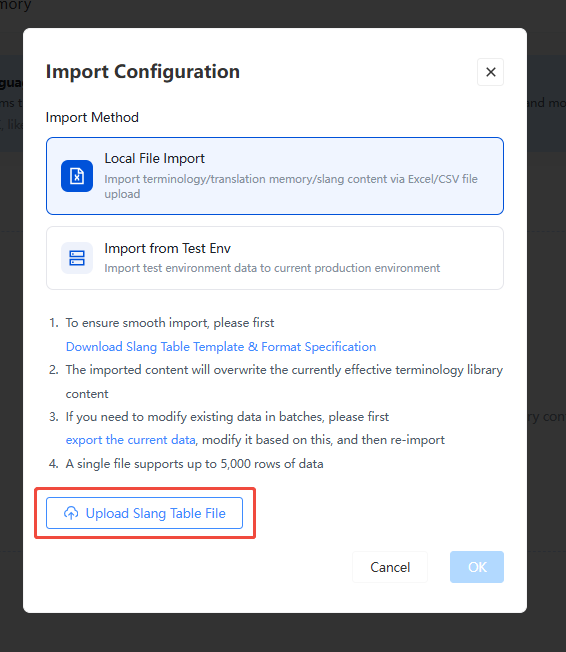
Select Local File Import, click Upload Slang File to choose and upload a file.
-
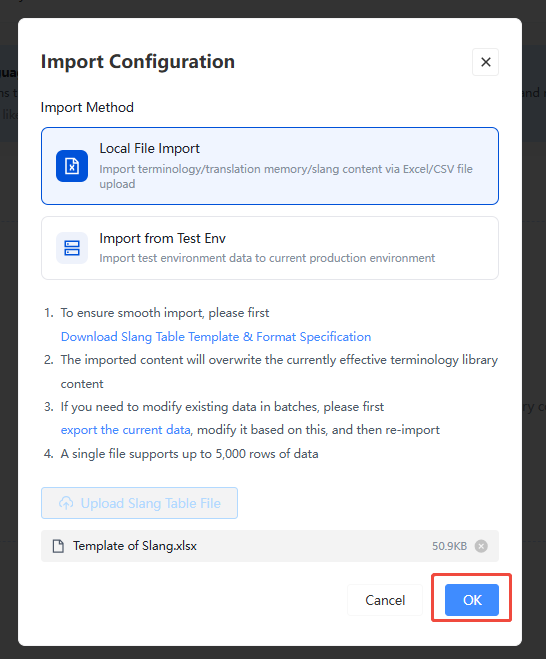
Click Confirm to start parsing the document.
If previous translation content exists, this import will overwrite the current active slang library content.
-
[Optional] If the content is extensive, parsing in the background is supported and does not affect other operations on the front end.
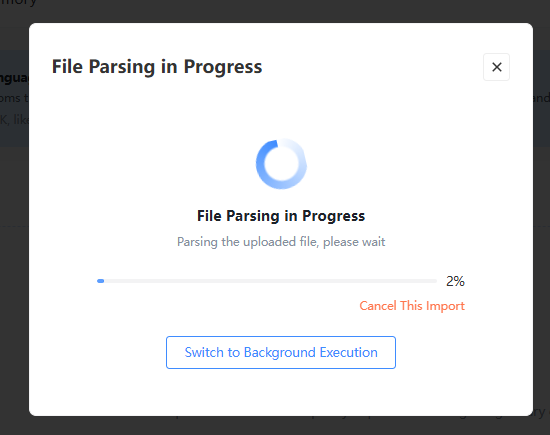
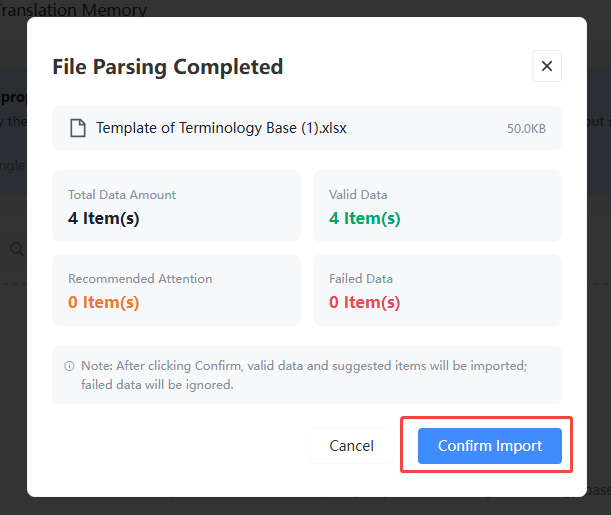
After the file is parsed, click Confirm Import. After a secondary confirmation, the list page will display the imported content.
Please carefully review the imported data. Only [Valid Data] and [Recommended Entries] are supported for import; failed entries will not be imported.
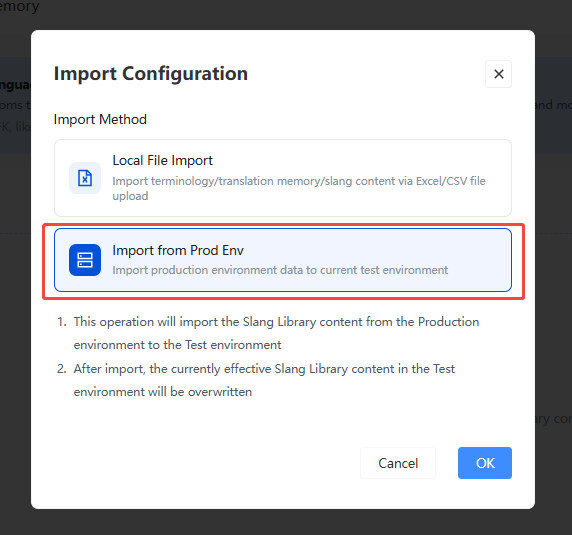
Import from Production/Test Environment
-
If there is already configured slang library content in the production/test environment, you can import from there.
-
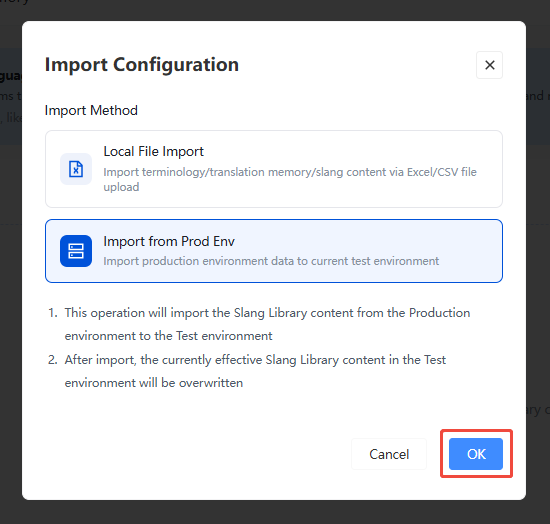
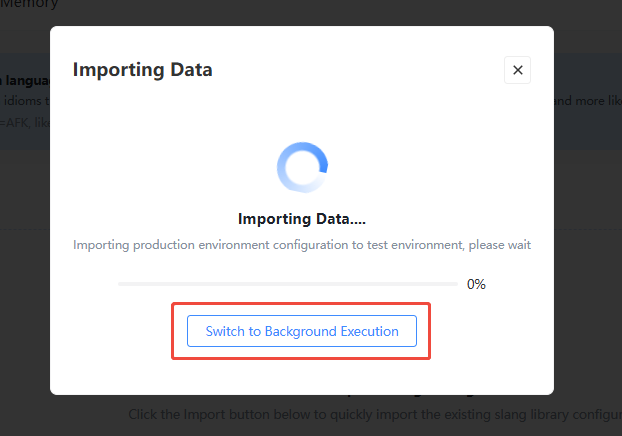
Click Confirm to start parsing the document.
If previous translation content exists, this import will overwrite the current active slang library content.
-
[Optional] If the content is extensive, parsing in the background is supported and does not affect other operations on the front end.
-
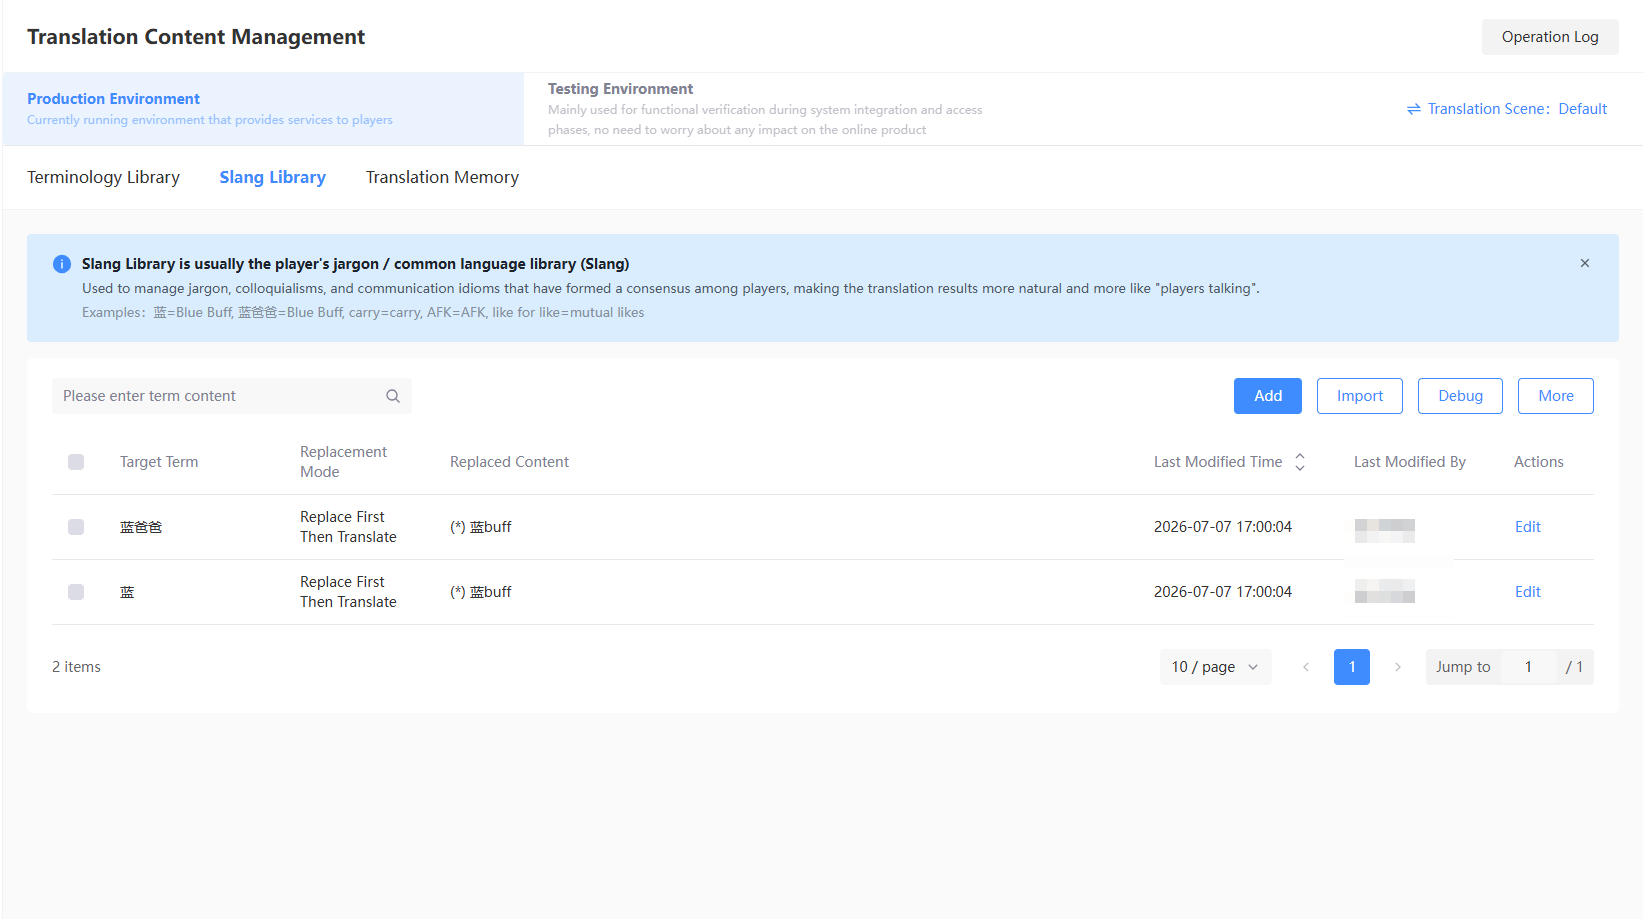
After the file is parsed, the list page will display the imported content.
-
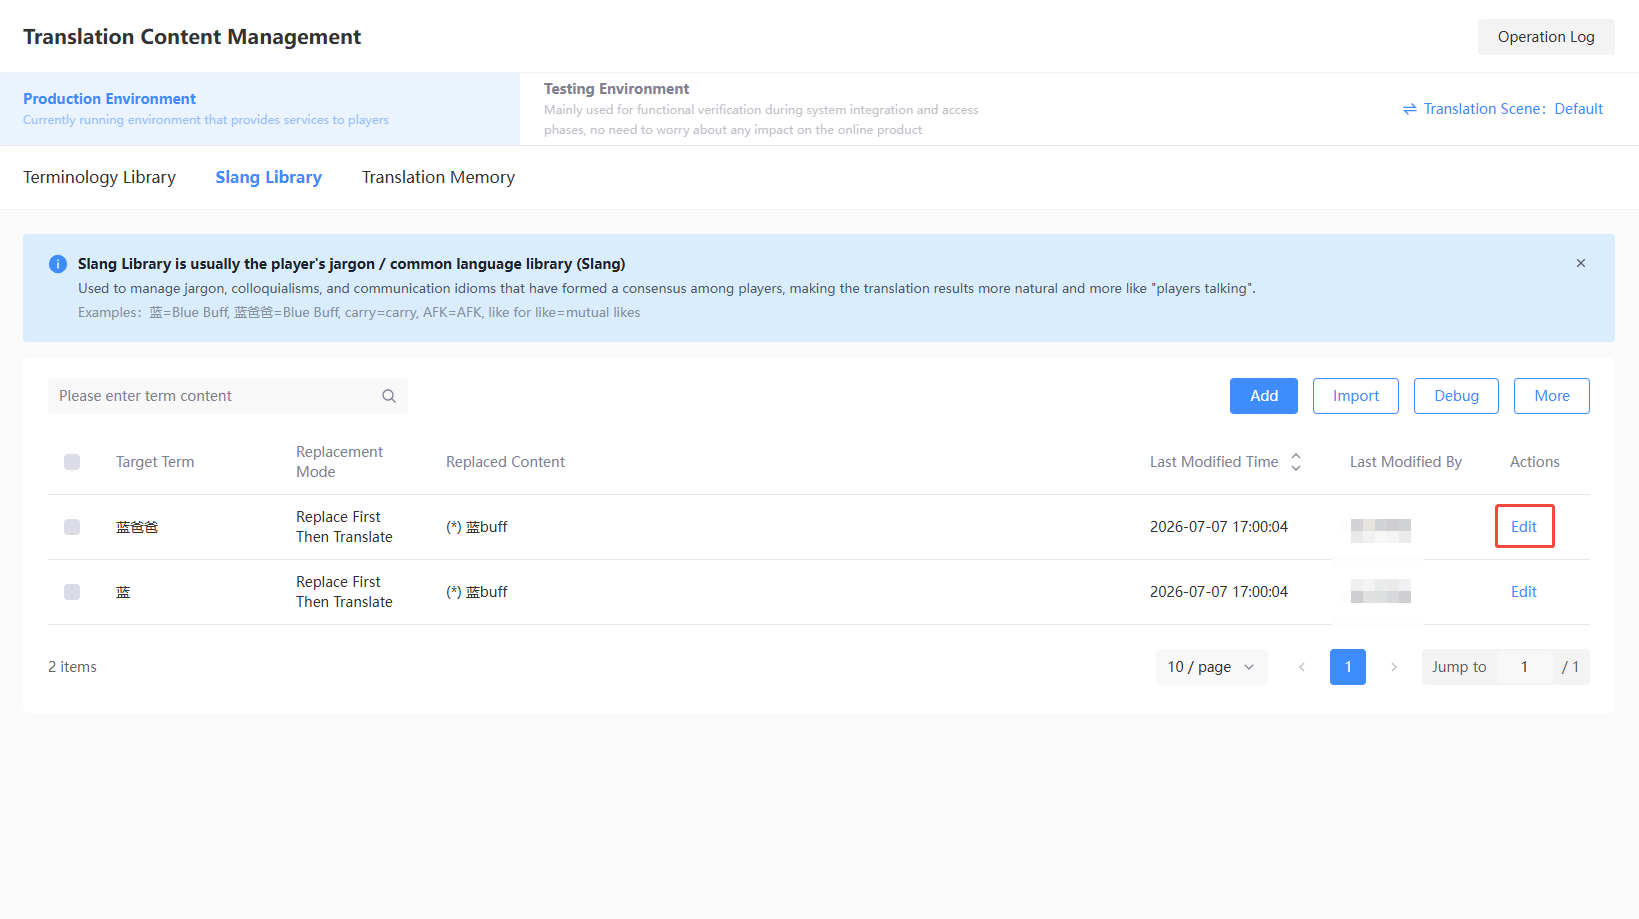
[Optional] Single entry editing is supported.
Add
If you only need to add a single translation entry, you can manually configure it to avoid batch export and editing operations.
-
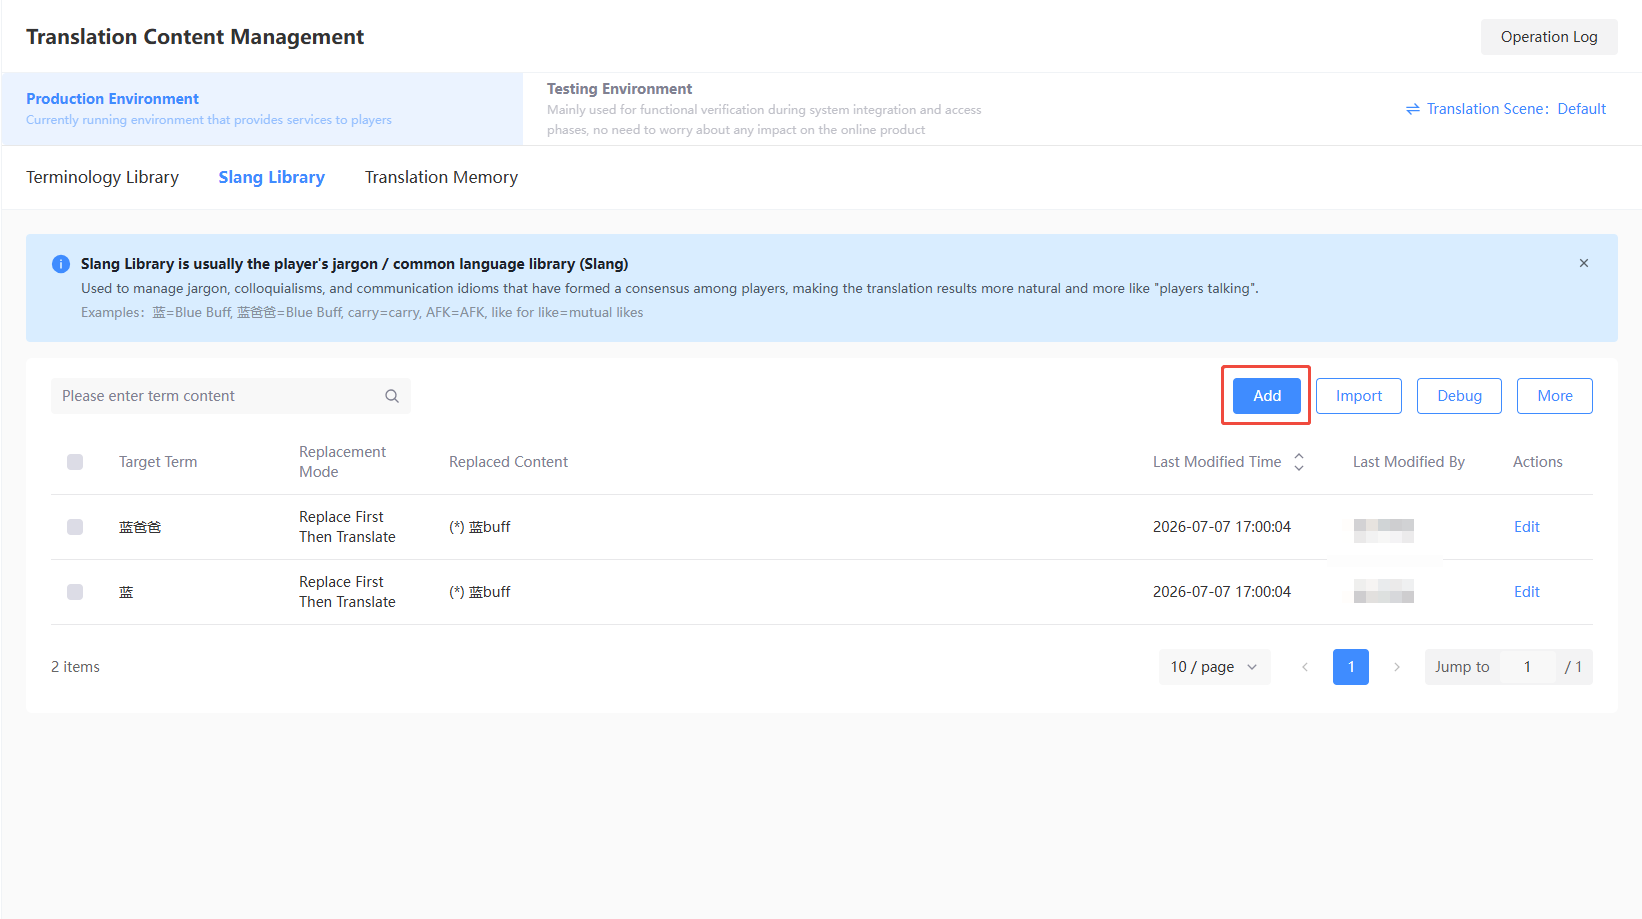
Under Slang Library, click Add.
-
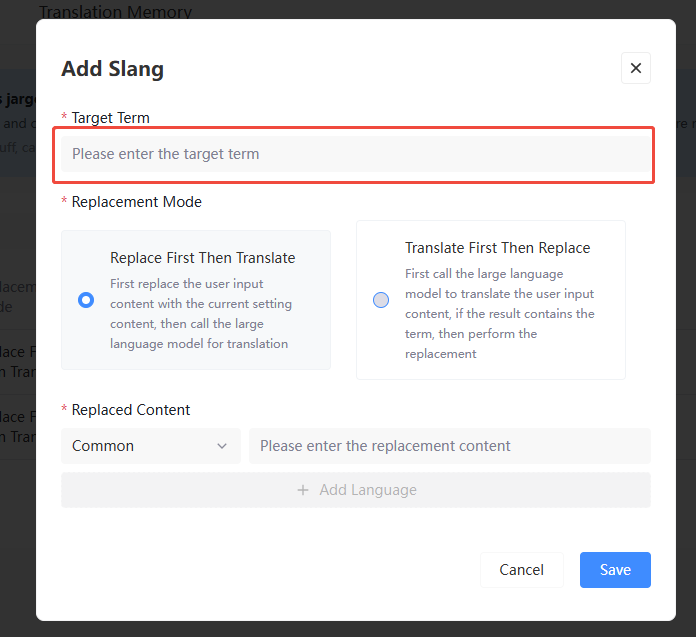
Enter Target Entry.
-
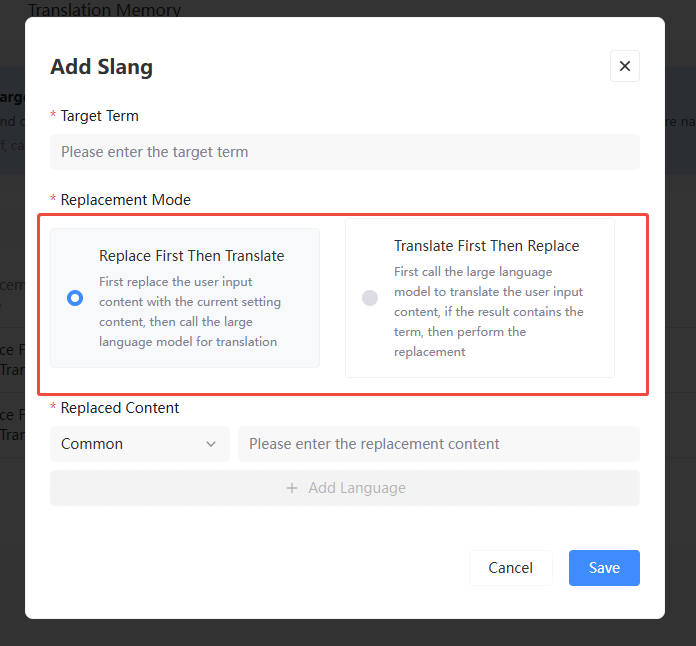
Select the replacement method as needed. Currently, Replace then Translate and Translate then Replace are supported.
Replace then Translate: Replace the user input with the current setting first, then call the large language model for translation;
Translate then Replace: Call the large language model to translate the user input first. If the result contains the entry, perform replacement afterwards.
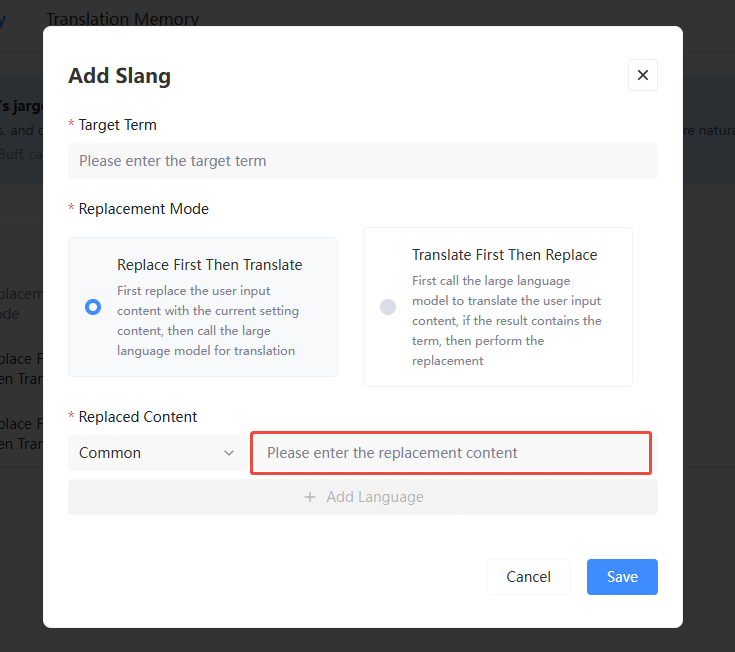
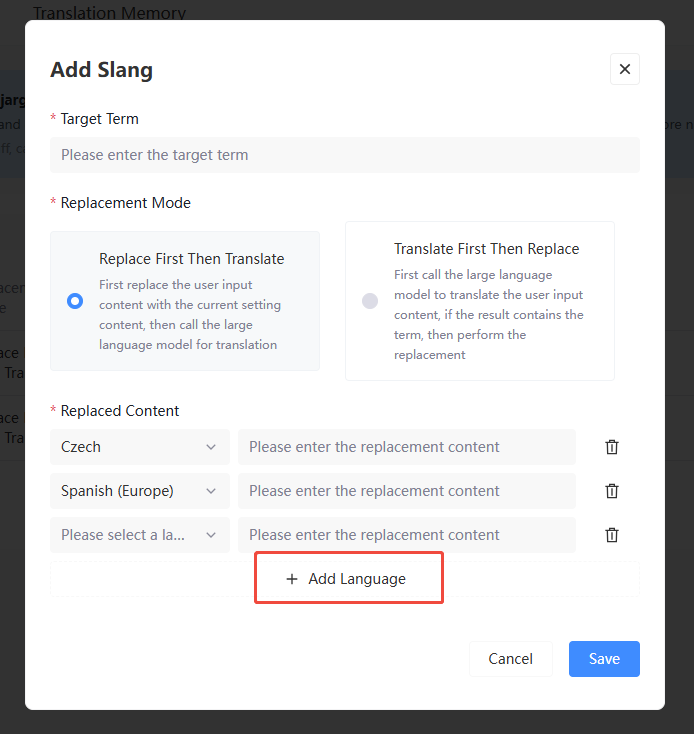
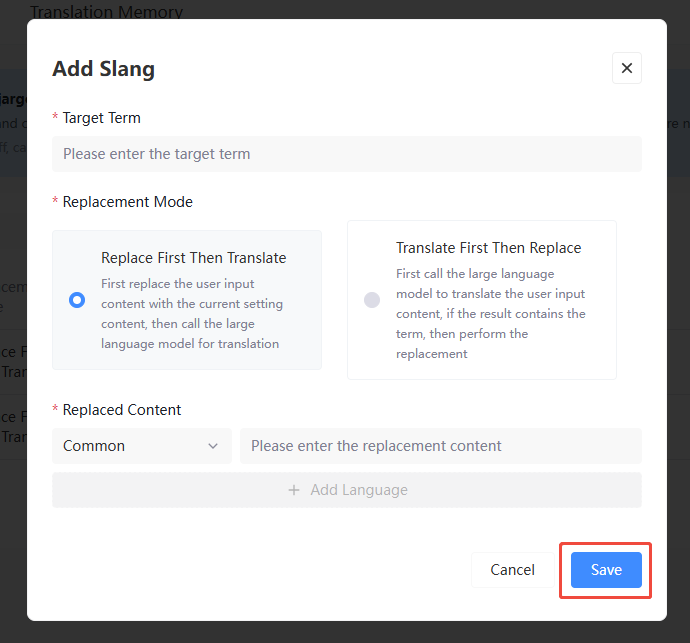
- Fill in the replacement content, supporting replacement according to General or Other Languages.
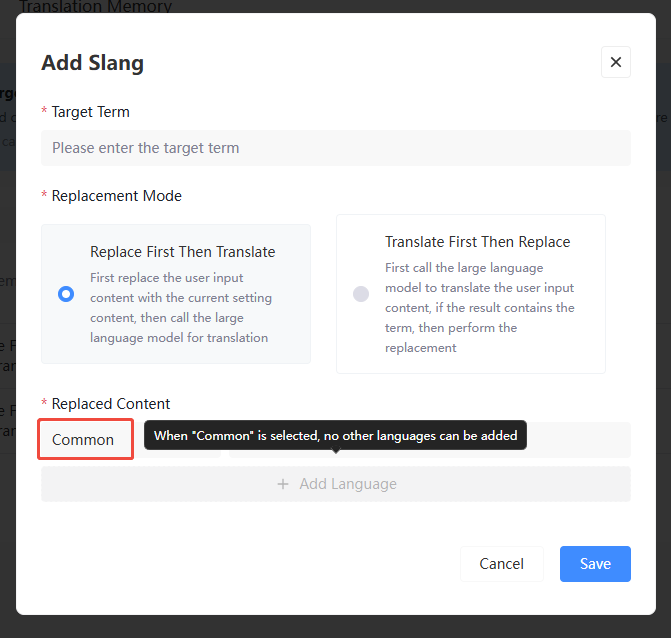
General: Once General language is selected, other languages cannot be added.
Other Languages: After selecting other languages, you can add more languages for translation.
- Click Save to complete the creation.
Debug
Operations staff can quickly check whether translation content configuration meets expectations.
-
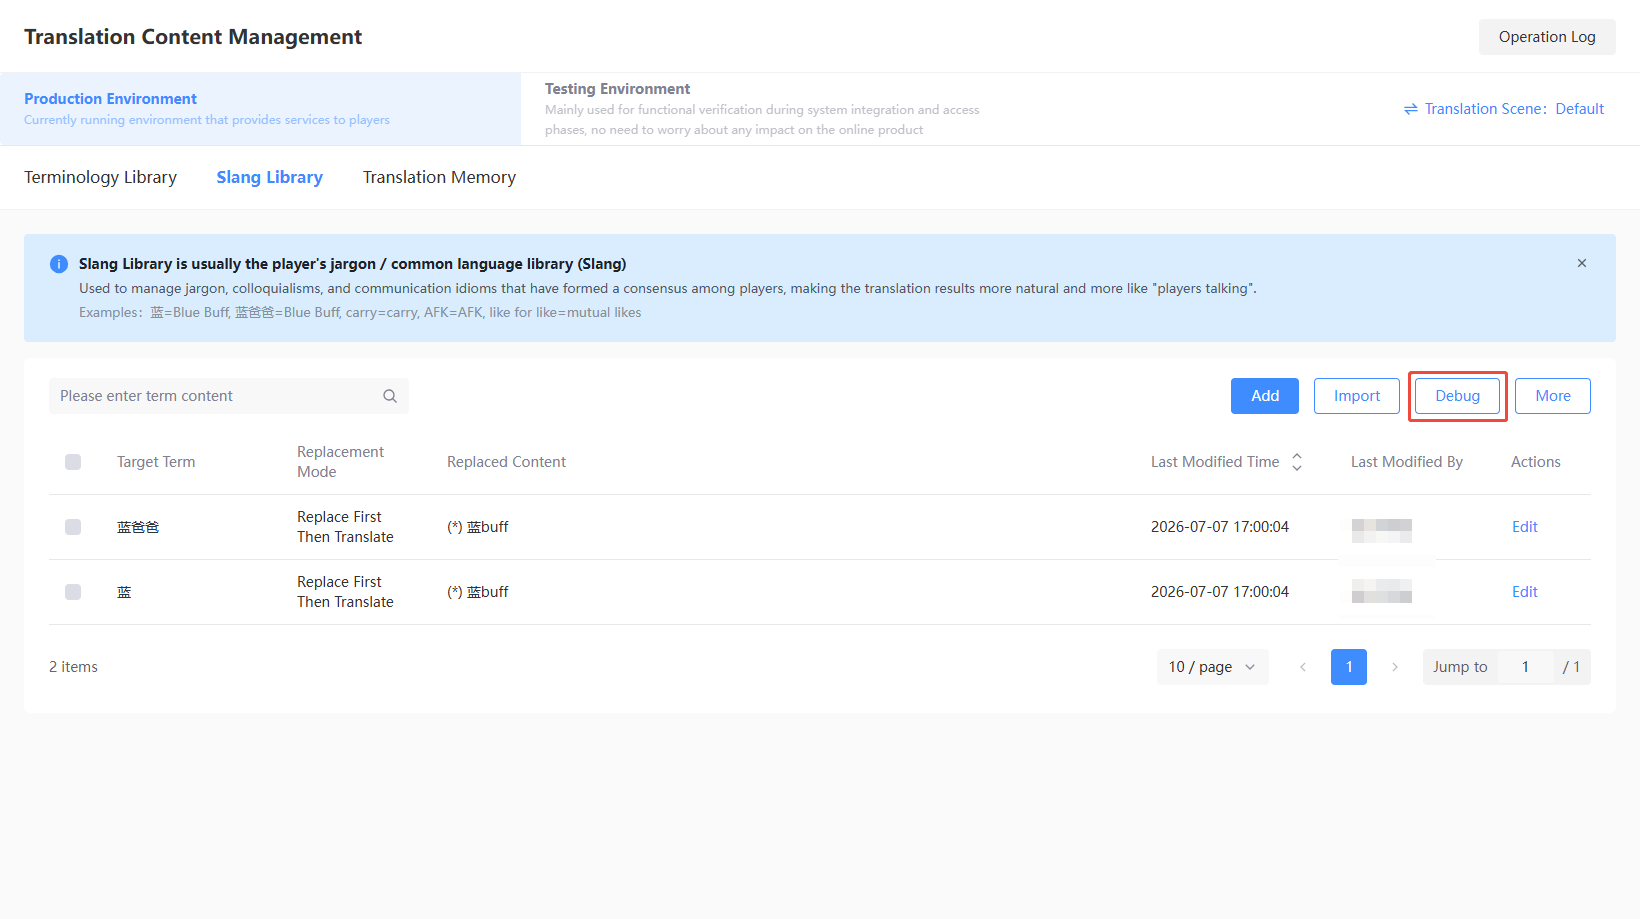
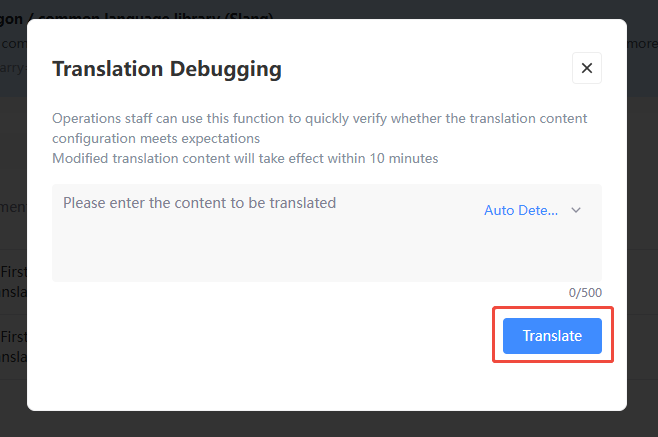
Under Slang Library, click Debug.
-
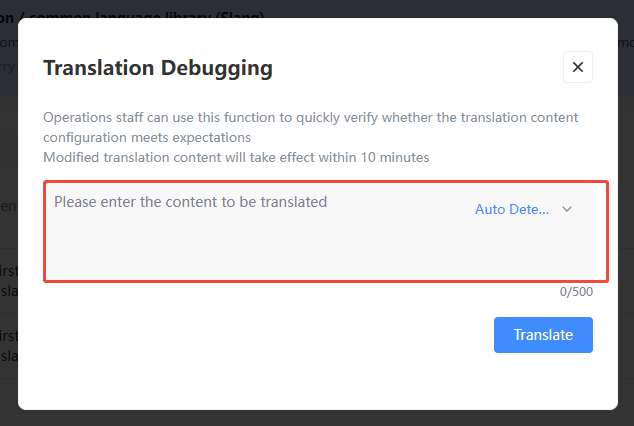
Enter the entry to check. Supports automatic detection or specifying a language as the input source.
-
Click the Translate button to start debugging.
-
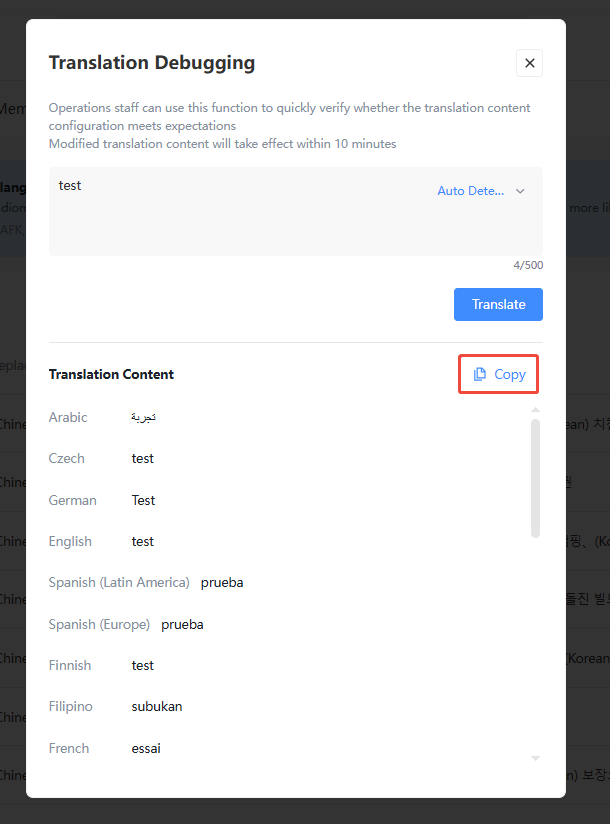
[Optional] If you think the translation is correct, you can click Copy to copy in one click, making document maintenance easier.
More
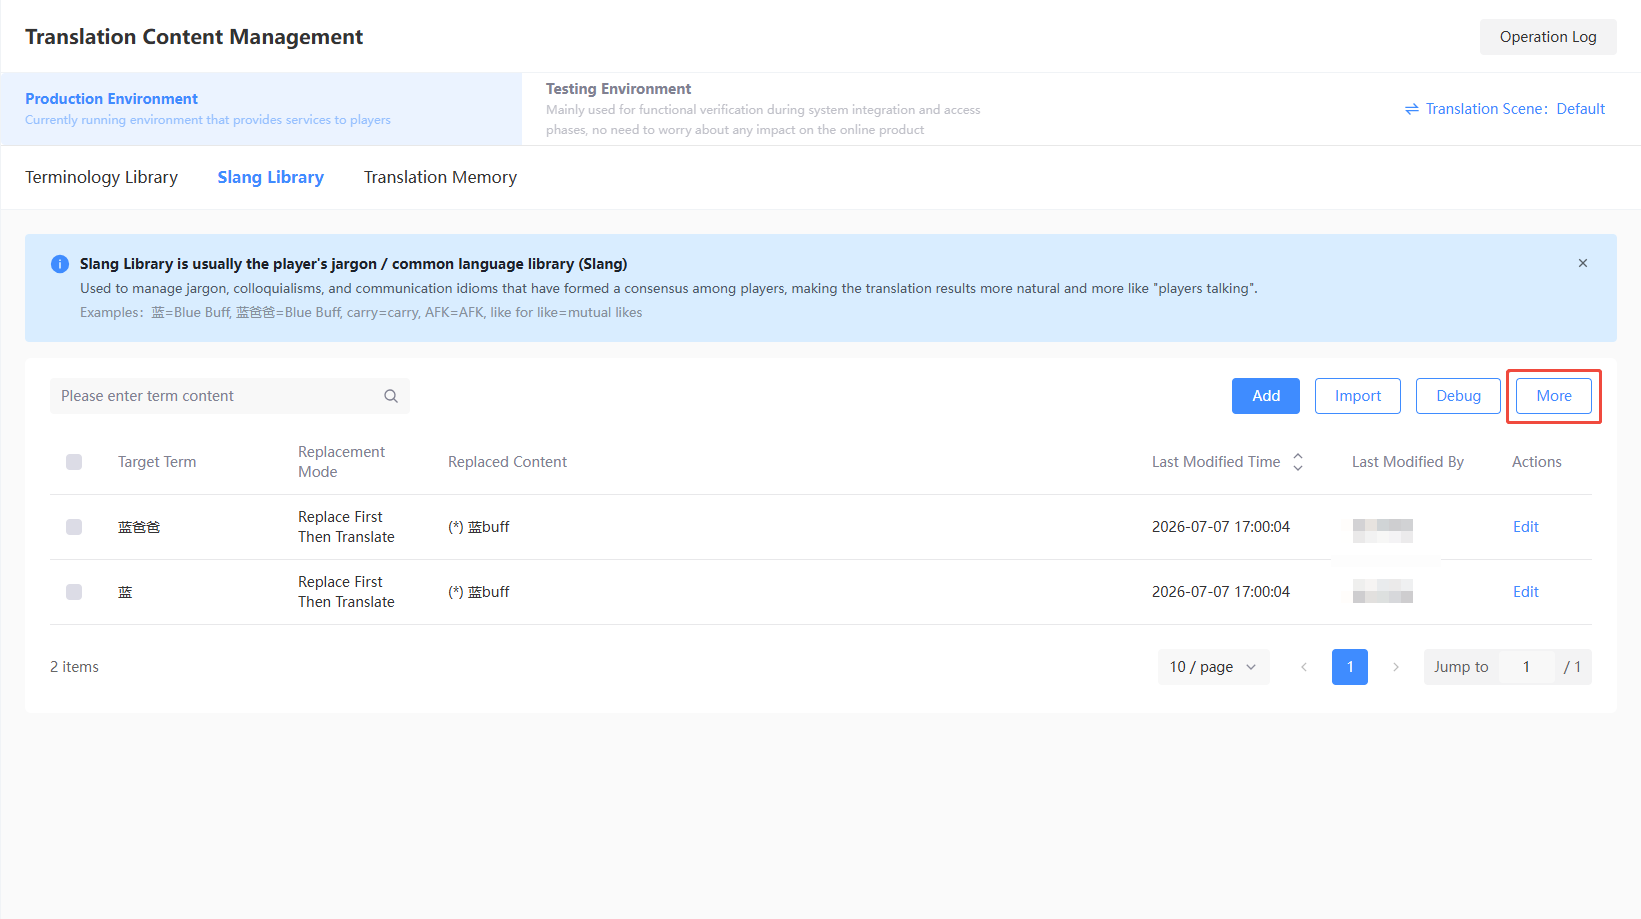
Under Slang Library, click More. Supports single/batch data deletion, clearing all current configuration entries, and exporting existing content.
Delete
-
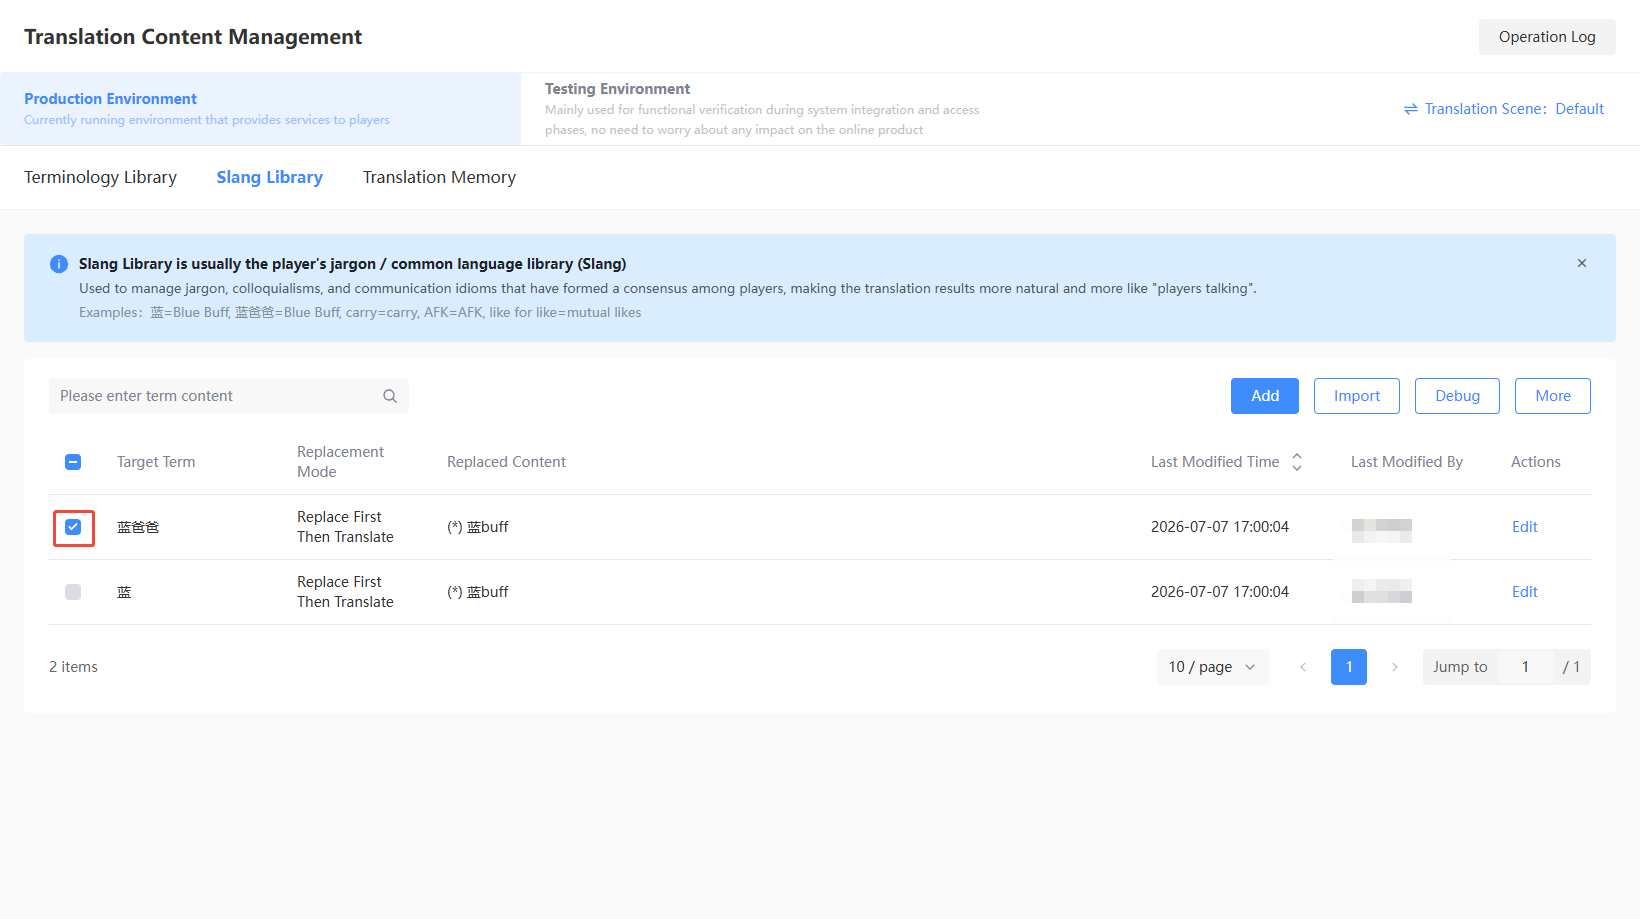
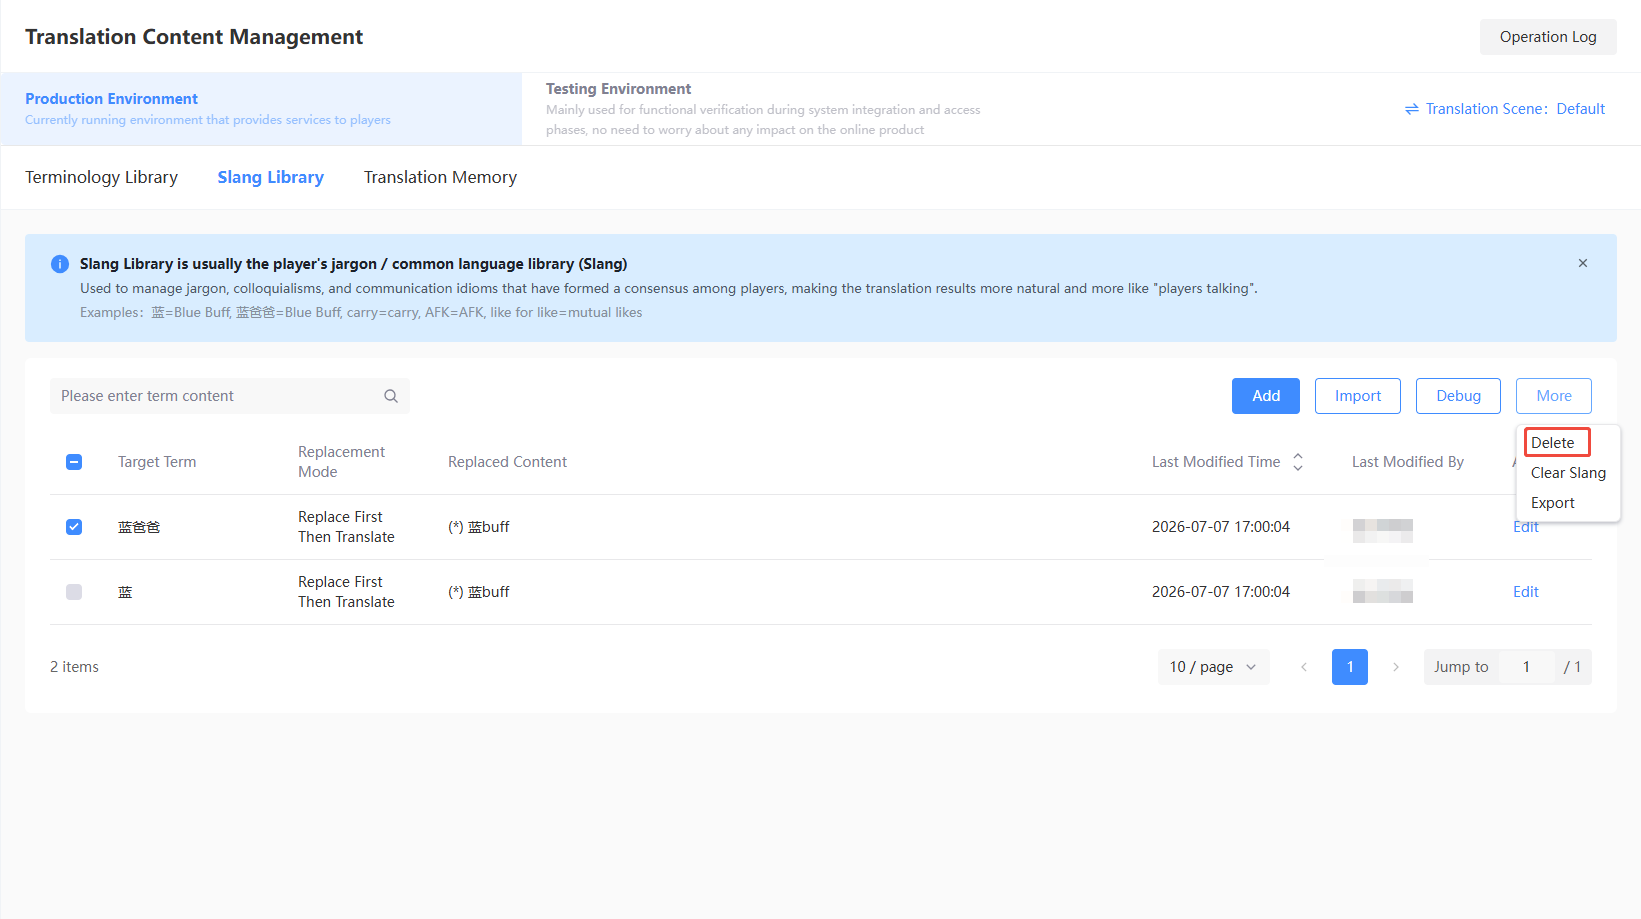
Select the entries to delete in the Slang Library List.
-
Click Delete under More.
-
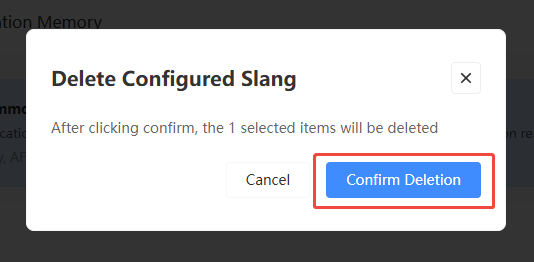
Verify the number of entries to delete, click Confirm Delete to immediately delete the selected entries.
Clear
The clear operation will delete all current slang library content. Please proceed with caution.
-
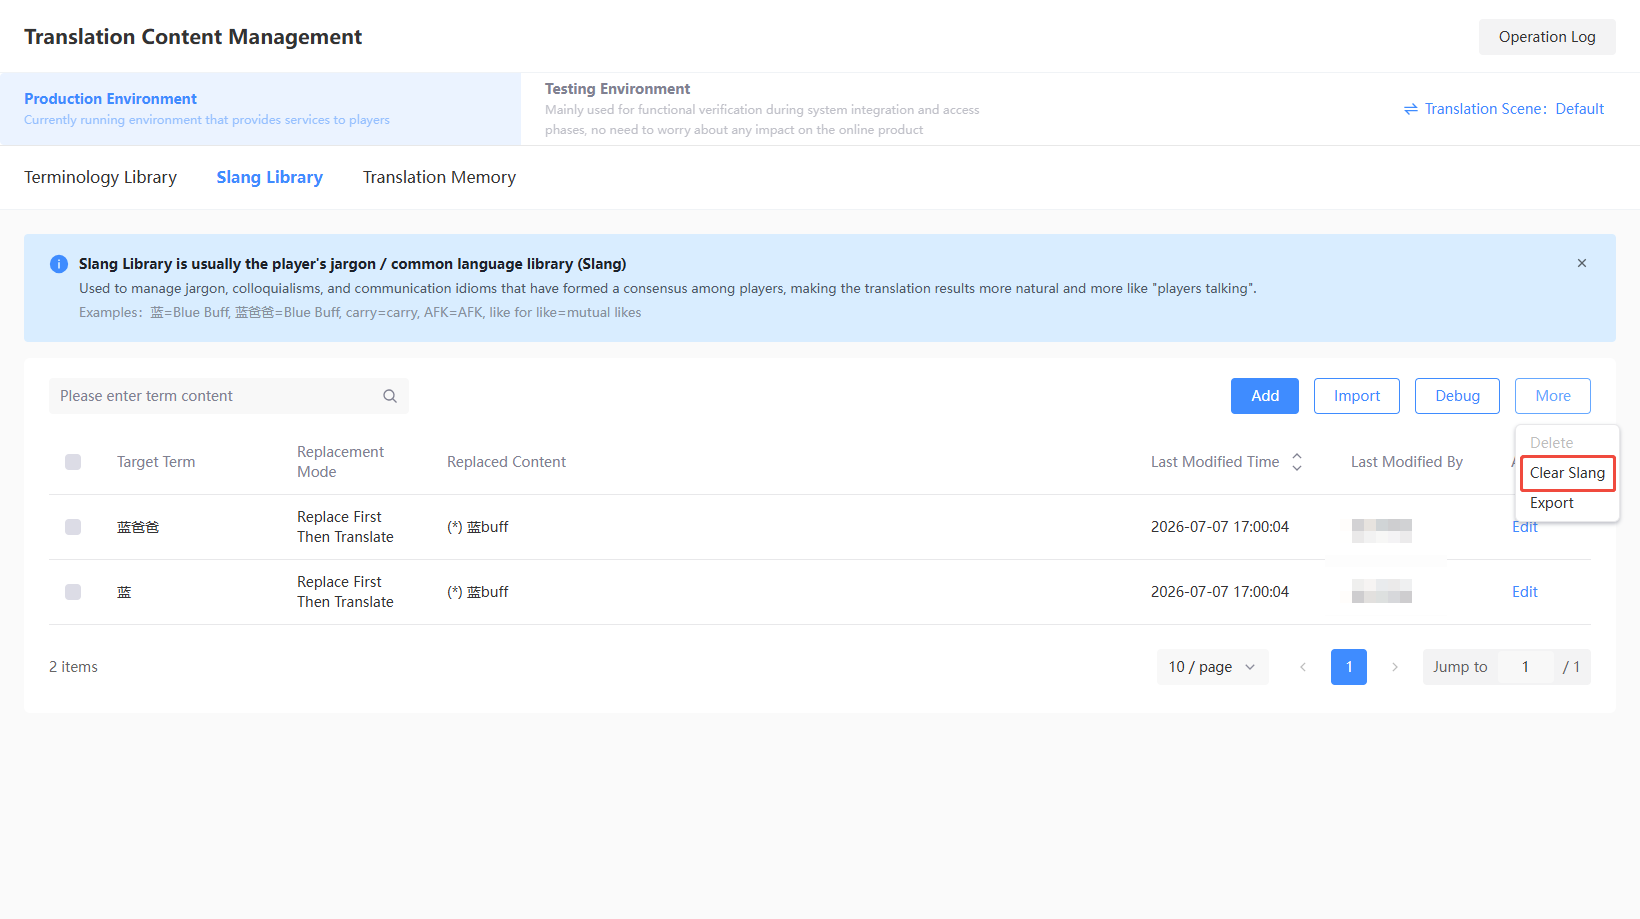
Click Clear under More.
-
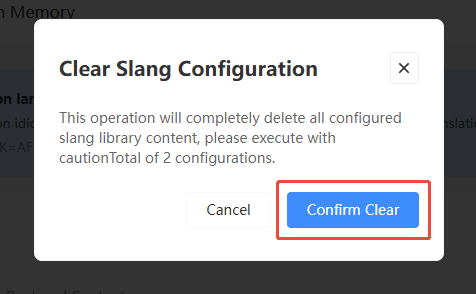
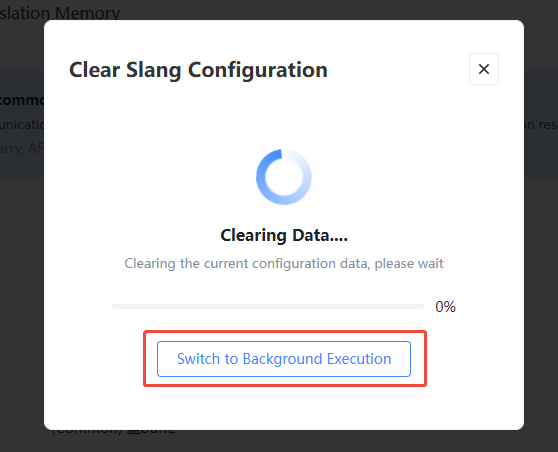
In the popup, click Confirm Clear to immediately clear all current slang library content.
-
[Optional] When the content is extensive, clearing in the background is supported and does not affect front-end operations.
Export
Export existing slang library content as an Excel file, which can be used for subsequent translation content management.
-
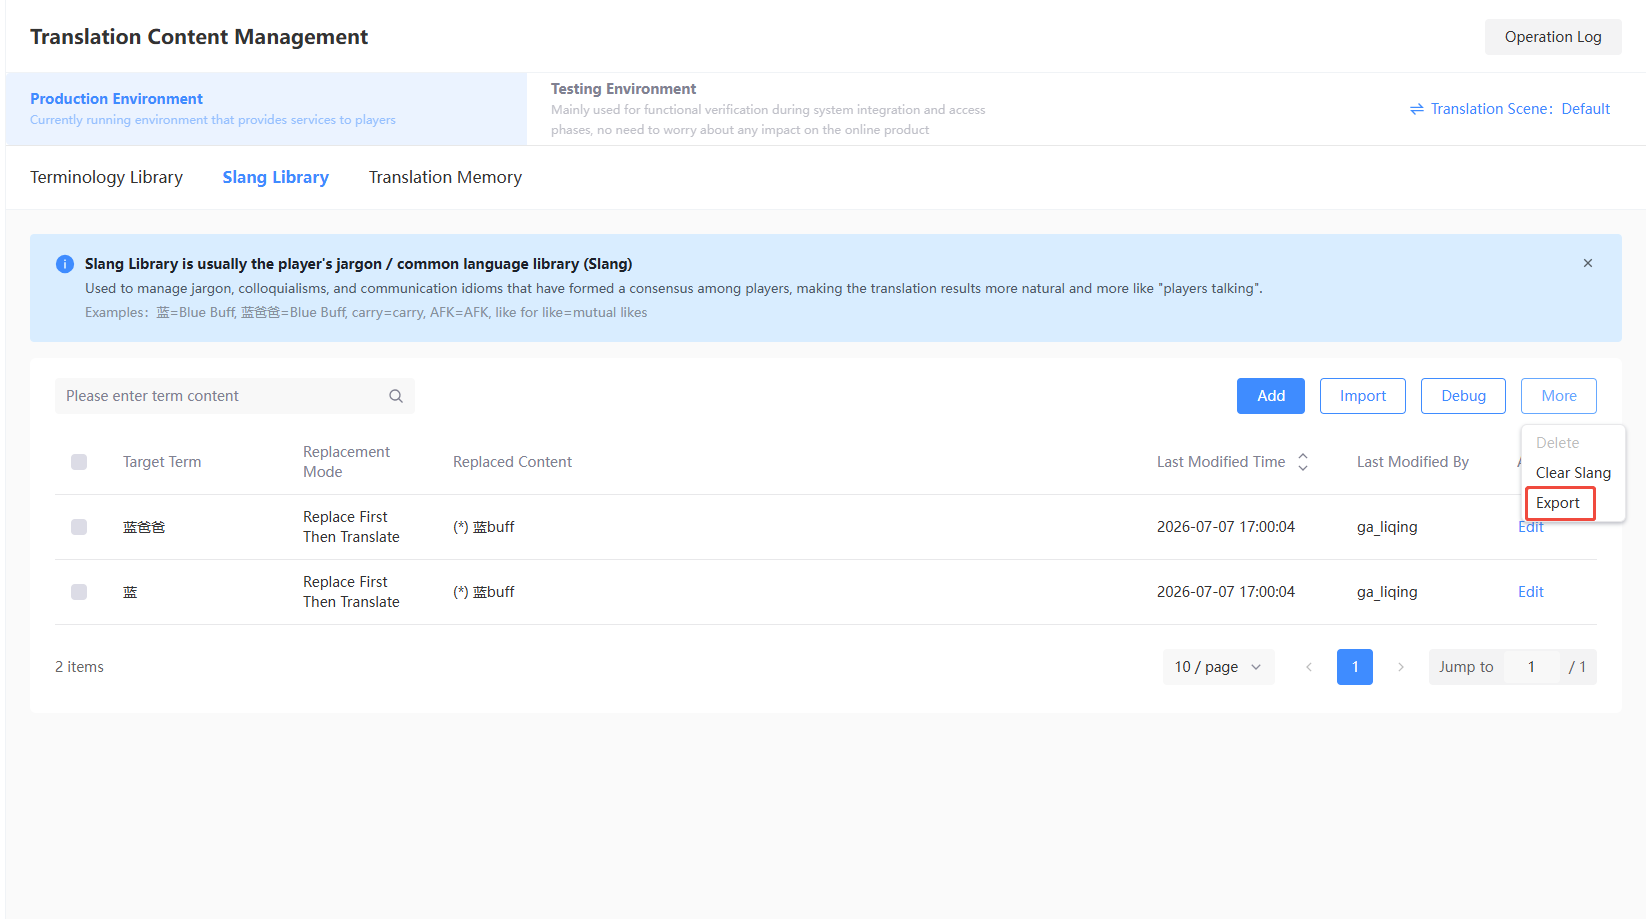
Click Export under More.
-
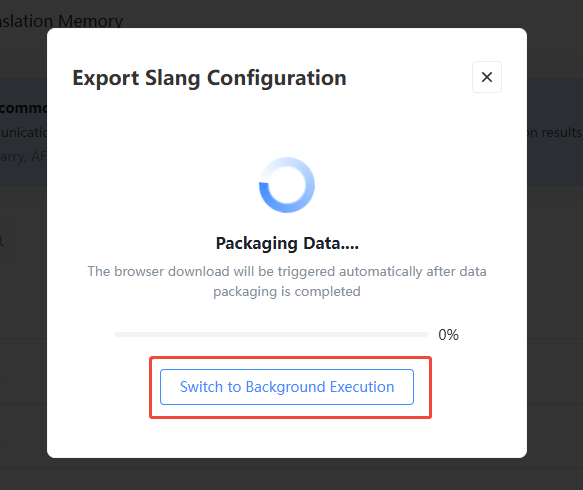
[Optional] When the content is extensive, exporting in the background is supported and does not affect front-end operations.
-
The popup will display data packaging progress. Once completed, the browser will automatically download it.

Translation Memory
Full-sentence translation memory is usually a fixed sentence-pattern repository (Translation Memory).Used to save confirmed sentence translations. When the same text appears, it will automatically match and reuse, improving translation consistency and efficiency.
Example: Mad skills! = Well played!| Our reign will never end! = 王者永不落幕|猥琐发育,别浪=Play it safe, focus on farming.
Import
-
Login to the Player Network Console and click Translation Content Management under AI Translation in the left column.
-
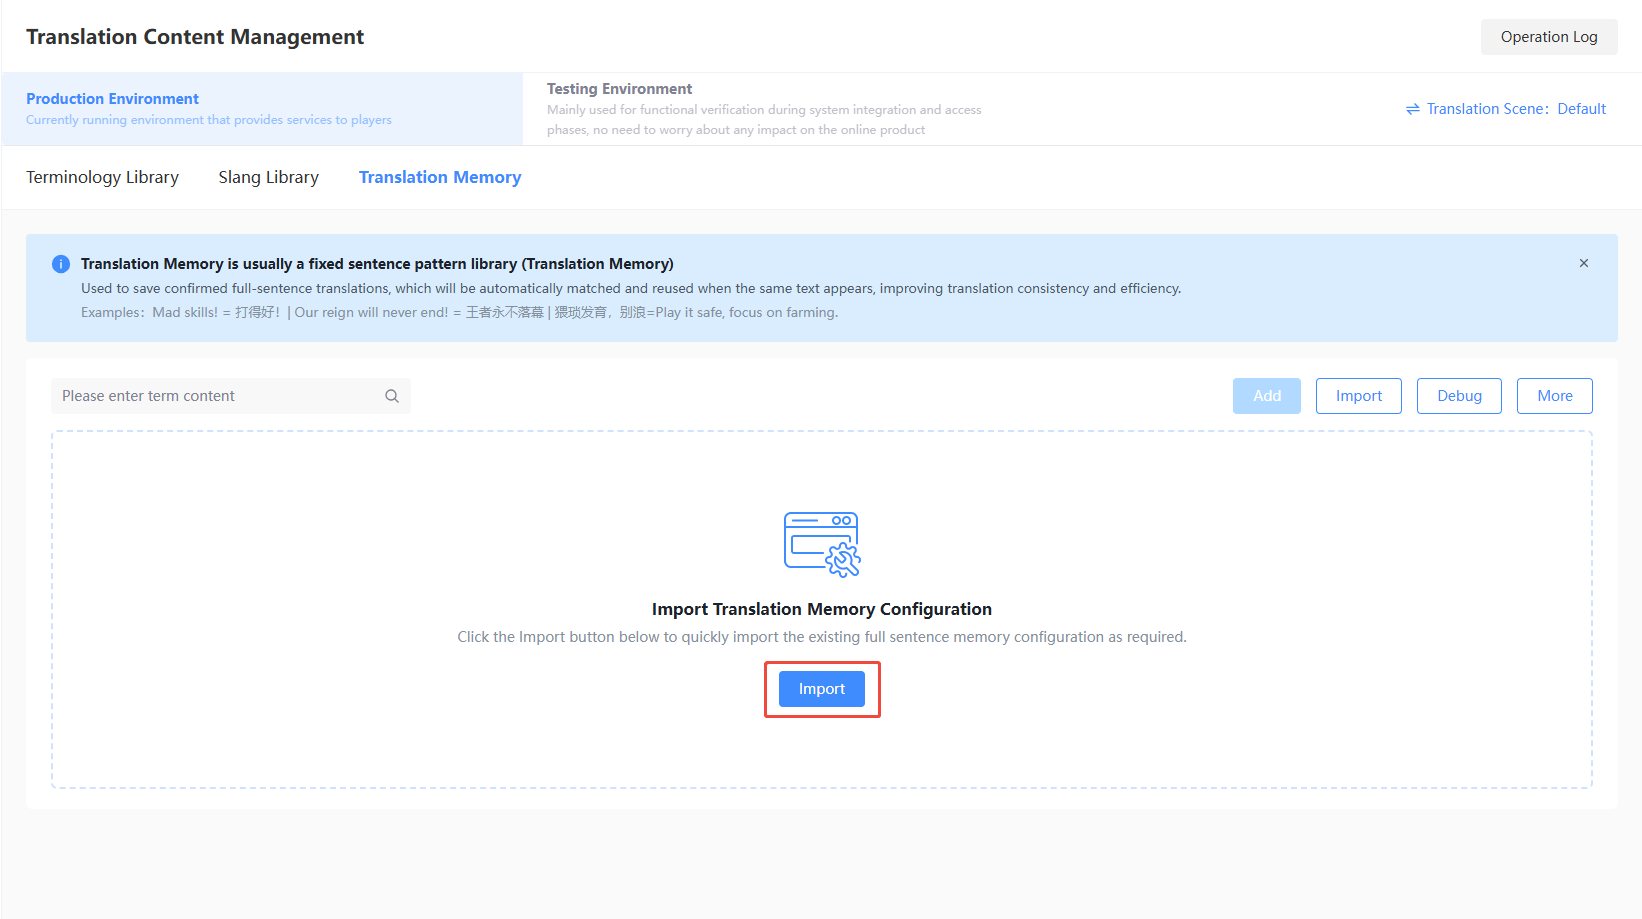
Under Translation Content Management, click Translation Memory.
-
Click Import.
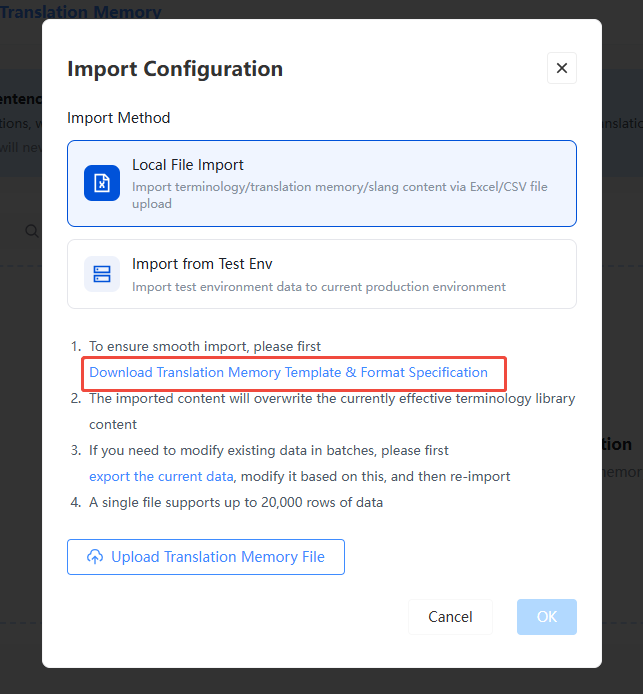
If this is your first time, please Download Memory Template & Format Specification to configure the content.
-
[Optional] The template can be configured based on requirements; unused language fields can be left blank.

-
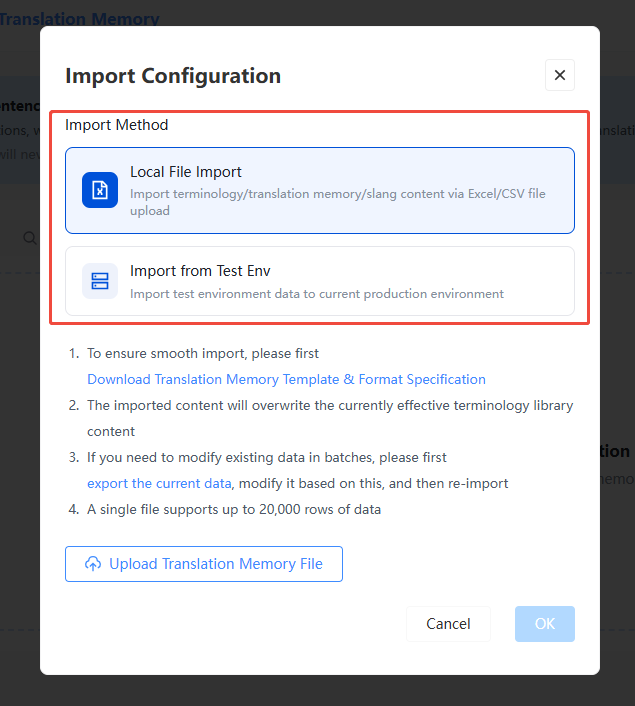
Select the desired import method. Currently, Local File Import and Import from Production/Test Environment are supported.
Local File Import
-
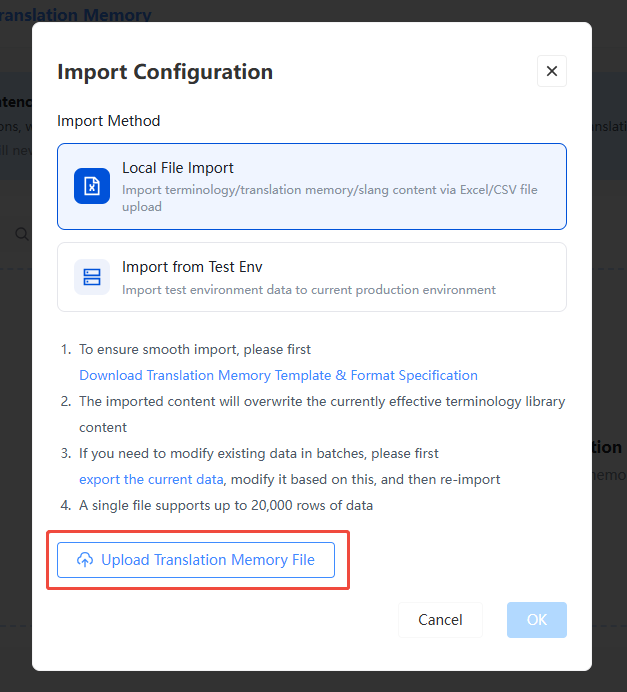
Select Local File Import, click Upload Memory File to choose and upload a file.
-
Click Confirm to start parsing the document.
If previous translation content exists, this import will overwrite the current active translation memory content.
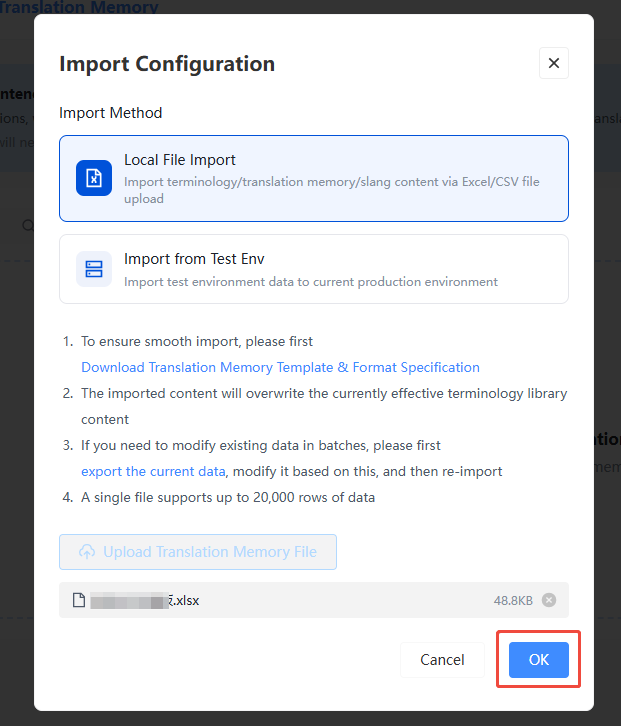
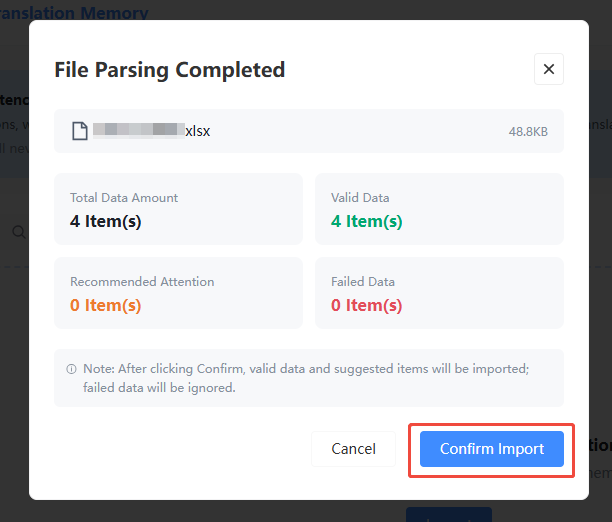
- After the file is parsed, click Confirm Import. After a secondary confirmation, the list page will display the imported content.
Please carefully review the imported data. Only [Valid Data] and [Recommended Entries] are supported for import; failed entries will not be imported.
-
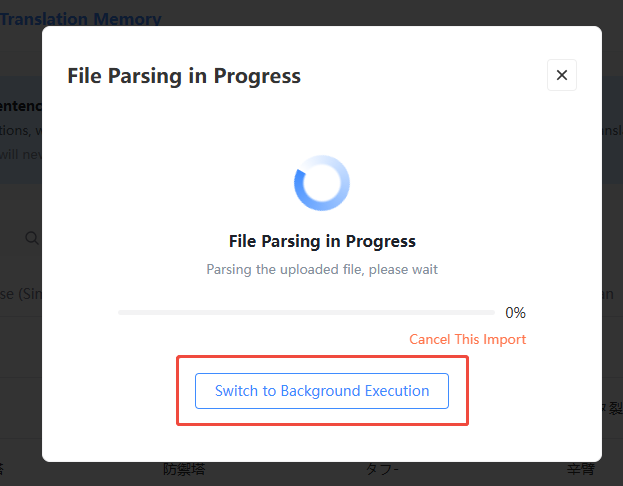
[Optional] If the content is extensive, parsing in the background is supported and does not affect other operations on the front end.
-
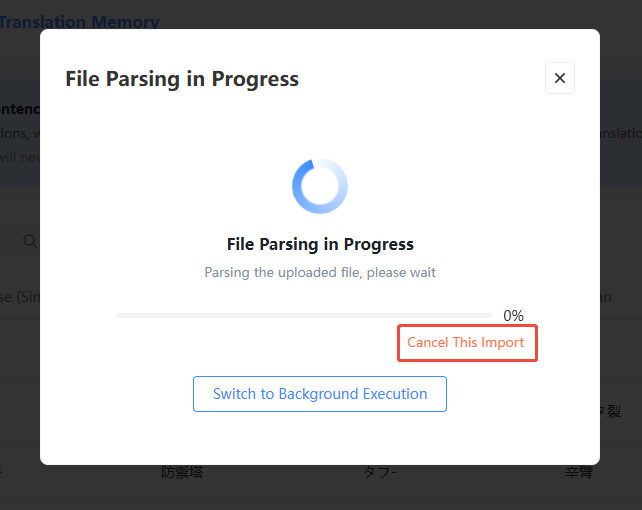
[Optional] If it is not the first time importing a multilingual entry file, canceling import is supported. You can click Abandon This Import to return to the list page.
Import from Production/Test Environment
-
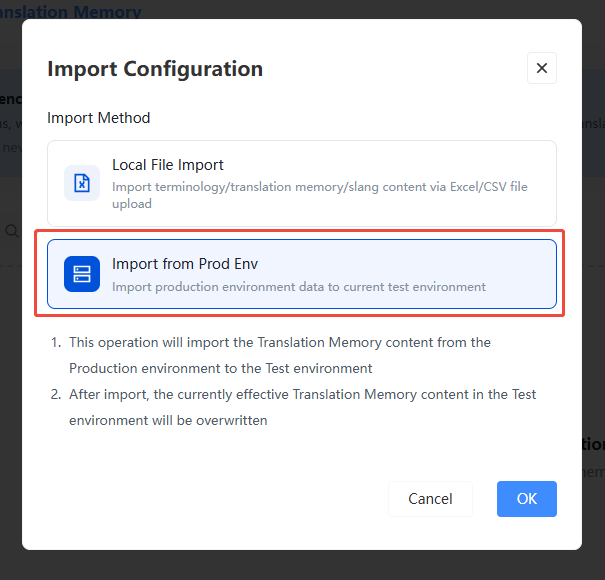
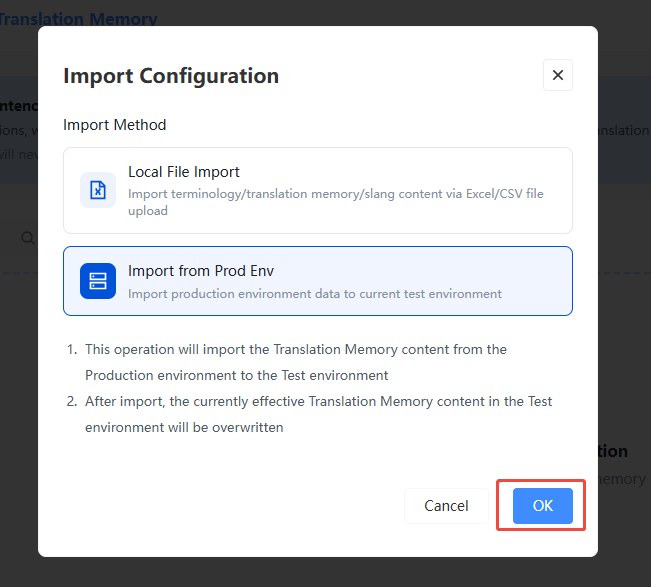
If there is already configured translation memory content in the production/test environment, you can import from there and click Confirm to start import.
-
Click Confirm to start parsing the content. Once parsed, the list page will display the imported content.
If previous translation content exists, this import will overwrite the current active translation memory content.
-
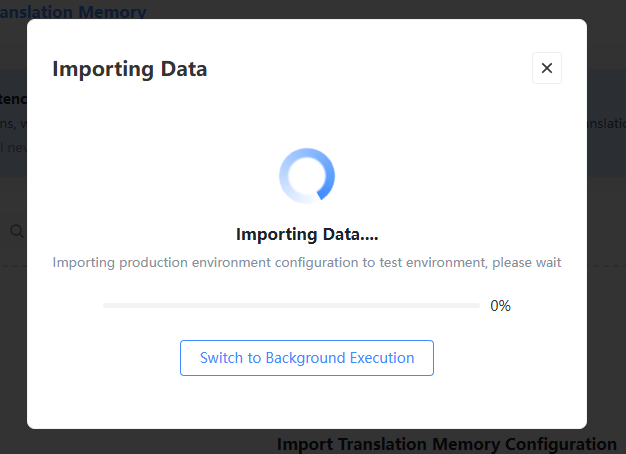
[Optional] If the content is extensive, parsing in the background is supported and does not affect other operations on the front end.
-
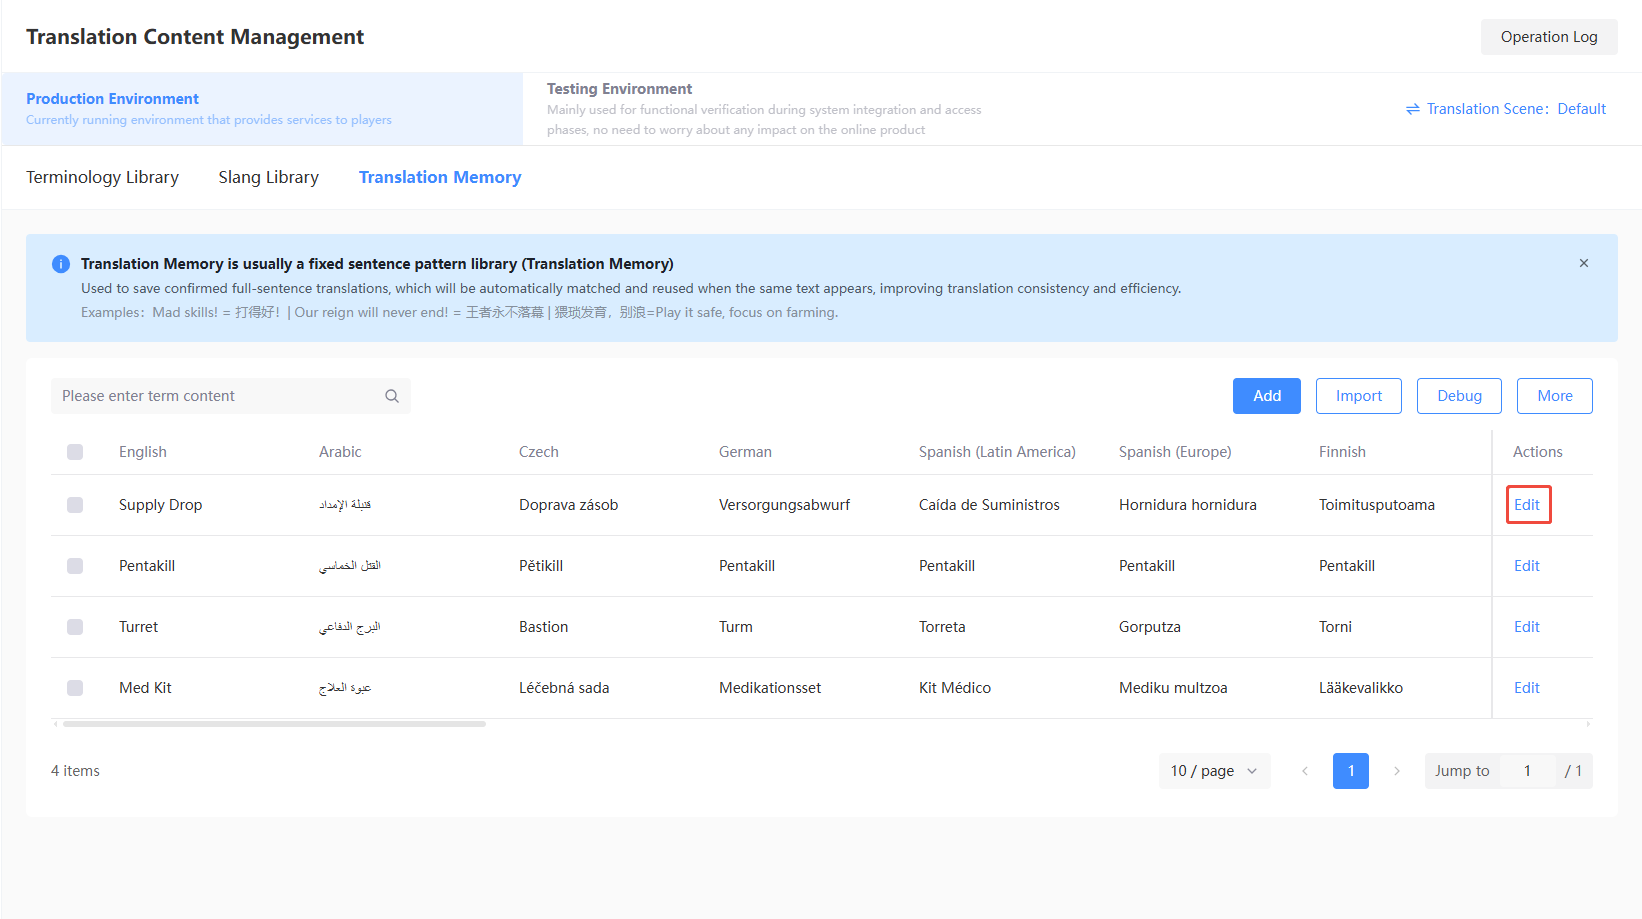
[Optional] Single entry editing is supported.
Add
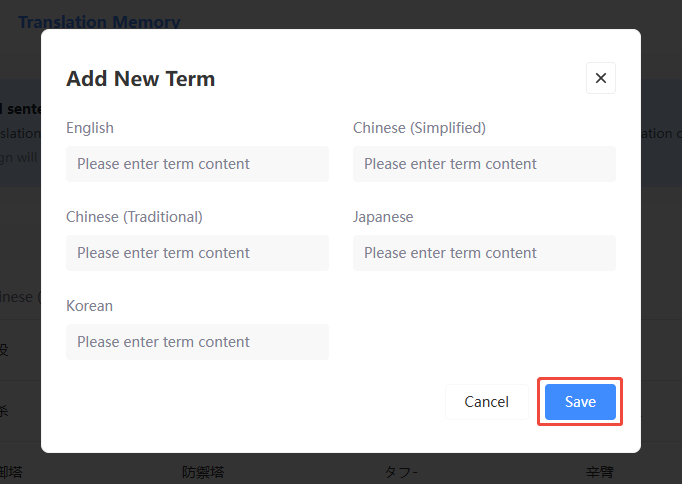
If you only need to add a single translation entry, you can manually configure it to avoid batch export and editing operations.
-
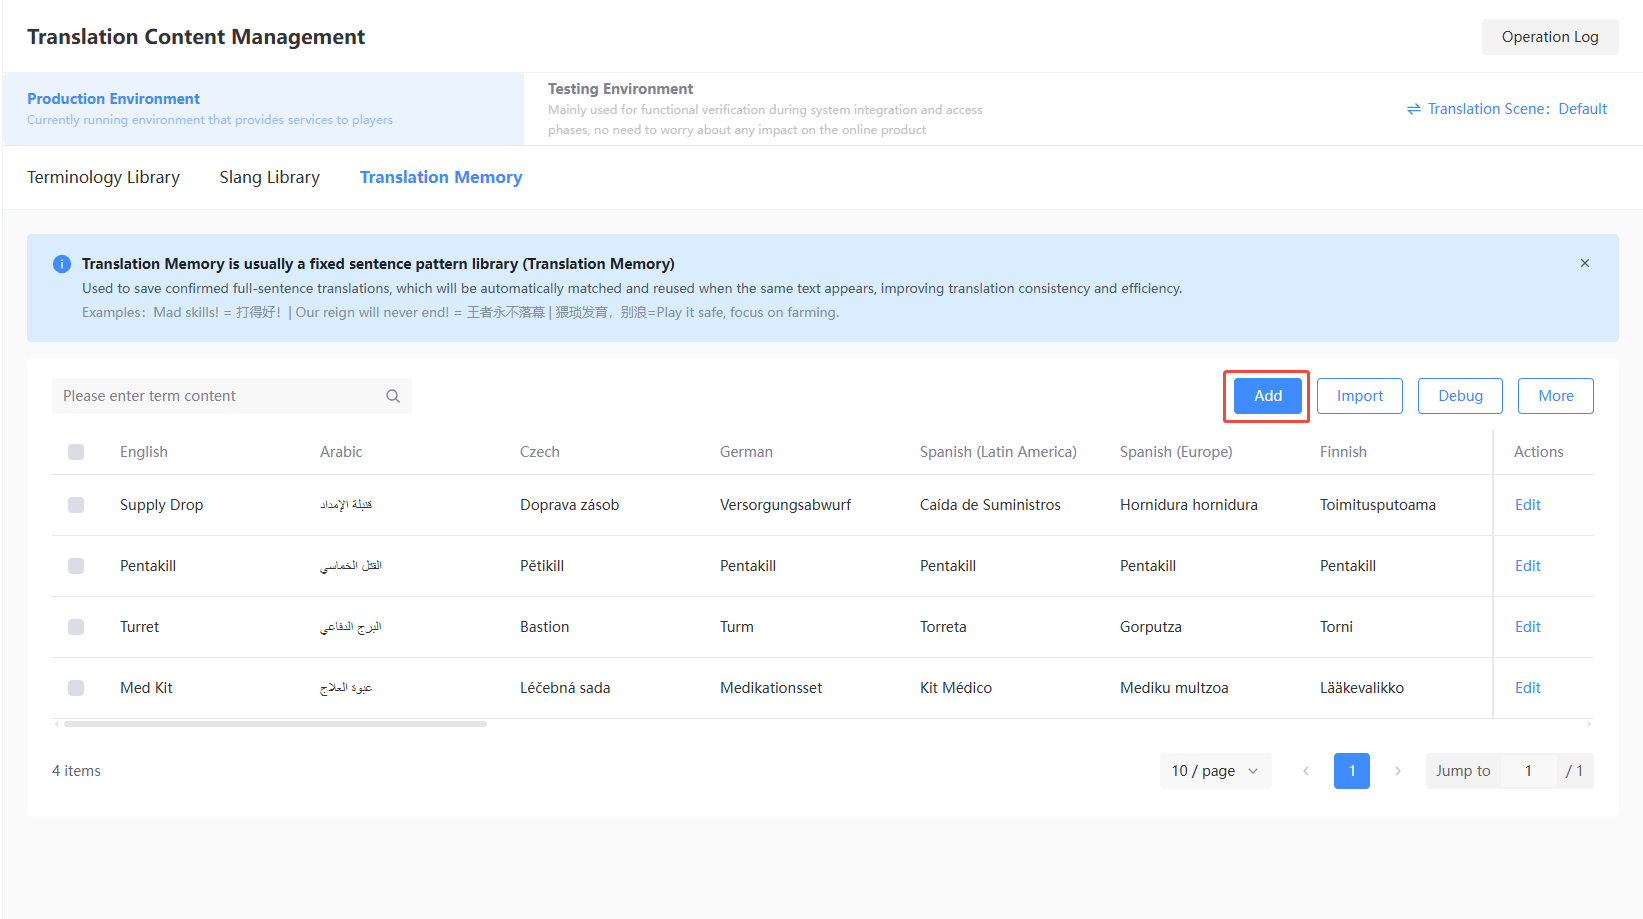
Under Translation Memory, click Add.
-
Fill in the multilingual entries you need to configure, then click New.
Debug
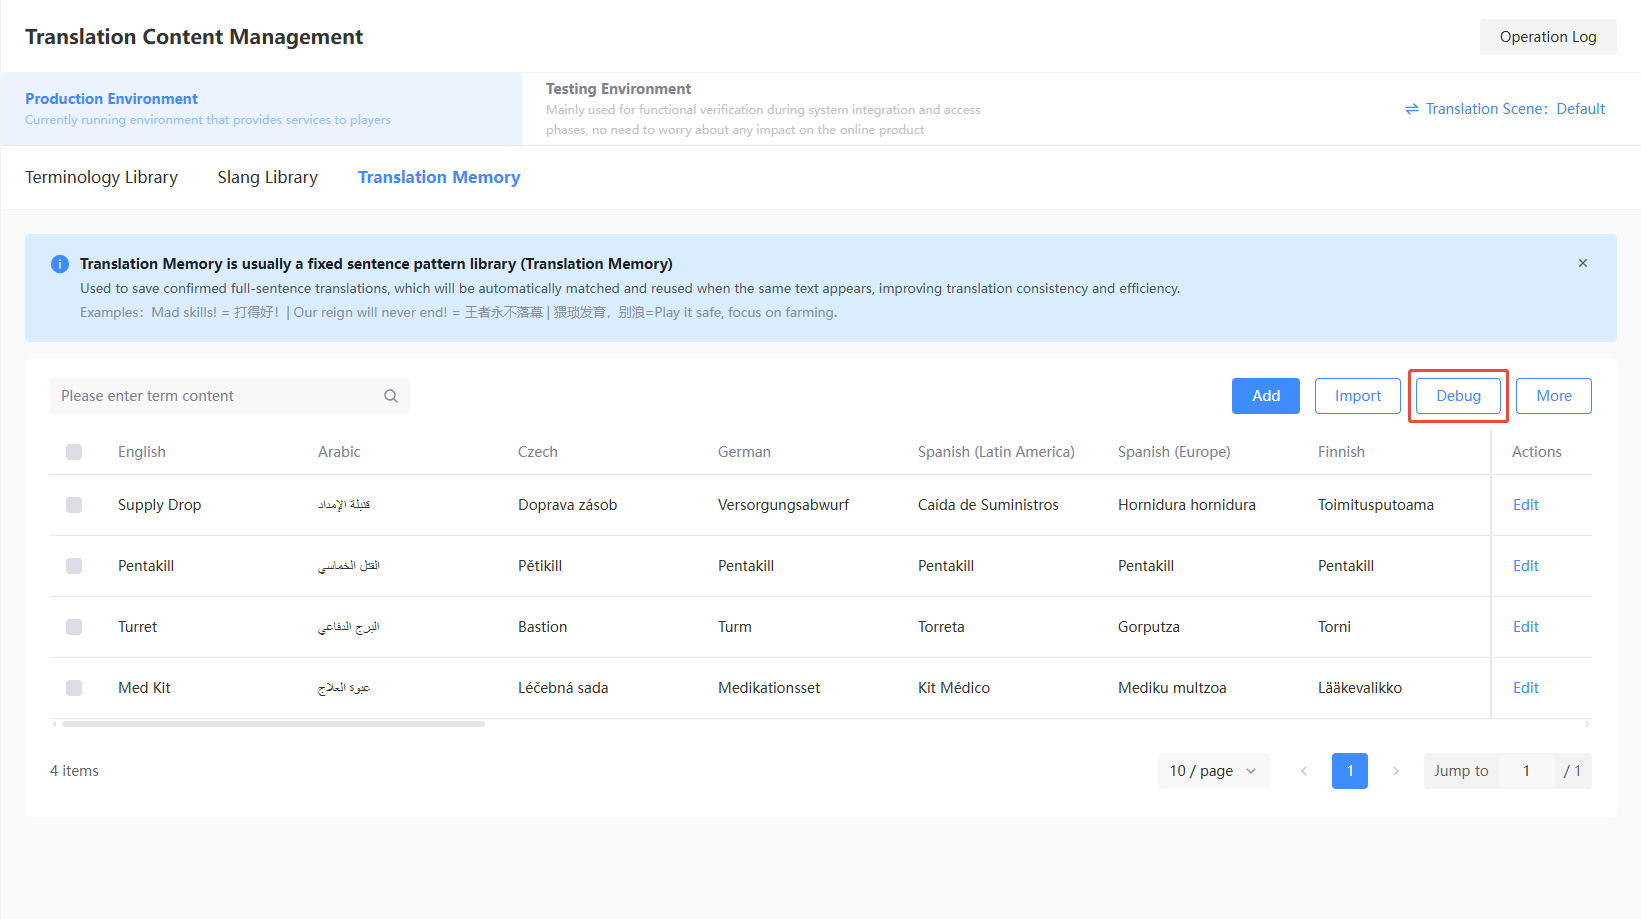
Operations staff can quickly check whether translation content configuration meets expectations.
-
Under Translation Memory, click Debug.
-
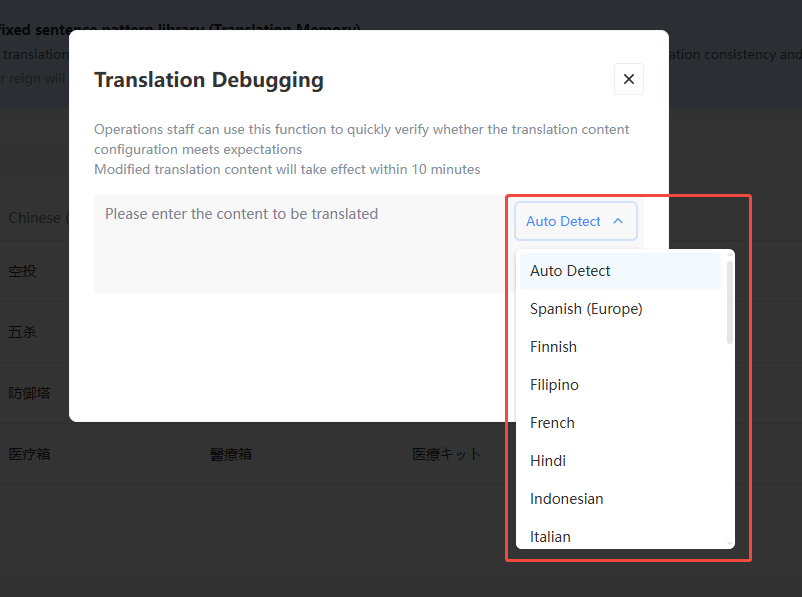
Enter the entry to check. Supports automatic detection or specifying a language as the input source.
-
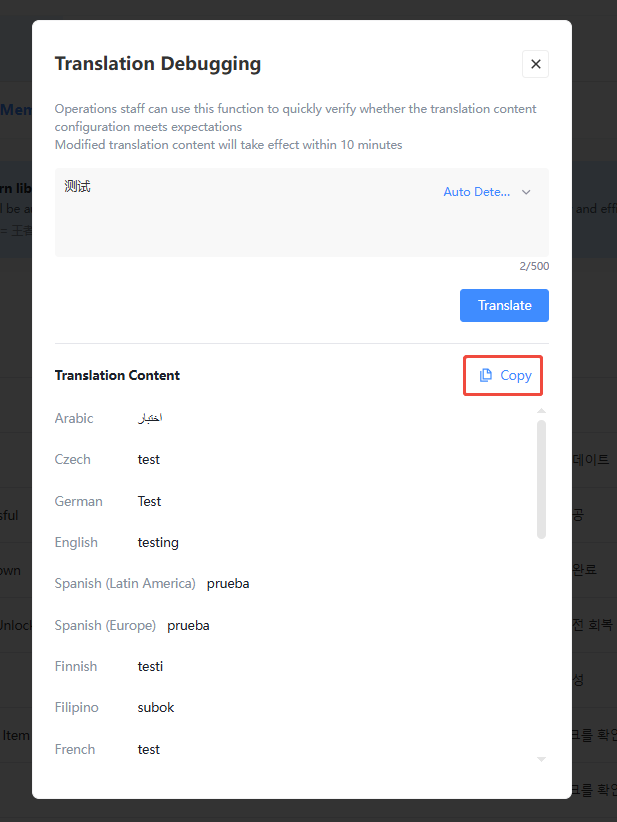
[Optional] If you think the translation is correct, you can click Copy to copy in one click, making document maintenance easier.
More
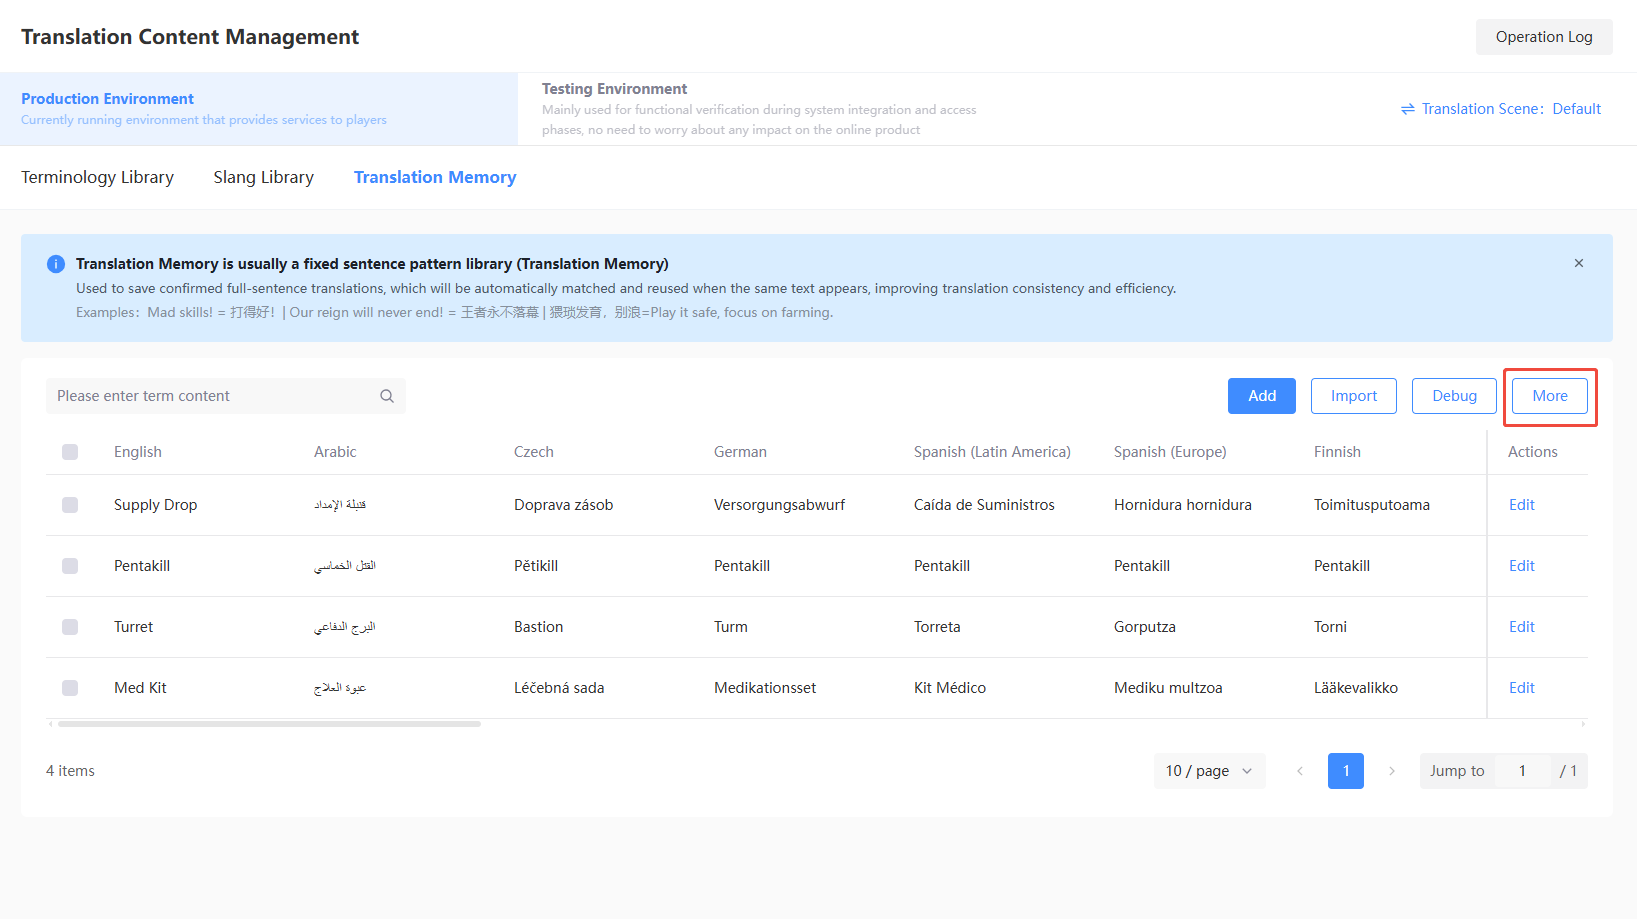
Under Translation Memory, click More. Supports single/batch data deletion, clearing all current configuration entries, and exporting existing content.
Delete
-
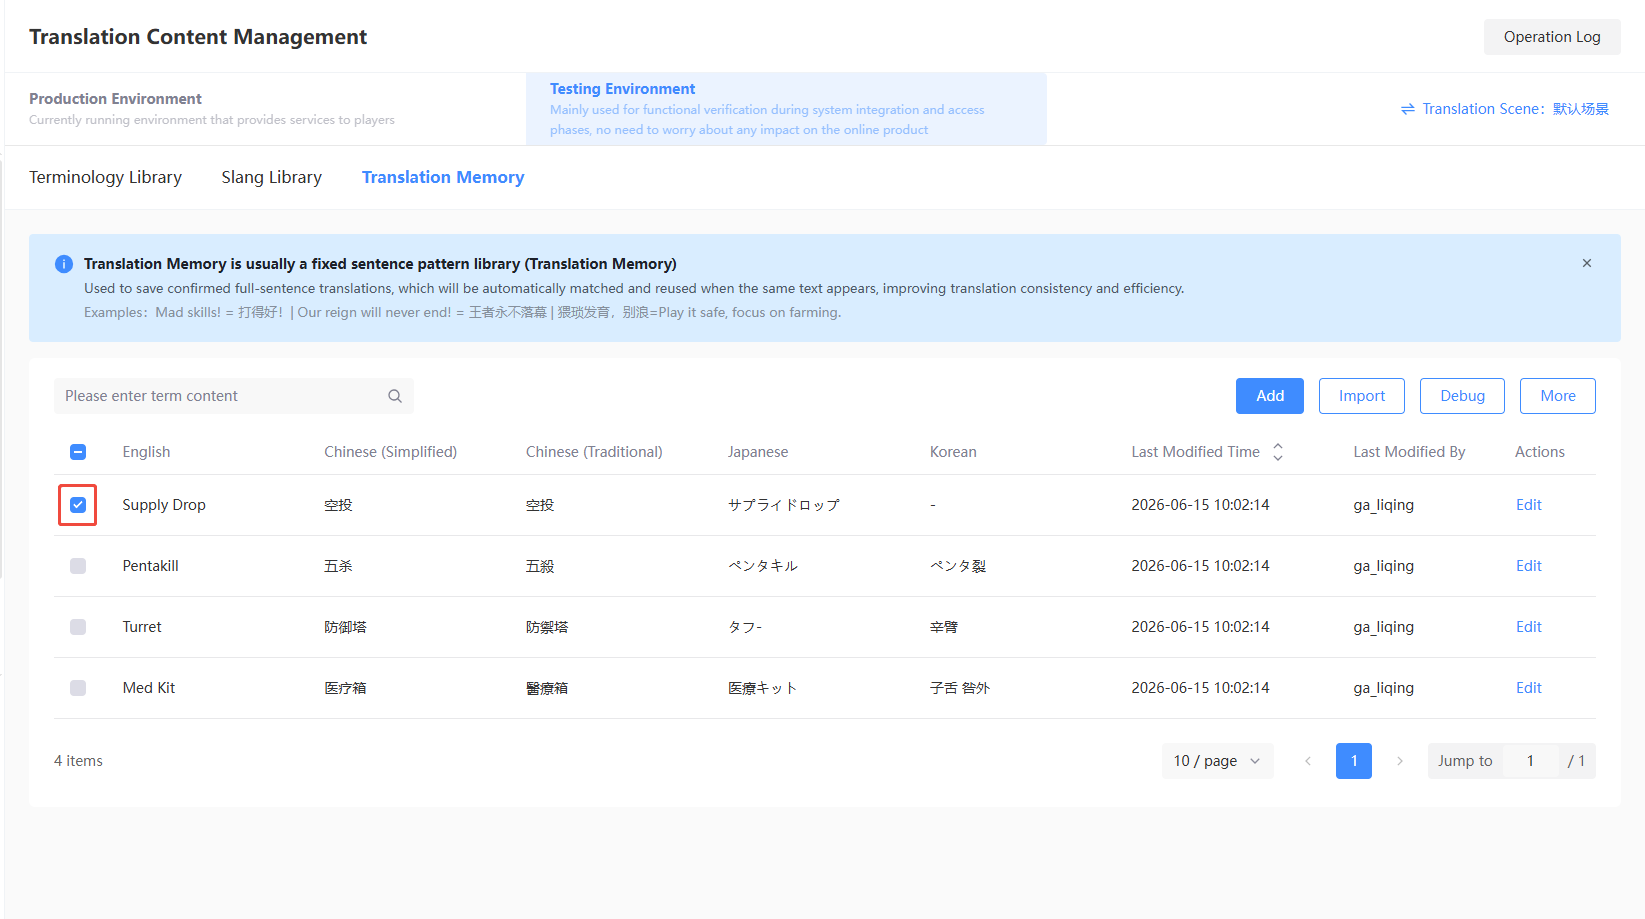
Select the entries to delete in the Translation Memory List.
-
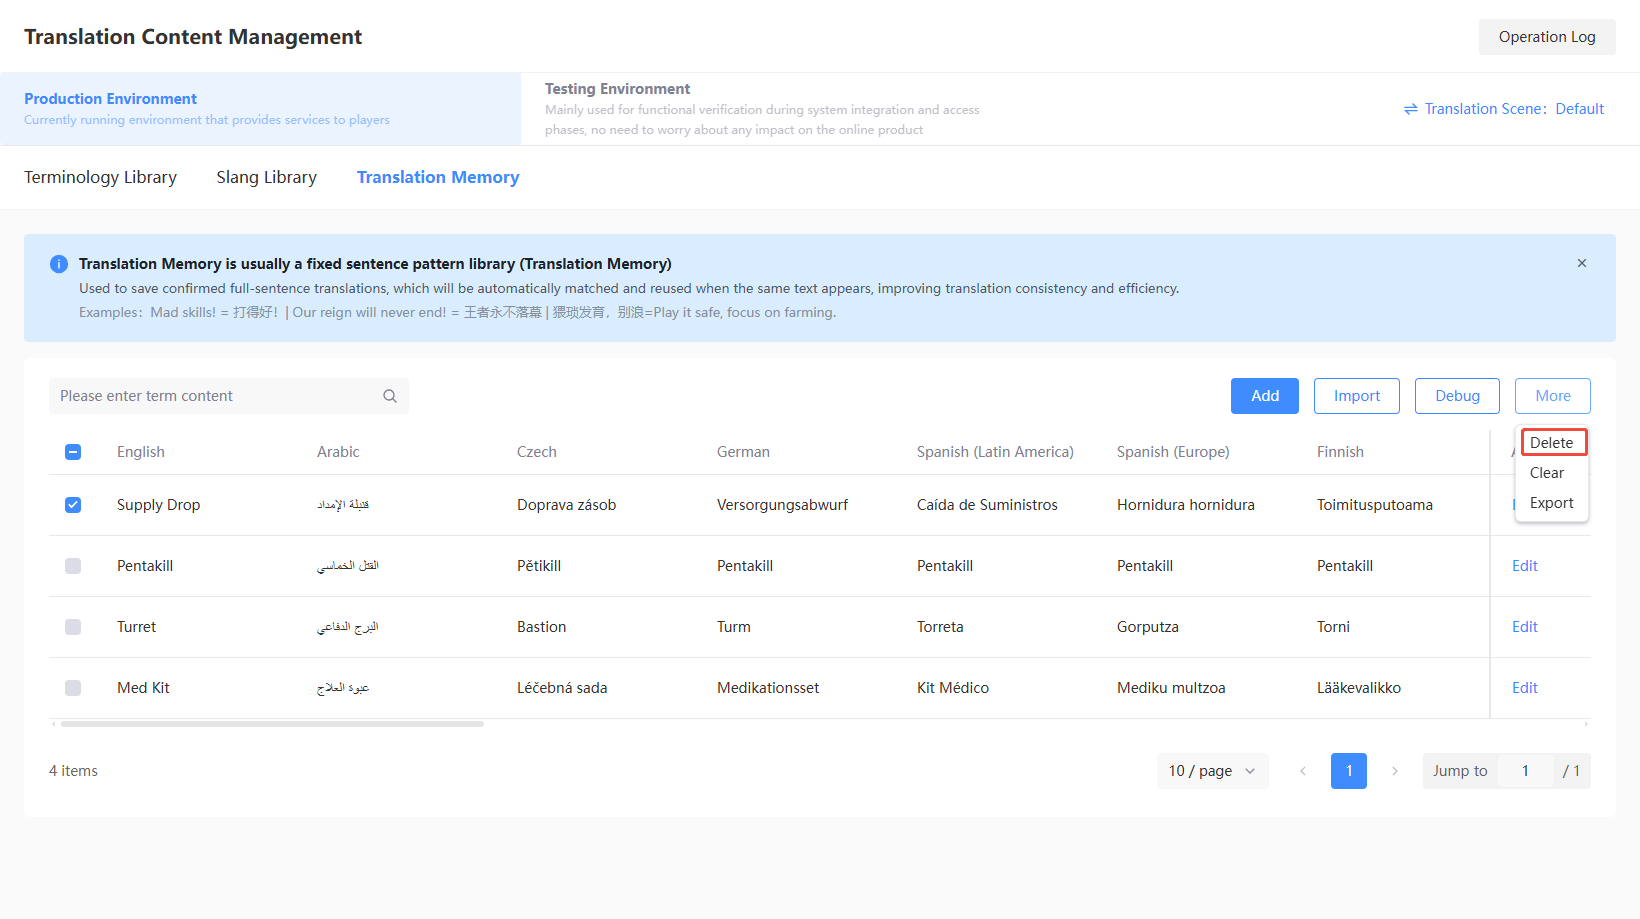
Click Delete under More.
-
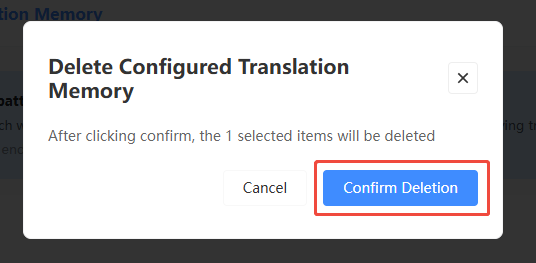
Verify the number of entries to delete, click Confirm Delete to immediately delete the selected entries.
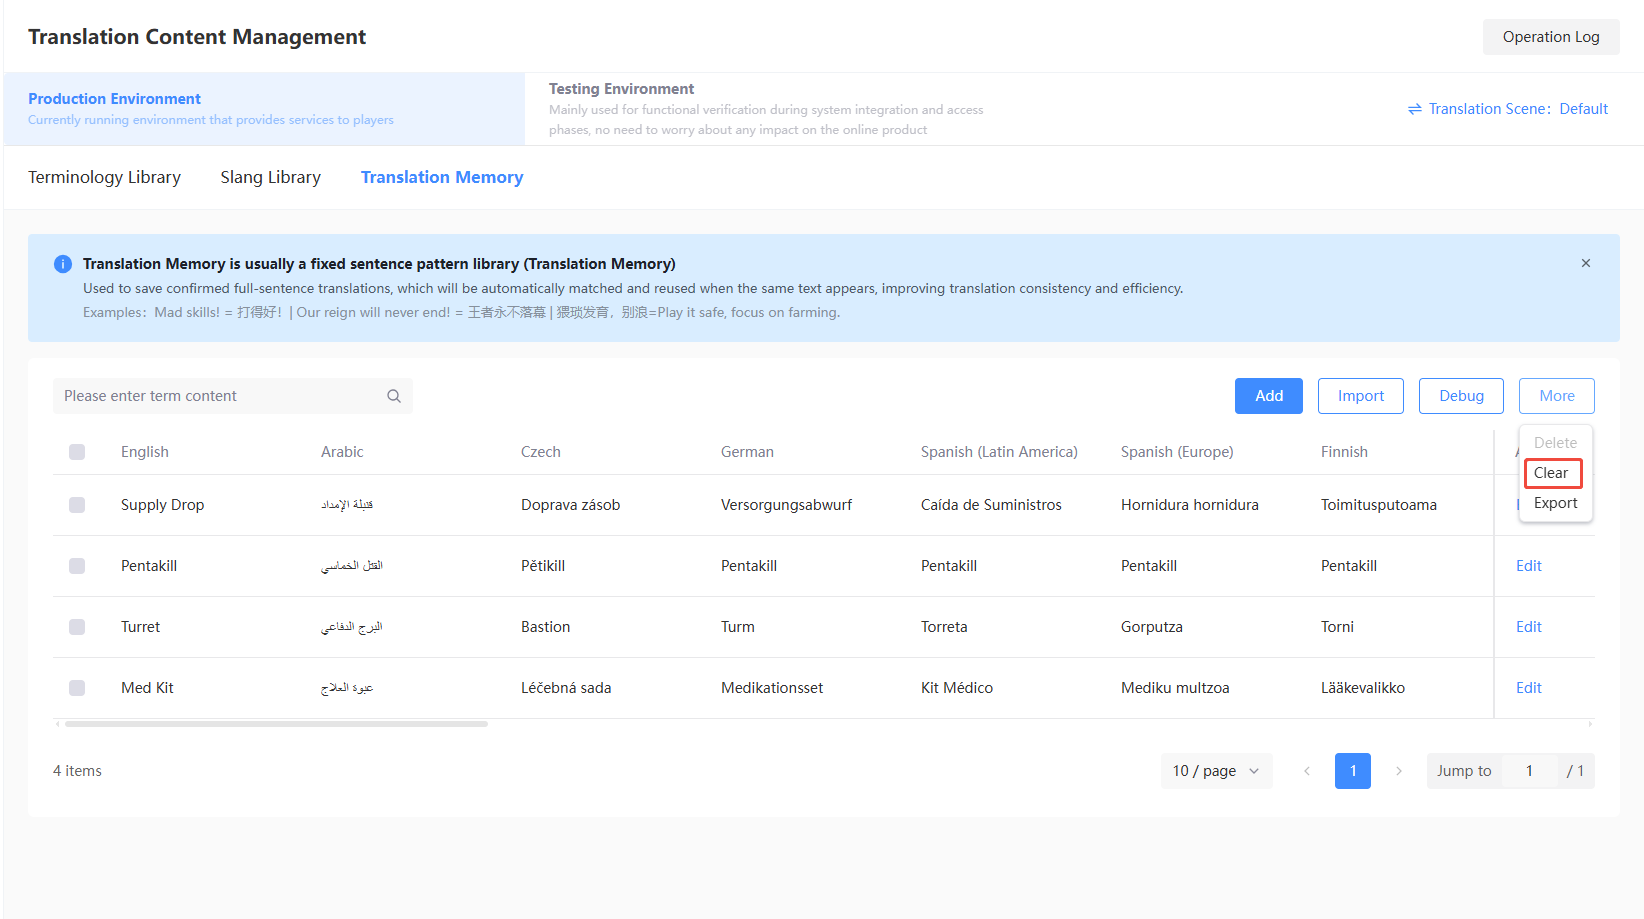
Clear
The clear operation will delete all current translation memory content. Please proceed with caution.
-
Click Clear under More.
-
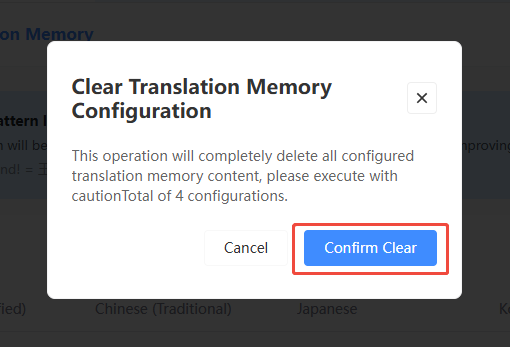
In the popup, click Confirm Clear to immediately clear all current translation memory content.
-
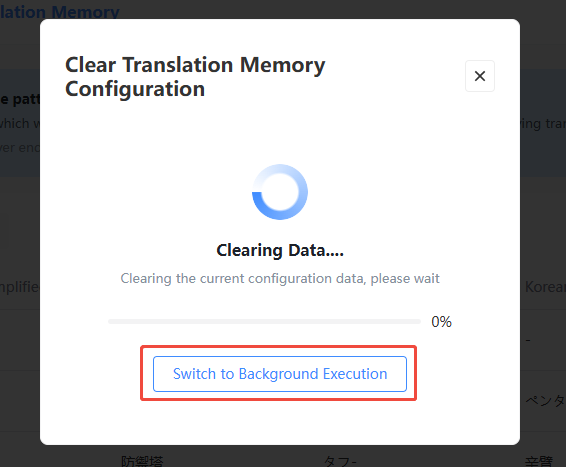
[Optional] When the content is extensive, clearing in the background is supported and does not affect front-end operations.
Export
Export existing translation memory content as an Excel file, which can be used for subsequent translation content management.
-
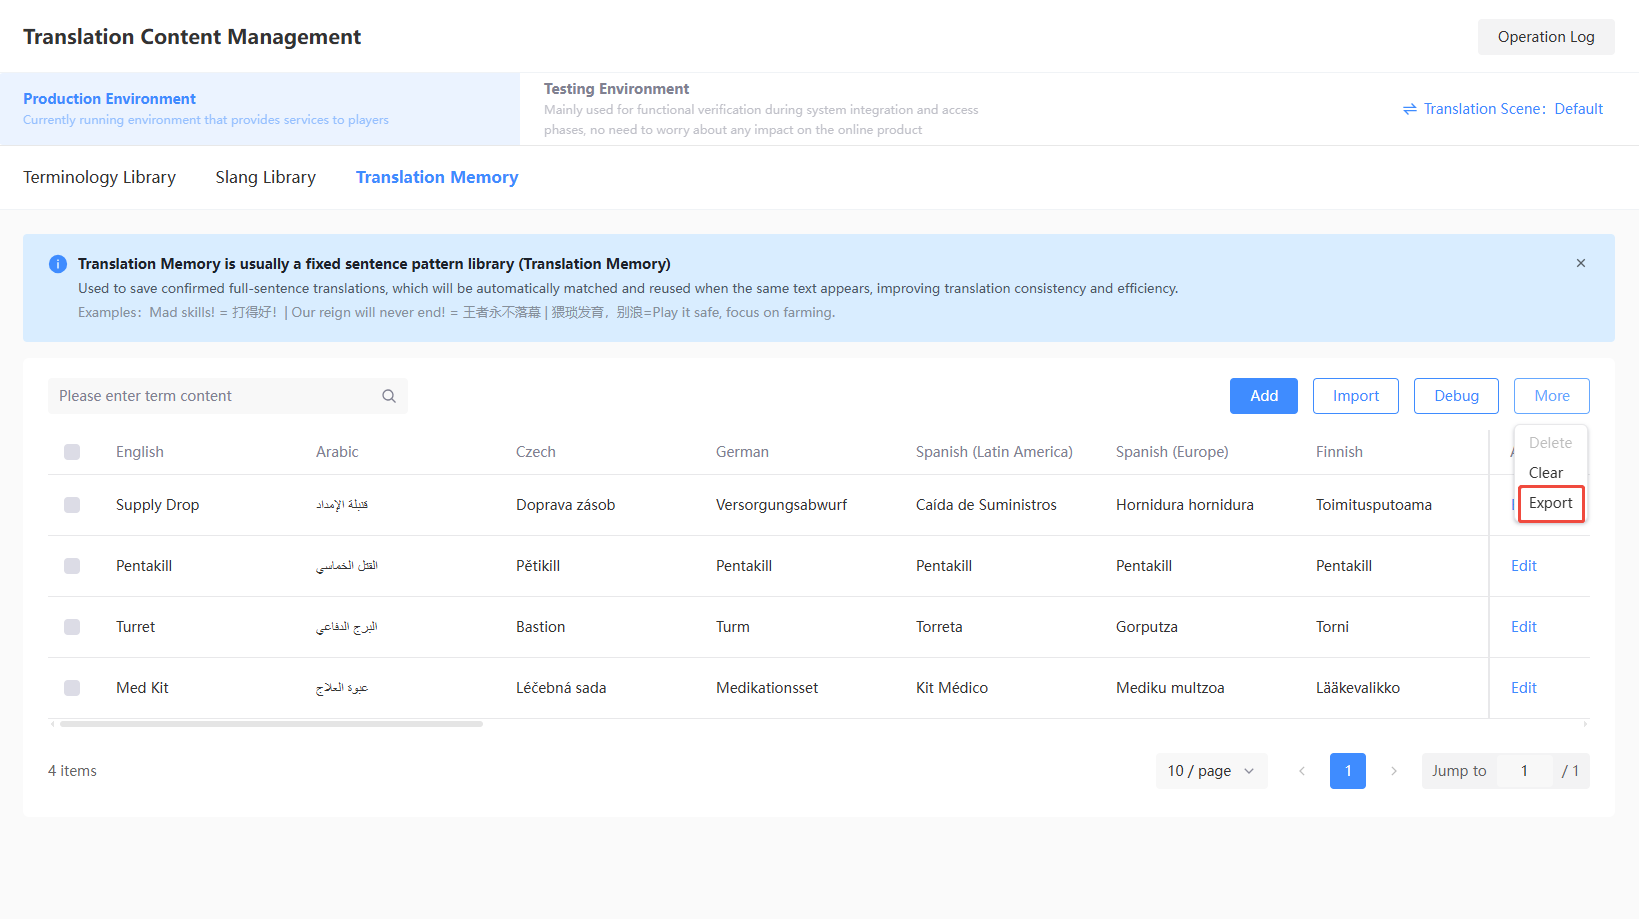
Click Export under More.
-
[Optional] When the content is extensive, exporting in the background is supported and does not affect front-end operations.
-
The popup will display data packaging progress. Once completed, the browser will automatically download it.

Operation Log
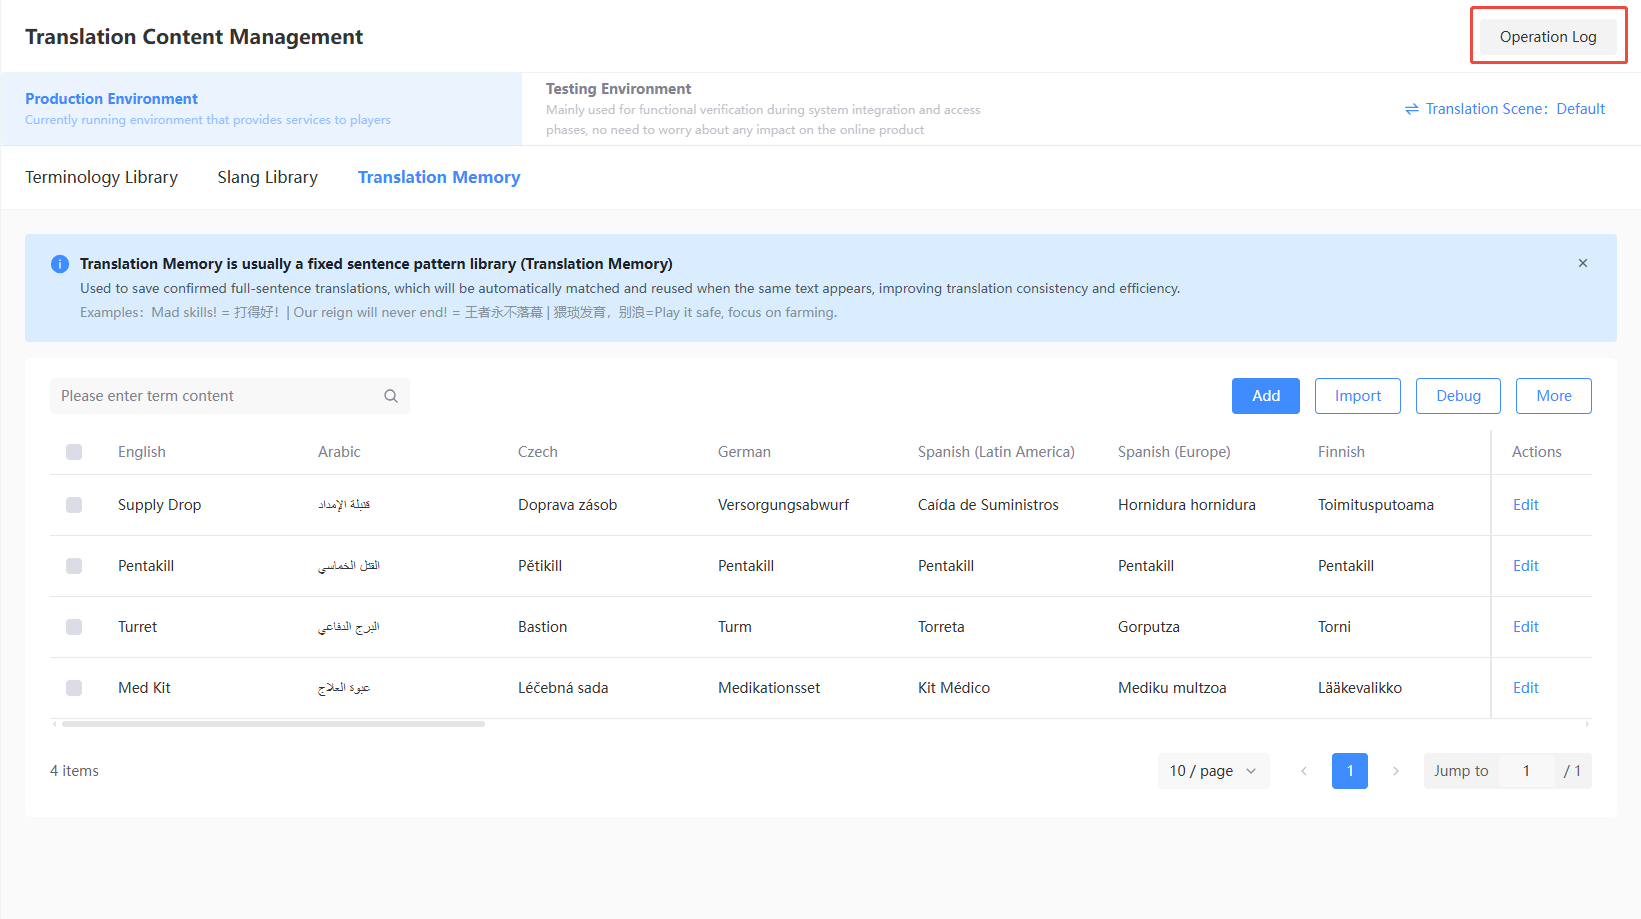
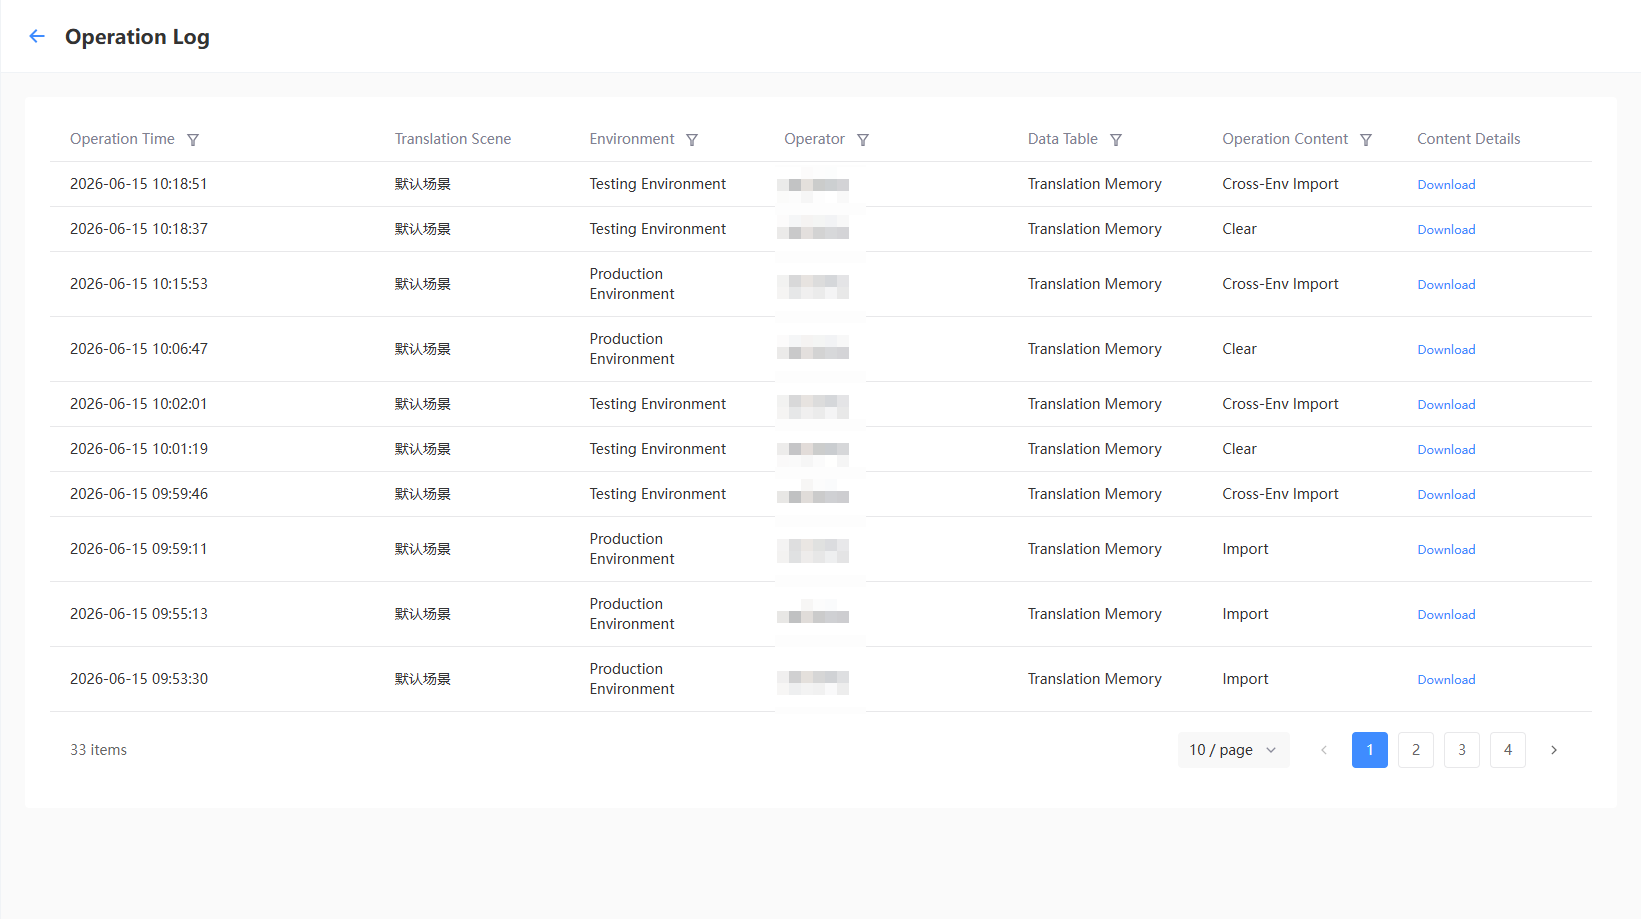
View historical operation logs of the Translation Content Management module through Operation Log, including detailed records of import, edit, clear, delete, and other actions for easier auditing and tracing.
- On the Translation Content Management page, click Operation Log.
Filter Conditions
The operation log list supports quickly locating target records using the following filter conditions:
-
Operation Time: Supports filtering operation logs by time range.
-
Translation Scenario: Supports filtering by translation scenario name.
-
Environment: Supports filtering by Production Environment or Test Environment.
-
Operator: Supports filtering by operator account.
-
Database: Supports filtering by Terminology Library, Slang Library, or Translation Memory.
-
Operation Content: Supports filtering by Import, Edit, Clear, Delete, etc.
Dashboard
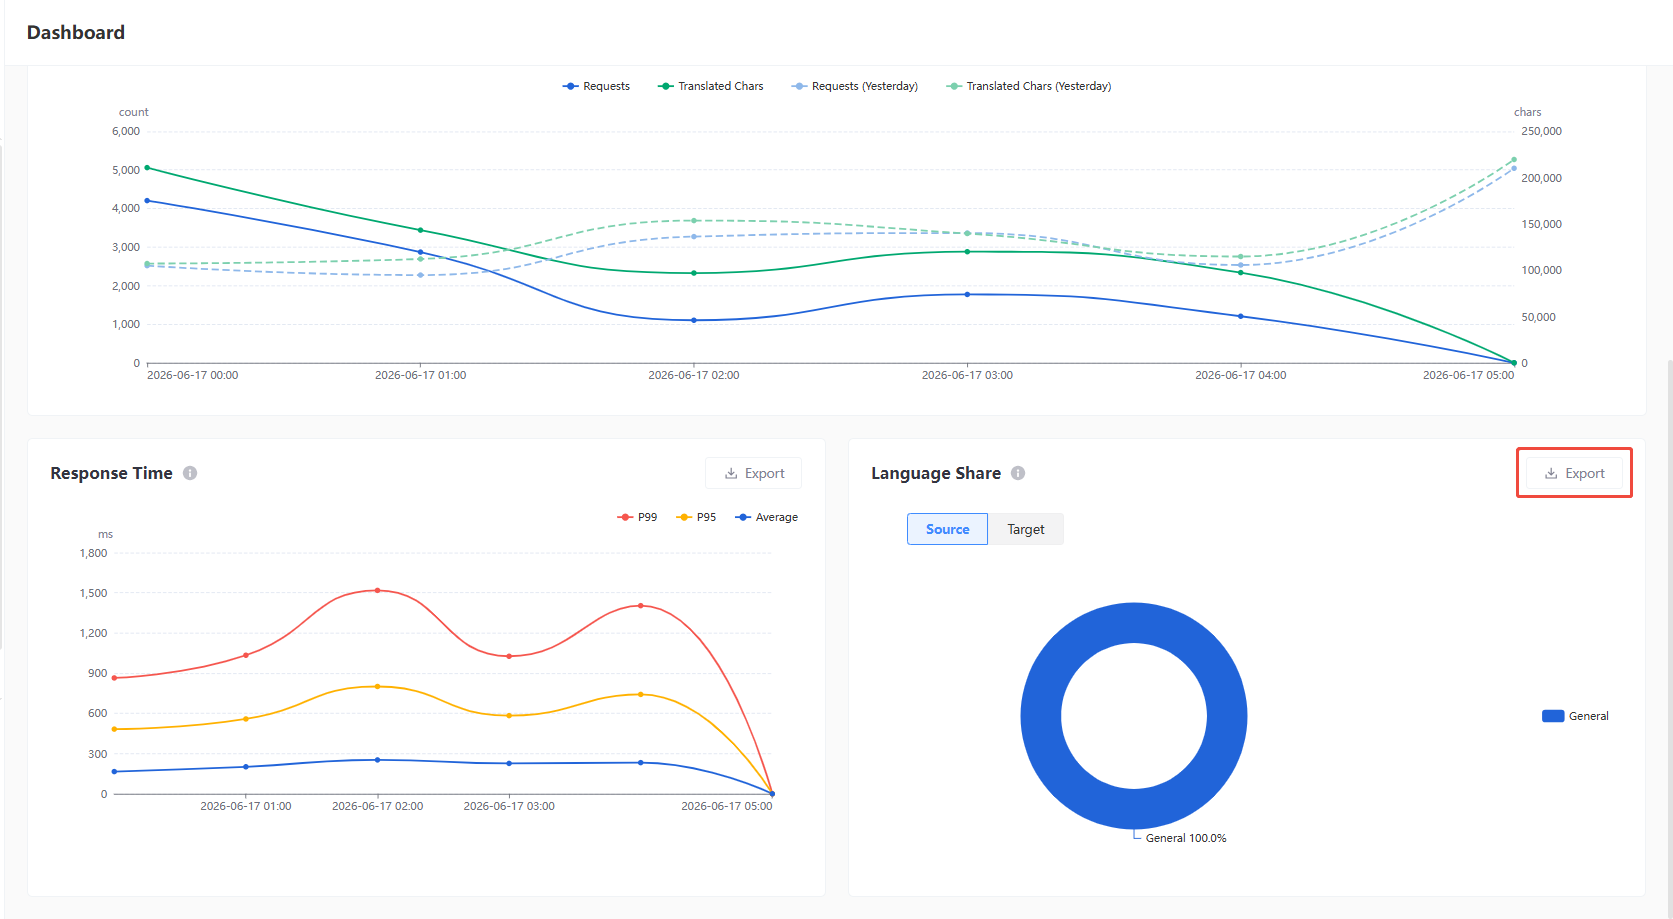
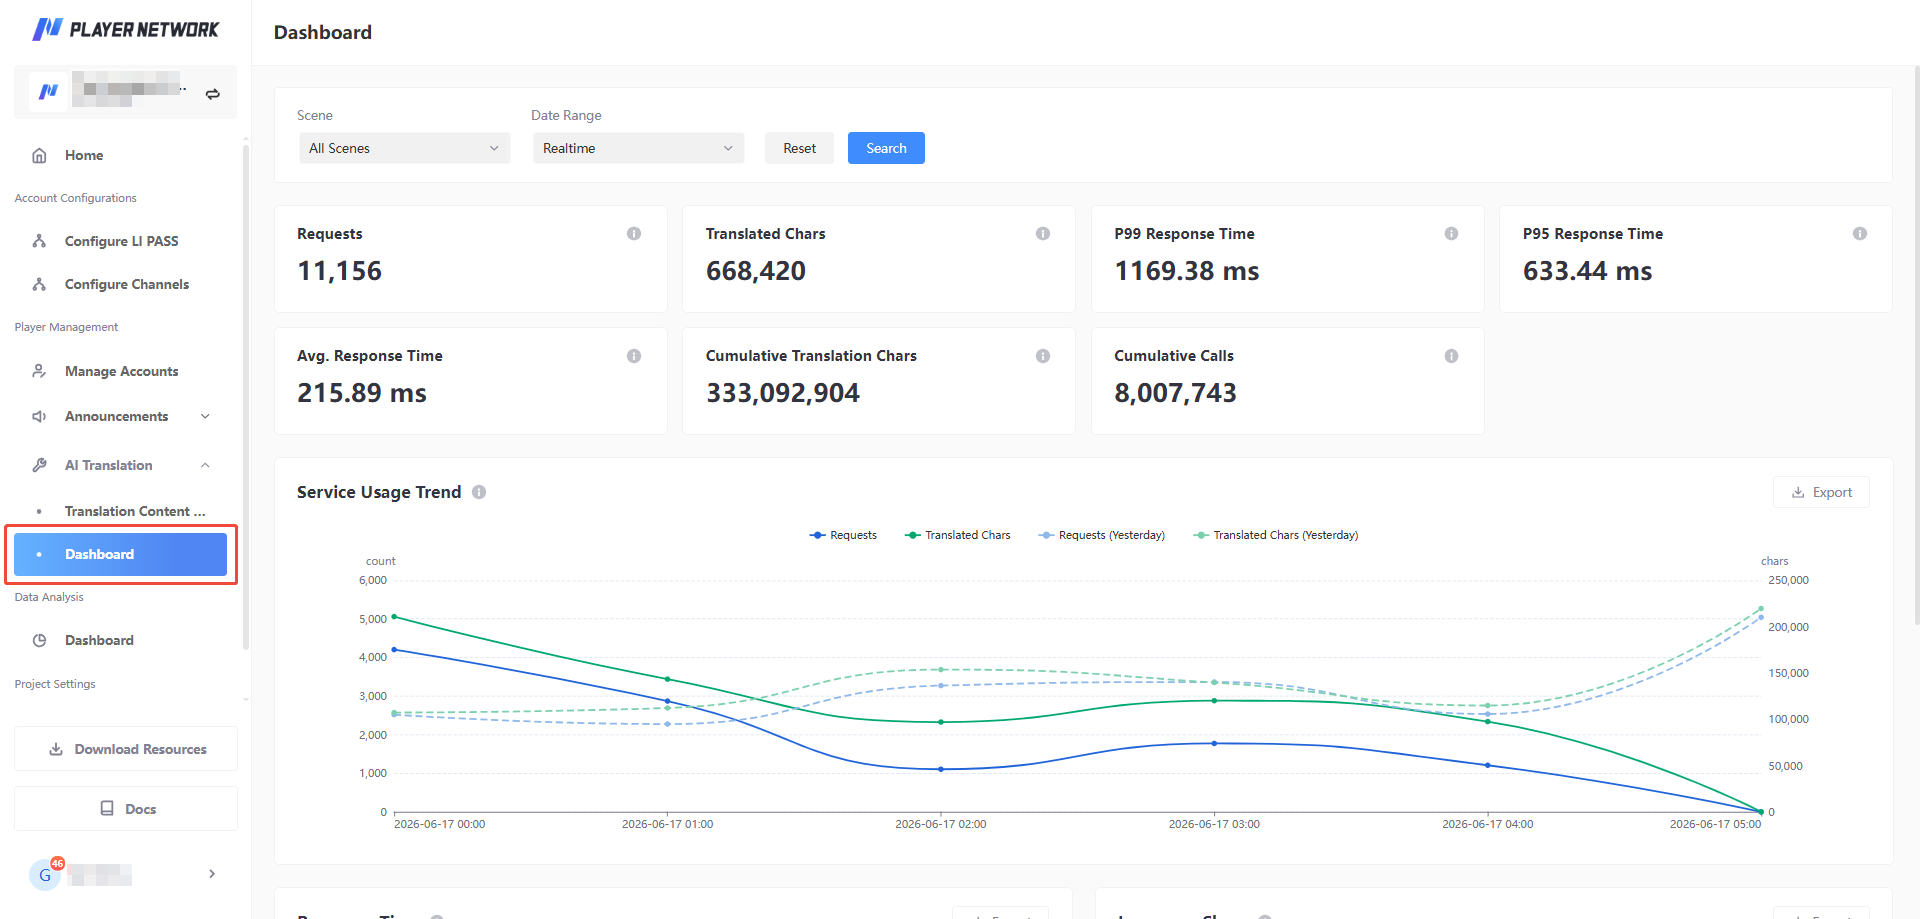
View core indicator data of AI Translation Service through Dashboard, including request count, translated character count, response time, and other key statistics, as well as visual charts for service usage trends and response time.
- Login to the Player Network Console and click Dashboard under AI Translation in the left column.
Filter criteria
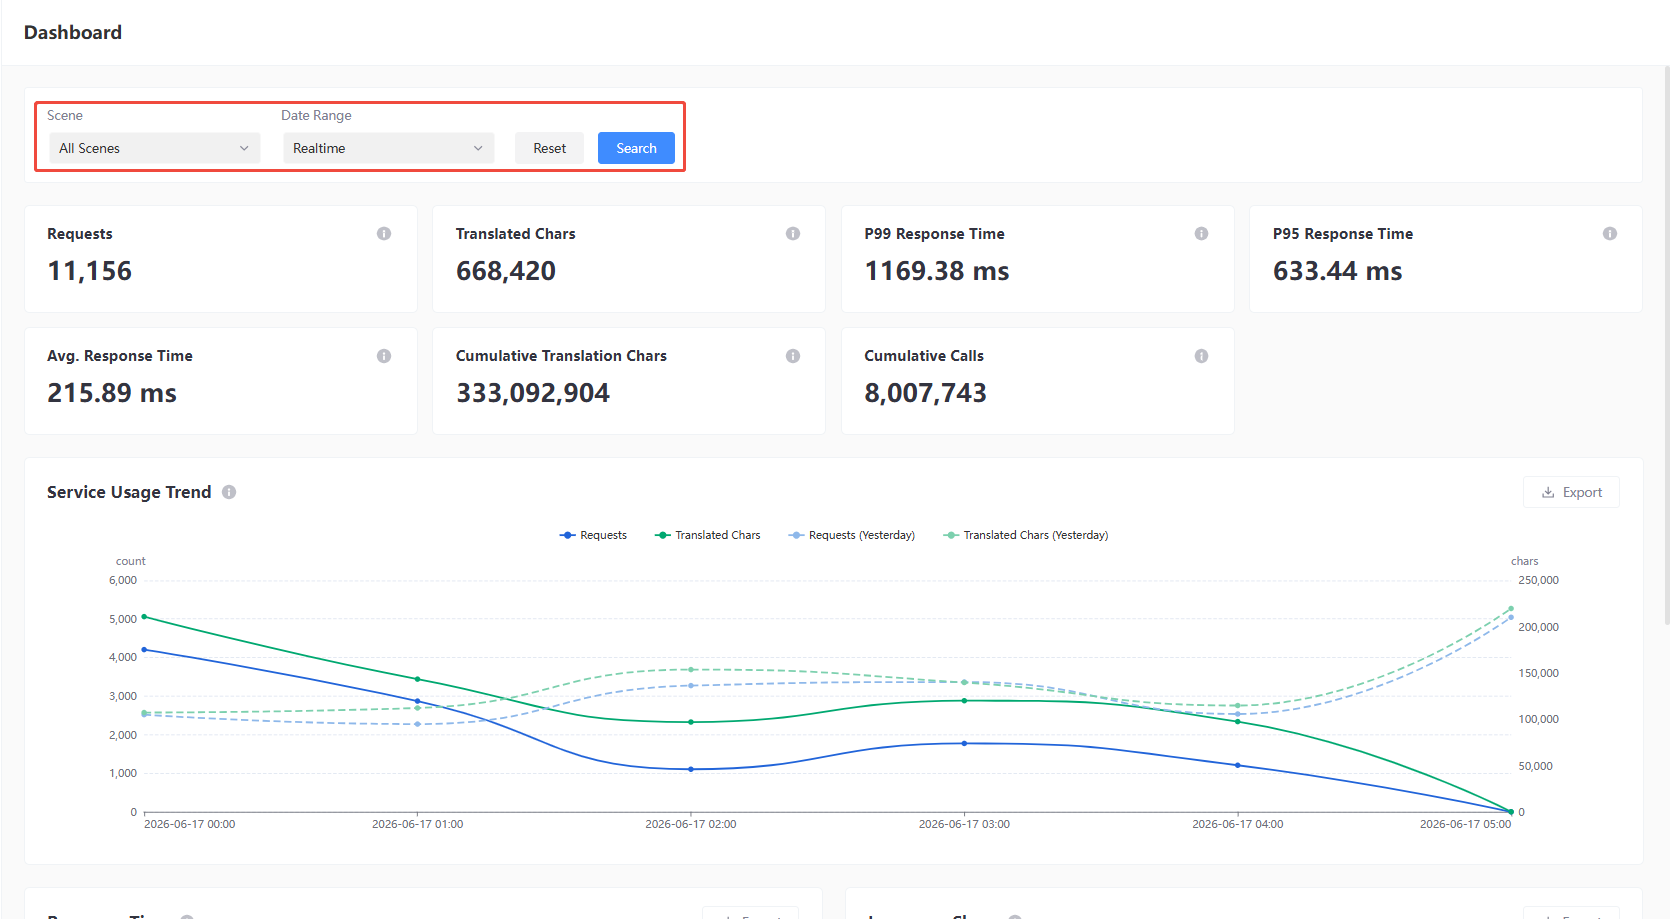
At the top of the Dashboard, you can view data within a specified range using the following filter criteria:
- Translation Scenario: Select the translation scenario to view. You can choose all scenarios or a specified scenario.
- Data Period: Select the time granularity for data statistics. Options include: Real-time Data, This Week, This Month, Last Ten Days, and more.
After configuring the filter criteria, click the Query button to refresh the data; click the Reset button to restore the default filter criteria.
Metrics
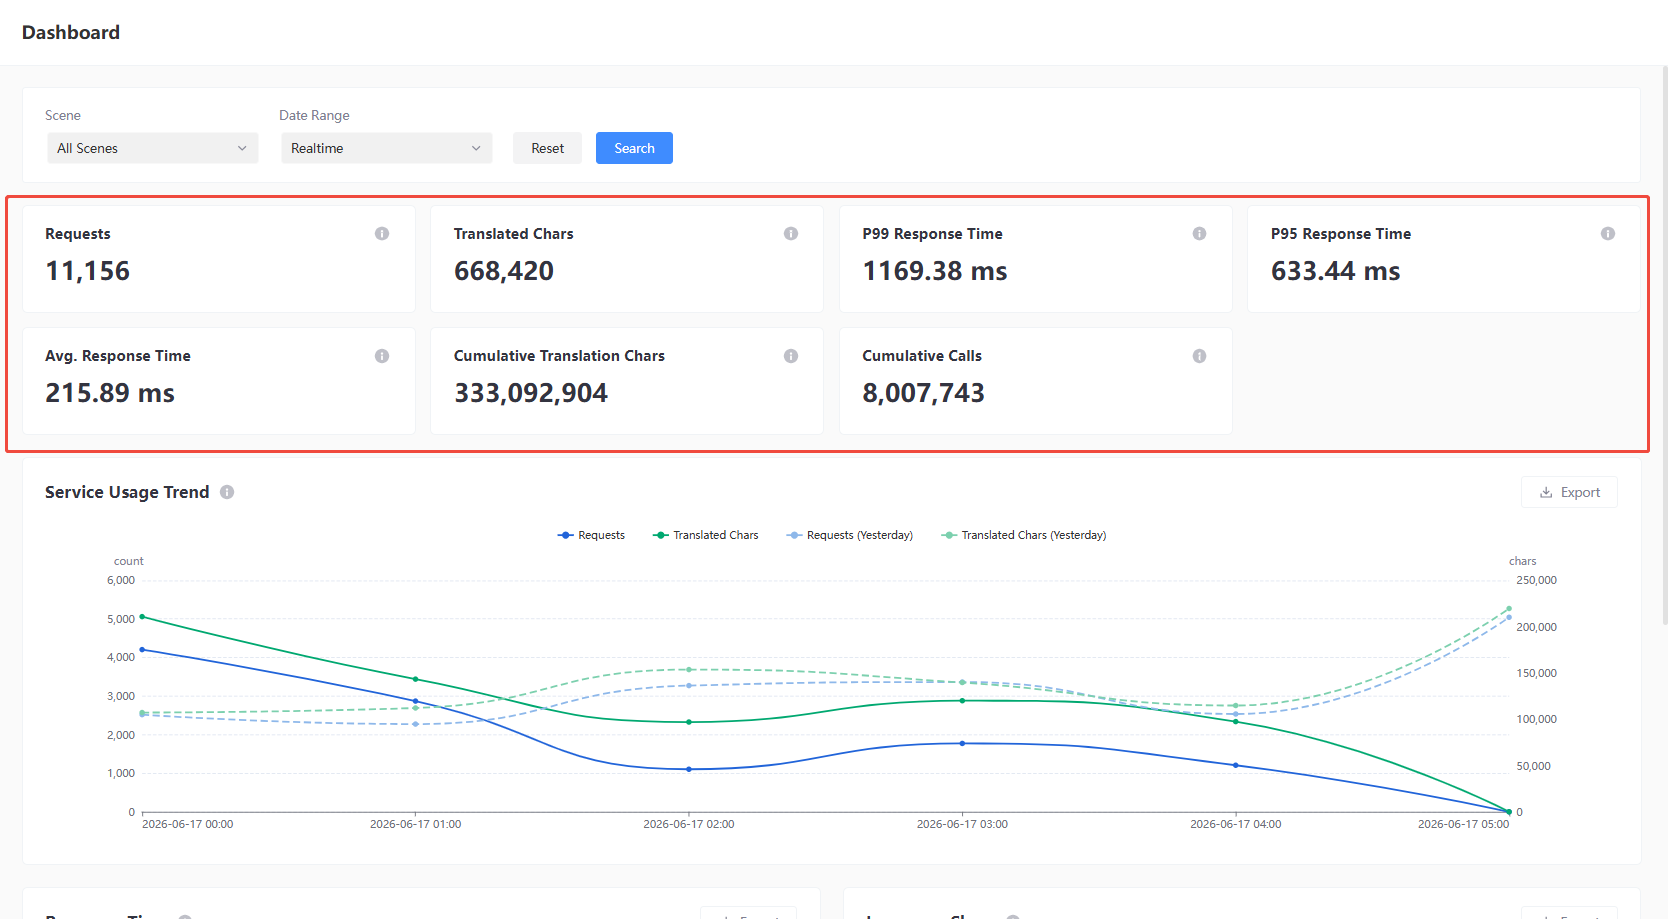
The Dashboard displays the following core metric cards:
| Metric Name | Description |
|---|---|
| Request Count | Total number of AI translation API requests during the current period |
| Translated Characters | Total number of characters processed by the AI translation API during the current period |
| 99% Response Time | 99% of requests have response times shorter than this value |
| 95% Response Time | 95% of requests have response times shorter than this value |
| Average Response Duration | Average response duration of all requests during the current period |
| Cumulative Translated Volume | Total number of translated characters since business integration |
| Cumulative Call Count | Total number of translation API calls since business integration |
Service Usage Trend
Displays the trend of request count and translated characters over the selected period. For real-time data, yesterday’s corresponding time period is shown as a dashed line for comparison.
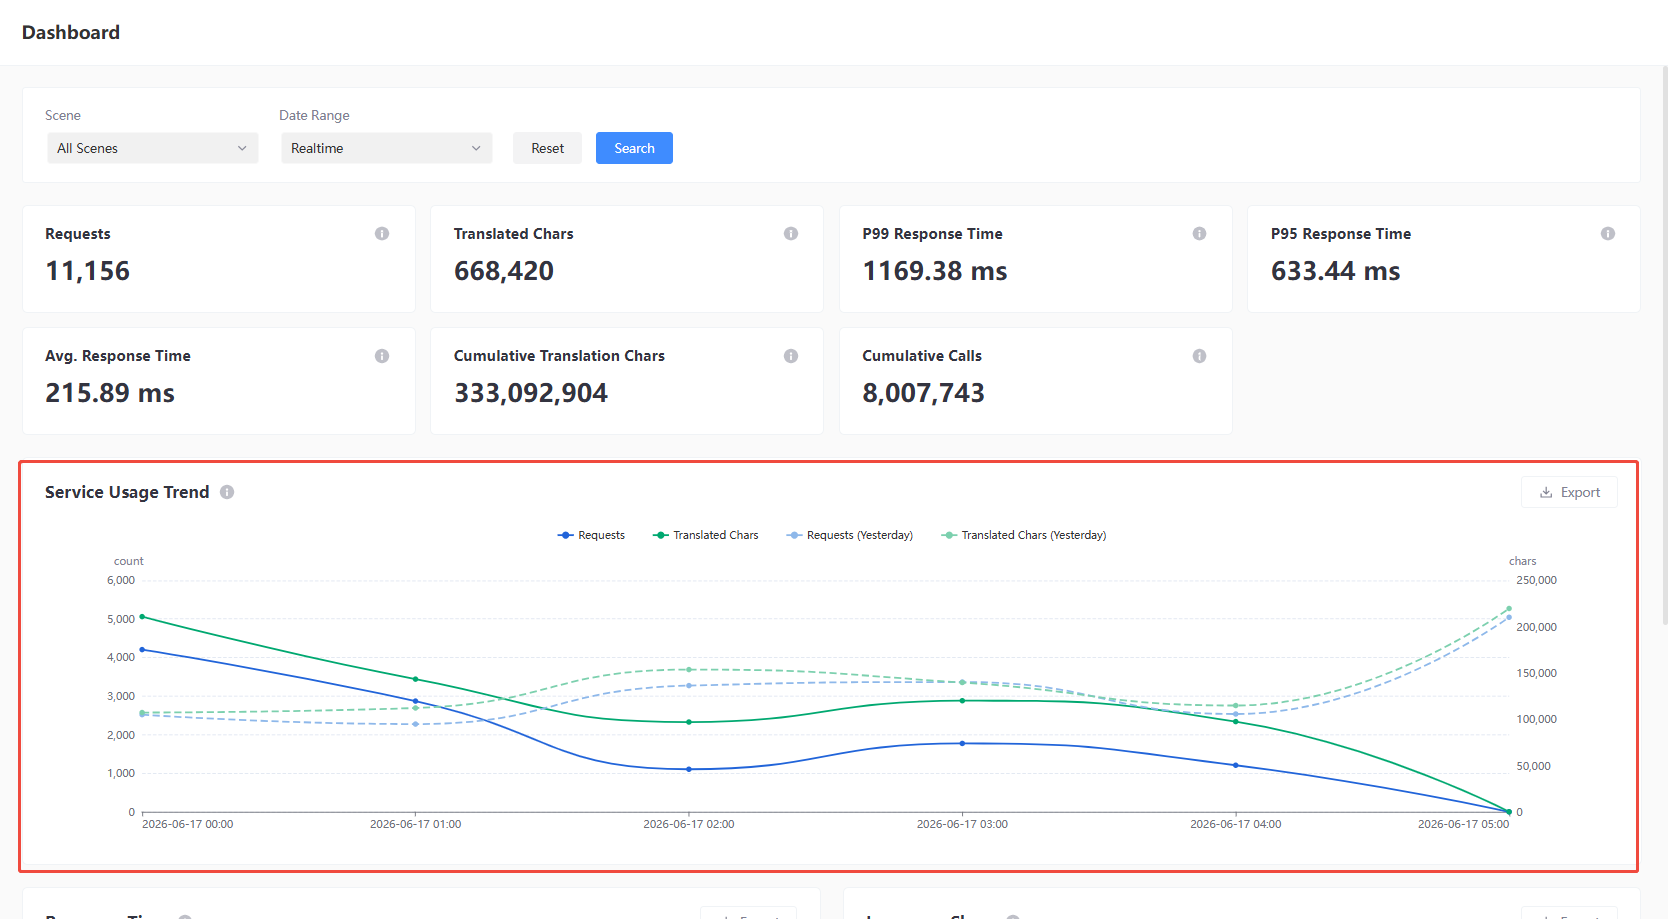
The Service Usage Trend chart shows changes in translation service usage over time, supporting the following data dimensions:
- Request Count: Shows the number of requests at each time point.
- Translated Characters: Shows the number of translated characters at each time point.
- Request Count (Yesterday): Shows the comparison with the number of requests at the same period yesterday.
- Translated Characters (Yesterday): Shows the comparison with the number of translated characters at the same period yesterday.
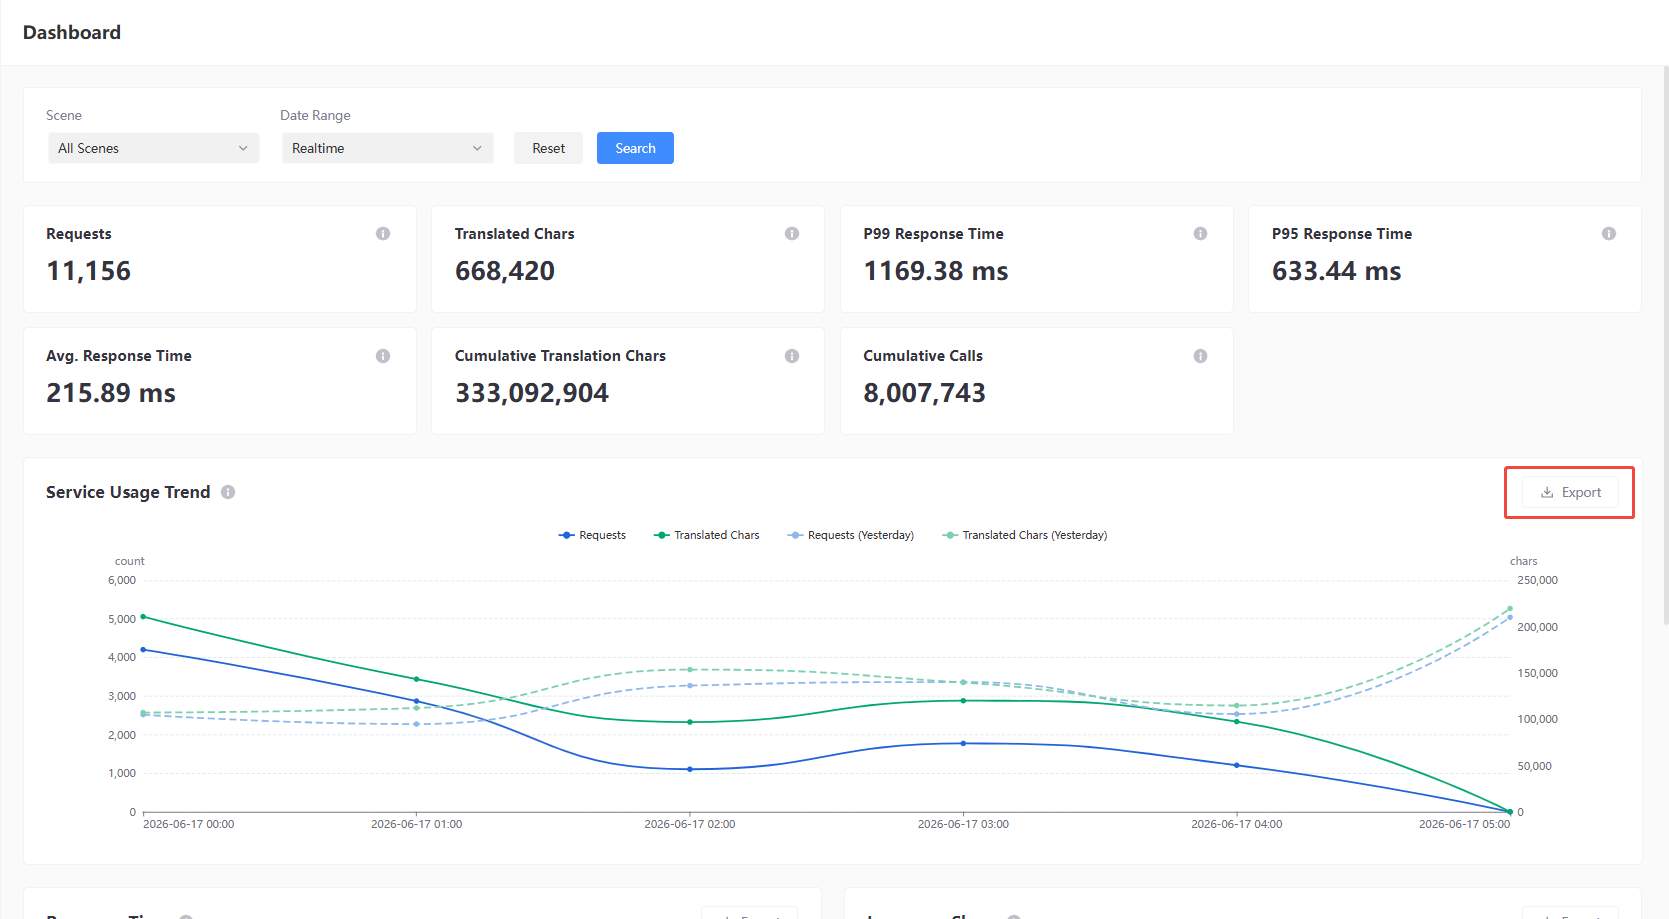
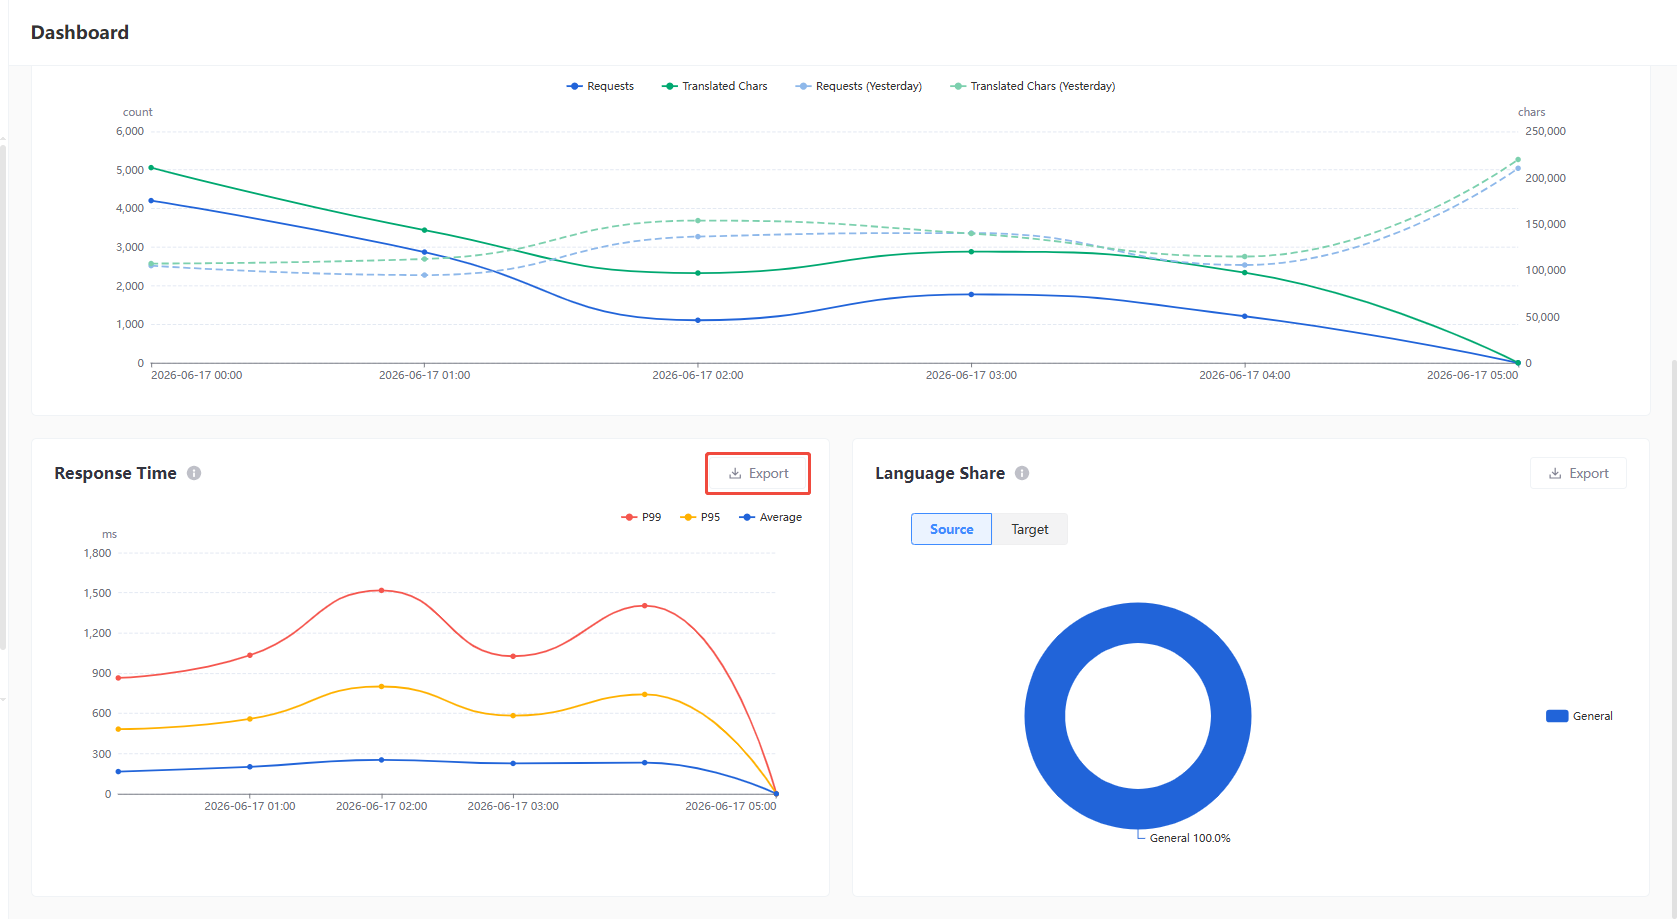
The chart supports the Export feature in the top right corner, allowing you to export chart data as a file.
Service Response Time
Displays the trend of 99%, 95% percentile and average response times during the selected period.
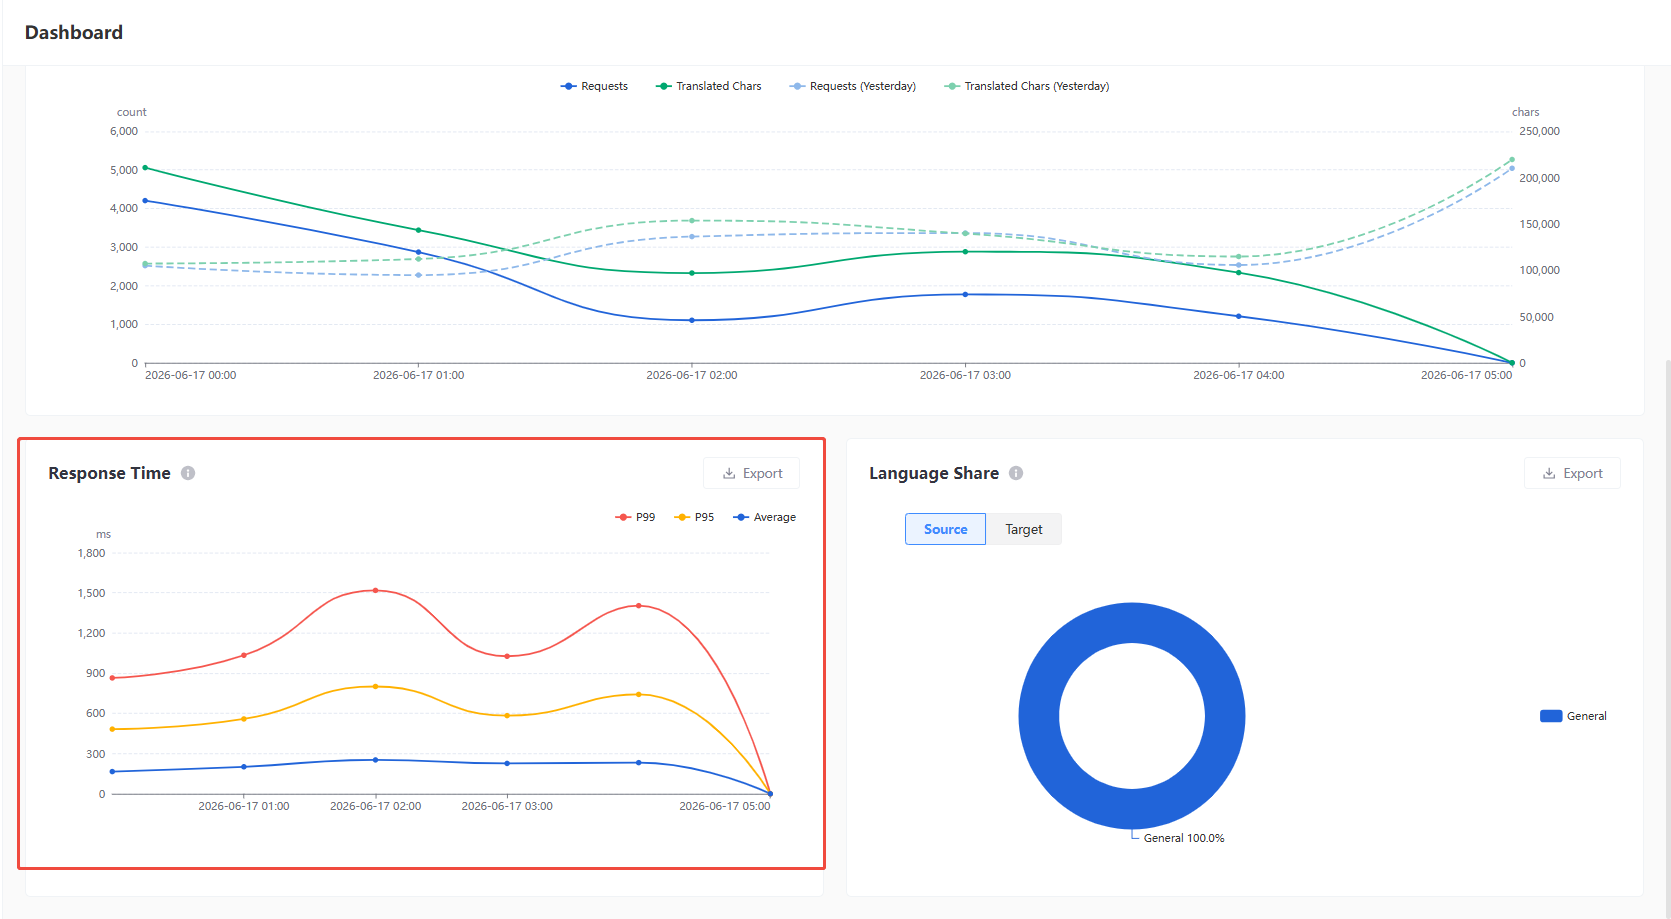
The Service Response Time chart shows the changes in translation service response time over time, supporting the following data dimensions:
- 99% Response Time: Shows the 99% response time at each time point.
- 95% Response Time: Shows the 95% response time at each time point.
- Average Response Time: Shows the average response time at each time point.
The chart supports the Export feature in the top right corner, allowing you to export chart data as a file.
Distribution of Translation Languages
The proportion of requests by source language / target language during the selected period, can be toggled between views.
The Distribution of Translation Languages chart shows the language usage proportion in the translation service, supporting switching to view distribution data for either source or target languages.
Click the Source Language or Target Language labels to switch and view the respective language distribution.
-
Source Language: Shows the distribution of source languages in translation requests.
-
Target Language: Shows the distribution of target languages in translation requests.
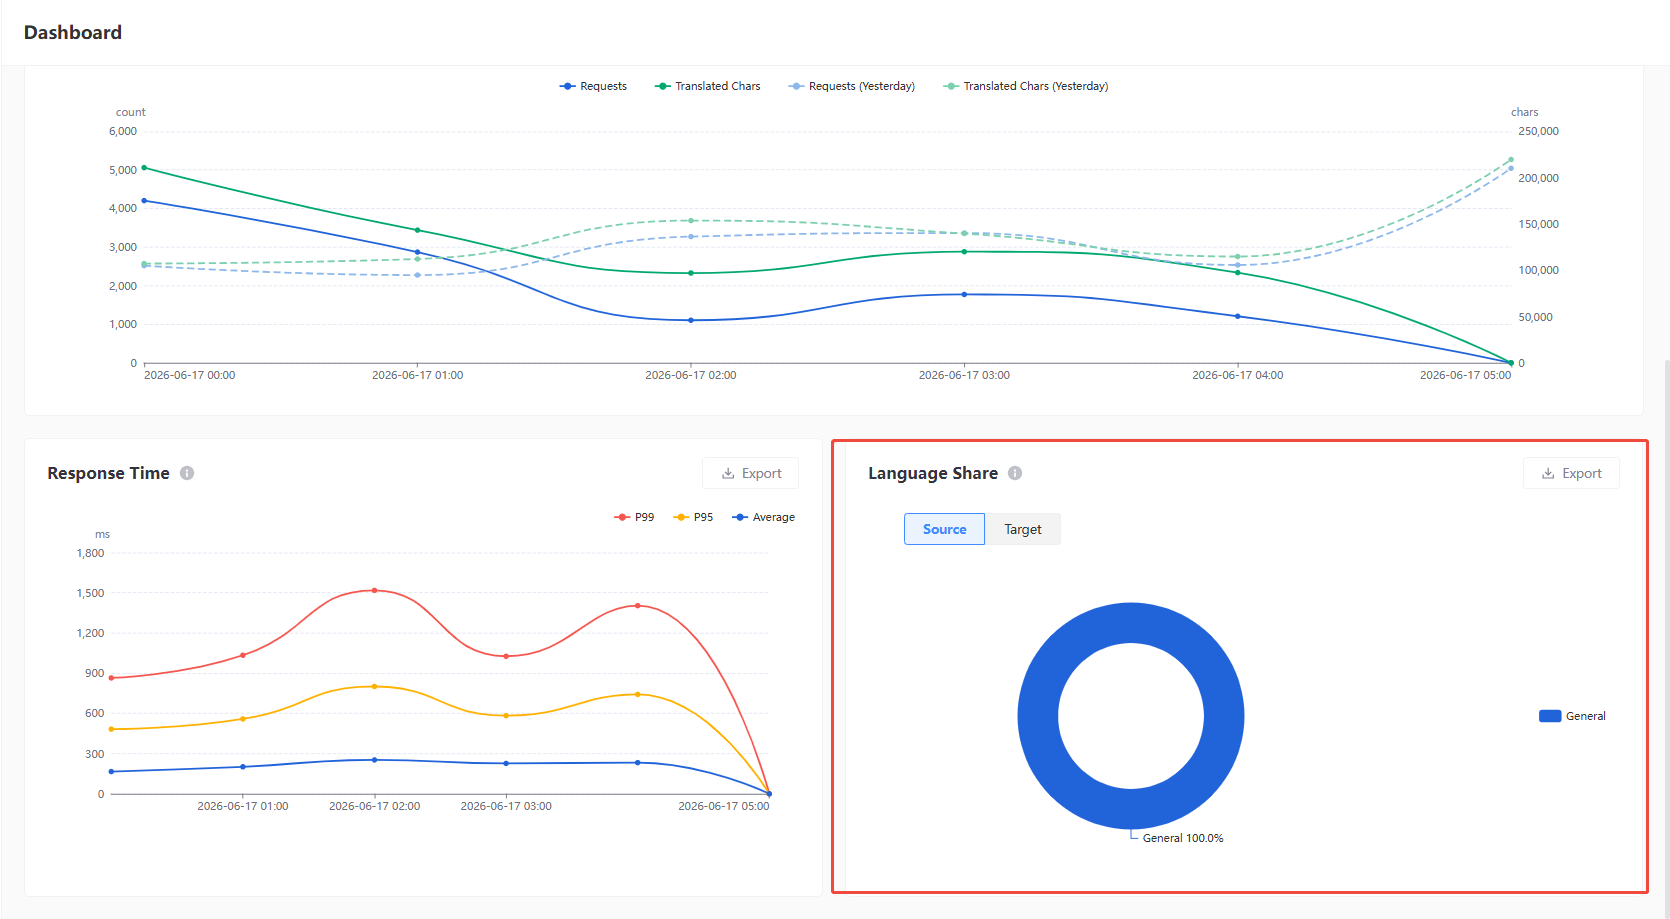
The chart supports the Export feature in the top right corner, allowing you to export chart data as a file.